You bought a reusable K cup to save money and cut down on plastic waste. A week later, you’re staring at a weak, watery cup of coffee and wondering if you made a mistake. Or worse, your Keurig is sputtering and leaking, and you’re ready to toss the whole thing in a drawer.
I’ve tested dozens of reusable pods across multiple Keurig models. The good news: the reusable K cup mistakes beginners make are almost always the same, and they’re all fixable. This guide walks through each one with the exact steps to correct them.

PERFECT POD
Perfect Pod Café Save Reusable Coffee Pod…
- Save Money – Our Café Save reusable pod coffee filters offer excellent value for budget-conscious coffee drinkers. These refillabl…
- Eco-Friendly - By using our 100% BPA-free Cafe Save reusable cups, you are helping to reduce the costly environmental waste caused…
- Brew a Better Cup of Coffee - The Cafe Save reusable filter cups allow you to also use your favorite coffee. Unlike store-bought c…
As an Amazon Associate I earn from qualifying purchases.
You’ll learn the right grind size, the correct fill level, how to dial in your brew time, and why your coffee tastes bitter one day and weak the next. I’ll also cover cleaning habits that keep your machine from clogging.
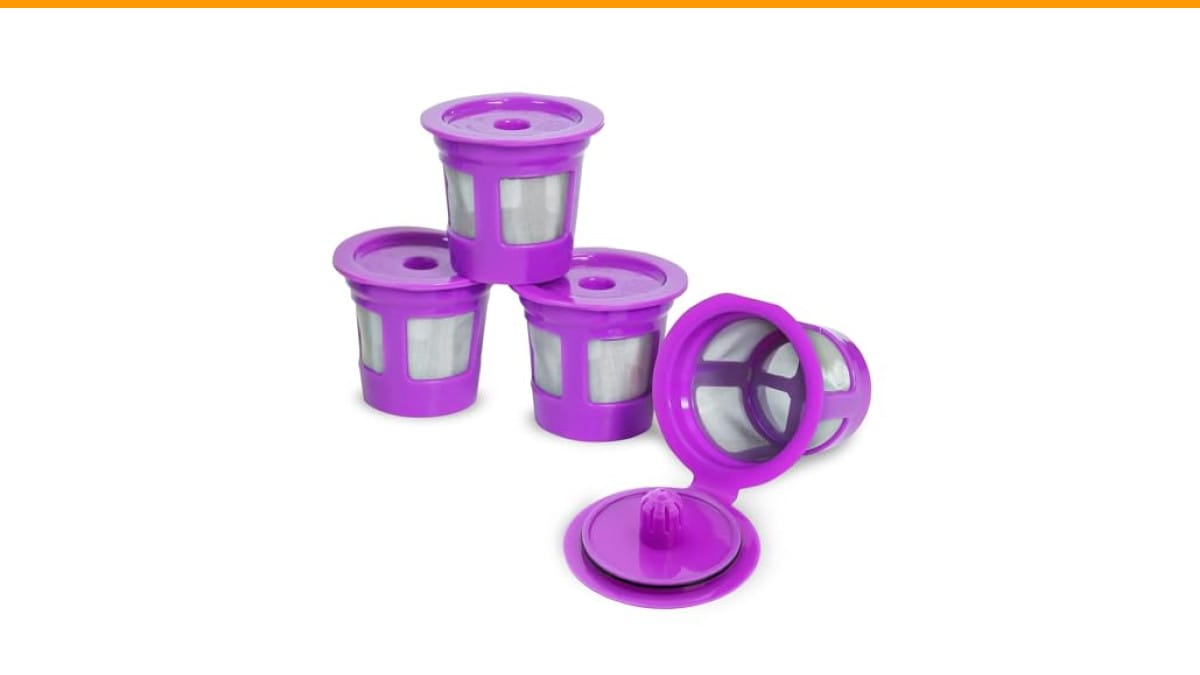
If you’re starting fresh, a solid option is the Perfect Pod Café Save Reusable K-Cup Coffee Filter Capsules, 4 Pack. It’s a straightforward, BPA-free stainless steel filter that works with most Keurig 1.0 and 2.0 brewers, and it’s a good baseline for learning the technique below.
Grind Size: The Most Common Reusable K Cup Mistake
Beginners almost always use the wrong grind. Pre-ground supermarket coffee is usually too fine for a reusable K cup. Fine grounds slip through the mesh and end up in your mug, making the last sip gritty.
What you want is a medium grind, similar to table salt or sand. Not powder, not chunks. If you buy pre-ground, look for the drip coffee setting, not espresso. If you grind at home, set your burr grinder somewhere in the middle of the range.
Here’s the test: pinch a little ground coffee between your fingers. If it feels like flour, it’s too fine. If it looks like small pebbles, it’s too coarse. Medium sits right in between.
One thing I learned the hard way: oily beans clog the mesh faster. Dark roasts with a shiny surface produce more oil. That oil builds up and slows the flow. If you drink dark roasts, you’ll need to rinse the filter more often.
When in doubt, err on the side of slightly coarser. A coarse grind brews faster and cleaner. A fine grind stalls the brew cycle and can trigger the machine’s pressure sensor to stop early.
Fill Level and Tamping: Less Is More
The second most common mistake is overfilling the basket. Beginners pack it to the brim, press the coffee down hard, and then wonder why the machine takes forever or produces a weak cup.
Here’s the thing: Keurig machines use pressure, not gravity, to push water through the coffee. If you overfill and tamp hard, the water can’t pass through. The machine compensates by running a longer cycle, which over-extracts the coffee and makes it bitter.
The correct fill level is just below the rim of the basket, about 1-2 millimeters of headspace. You want the coffee level with the top edge, not mounded above it. And do not tamp. Lightly tap the basket on the counter to settle the grounds, then snap the lid closed.
The lid itself applies some pressure to the coffee. That’s enough. If you tamp, you’re fighting the machine.
For most reusable pods, that means about 1.5 to 2 tablespoons of ground coffee. Start with less, taste the result, and adjust. It’s easier to add a little more than to fix an over-packed basket.
One more tip: don’t reuse the same grounds for a second brew. The first extraction pulls out most of the flavor. The second cup will be brown water with a hint of bitterness.
Brew Size and Ratio: Match the Cup to the Fill
Your Keurig offers multiple brew sizes: 6, 8, 10, and sometimes 12 ounces. Beginners pick the largest size and then wonder why the coffee tastes weak.
Think about it. You put the same amount of coffee in the basket, but you’re diluting it with more water. A 6-ounce brew from a properly filled basket tastes like a proper cup. An 8-ounce brew tastes lighter. A 10-ounce brew tastes like mildly flavored water.
My rule of thumb: use the 6-ounce or 8-ounce setting for a standard fill. If you want a larger mug, brew a 6-ounce cup into your mug, then hit the button again with the same pod for a second, weaker shot. Or just accept that a bigger cup means a lighter brew.
This is where the cup measurement guide on this site helps — if you’re trying to scale your coffee-to-water ratio beyond the standard settings.
Another factor: water temperature. Keurig machines brew at around 192°F, which is slightly below the 195-205°F sweet spot. That’s a machine limitation, not a reusable pod issue. You can’t fix it, but you can compensate with a slightly finer grind (not too fine) or a slightly longer brew time.
Some Keurig models have a ‘Strong’ button that runs a slower extraction. If yours has it, use it. That button makes a noticeable difference with reusable pods.
Cleaning and Maintenance: The Hidden Culprit
Reusable K cups need regular cleaning. Skip it, and the mesh clogs with coffee oils and fines. The result: slower brew times, weaker coffee, and a gritty cup.
Rinse the basket under hot water immediately after each use. That’s the minimum. Once a week, do a deeper clean: soak the basket in warm water with a drop of dish soap for 10 minutes, then scrub gently with a soft brush.
Do not put the basket in the dishwasher unless the manufacturer says it’s safe. The high heat and detergent can warp the plastic or damage the mesh over time. Hand washing is safer.
Every few months, soak the basket in a solution of equal parts white vinegar and water for 30 minutes. That dissolves built-up oils that soap won’t touch. Rinse thoroughly afterward.
Your Keurig itself also needs regular descaling. A clogged machine will brew weak coffee no matter what pod you use. If your brew time has crept from 45 seconds to 90 seconds, it’s time to descale. Check our coffee maker cleaning guide for the full process.
One mistake I see constantly: people store the reusable pod with wet grounds inside. That grows mold. Empty the basket, rinse it, and let it air dry completely before storing.
Compatibility: Not All Reusable Pods Fit All Machines
Keurig has changed its design over the years. Older 1.0 and 2.0 brewers accept the standard reusable pod. Newer models with the ‘5-Stream’ technology use a different needle placement and a different pod shape.
Check your machine’s model number before buying. The Perfect Pod Café Save works with K-Mini, K-Classic, K-Elite, K-Cafe, and most other single-stream brewers, but it’s not for the 5-stream models. That’s a critical distinction.
If you have a 5-stream machine, you need a pod designed for that system. Using the wrong one will either not fit or will brew terribly.
Also note that reusable pods don’t fit every single-serve machine. They’re designed for Keurig. If you have a Cuisinart or a Mr. Coffee single-serve, check compatibility first. Some of those machines use a different basket shape.
If your Keurig is acting up, it might not be the pod. A common issue is the machine not brewing a full cup, which has its own troubleshooting steps. You can read about Keurig not brewing full cup fixes to rule out a machine problem.
Comparing Reusable Pods vs. Store-Bought K Cups
Let’s put the numbers side by side. Store-bought K cups cost anywhere from $0.50 to $1.50 per cup. A bag of whole beans costs $10-20 per pound, which makes about 30-40 cups. That’s $0.25-0.50 per cup for fresh coffee.
| Factor | Store-Bought K Cup | Reusable K Cup |
|---|---|---|
| Cost per cup | $0.50 – $1.50 | $0.10 – $0.40 |
| Freshness | Stale, sits on shelf for months | Fresh, you control the roast |
| Grind control | Fixed by manufacturer | You choose the grind |
| Environmental impact | Non-recyclable plastic waste | Zero waste after initial purchase |
| Brew time | Faster (no prep) | Adds 15 seconds of prep |
| Cleaning | None | Rinse after each use |
| Flavor range | Limited to what’s on the shelf | Any coffee you can buy |
The trade-off is prep time and cleaning. You save money and get better coffee, but you give up convenience. If you’re brewing one cup at a time, the extra 15 seconds is worth it.
For beginners, I recommend starting with a medium roast, medium grind, and the 8-ounce brew setting. That’s the most forgiving combination. Once you get that right, experiment from there.
Frequently Asked Questions
Why is my reusable K cup coffee weak?
Most likely, you’re using too little coffee or choosing a large brew size. Add a little more coffee to the basket (up to the rim) and select the 6-ounce or 8-ounce brew setting. Also check that your grind isn’t too coarse — coarse grounds extract quickly and produce a thin cup.
Why does my reusable K cup leak?
Leaks usually come from an overfilled basket. When you pack too much coffee, the lid can’t close properly, and water escapes around the seal. Empty the basket, refill to just below the rim, and make sure the lid snaps shut with a clean click.
Can I use espresso grounds in a reusable K cup?
Technically yes, but it won’t taste like espresso. Espresso is brewed under 9 bars of pressure; a Keurig produces much less. The fine espresso grind will also clog the mesh and slow the brew. Stick with medium or medium-fine grind for best results.
How many times can I reuse the same grounds?
Once. The first brew extracts most of the soluble flavor compounds. A second brew will be very weak and often bitter. The reusable pod itself can be used thousands of times, but the coffee inside is single-use.
Does a reusable K cup void my Keurig warranty?
No. The Magnuson-Moss Warranty Act protects consumers from having a warranty voided just for using third-party accessories. As long as the reusable pod doesn’t cause damage (like jamming the needle), your warranty stays intact. That said, if your machine breaks and the pod is clearly the cause, the claim could be denied.
What to Do Next (The Short Version)
- Use a medium grind — not fine, not coarse. Adjust only after tasting.
- Fill the basket to just below the rim, about 2 tablespoons. Never tamp.
- Brew at 6 or 8 ounces. Bigger cups need more coffee, not more water.
- Rinse the basket after every use. Deep clean with vinegar monthly.
- Check your Keurig model for compatibility before buying a reusable pod.
- If your machine brews slowly, descale it — that’s a machine issue, not a pod issue.
- Buy a pack of reusable pods that fits your model, and compare the cost per cup over a month. You’ll see the savings quickly.
The reusable K cup mistakes beginners make are all about ignoring the relationship between grind, fill, and water volume. Fix those three variables, and you’ll get a cup that’s better than most store-bought pods. It takes a few tries to dial in, but once you do, you won’t go back.
Products related to this article
Sponsored / affiliate links. As an Amazon Associate I earn from qualifying purchases. I may earn additional commission from eligible campaigns.
 Coffee Mug Warmer & You are Awesome Mug Set, Electric Cup Warmer for Desk
 Coffee Mug Warmer,Cup Warmer with 7 Temp Settings,8H Auto Shut Off & 12H Timer,Fast Bottle Warmers for All Bottles,The Ultimate Coffee Warmer Plate for Beverage Lovers (Wood)
 Quick Heating Cup Warmer, Three Temperature Settings, Splashproof and Portable, for Coffee, Milk, Lightweight ABS Material