You pull the lever, the pump whirs, and what drips out looks more like tea than espresso. Or the steam wand sputters like a dying balloon. Or the machine just sits there, silent, with a blinking red light that might as well be in code. Every automatic espresso machine owner hits one of these walls eventually. The good news: most of these failures trace back to three root causes — water, heat, or pressure.
This guide walks you through a quick diagnostic tree. You’ll identify the symptom, match it to the cause, and get the exact fix. No vague advice about “cleaning regularly.” You’ll get specific steps, numbers, and trade-offs. I’ve owned and repaired semi-automatics and super-automatics for over a decade, and I’ll tell you straight which fixes are worth your time and which ones mean calling a tech.

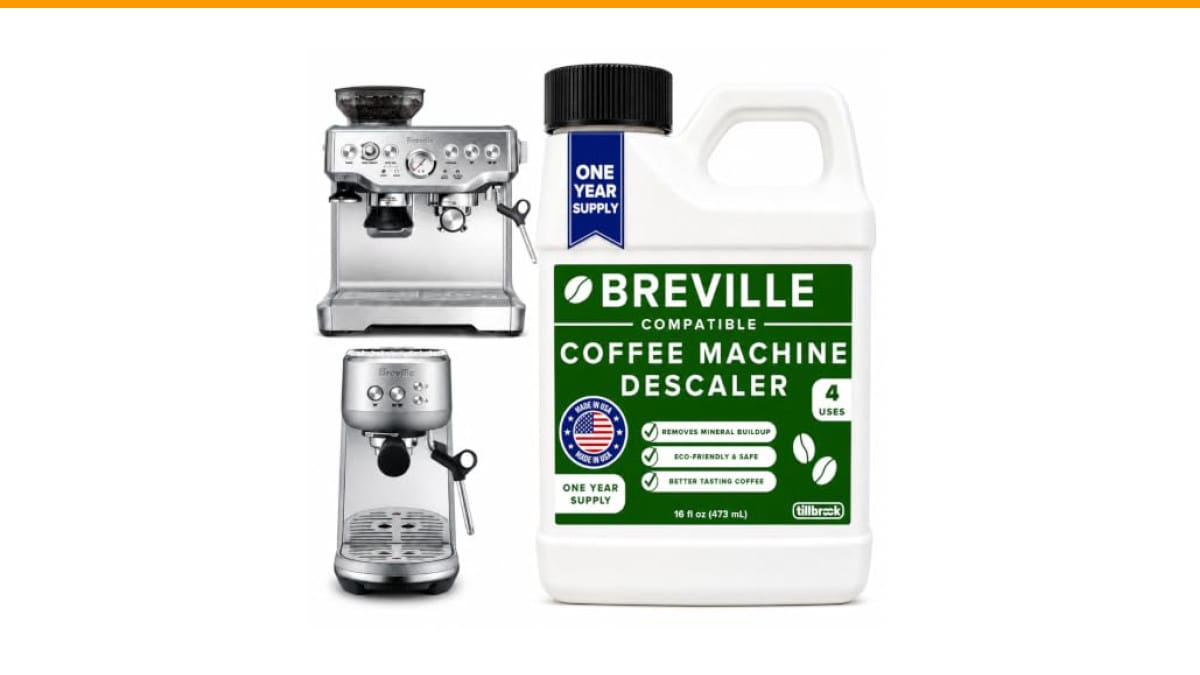
Tillbrook
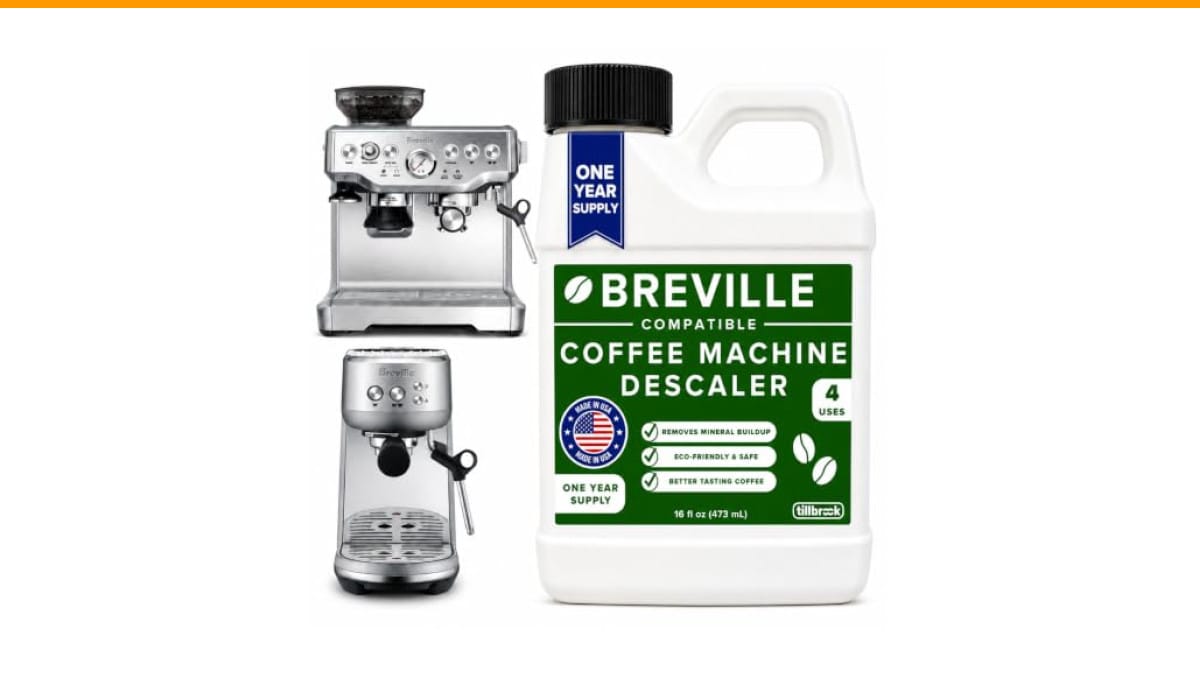
Breville Espresso Machine Compatible Descaler, 4 Uses,…
- EXCEPTIONAL RESULTS: Introducing Tillbrook Coffee Machine Descaler specifically formulated for Breville—the best choice for removi…
- 1 YEAR SUPPLY: Our concentrated formula is easy to use and provides remarkable value with 4 cleanings per bottle. Simply add 1/2 c…
- SCIENTIFICALLY ENGINEERED: Our advanced descaling solution is carefully crafted with powerful, all-natural ingredients that remove…
As an Amazon Associate I earn from qualifying purchases.
You’ll walk away knowing how to clear an airlock, fix channeling, descale a boiler, and decide whether a $150 repair makes sense on a machine that cost $400.
Before we dive in: scale buildup is the silent killer of automatic espresso machines. Hard water leaves mineral deposits that clog valves, slow the pump, and block heat transfer. A dedicated descaler like this Tillbrook descaler made for Breville machines breaks down limescale without damaging internal seals. It’s a four-use bottle, so one purchase covers a year of maintenance if you descale every three months.
Quick Diagnostic: Is It a Water, Heat, or Pressure Problem?
Stop guessing and start testing. Answer three questions in order. Each one eliminates a whole category of causes.
- Does water flow from the group head without a portafilter? If yes, water delivery works. If no, you have a supply problem (tank, valve, airlock, or pump).
- Does the machine heat up within 5 minutes? Touch the group head and steam wand. Cold means a heating element or thermostat issue.
- Does the pump run at a steady pitch? A smooth hum means pressure is building. A stuttering or surging sound means a pressure problem — often scale or a failing pump.
That’s the whole decision tree. Water issue? Go to Problem 1. Pressure issue? Go to Problem 2. Heat issue? Skip to Problem 6. Most fixes below take under 20 minutes.
Problem 1: No Water or Weak Flow from the Group Head
This is the most common complaint I hear. The machine turns on, the pump runs, but nothing comes out. Or a thin trickle that takes forever to fill a shot glass.
Check the Water Tank and Inlet Valve
Pull the tank out and look at the bottom. There’s a small valve or spring-loaded pin that opens when the tank sits on the machine. If that pin is stuck, no water enters the system. Press it with a finger — it should move freely. Rinse it under warm water if it feels gritty.
Also check the tank’s water level sensor. Many machines refuse to pump if the sensor is dirty or if the water level is below the minimum line. Wipe the sensor with a damp cloth. This sounds too simple, but it fixes a surprising number of “dead” machines.
Clear Airlocks After a Dry Tank
Ran the tank dry? Air got sucked into the pump. The pump can push water but not air, so it just spins uselessly. This is called an airlock.
- Fill the tank with fresh water.
- Turn the machine on.
- Open the steam wand fully. The wand is the highest point in the system, so air escapes there first.
- Run the pump for 30 seconds. You’ll hear the pitch change as water reaches the wand.
- Close the wand and run water through the group head.
This works on nearly every semi-automatic and most super-automatics. If you have a super-automatic with a brew unit, you may need to run a cleaning cycle instead — check your manual for the exact sequence.
Clean or Replace the Pump Inlet Filter
Some machines have a small mesh filter at the bottom of the water tank or on the inlet hose. Over time, scale and debris clog it. The pump works harder, makes more noise, and flow drops.
Pull the filter out, rinse it under hot water, and scrub gently with a soft toothbrush. If it’s brittle or discolored, replace it. They cost a few dollars and take two minutes to swap.
Problem 2: Espresso Flows Too Fast or Too Slow
You have water, but the shot runs wild — 15 seconds and done. Or it crawls — 40 seconds for a thimble of dark sludge. Both point to pressure, but the fix starts before the pump.
Fix Grind Size and Dose First
Grind size is the #1 lever. Too coarse and water blasts through. Too fine and water can’t pass. For a 30-second shot, you want the grind to feel like powdered sugar — not table salt, not flour.
Dose matters too. A typical double basket holds 18 grams. Under-dosing leaves room for water to channel. Over-dosing packs the coffee so tight that water finds one weak spot and blows through it.
Weigh your coffee. Yes, every time. Volume-based scoops are inconsistent because bean density varies. A cheap scale costs less than a bag of good beans and fixes half your extraction problems.
Address Channeling (Uneven Extraction)
Channeling happens when water finds a path through the puck instead of saturating it evenly. You’ll see it as a single dark stream, not a honey-like flow across the whole basket. The shot tastes sour and bitter at the same time — a classic sign.
Fix the puck prep: distribute the grounds before tamping. Use a distribution tool or just tap the portafilter side-to-side to level the bed. Then tamp level and firm — about 30 pounds of pressure.
But here’s something most guides miss: stale grinder burrs cause channeling too. Dull burrs produce uneven particle sizes, which means fines and boulders in the same grind. Water flows around the boulders and over-extracts the fines. If your puck prep is solid but shots still channel, check your burrs. They typically last 500-800 pounds of coffee. If you’re past that, a new burr set is cheaper than a new grinder.
Adjust Pump Pressure (If Adjustable)
Most home machines run at 9 bars, but many come from the factory set higher — 11 or 12 bars. High pressure over-extracts and causes bitter shots. Some machines have an adjustable OPV (over-pressure valve) or a pressure gauge on the front.
If you have a gauge, watch it during a shot. It should hold steady at 9 bars. If it spikes to 12 and stays there, you can often adjust the OPV with a hex key. Check your manual — not every machine allows this. If yours doesn’t, consider a shim or a different basket. But don’t go down this path until you’ve fixed grind and dose.
Problem 3: Sour vs. Bitter Espresso (Temperature and Ratio Fixes)
Sour espresso tastes sharp, like lemon juice. Bitter espresso tastes harsh, like burnt toast. They’re opposites, and each points to a different problem.
Sour means under-extraction. The water didn’t pull enough flavor out of the beans. Causes: water too cool, grind too coarse, or the shot ran too fast. Fixes: grind finer, increase dose, or raise the brew temperature. Most machines run at 195-205°F. If yours has a temperature setting, bump it up a few degrees.
Bitter means over-extraction. The water pulled out too many compounds, including the harsh ones. Causes: water too hot, grind too fine, or the shot ran too long. Fixes: grind coarser, reduce dose, or lower the temperature.
Ratio is the other lever. A standard espresso is 1:2 — 18 grams in, 36 grams out. If you’re pulling 50 grams out of 18 in, you’ve over-extracted. Use a scale under your cup. Time the shot too: aim for 25-35 seconds from first drop to last.
I’ve seen people buy new beans, new grinders, even new machines, when the real problem was a thermostat that had drifted 10 degrees. A simple thermometer on the group head during a shot tells you a lot.
Problem 4: Steam Wand Issues (Weak or No Steam)
You want milk foam, but the wand dribbles hot water. Or it produces thin, watery foam. This is almost always scale or a clogged tip.
Purge and Clean the Steam Tip
Milk residue burns onto the tip and blocks the tiny holes. After every steaming session, wipe the wand with a damp cloth and run a quick purge — open the steam valve for a second to blow out any milk.
If the tip is clogged, remove it (most unscrew) and soak it in warm water with a drop of dish soap. Use a pin to clear the holes. Don’t use a toothpick — it can break off inside.
Descale the Boiler for Steam Power
Weak steam that’s been getting weaker over months points to scale in the boiler. Scale acts as an insulator, so the water heats slower and produces less steam. The fix is a proper descale.
Follow your machine’s descaling procedure. Most involve running a descaling solution through the system, then rinsing with fresh water. Use a product designed for espresso machines — the descaling guide on this site walks through the full process step by step. A citric acid solution works in a pinch, but commercial descalers are formulated to dissolve stubborn scale without attacking seals.
Don’t skip the rinse cycle. Leftover descaler leaves a chemical taste in your coffee. Run at least two full tanks of fresh water through after descaling.
Problem 5: Leaks (Portafilter, Drip Tray, Under Machine)
Leaks have three common sources, and each needs a different fix.
Portafilter leak: Water seeps around the edge of the portafilter during a shot. This is usually a worn gasket. The group head gasket is a rubber ring that seals the portafilter. It wears out after a year or two of regular use. Replace it — it’s a $10 part and a 5-minute job. Look for a silicone gasket; they last longer than rubber.
Drip tray fills too fast: Check the three-way valve. After a shot, the valve dumps excess water into the drip tray. If it’s stuck open, it dumps continuously. Scale often causes this. A descale might fix it. If not, the valve may need replacement — that’s a tech job on most machines.
Water under the machine: Check the hoses and fittings inside. A loose clamp or a cracked hose causes a slow drip. Open the case (unplug first!) and inspect. Tighten clamps with a screwdriver. If a hose is cracked, replace it — they’re cheap. For more detail, see our guide on fixing a leaking automatic espresso machine.
Problem 6: Error Codes, No Heat, or Machine Won’t Turn On
This is the scary category. But don’t panic — many of these have simple fixes.
Machine won’t turn on: Check the outlet first. Then check the power cord and the machine’s fuse. Some machines have a resettable thermal fuse that trips if the boiler overheats. Let the machine cool for an hour and try again.
Blinking lights or error codes: Consult your manual. Common codes include: water tank empty (even when full — clean the sensor), drip tray full (check the float), or brew unit not seated (super-automatics — remove and reinsert the brew unit).
No heat: If the pump runs but the group head stays cold, the heating element or its thermostat has failed. This is a repair, not a fix. If your machine is over 5 years old, weigh the cost. A new boiler assembly can run $150-$250 for parts alone. A new machine might cost less.
Loud or surging pump: A pump that pulses or surges during extraction is often starved for water — check the inlet filter and airlock first. If those are clear, the pump itself is failing. Pumps wear out; they’re a wear item like brake pads. Replacement pumps cost $30-$80 and are available online. If you’re handy, it’s a doable swap. If not, factor in labor costs.
Super-Automatic vs. Semi-Automatic: Key Differences in Fixes
These two machine types share the same core components but fail differently.
- Semi-automatics (like a Breville Barista Express): You control grind, dose, and tamp. Most problems trace to user technique — grind size, puck prep, or stale beans. Mechanical failures are simpler: gaskets, pumps, and valves are easy to reach.
- Super-automatics (like a Jura or Philips): The machine does everything, which means more parts to fail. The brew unit is the biggest culprit. It needs regular lubrication and cleaning. If it jams, you’ll see an error code. Many super-automatics also have a bypass chute for pre-ground coffee — if that chute is clogged, the machine won’t brew. Check it regularly.
For super-automatics, the maintenance schedule is non-negotiable. You can’t skip cleaning cycles. For semi-automatics, you have more forgiveness, but you also have more responsibility for the puck.
If you’re deciding between the two, our automatic vs. semi-automatic comparison breaks down the trade-offs.
When to Repair vs. Replace Your Machine (Cost Guide)
Here’s the honest math. A repair makes sense when the fix costs less than half the value of a comparable new machine. Use this table as a rough guide.
| Problem | Typical Repair Cost | Repair or Replace? |
|---|---|---|
| Group head gasket | $10-$20 (DIY) | Repair. Easy and cheap. |
| Pump replacement | $50-$100 (DIY) | Repair if machine is under 5 years old. |
| Boiler/heating element | $150-$250 (parts) | Replace if machine cost under $500. |
| Control board failure | $200-$400 | Replace. Not worth it on most home machines. |
| Brew unit (super-auto) | $150-$300 | Depends on machine age. Often worth it on $1000+ machines. |
A $300 machine with a dead boiler costs more to fix than it’s worth. A $1500 machine with a dead pump is worth repairing. The rule of thumb: if the repair cost exceeds 50% of the machine’s current value, replace it.
Maintenance Schedule to Prevent Future Problems
You can avoid most of these issues with a simple routine. Set a calendar reminder — your machine won’t remind you.
- Daily: Purge the steam wand, wipe the group head, knock out the spent puck, empty the drip tray.
- Weekly: Backflush with water (if your machine has a blind basket). Clean the portafilter and basket with soapy water.
- Monthly: Backflush with a detergent (like Cafiza) for semi-automatics. Clean the water tank and inlet filter.
- Every 3-4 months: Descale. If you use hard tap water, do it monthly. If you use filtered water, every 3 months is fine. This is the single most important step for longevity.
- Yearly: Replace the group head gasket. Check hoses and clamps for wear.
Water hardness matters more than anything. If you have hard water (above 120 ppm), use filtered water or a softening cartridge in the tank. Scale is the #1 cause of premature pump and boiler failure. For a deeper look, our deep cleaning guide covers the full routine.
Frequently Asked Questions
Why is my espresso machine pulsing or surging during extraction?
A pump that surges usually means it’s starved for water. Check the tank level, the inlet filter, and clear any airlock. If those are fine, the pump itself is failing. A surging pump can also be caused by scale buildup inside the pump head. Descale first, then consider a pump replacement if the surging persists.
How often should I descale my automatic espresso machine?
It depends on your water hardness. With hard tap water, descale every 4-6 weeks. With filtered water, every 3 months is adequate. With soft water, every 6 months. The descaling light on your machine is a guide, but it’s often conservative. If you notice slower flow, weaker steam, or louder pump noise, descale sooner.
Can I use vinegar to descale my espresso machine?
You can, but I don’t recommend it. Vinegar is acetic acid, which can attack rubber seals and leave a lingering smell. Commercial descalers use a mix of acids (citric, lactic, or sulfamic) that dissolve scale more effectively and are safer for your machine. If you must use vinegar, use white vinegar diluted 1:1 and run at least three rinse cycles afterward.
Why does my espresso taste sour even with fresh beans?
Sour taste means under-extraction. The water didn’t pull enough flavor out. Check your grind — it’s probably too coarse. Grind finer and see if the shot time increases. Also check your brew temperature; if it’s too low, the water can’t extract properly. Finally, make sure you’re pulling enough liquid — a 1:2 ratio is a good starting point.
My machine makes a loud noise. Is it broken?
Not necessarily. A grinding or rattling noise often comes from the grinder (if it’s a super-automatic) or from a pump struggling against scale. A high-pitched whine from the pump usually means it’s working hard — check the inlet filter and airlock. A knocking sound could be a loose part inside. If the noise is new and persists, check our guide on loud automatic espresso machines for specific fixes.
What to Do Next (The Short Version)
- Diagnose first: water, heat, or pressure. That one question saves hours.
- Grind size and dose fix most extraction problems. Weigh your coffee.
- Channeling is often a puck prep issue, but check your burrs if it persists.
- Scale is the enemy. Descale on a schedule based on your water hardness.
- Steam wand issues are almost always scale or a clogged tip.
- Repair vs. replace: if the fix costs more than half the machine’s value, buy new.
- Keep a spare group head gasket on hand. It’s the most common wear item.
Most of these fixes take less than 20 minutes and cost under $20. The few that don’t — pump, boiler, control board — are worth understanding before you call a repair tech. You’ll know exactly what to ask for, and you’ll know whether it’s worth paying for.
Products related to this article
Sponsored / affiliate links. As an Amazon Associate I earn from qualifying purchases. I may earn additional commission from eligible campaigns.
 Coffee Espresso Machine Handle Replacement Parts, Cafe Bracket Handle for Lidl Silvercrest CM4621 CM4218 KF5002 KF500S Barista (for 51mm Portafilter Basket - Not included)
 Quick Heating Cup Warmer, Three Temperature Settings, Splashproof and Portable, for Coffee, Milk, Lightweight ABS Material
 Linnkyfloa Coffee Espresso Maker Handle Replacement for Stovetop Moka Pot or Percolator, Black Plastic for Spare Part Compatible with Italian(9-12 Cup)