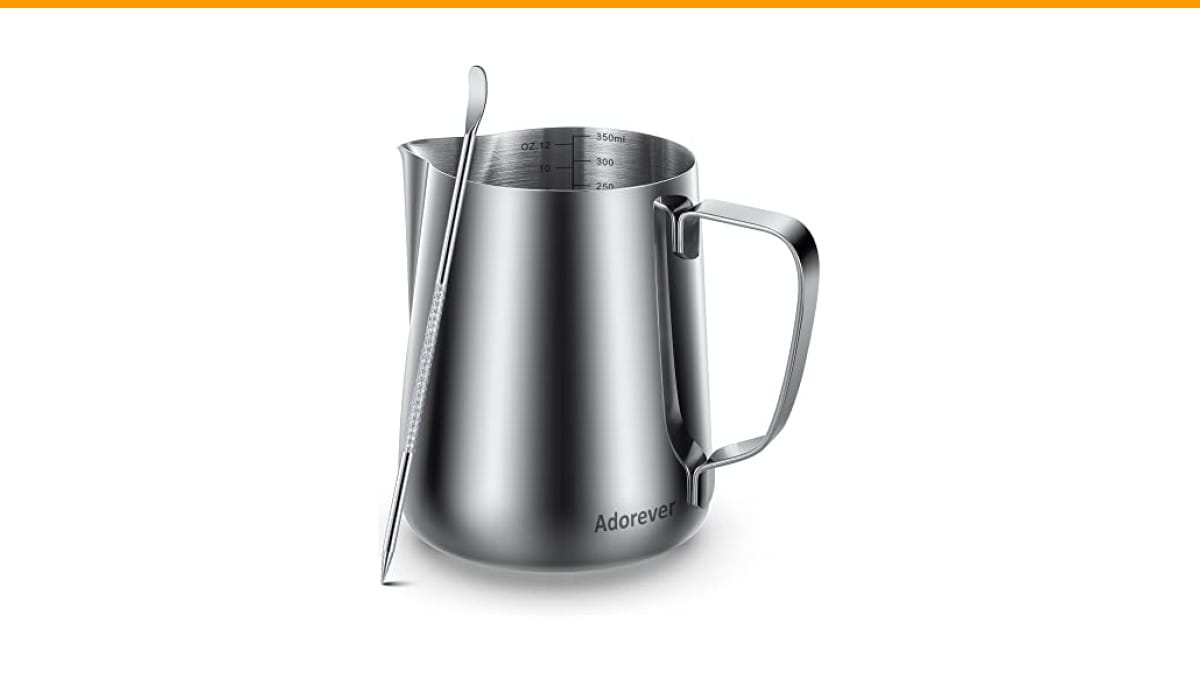
You pull the pitcher off the shelf, steam wand ready, milk poured. Then you see it: a dent in the side, a wobbling handle, or a crusty ring of burnt milk that won’t budge. The pitcher still holds liquid, but it’s not working like it should. Milk swirls unevenly, the handle feels like it might snap, or the spout drips down the side instead of pouring clean.
Most people toss the pitcher and buy another one. That’s often unnecessary. A broken milk frothing pitcher usually has one of four issues: a dent affecting pour geometry, a loose or cracked handle, burnt-on milk residue, or a compromised spout. Each has a practical fix that takes under twenty minutes and costs almost nothing.

Adorever
Milk Frothing Pitcher, 8.5oz/12oz/20oz/32oz/50oz/66oz Milk Frother Cup…
- Perfect Combination Of Milk Frothing Pitcher And Latte Art Pen: The milk frother jug can be used in different ways: froth or steam…
- Premium Quality: The milk steaming pitchers and coffee art pen are made of chrome finished #304 stainless steel. Rust-proof, stain…
- Point-Mouth Design: Can prevent liquid leaking from the jug and make the coffee pattern pretty. Offer 12oz/20oz/32oz/50oz milk jug…
As an Amazon Associate I earn from qualifying purchases.
This guide walks through each repair with specific steps, the tools you need, and when to admit the pitcher is done. You’ll also learn what to look for when a replacement is the smarter move.
If you do end up replacing it, a solid stainless steel option like the Adorever milk frothing pitcher handles daily use well. It’s made from #304 stainless steel, so it resists rust and dents better than thinner aluminum pitchers. The point-mouth spout design also helps with latte art control, which matters once your pour technique improves.
Dents: Fixing the Pour Geometry
A dent changes how milk flows. The spout might drip, or the vortex during steaming gets weak. You don’t need to live with it.
For small dents under half an inch, try the compressed air method. Heat the dented area with a hairdryer for about two minutes, then spray canned air upside down directly on the dent. The rapid temperature change often pops small dents back out. It works on stainless steel about sixty percent of the time. It won’t work on aluminum, which lacks the spring-back memory.
For deeper dents, use a wooden dowel or the rounded end of a wooden spoon. Insert it into the pitcher, press against the dent from the inside, and work the metal back outward. Go slow. Stainless steel will fatigue if you bend it back and forth too many times. One or two passes is usually enough. Stop once the surface is close to flush, not perfect.
If the dent is on the spout itself, skip the repair. Spout dents almost always cause drips and uneven pouring. No amount of bending restores the precise edge geometry. That pitcher becomes a measuring cup or a milk storage container.
After any dent repair, test the pour with water first. Fill it halfway, pour into a cup, and watch the stream. A clean, single stream means you’re good. A split or splashing stream means the metal is too deformed to save.
Loose or Broken Handles
The handle is where most cheap pitchers fail. The weld joint cracks, or the handle itself snaps off. You can fix a loose handle, but a snapped one needs replacement.
For a loose handle where the weld is still intact but wiggles, tighten the internal rivet. Most pitchers use a small rivet or screw hidden under the handle’s base. Flip the pitcher over and look for a small indentation or cap. Pry it off gently with a flathead screwdriver. Tighten the screw underneath with a Phillips head. That solves about ninety percent of wobble issues.
If there’s no screw, the handle is spot-welded. Spot welds don’t loosen. If the handle wiggles, the weld is cracking. Stop using the pitcher immediately. A full pitcher of hot milk with a failing handle is a burn waiting to happen. You can’t re-weld stainless steel at home without specialized equipment. This is a replacement situation.
A snapped handle is also replacement territory. Epoxy and superglue won’t hold under the weight of a full pitcher plus the torque of pouring. Don’t risk it. Keep your steam wand clean and grab a new pitcher with a properly welded handle.
Burnt-On Milk Residue
Burnt milk is the most common problem, and it’s not actually a breakage. But it makes a pitcher unusable if left untreated. The residue builds up, scorches, and ruins every batch of milk you steam.
Don’t use abrasive scrubbers. They scratch stainless steel, and those scratches become breeding grounds for bacteria and future milk buildup. Use a dedicated pitcher cleaner or a simple baking soda paste.
Mix three tablespoons of baking soda with enough water to form a thick paste. Coat the inside of the pitcher, focusing on the burnt areas. Let it sit for fifteen minutes. Then scrub with a non-abrasive sponge. The paste lifts the burnt protein without scratching the metal.
For stubborn, blackened residue, fill the pitcher with hot water and drop in a denture tablet. Let it fizz for thirty minutes. The effervescent action breaks down the protein bond. Rinse thoroughly. This method is gentler than boiling vinegar, which can discolor the stainless steel finish.
If the residue has actually pitted the metal, meaning there are visible pits or rough spots after cleaning, the pitcher is compromised. Those pits trap milk and bacteria, and you can’t steam clean them effectively. Replace it.
Spout Issues and Leaks
A spout that leaks down the side instead of pouring cleanly is frustrating. You go to pour latte art and get a dribble down the front of the pitcher instead of a controlled stream.
Check the spout edge for burrs or nicks. Run your finger gently along the lip. If you feel rough spots, use a fine-grit sandpaper (400 grit) to smooth them. This fixes minor drips. Don’t over-sand, or you’ll change the spout’s shape.
If the spout looks fine but still drips, the issue is the pitcher’s balance. A dented bottom or a warped base makes the pitcher tilt slightly when you pour, causing the milk to run along the side. Place the pitcher on a flat counter. If it rocks, gently tap the high side with a rubber mallet to flatten the base.
Leaks from the side or bottom of the pitcher are a different story. That means a crack in the metal or a failed weld seam. No home repair fixes that. The pitcher is done.
Comparing Repair vs. Replacement
Here’s a quick breakdown to help you decide whether a repair is worth the effort.
| Issue | Repairable? | Time | Tools Needed | When to Replace |
|---|---|---|---|---|
| Small dent (under 1/2 inch) | Yes, often | 5-10 minutes | Hairdryer, canned air, or wooden dowel | Dent is on the spout |
| Deep dent (over 1/2 inch) | Maybe | 10-15 minutes | Wooden dowel, patience | Metal is creased or cracked |
| Loose handle (screw-based) | Yes | 5 minutes | Flathead and Phillips screwdriver | Weld is cracked |
| Snapped handle | No | N/A | N/A | Always replace |
| Burnt milk residue | Yes | 15-30 minutes | Baking soda, non-abrasive sponge | Metal is pitted |
| Spout drip | Sometimes | 5 minutes | Fine-grit sandpaper | Spout is deformed |
| Side or bottom leak | No | N/A | N/A | Always replace |
Notice a pattern. Repairs work for surface issues. Structural damage means replacement. Don’t waste time on a pitcher with a cracked weld or a deformed spout. It’s not worth the risk of hot milk spilling on you.
If you’re replacing, consider the capacity you actually use. A 12oz pitcher works for a single latte. A 20oz handles two drinks. Anything larger is for multiple drinks or practice. The Adorever pitcher comes in both sizes, so you can match it to your routine.
Prevention: Keeping the Pitcher Working
Repairs are a hassle. Prevention is easier. A few habits keep your pitcher working for years.
Rinse the pitcher immediately after steaming. Hot milk residue hardens fast. Thirty seconds under hot tap water prevents most buildup. Don’t let it sit on the counter while you finish your drink.
Hand wash with mild soap. Dishwashers are convenient, but the high heat and harsh detergents break down the finish over time. If your pitcher is dishwasher safe, it still lasts longer with hand washing. Routine cleaning habits extend the life of all your coffee gear.
Store the pitcher upside down on a drying rack. This prevents water spots and keeps dust out. Don’t stack other items on top of it. That’s how dents happen.
Use the right milk temperature. Overheating milk causes protein to bond to the metal. Stop steaming at 150-155°F, not when it’s boiling. A thermometer takes the guesswork out.
And don’t use metal utensils inside the pitcher. They scratch the surface, which makes future cleanup harder. A silicone spatula or the steam wand itself is all you need.
Frequently Asked Questions
Can I use a hammer to fix a dent in my milk pitcher?
You can, but you’ll likely make it worse. A hammer creates new dents and stretches the metal. Use a wooden dowel from the inside instead. It gives you controlled pressure without marring the surface.
Is it safe to drink milk from a pitcher with a scratched interior?
Minor scratches are fine if they’re clean. Deep scratches or pits trap milk and bacteria. If you can’t get the surface smooth after cleaning, replace the pitcher. It’s not worth a stomachache.
How do I remove a stubborn burnt milk smell from the pitcher?
Fill it with hot water and add two tablespoons of white vinegar. Let it sit for twenty minutes, then wash with soap and water. The vinegar neutralizes the odor. Rinse thoroughly so no vinegar taste remains.
Can I put a dented pitcher in the dishwasher?
Yes, but it won’t fix the dent. The dishwasher’s heat won’t reshape metal. You need the manual methods described above. Also, a dented pitcher might not sit properly on the dishwasher rack, which can cause it to tip over and hold water.
What’s the best way to test if my pitcher still works after a repair?
Fill it with cold water and practice pouring into a cup. Check for drips, splits in the stream, or wobbling. Then steam milk and see if the vortex forms properly. If both pass, you’re good to go.
What To Do Next
You’ve assessed the damage, tried the repair, and tested the result. Here’s the quick version of everything above.
- Small dents pop out with heat and compressed air or a wooden dowel.
- Spout dents and cracked welds are not repairable at home.
- Burnt milk residue lifts with baking soda paste or a denture tablet.
- Loose handles often just need a tightened screw underneath.
- Test every repair with water before using milk.
- Replace the pitcher if there are pits, cracks, or a deformed spout.
- Rinse after every use to prevent future problems.
If you’re in the market for a replacement, check the Adorever pitcher on Amazon for current pricing. A good pitcher is an investment in your daily coffee ritual, not just another gadget. If you’re also having trouble with your steam wand, check this troubleshooting guide for common frothing issues.
Products related to this article
Sponsored / affiliate links. As an Amazon Associate I earn from qualifying purchases. I may earn additional commission from eligible campaigns.
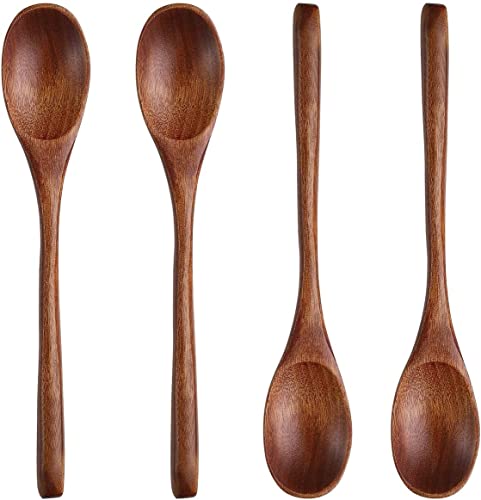 Long Handle Wooden Spoon For Mixing Coffee Tea Jam and Bath Salt In Kitchen, Environmentally Friendly Table Spoon, 8.6 Inches,4 Pieces…
 MIBOTE Silicone Cooking Kitchen Utensils Set, Wooden Handle, Coffee
 Quick Heating Cup Warmer, Three Temperature Settings, Splashproof and Portable, for Coffee, Milk, Lightweight ABS Material