You just pulled your last shot before a two-week vacation, or maybe you are upgrading your counter setup and the old machine is heading to a closet. You wipe the outside, unplug it, and think, ‘That’s done.’ It isn’t. Storing an espresso machine with grinder the wrong way is how you end up with rancid coffee oils, rust, and a machine that tastes like musty basement for months after you bring it back.
Most home baristas treat storage as an afterthought, but it’s actually a preservation task. The grinder holds coffee oils that go stale and sticky. The boiler and group head trap water that breeds scale and, in some cases, mold. The gaskets dry out. The hopper collects dust. This guide walks you through the entire process, from the quick weekend break to a multi-month deep storage, so your equipment comes out of hiding ready to pull shots, not repair bills.

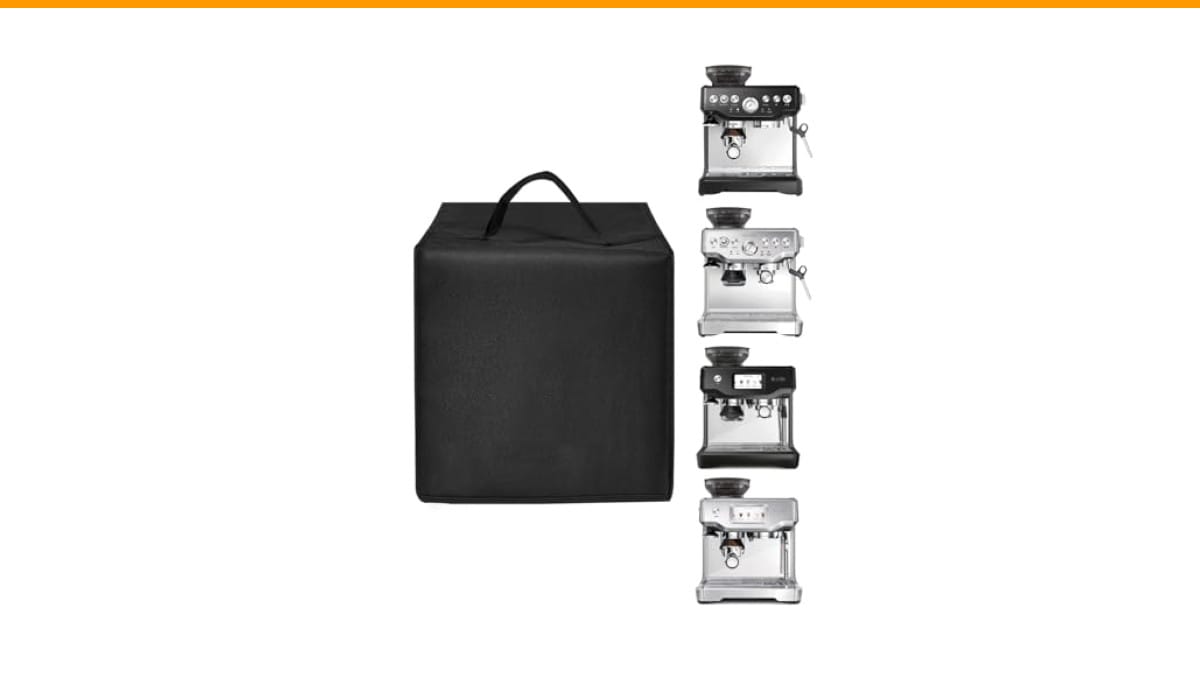
EiiJugaloo
Espresso Machine Cover for BES870XL/ BES880BSS/BES876BSS Coffee…
- Coffee Maker Cover size:15.8"W x 15.4"D x 15.8"H (40x39x40cm),cover compatible with Express Espresso Maker BES870XL/BES870BSXL/BES…
- Waterproof Nylon: Cover made of durable heavy duty 600D nylon, it is waterproof, scratch resistant and anti-static; it provides re…
- Kitchen Protective Cover:Keep the kitchen and dining room clean; avoid the trouble of dust, oil smoke and cooking steam; prolong t…
As an Amazon Associate I earn from qualifying purchases.
You’ll learn the exact cleaning steps, the drying method that prevents internal rust, the role of a quality cover, and the mistakes that cause most storage-related damage.
If you are storing a machine on an open shelf or in a garage, a fitted cover is not optional. The EiiJugaloo Espresso Machine Cover is built from heavy 600D waterproof nylon and sized for popular Breville models like the BES870XL and BES880BSS. It blocks dust, kitchen grease, and cooking steam while the bottom opening lets air circulate so moisture doesn’t pool underneath. It folds flat when you are not using it, which is handy if you rotate between machines.
Why Storing a Machine with a Grinder Is Different
A standalone espresso machine just needs its boiler drained. A grinder needs its burrs cleaned and its hopper emptied. When they are combined in one unit, you have to do both jobs, and you have to do them in the right order.
The grinder side holds beans that contain volatile oils. Those oils oxidize and go rancid within days of being ground. If you leave beans in the hopper for a month, you are not just dealing with stale coffee. You are dealing with sticky residue that clogs the chute and coats the burrs. Cleaning that later takes twice as long as it would have taken before storage.
The espresso side holds water in the boiler, the group head, and the steam wand. Stagnant water is a breeding ground for bacteria and scale. If you store the machine with water inside, you risk calcium deposits hardening in the boiler, which shortens the machine’s life. You also risk a musty smell that no amount of fresh beans will cover up.
The 6-Step Cleaning and Prep Process
Do this sequence every time you plan to store the machine for more than three days. It takes about 30 minutes and saves you from a frustrating first session back.
- Empty and clean the grinder hopper. Remove all beans. Wipe the hopper with a dry microfiber cloth. Do not wash the hopper with soapy water unless the manufacturer says it’s removable and dishwasher-safe, because residual soap can taint the first few grinds later.
- Run cleaning tablets or rice through the grinder. Grinder cleaning tablets absorb oils. If you don’t have tablets, use plain white rice — it’s a common hack. Run a quarter cup through on a coarse setting, then grind a few grams of fresh beans to push out the rice dust. This pulls oil off the burrs.
- Backflush the group head. Use a blind basket and a cleaning detergent designed for espresso machines. Run the cleaning cycle according to your machine’s manual. This flushes coffee oils out of the group head and the internal lines. Skip this step only if you store the machine every week; if it’s for a month, do it.
- Purge the steam wand. Turn the steam on for 10 seconds into a towel to clear milk residue from the tip. Then wipe the wand with a damp cloth. Milk residue inside the wand is a primary cause of clogged steam tips.
- Drain the boiler. This is the step most people miss. If your machine has a drain valve, open it and let the water run out. If it doesn’t, use the hot water spout to empty the tank, then run the pump until the boiler is as empty as it will go. Some machines allow you to siphon the boiler with a turkey baster through the hot water tube. Check your manual.
- Dry everything thoroughly. Wipe every external surface, the drip tray, the portafilter, and the steam wand. Leave the portafilter out of the group head so the gasket isn’t compressed for weeks. Leave the water tank empty and the lid off so it can air dry.
One caveat: if your machine is a super-automatic with an integrated grinder and a removable brew unit, take the brew unit out, rinse it under cold water (no soap), and let it dry completely before reinstalling it. That unit is where mold hides in these machines.
Drying and Moisture Control: The Step That Decides Everything
You can clean perfectly and still ruin a machine in storage if you trap moisture. The inside of a closed espresso machine is dark and warm if stored indoors, which is exactly what mold spores want.
The goal is to get the internal components as dry as possible before you put a cover on or close the cabinet door. After draining, leave the machine unplugged with the portafilter removed and the steam wand open for 24 hours. Yes, open. The wand acts as a vent. If you close it, any residual water in the wand has nowhere to evaporate.
For storage longer than two weeks, add a desiccant pack. Silica gel packets (the kind that come in shoe boxes) work. Place one inside the water tank and one near the grinder hopper. Replace them every few months. A cheap digital hygrometer in the storage area helps too — if the room humidity sits above 60%, you’re fighting a losing battle.
Do not store the machine in a plastic bag. A sealed bag traps any remaining moisture and accelerates rust on unpainted metal parts. Use a breathable cover instead. The EiiJugaloo cover mentioned earlier has a bottom opening specifically for airflow, so it protects against dust without creating a greenhouse effect.
Where to Store It: Location Matters More Than You Think
Not all storage spots are equal. Here’s how the common options compare in real-world testing.
| Storage Location | Pros | Cons | Best For |
|---|---|---|---|
| Kitchen counter (covered) | Easy access, stable temperature | Takes up space, exposed to cooking grease | Weekly use, short breaks |
| Kitchen cabinet (dedicated) | Dark, dust-free, consistent climate | Limited space, may require lifting | Monthly rotation, small kitchens |
| Pantry or closet | Out of sight, roomy | Risk of nearby cleaning chemicals or humidity | Seasonal storage (1–3 months) |
| Garage or basement | Out of the way completely | Temperature swings, high humidity, pests | Only if climate-controlled |
Garage storage is the riskiest. Temperature swings cause condensation inside the machine. If you must use the garage, put the machine in a sealed plastic tote with a large desiccant pack, and bring it inside for 24 hours before you use it to let it acclimate. Condensation on a cold machine that’s suddenly turned on can short electrical components.
Long-Term vs. Short-Term: Adjusting Your Approach
Three days of storage doesn’t require the full ritual. A week might. Here’s a practical breakdown.
Short-term (3–7 days): Empty the hopper and wipe the outside. Leave the water in the tank. Run a quick cleaning cycle when you return. This is fine for a weekend trip.
Medium-term (1–4 weeks): Do the full 6-step cleaning process, drain the boiler, and leave the portafilter out. Use a cover. This is the vacation scenario.
Long-term (1 month+): Everything in the medium-term plan, plus remove the burrs from the grinder if you are comfortable doing so, clean them individually, and store them in a sealed bag with a desiccant. Lubricate the group head gasket with a food-safe silicone grease before reassembly. This prevents the gasket from drying out and cracking.
Mistakes That Ruin Stored Machines
I’ve seen all of these in repair forums and in my own testing. Avoid them.
- Storing with beans in the hopper. Rancid oils will coat the burrs and require a full disassembly to clean.
- Storing with the portafilter locked in. The group gasket stays compressed and loses its shape, causing leaks later.
- Storing with the water tank full. Stagnant water grows bacteria. It also makes the machine heavier and more likely to crack internally if it freezes.
- Putting the cover on a hot machine. Trapped heat accelerates rubber degradation. Let it cool completely first.
- Using a damp cloth to wipe the grinder burrs. Water on burrs causes rust spots. Use a dry brush or a dedicated grinder cleaner.
Bringing It Back Into Service
When you pull the machine out, don’t just turn it on and pull a shot. Run two full tanks of water through the system without coffee to flush any stale water from the boiler and lines. Run a backflush with plain water. Grind and discard about 10 grams of beans to clear the chute. Then pull your first shot. It might taste slightly off for the first few drinks, especially if the machine was stored for over a month. That’s normal. The oils in the group head need a few shots to re-season.
If you notice a musty smell even after flushing, the internal lines may need a deeper deep clean or a descaling cycle. Storing a machine properly is the best way to avoid that outcome entirely.
Frequently Asked Questions
Should I remove the grinder burrs before long-term storage?
Yes, if you can do it without forcing anything. Burrs are precision parts, and removing them lets you clean off old coffee oils completely. Store them in a zipper bag with a silica packet. If your manual doesn’t show how to remove them, leave them in place and just run cleaning tablets through before storage.
Can I store my espresso machine in a garage during winter?
Only if the garage is heated or insulated. Freezing water in the boiler will crack it. That’s a terminal repair, often costing more than the machine’s value. If you have no choice, drain the boiler completely and leave the machine unplugged for 48 hours before moving it to the garage so any residual moisture evaporates.
How often should I replace the desiccant packs in storage?
Check them monthly. Silica gel changes color when saturated (most are orange-to-green or blue-to-pink). If they look saturated, dry them in a 200°F oven for 2 hours or replace them. Cheap desiccant packs are not worth reusing if you’re not sure of their condition.
Is it okay to store the machine with the water tank attached?
It’s fine if the tank is empty and dry. Leaving it attached with water in it is the problem. Remove the tank, dry it, and leave the lid off. If you store the machine upright, the empty tank just sits there harmlessly.
Do I need to lubricate the group head gasket before storage?
For storage over a month, yes. Use food-grade silicone grease (not petroleum-based). A thin layer on the gasket keeps it pliable. For short storage, skip it — you’ll just make a mess when you lock the portafilter in next time.
What to Remember Before You Box It Up
Storage is a 30-minute task that saves you from a 3-hour cleaning session later. Here’s the short version.
- Empty the hopper and clean the grinder burrs with tablets or rice before anything else.
- Backflush the group head and purge the steam wand to remove milk and coffee oils.
- Drain the boiler completely — this is the most skipped and most important step.
- Leave the portafilter out and the steam wand open for 24 hours to let everything dry.
- Use a breathable, waterproof cover like the EiiJugaloo model for dust and grease protection.
- Add desiccant packs for storage longer than two weeks, especially in humid climates.
- Flush two tanks of water through the machine before your first shot after storage.
Follow this routine and your machine will outlast your countertop. Ignore it and you’ll be shopping for a new one sooner than you expect. For more on keeping your gear running between storage periods, check our guide on coffee machine maintenance or the difference between automatic and semi-automatic machines if you’re considering an upgrade.
Products related to this article
Sponsored / affiliate links. As an Amazon Associate I earn from qualifying purchases. I may earn additional commission from eligible campaigns.
 Coffee Espresso Machine Handle Replacement Parts, Cafe Bracket Handle for Lidl Silvercrest CM4621 CM4218 KF5002 KF500S Barista (for 51mm Portafilter Basket - Not included)
 HomeBeyond Espresso Coffee Maker 12 Cups, Classic Stovetop Espresso Maker, 600ml / 20oz Coffeemaker for Gas & Ceramic Stovetops (Silver)
 Quick Heating Cup Warmer, Three Temperature Settings, Splashproof and Portable, for Coffee, Milk, Lightweight ABS Material