You finish your shot, rinse the portafilter, and then what? The tamper sits on the counter, gets knocked into the sink, or slides into a drawer where it clanks against spoons. After a few weeks, the base shows scratches, the handle feels loose, and your tamping angle goes crooked. Nobody plans for that. But how you store an espresso tamper matters more than most home baristas think.
This article covers the practical side of tamper storage: where to keep it, what ruins a tamper over time, and how to build a simple routine that protects your gear. You’ll also see a comparison of storage methods so you can pick what fits your counter space and budget. No theory here, just what works after years of pulling shots at home.

brikinte
Portafilter Holder for Ninja Espresso Machine, Espresso…
- Compatible with: Portafilter holder compatible with Ninja luxe cafe pro, Ninja espresso machine, Ninja ES601 coffee machine, Ninja…
- High-quality materials: Espresso station is made of silicone material, which is highly durable. The design for Ninja luxe cafe acc…
- Provide stability: Coffee tamper station offers a stable foundation for your tool for Ninja coffee machine, while avoiding damage…
As an Amazon Associate I earn from qualifying purchases.
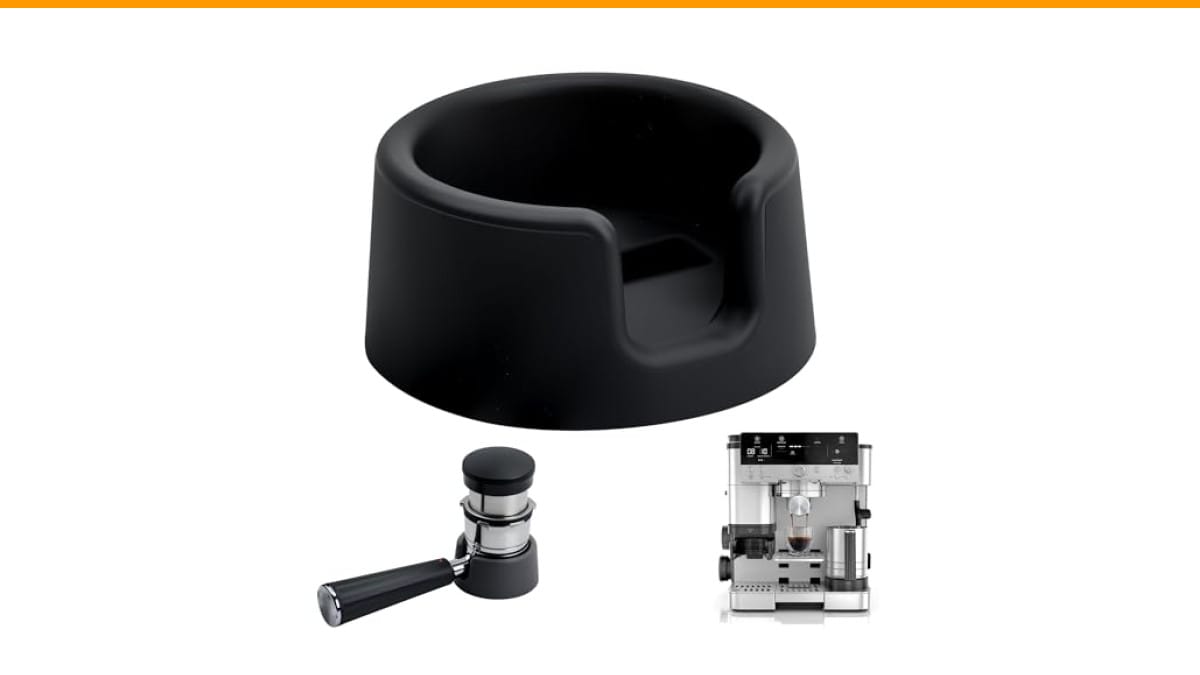
If you’re using a Ninja espresso machine, you might also want a dedicated spot that holds the portafilter while you tamp. The brikinte Portafilter Holder for Ninja Espresso Machine is a silicone tamping station that grips the counter and keeps the portafilter steady. It doubles as a landing pad for your tamper between shots, which solves the “where do I put this wet thing” problem neatly.
Why Storage Actually Damages a Tamper
Most tampers are made of aluminum, stainless steel, or a coated base with a wooden or plastic handle. Each material reacts differently to neglect. Aluminum oxidizes when left wet. Wooden handles warp and crack in humid environments. Even stainless steel can develop water spots if you put it away damp.
The biggest killer is moisture. You rinse the tamper under the tap, give it a quick shake, and drop it in a drawer. That trapped water sits against the base and handle joint. Over months, the base develops pitting, and the handle loosens because the internal glue or thread degrades. A $50 tamper shouldn’t fail that way, but it will if you store it wet.
Physical damage comes second. A tamper tossed into a drawer with metal scoops and spoons gets scratched. Scratches on the base matter because they create uneven pressure on the coffee bed. Even a tiny groove can cause channeling, which ruins your shot. The base is the one part you cannot afford to damage.
Heat is the third issue. Leaving a tamper on a counter next to a hot espresso machine might seem harmless, but prolonged exposure to heat dries out wooden handles and can warp plastic bases. Keep it off the machine’s warming tray.
The Right Way to Store a Tamper: Three Methods That Work
You have three solid options for storing a tamper at home. Each fits a different workflow and counter setup.
Method 1: Dedicated Tamping Station or Mat
A tamping station gives the tamper a designated home. The brikinte holder mentioned earlier works this way: you place the portafilter in the silicone cradle, tamp, and set the tamper back on the mat. The mat’s non-slip surface keeps everything from sliding, and its smooth face doesn’t trap coffee grounds.
This method works best if you have counter space near your grinder. The tamper stays within arm’s reach, which keeps your workflow fast. Cleanup takes seconds because the silicone wipes down. You also protect your countertop from scratches and dents, especially if you tamp with force.
The downside is footprint. A tamping station takes up real estate, and if your kitchen is tight, that might bother you. But for most home setups, the convenience outweighs the space cost.
Method 2: A Dry, Dedicated Drawer or Caddy
If you prefer a clean counter, use a drawer organizer or a small caddy. The key is that the tamper has its own compartment, not shared with metal tools. A bamboo or plastic organizer with a slot for the tamper works well.
Before putting it away, wipe the tamper completely dry with a microfiber cloth. Pay attention to the joint between the handle and base. Then place it base-down or handle-down, depending on the organizer. Base-down is safer because it keeps the handle from taking impacts.
This method protects the tamper from scratches and moisture, but it adds a step. You have to dry it thoroughly, and you need to remember to put it back instead of leaving it on the counter. It’s a good option for people who don’t want visual clutter.
Method 3: Wall-Mounted Magnetic Holder
Magnetic holders work if your tamper has a ferrous metal base. You mount a small magnetic strip or a dedicated tamper holder on the side of your cabinet or a nearby wall. The tamper hangs vertically, which lets air circulate around it and prevents moisture buildup.
This is the best method for airflow, but it has a catch. Not all tampers are magnetic. Aluminum bases won’t stick. Check your tamper before buying a magnetic holder. Also, hanging a tamper by its base puts stress on the handle joint over time, so make sure the magnet is strong enough to hold the full weight securely.
If you have a calibrated tamper with a spring mechanism, avoid hanging it. The constant pull can affect the spring’s tension over months. Keep calibrated tampers on a flat surface instead.
What to Avoid When Storing a Tamper
Some storage habits are common but harmful. Let’s clear them up.
- Never store it wet. Dry the tamper fully before putting it away. A quick wipe with a cloth takes ten seconds and prevents rust and handle damage.
- Don’t leave it on the drip tray. The drip tray stays damp and collects coffee residue. Your tamper will pick up both.
- Avoid loose drawers. A tamper rattling against other tools gets scratched. If you use a drawer, give it a dedicated slot.
- Keep it off the machine’s top. The heat from the warming tray can warp plastic bases and dry out wood handles.
- Don’t store it base-down on a hard surface. The base will pick up micro-scratches from the counter. Use a mat or a soft cloth underneath.
One thing I learned the hard way: a tamper left on a damp counter for a weekend developed a rust ring on the base. It didn’t affect the taste, but it looked terrible and took serious scrubbing to remove. A dry storage spot prevents that entirely.
Comparing Storage Methods Side by Side
Here’s a quick comparison to help you decide. These are based on real use, not spec sheets.
| Method | Best For | Moisture Protection | Scratch Protection | Counter Space | Cost |
|---|---|---|---|---|---|
| Tamping station / mat | Daily use, fast workflow | Good (air exposure) | Excellent (soft surface) | Requires dedicated area | Low to medium |
| Drawer organizer | Clean counters, minimal visual clutter | Fair (must dry first) | Good (separate slot) | None | Very low |
| Wall-mounted magnetic holder | Small kitchens, airflow priority | Excellent (vertical air circulation) | Good (no contact) | None | Low |
| Loose on counter | No setup, temporary | Poor | Poor | Minimal | Free |
The table shows a clear pattern: the more deliberate your storage, the better your tamper survives. Loose on the counter is the worst option, and it’s also the most common. If you only change one habit, give the tamper a dedicated spot.
How to Clean a Tamper Before Storage
Cleaning before storage is half the battle. You don’t need soap every time. Here’s a simple routine that takes under a minute.
- Rinse the base under warm running water to remove coffee oils and grounds.
- Wipe the entire tamper with a damp microfiber cloth. Avoid soaking the handle if it’s wood.
- Dry the base and handle thoroughly with a separate dry cloth.
- Let it air dry for 30 seconds on a clean surface before putting it away.
- Once a month, wipe the base with a food-safe mineral oil if it’s bare cast iron or untreated wood. This prevents drying and cracking.
Skip the dishwasher. The heat and detergent will ruin the finish on most tampers. Hand washing is the only safe route.
If your tamper has a coated base (like a matte black finish), avoid abrasive scrubbers. They’ll strip the coating and expose the raw metal underneath. A soft sponge is enough.
Frequently Asked Questions
Can I store my tamper in the freezer to keep it cold?
No. Cold tampers don’t improve espresso extraction, and the condensation from a frozen tamper adds moisture to your coffee grounds. It also risks cracking the handle. Room temperature is fine.
Should I store the tamper base-up or base-down?
Base-down is safer for the handle. If you store it base-up, the handle is exposed to impacts. On a flat, soft surface like a silicone mat, base-down works perfectly. In a drawer, base-down in a dedicated slot is best.
How often should I replace my tamper?
A good tamper lasts years if stored properly. Replace it when the base shows deep scratches, the handle wobbles, or the coating peels. If you notice channeling in your shots that isn’t caused by grind size or distribution, inspect the base for damage.
Is it okay to leave the tamper on the portafilter between shots?
It’s not ideal. The tamper sits in a damp, coffee-coated environment, and the portafilter’s weight can press the base against the basket, causing micro-scratches. Set it aside on a clean surface instead.
Does a magnetic holder affect a calibrated tamper?
Yes, potentially. The constant magnetic pull can stress the spring mechanism over months. If your tamper has a spring-loaded calibration system, store it flat on a mat or in a drawer, not on a magnet.
What to Do Next: Build a Simple Storage Routine
You don’t need expensive gear to store a tamper well. You need a habit and a designated spot. Pick one method from the table, set it up, and make it part of your post-shot routine.
- Dry the tamper completely before storage, every time.
- Give it a dedicated spot, whether that’s a silicone mat, a drawer slot, or a magnetic holder.
- Keep it away from heat, moisture, and metal tools.
- Inspect the base monthly for scratches or coating wear.
- Hand wash only, and condition wooden handles with mineral oil occasionally.
- If you use a Ninja espresso machine, consider a dedicated tamping station like the brikinte portafilter holder to keep everything in one place.
- If your shots start channeling, check the tamper base before blaming the grinder.
Storage is a small part of espresso, but it protects a tool you use every day. A few seconds of care keeps your tamper flat, smooth, and ready for the next shot. That consistency shows up in the cup.
For more on building a solid home setup, check our espresso machine guide or troubleshoot common issues like bitter espresso shots. Both tie directly into how your tools perform.
Products related to this article
Sponsored / affiliate links. As an Amazon Associate I earn from qualifying purchases. I may earn additional commission from eligible campaigns.