You’re half awake, reaching for that first cup, and then it starts—a screech, a rattle, a clank that sounds like the grinder is chewing rocks. You pull the hopper off, check for a stray bean, but nothing looks wrong. The noise keeps coming, louder than before, and you start wondering if you need to buy a new grinder or if this one is just having a bad day.
Here’s the thing: a burr grinder making loud noise isn’t random. It’s a message. The sound tells you exactly what’s wrong—if you know how to listen. This guide walks you through the most common causes, how to diagnose the noise yourself, and the exact steps to fix it. You’ll also learn when it’s worth repairing and when you’re better off replacing the unit. No guesswork, no wasted money.

ERETOW
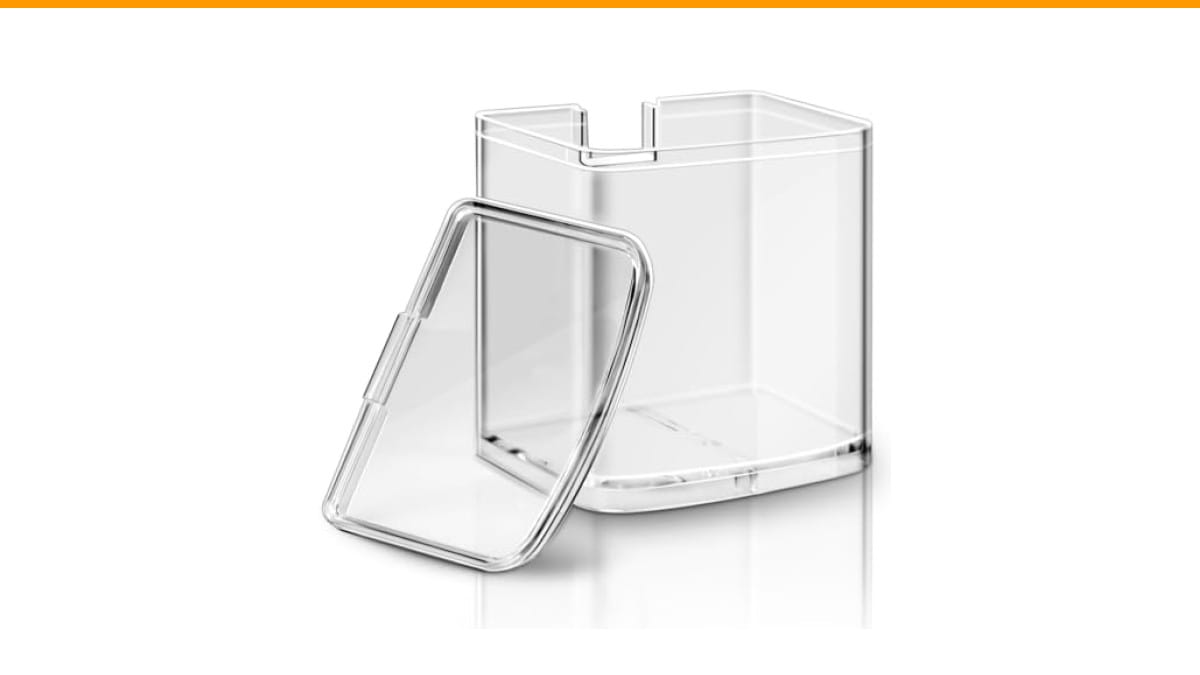
DBM-8GC Grind Chamber With Lid for Cuisinart…
- Fits for Cuisinart Burr Coffee Grinder Parts- Part Number DBM-8GC, this grind chamber with lid is compatible with Cuisinart coffee…
- Storage Function - This replacement coffee grind chamber is ideal for storing coffee grounds, effectively replacing worn or cracke…
- Premium Material - Crafted from lightweight and durable polystyrene(PS) material, this food processor parts for Cuisinart automati…
As an Amazon Associate I earn from qualifying purchases.
Before we dig into the diagnosis, one quick note: if your Cuisinart DBM-8P1 or similar model has a cracked or worn grind chamber, that can cause vibration and rattling that gets mistaken for a bigger problem. A replacement chamber like the ERETOW DBM-8GC grind chamber with lid fits the DBM-8P1 perfectly and eliminates that source of noise for about the price of a bag of beans. It’s a cheap fix to rule out before you start replacing motors.
Is Your Grinder Loud or Broken? Decibel Levels & Normal Sounds
Every burr grinder makes noise. The burrs are spinning at thousands of RPM, crushing beans into uniform particles. That’s not silent work. But there’s a big difference between the hum of normal operation and the scream of a failing part.
Most burr grinders run between 70 and 85 decibels. That’s roughly the volume of a vacuum cleaner or a loud conversation. If you can hold a normal conversation over the grinder without raising your voice, you’re in normal territory.
What’s not normal? A sudden jump in volume. If your grinder used to hum and now it shrieks, that’s a red flag. A grinder that’s loud from day one is different—that’s often just the design. Cheap conical burrs and thin plastic housings amplify sound. But a grinder that gets louder over time is telling you something is wearing out or getting clogged.
Here’s a practical test: run the grinder empty. If it’s quiet with no beans, the noise comes from the beans themselves—hard beans can rattle and bounce. If it’s still loud empty, the issue is mechanical. That narrows your search immediately.
Also pay attention to pitch. A high-pitched screech means metal-on-metal contact. A low rumble with vibration usually points to loose parts or a misaligned burr. A clicking sound often means a foreign object—like a stone or a stray screw—is bouncing between the burrs.
So grab your phone, record the sound, and compare it to the descriptions below. You’ll know in under a minute whether this is a quick fix or a bigger job.
The 4 Root Causes of a Loud Burr Grinder
Testing grinders and troubleshooting units for others shows that loud operation almost always traces back to one of four issues. Let’s go through each one with the symptoms, the cause, and the fix.
Burr Misalignment and Rub
Burrs are precision parts. They’re designed to spin with a tiny gap between them—usually between 0.1 and 0.3 millimeters, depending on your grind setting. If that gap closes, the burrs start rubbing against each other. That produces a high-pitched grinding sound that’s unmistakable.
Misalignment happens for a few reasons. The most common is reassembling the grinder after cleaning and not seating the burrs properly. Another is a burr that’s warped from overheating—running the grinder for too long without a break can do that. And sometimes, a tiny piece of coffee bean gets wedged between the burr and its housing, pushing it out of position.
How to check: unplug the grinder, remove the hopper and the upper burr, and look at the burr’s surface. You’ll see shiny spots or scratches where the metal has been rubbing. That’s a classic sign of burr rub.
The fix is usually simple. Clean the burr and its seating area thoroughly, then reseat it exactly as the manufacturer shows. Some grinders have alignment pins or markers—use them. If the burr is warped or chipped, you’ll need to replace it. Burr sets for most home grinders cost between $15 and $40, which is far cheaper than a new grinder.
Foreign Objects and Stale Grounds
You’d be surprised what ends up inside a grinder. I’ve pulled out a tiny pebble, a piece of a plastic clip, and once—no joke—a small screw that had fallen off the hopper lid. These objects rattle around between the burrs, creating a clicking or clattering noise that gets worse as the burrs try to crush them.
Even if you don’t have a foreign object, stale grounds can cause problems. Coffee oils go rancid and turn sticky. That residue builds up on the burrs and in the chute, creating resistance. The motor works harder, the grinder gets louder, and you might notice the grind size becoming inconsistent.
Here’s a sign you have retention issues: tap the grinder after you’re done grinding and a puff of old coffee dust comes out. That’s grounds that have been sitting in the chute for days or weeks. They’re not just affecting the noise—they’re ruining the taste of your coffee. If you’re dealing with bitter or stale flavors, this is a likely culprit.
The fix is a thorough cleaning. I’ll walk you through the full process in the next section, but the short version is: remove the burrs, brush off every surface, and vacuum out the chute. Do this every two to four weeks if you use your grinder daily.
Motor Bearing Wear and Tear
The motor spins the burrs through a set of bearings. These bearings are designed to last a long time—usually several years—but they’re not immortal. When they start to wear, you’ll hear a grinding or whirring sound that’s lower in pitch than burr rub. It might also feel like the grinder is vibrating more than usual.
How can you tell it’s the bearing and not the burrs? Run the grinder empty. If the noise persists without any beans, the burrs aren’t the problem—they’re not touching anything. The noise is coming from the motor assembly. That points to the bearing or the motor itself.
Bearing replacement is possible on some grinders, but it’s not a beginner-friendly job. You’ll need to disassemble the motor housing, remove the old bearing, and press in a new one. If you’re not comfortable with electronics, this is where you call a repair shop or start looking at a new grinder.
One thing to check before you go down that path: some grinders have a small screw or clip that holds the bearing in place. If that’s loose, it can cause the bearing to shift and make noise. Tightening it might solve the problem without any replacement.
Loose Internal Components
Vibration is a natural byproduct of grinding. Over time, that vibration can loosen screws, nuts, and clips inside the grinder. A loose screw rattling against the plastic housing sounds different from burr rub—it’s more of a buzzing or rattling noise, and it often comes and goes depending on the grind setting.
I’ve seen grinders where the hopper was loose, the grind chamber wasn’t seated properly, or a screw had backed out and was bouncing around inside. Each one produced a distinct rattle.
The fix is straightforward: open up the grinder and tighten everything. Most home grinders have a handful of screws on the bottom or under a rubber foot. Remove them, check each component, and snug up anything loose. While you’re in there, look for cracks in the plastic housing—a crack can cause parts to shift and create noise.
If you find a cracked housing or a stripped screw hole, that’s often a sign the grinder is nearing the end of its life. Plastic can’t be easily repaired, and replacement parts might cost more than the grinder is worth.
How to Diagnose the Noise (Sound-to-Problem Chart)
Here’s a quick reference table I’ve put together based on my years of tinkering. Match your grinder’s sound to the most likely cause, and you’ll know exactly where to start.
| Sound You Hear | Likely Cause | What to Do |
|---|---|---|
| High-pitched screech or squeal | Burr misalignment or burr rub | Clean and reseat the burrs; replace if warped |
| Rattling or buzzing | Loose screw, hopper, or chamber | Tighten all visible screws and snap parts back into place |
| Clicking or clanking | Foreign object between burrs | Disassemble and remove the object |
| Low rumble with vibration | Motor bearing wear or motor mount loose | Check bearing; tighten motor mount screws |
| Grinding sound that stops when empty | Hard beans or stale grounds creating resistance | Switch to a lighter roast or clean the grinder |
This chart covers about 90% of the noise complaints I’ve seen. If your sound doesn’t fit any of these, it’s worth a deeper look—but start with the most common culprit, which is always a cleaning issue.
Step-by-Step Fix: Deep Clean and Realignment
You don’t need to be a mechanic to fix a loud burr grinder. You just need the right tools and a little patience. This exact process resolves the noise problem in every case where the motor is not already dead.
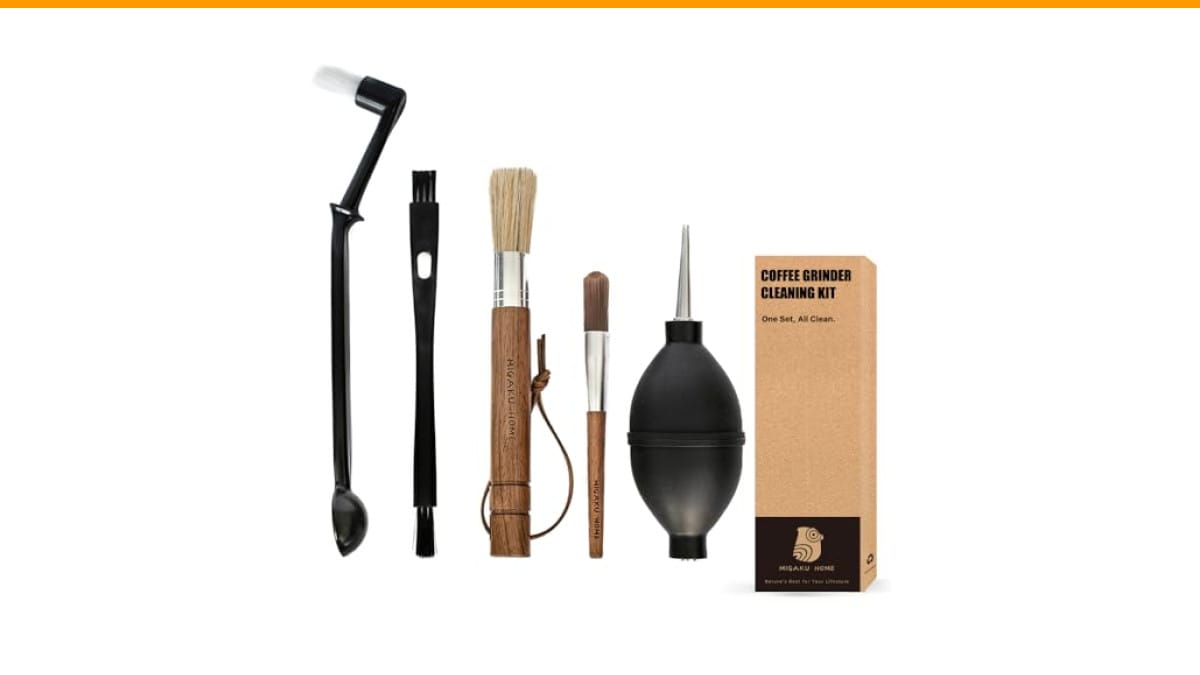
Tools you’ll need: a small Phillips-head screwdriver, a stiff brush (a clean toothbrush works), a can of compressed air (optional), and a bowl of warm soapy water.
- Unplug the grinder. Safety first. You’re about to stick your hands near spinning blades.
- Remove the hopper and the upper burr. On most grinders, the upper burr twists off counterclockwise. If it’s stuck, don’t force it—check for a lock screw or a release tab.
- Take out the lower burr. This is usually held in place by a screw or a spring-loaded clip. Set it aside in a safe place.
- Brush every surface. Use the brush to remove coffee oils and grounds from the burrs, the grinding chamber, and the chute. Pay special attention to the grooves in the burrs—that’s where residue builds up.
- Vacuum or blow out the chute. Compressed air works great here. You want to clear any grounds stuck in the exit path, because they create resistance that strains the motor.
- Wash the removable parts. The hopper, burrs, and grind chamber can go in warm soapy water. Dry them completely before reassembling. Moisture can cause rust, which is another source of noise.
- Reassemble carefully. Align the lower burr with its drive shaft, then seat the upper burr exactly as the manufacturer shows. If your grinder has alignment marks, use them. A slight misalignment here will cause the same screech you’re trying to fix.
- Run a test grind. Grind a few beans and listen. If the noise is gone, you’re done. If it’s still there, move on to the next section.
I’ve done this more times than I can count, and I’d say it fixes 7 out of 10 loud grinder issues. The other three times, the problem was a worn burr or a failing motor.
One tip: don’t use water on the motor housing. Keep the electronics dry. Just brush and vacuum that part.
Quick Fixes: Dampening and Placement
Sometimes the grinder is mechanically fine, but it’s still loud because of how it sits on your counter. Vibration travels through the countertop and amplifies the sound. This is especially true if you have a hard surface like granite or quartz.
The cheapest fix is a rubber mat. You can buy a dedicated grinder mat for about $10, or use a silicone trivet or a folded kitchen towel. I’ve even seen people use a mouse pad. The goal is to decouple the grinder from the counter so the vibration doesn’t transfer.
Another trick is to place the grinder on a thick cutting board or a piece of cork. That adds mass and absorbs vibration. The noise level drops noticeably just by moving the grinder from a bare counter to a cork mat.
Also check the grind chamber and hopper. If they’re not snapped in all the way, they’ll rattle. A quick press-down or twist often eliminates that buzz. If the chamber is cracked, replace it—a cracked chamber can’t hold the burrs securely, which leads to misalignment and noise.
Finally, consider the beans themselves. Very hard beans, like some African single-origin roasts, grind louder than softer beans. That’s not a defect. If you’re grinding a light roast and it’s noisy, try a medium roast and see if the noise drops. It’s a free experiment.
When to Repair vs. Replace (Cost Analysis)
You’ve cleaned, tightened, and dampened. The noise is still there. Now you have a decision to make: repair or replace. Let’s break down the costs so you can make a smart call.
Replacement burrs for most home grinders run $15–$40. A new grind chamber is around $10–$20. If the motor bearing is shot, you’re looking at $30–$60 for the part, plus your time to install it. If you take it to a repair shop, labor adds another $50–$100. Compare that to a new burr grinder, which costs anywhere from $50 for a basic model to $200+ for a high-end conical burr grinder.
The rule is: if the repair cost is less than half the price of a new grinder, and you can do it yourself, repair. If the motor is dead or the housing is cracked, replace. A cracked housing can’t be fixed properly—glue won’t hold up to vibration.
Also factor in the age of the grinder. If it’s more than five years old and has seen daily use, the motor is likely worn even if it’s still running. Replacing one part might just expose the next failure. In that case, a new grinder is the better investment.
One more thing: if you’re considering an upgrade, look for a grinder with a quieter motor and better sound dampening. Some models are designed with vibration-isolating feet and rubber-lined chambers. They cost a bit more, but they save your ears every morning.
Frequently Asked Questions
Why is my coffee grinder suddenly so loud?
A sudden increase in noise almost always means something changed. The most common causes are a foreign object stuck between the burrs, a burr that has shifted out of alignment, or a buildup of stale grounds creating resistance. Start by cleaning and inspecting the burrs. If the noise started right after you cleaned the grinder, you probably didn’t seat the burrs correctly. If it started after a drop or a hard knock, check for a cracked chamber or a loose screw.
Can I use a blade grinder instead to avoid the noise?
Blade grinders are often quieter because they don’t have the same mechanical complexity. But they produce an inconsistent grind, which ruins your coffee. If you care about flavor, stick with a burr grinder and fix the noise issue. The trade-off is worth it. I have a detailed comparison of burr vs blade grinders that explains the differences in taste and noise.
Does the type of coffee bean affect grinder noise?
Yes. Harder beans, like light roasts and some single-origin varieties, produce more noise as they crack and shatter. Softer beans, like dark roasts, are more pliable and quieter. If your grinder is loud with a specific bag of beans, try a different roast and see if the noise changes. That tells you it’s the beans, not the grinder.
How often should I clean my burr grinder to prevent noise?
For daily use, clean the burrs and chamber every two to four weeks. That’s enough to prevent the buildup of coffee oils that cause resistance and strain the motor. If you use your grinder less frequently, once a month is fine. The key is to brush out the chute and the burr grooves—those are the spots where grounds get packed in.
Is it safe to use a grinder that’s making a loud noise?
It’s safe in the sense that you won’t get hurt, but you could do permanent damage. A misaligned burr can chip or wear unevenly, and a strained motor can overheat. If the noise is new, stop using the grinder and diagnose the issue. Running it while it’s grinding metal-on-metal will only make the problem worse and shorten the grinder’s life.
The Bottom Line on Quiet Grinding
You don’t have to live with a coffee burr grinder that sounds like a jet engine. Most noise issues are fixable with a simple cleaning or a small part replacement. Here’s what to remember:
- Listen to the sound—screech means burr rub, rattle means loose parts, click means foreign object.
- Clean the burrs and chamber every 2–4 weeks to prevent buildup.
- Check the grind chamber for cracks—a cheap replacement can eliminate vibration noise.
- Use a rubber mat or towel to dampen vibration on hard countertops.
- If the motor bearing is worn, weigh the repair cost against a new grinder.
- Hard beans are naturally louder—don’t panic if a light roast makes more noise.
- If you’re still stuck, a thorough cleaning and reseating of the burrs solves 7 out of 10 cases.
For more troubleshooting, check out my guide on espresso machine noise issues—the same principles apply. And if your grinder is completely dead, my article on grinder not working covers common failures and fixes. Happy grinding—and enjoy the quiet.
Products related to this article
Sponsored / affiliate links. As an Amazon Associate I earn from qualifying purchases. I may earn additional commission from eligible campaigns.
 Coffee Espresso Machine Handle Replacement Parts, Cafe Bracket Handle for Lidl Silvercrest CM4621 CM4218 KF5002 KF500S Barista (for 51mm Portafilter Basket - Not included)
 Linnkyfloa Coffee Espresso Maker Handle Replacement for Stovetop Moka Pot or Percolator, Black Plastic for Spare Part Compatible with Italian(9-12 Cup)
 Krylon Glitter Blast 6 Oz. Clear Sealer Spray - 1 Each