You’re mid-pour, hand steady, and the water just stops. Or you switch it on before grinding beans and five minutes later it’s still sitting at room temperature. The gooseneck kettle is the workhorse of a pour-over setup, so when it acts up, your whole morning routine falls apart.
Most of these failures aren’t random. They follow predictable patterns, and you can trace them to a specific component or habit. This guide walks you through the common electric gooseneck kettle problems and fixes, starting from the symptom and working back to the cause. You’ll know exactly what to check, what to clean, and when to admit it’s time for a new one.
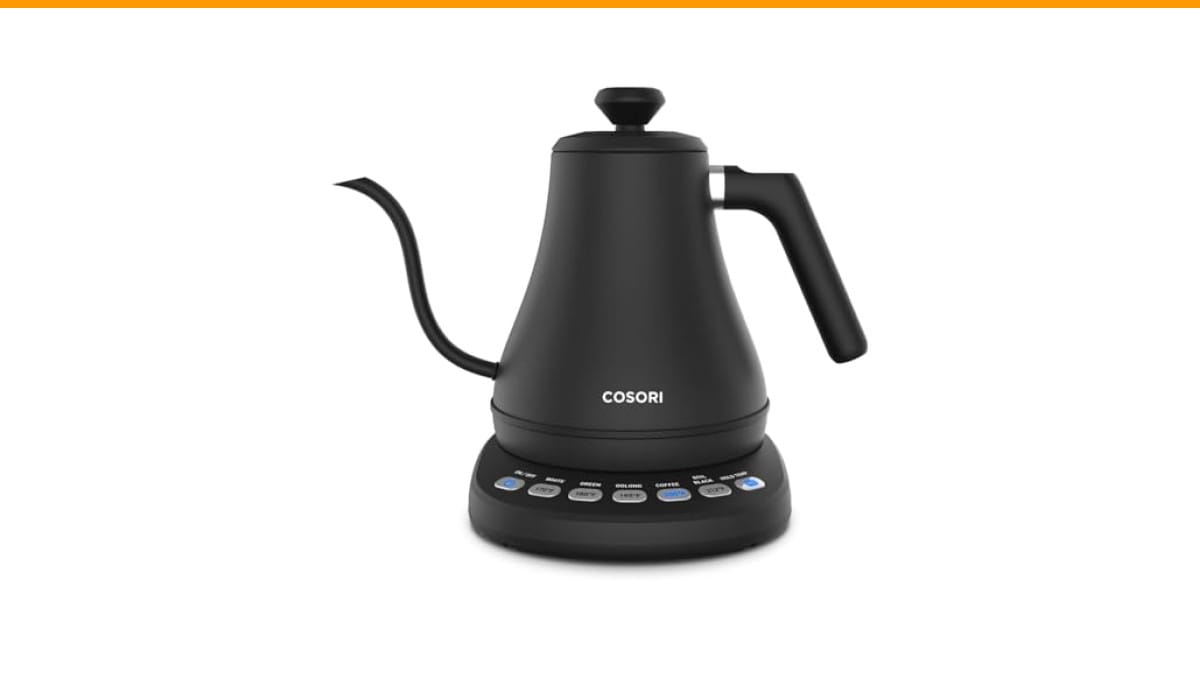
If you’re shopping for a reliable option that avoids many of these pitfalls, the Cosori Gooseneck Electric Kettle with Temperature Control holds temperature within 5°F and uses a 304 stainless steel interior, which cuts down on the plastic-taste issue and makes descaling more straightforward.
Common Gooseneck Kettle Problems: A Diagnostic Guide
Think of this as a decision tree, not a repair manual. You start with one symptom, follow the branch, and land on a fix. I’ve tested several gooseneck kettles side by side over the past year, and the same five or six issues keep showing up.
The table below maps the most frequent symptoms to their likely culprits. Use it as your first pass, then dig into the detailed sections that follow.
| Symptom | Most Likely Cause | Difficulty of Fix | Time to Fix |
|---|---|---|---|
| No power, no indicator light | Loose base connection, blown fuse, or dead outlet | Easy to Moderate | 5–15 minutes |
| Heats slowly or stops before boiling | Limescale on the heating element | Easy | 30–45 minutes |
| Boils dry or doesn’t auto shut-off | Faulty thermostat or steam tube blockage | Moderate | 20–30 minutes |
| Drips after pouring | Residual water in the spout or a worn spout filter | Easy | 5 minutes |
| Temperature reads wrong | Sensor drift or mineral buildup on the probe | Moderate | 15 minutes |
| Wobbly on the base | Deformed connector pins or a warped base plate | Moderate | 10 minutes |
Before you do anything else, rule out the obvious. Plug the kettle into a different outlet. Check if the power base has a reset button and press it. I’ve lost count of how many times a tripped GFCI outlet was the real culprit, not the kettle.
Problem 1: Kettle Won’t Turn On or Heat Up
This is the most common complaint, and it’s rarely the heating element itself. The element is a simple resistive coil; it either works or it doesn’t. Intermittent power issues almost always trace back to the connection between the kettle and its base.
Check the Power Base and Cord
Unplug the base and inspect the center connector pins. You’re looking for two things: black scorch marks and bent pins. A burnt smell or visible arcing means the pins aren’t making solid contact. If you see that, stop using the base immediately. That’s a fire risk, not a DIY repair.
Also check the cord for kinks, exposed wire, or a loose fit where it enters the base. A cord that sparks when you wiggle it needs replacing, not taping. If the cord is detachable, swap it with a known-good one to isolate the problem.
Testing the Thermal Fuse and Reset Button
Most electric kettles have a thermal fuse that blows if the unit overheats. It’s a one-time safety device; once it’s gone, the kettle is dead until you replace it. Testing it requires a multimeter set to continuity mode. You’ll need to remove the base plate (usually four screws) and locate the fuse near where the power cord enters.
If the fuse reads infinite resistance, it’s blown. Replacing it is possible—a 10-cent part—but you’re opening the electrical housing. If you’re not comfortable with that, this is the point where you call it and buy a new kettle. A word of caution: a blown thermal fuse often means the kettle boiled dry once. Fix the fuse without fixing the water-level habit and you’ll just blow another one.
Some models have a manual reset button on the bottom. If yours has one, press it firmly and try again. This is a common feature on cheaper kettles and often trips for no obvious reason.
Problem 2: Auto Shut-Off Fails or Boils Dry
This one is scary because it’s a safety feature failing. The kettle should shut off when the water hits a rolling boil, and again if it ever runs dry. When it doesn’t, you’re one distraction away from a melted plastic base and a kitchen full of smoke.
Two components handle this: the thermostat and the steam tube. The thermostat is a bimetallic strip that bends when heated, breaking the circuit. The steam tube channels steam from the boiling water up to that thermostat. If the tube is blocked with limescale, the steam can’t reach the sensor, so the kettle never knows it’s boiling.
Here’s the fix: descale the kettle thoroughly (detailed steps in the limescale section below), then test it with water. Fill it halfway, bring it to a boil, and watch it. If it still doesn’t shut off, the thermostat is likely faulty. That’s a replacement part, and on most gooseneck kettles, it’s not worth the cost of the part plus labor. If your kettle has ever boiled dry and still works, consider yourself lucky, but start watching it more closely. That event shortens the lifespan of every heat-sensitive component inside.
Problem 3: Spout Drips or Pours Too Slowly
A gooseneck that dribbles after you’ve finished pouring is annoying, but it’s not a mechanical failure. It’s physics. Water clings to the inside of the narrow spout, and when you tip the kettle back to vertical, that residual water runs out.
Cleaning the Spout and Filter
Most gooseneck kettles have a small mesh filter where the spout meets the body. Its job is to catch scale flakes before they land in your coffee. Over time, that filter gets clogged with mineral deposits, which restricts flow and makes the pour look sputtery instead of smooth.
Remove the filter if you can (check your manual; on many models it twists out). Soak it in a 50/50 water and white vinegar solution for 15 minutes, then scrub gently with an old toothbrush. Rinse thoroughly. While it’s out, shine a light into the spout and look for scale buildup inside the neck. A pipe cleaner dipped in vinegar works well for that narrow channel.
If the drip is persistent even when clean, check the spout tip for a tiny crack or a worn edge. A damaged spout tip won’t break the water’s surface tension cleanly, causing a trailing drip. There’s no reliable way to repair a cracked spout; it’s a replacement situation.
Problem 4: Inaccurate Temperature Readings
You set it for 200°F for your light roast, and the display says 200, but the water is clearly not bubbling. Or it’s screaming hot and the display reads 190. Temperature accuracy matters more in a gooseneck kettle than in a standard one because you’re using it for precise pour-over and tea brewing.
First, verify the reading with an independent thermometer. A good instant-read probe in the water will tell you the truth. If the kettle reads more than 5°F off, you have a sensor issue.
Mineral buildup on the temperature probe (usually a small metal rod inside the water chamber) insulates it from the actual water temperature. That causes lag and incorrect readings. Descale the kettle, and you’ll often fix this. If the sensor is still off after a clean descale, the thermistor has drifted. That’s a component-level failure. Some kettles allow you to calibrate the offset in the settings menu; check your manual for a calibration mode. If you can’t calibrate and the reading is consistently wrong, the kettle is frustrating to use for specialty coffee. A 0.8L model like the Cosori gooseneck kettle with its preset temperatures and 1-hour hold temp function gives you fewer variables to worry about, though it’s not immune to needing a descale over time.
Problem 5: Limescale Buildup and Slow Boiling
Hard water is the enemy of every electric kettle. The white, chalky scale that builds up on the heating element acts as an insulator. Your kettle has to work harder and longer to transfer heat to the water, which means slower boil times and higher energy use. In severe cases, the element can overheat and trip the thermal fuse.
The rate of buildup depends entirely on your local water hardness. If you live in an area with soft water, you might descale monthly. With hard water, weekly descaling isn’t overkill. If you’re using your kettle daily for pour-over, you should see a visible film within a couple of weeks on hard water.
The Ultimate Descaling Guide (Citric Acid vs. Vinegar)
You have two good options for descaling, and one is clearly better.
Vinegar is the household default. It works, but it leaves a residual smell that takes several boils to clear. Use a 1:1 ratio of white vinegar to water, bring it to a boil, then let it sit for 20 minutes. Pour it out, rinse, boil fresh water, dump it, and repeat until the smell is gone.
Citric acid is the better choice. It’s cheaper per use, has zero odor, and dissolves scale faster. You can buy food-grade citric acid powder in bulk. Use one to two tablespoons per liter of water. Bring it to a boil, let it sit for 15 minutes, and pour it out. The scale should be gone. If not, repeat with a stronger concentration.
For stubborn buildup on the heating element, don’t scrub it with anything abrasive. The element has a protective coating that scratching will damage, leading to corrosion and future failure. Let the acid do the work.
Problem 6: Lid Seal and Hot Handle Issues
A lid that doesn’t seal properly causes two problems: heat escapes (slower boil) and steam vents toward your hand. The rubber gasket around the lid can warp or crack over time, especially if you frequently run the kettle dry. Inspect the gasket for any deformation. If it’s misshapen, you can sometimes reseat it by removing it, soaking it in hot water, and pressing it back into the groove.
Hot handles are a design flaw, not a malfunction. If your kettle’s handle gets too hot to touch comfortably, it means the heat is transferring through the body and the handle lacks sufficient insulation. This is a safety concern, particularly for anyone with kids in the house. Some models use a counter-balanced handle that keeps your hand further from the steam vent, but if the handle material itself gets hot, there’s no fix. You live with it or you replace the kettle.
Problem 7: Wobbly Base and Electrical Sparks
If the kettle rocks on its base, the electrical connection is likely compromised. The connector pins on the base should seat firmly into the receptacle on the kettle’s bottom. If the kettle wobbles, those pins might be making partial contact, which causes arcing, heat, and eventually a burned-out base.
Unplug the base and look at the pins. If they’re blackened or the plastic around them is melted, do not use it again. This is a hard stop. A replacement base is sometimes available from the manufacturer, but for budget kettles, the base costs nearly as much as a new unit. If the pins look fine but the wobble persists, check the kettle’s bottom for a warped plate, often caused by overheating or dropping it.
Never operate a sparking electrical appliance. Even if it works after the spark, the internal damage is done. The risk of a short circuit or fire isn’t worth saving the cost of a new kettle.
The Preventative Maintenance Schedule
You can avoid ninety percent of these problems with a simple routine. I’ve adapted this from what I do with my own kettles, and it takes about five minutes a week.
- Daily: Empty any leftover water after use. Don’t let water sit in the kettle overnight; it lets minerals settle and scale form.
- Weekly: Wipe the exterior and the base with a dry cloth. Check the spout for any visible residue.
- Monthly (or every 20-30 boils): Descale with citric acid as described above. This is non-negotiable if you have hard water.
- Quarterly: Inspect the power cord and base pins for wear, scorching, or bending. Test the auto shut-off function with a half-full kettle.
That’s it. Most people skip the weekly wipe and regret it during the monthly deep clean. If you’re curious about how other kitchen gear fails, the troubleshooting approach is similar to what you’d find in our guide on grinder problems — it’s usually the simple stuff you ignore.
When to Repair vs. Replace Your Kettle
Here’s the honest math. A replacement heating element or thermostat costs anywhere from $10 to $25 if you can source it. The labor is yours, but you’re spending an hour or two on a repair that might fail again in six months.
A new gooseneck kettle with temperature control runs between $50 and $100. The Cosori model I mentioned earlier sits in that range, and it’s built with a 304 stainless steel interior that resists the plastic taste and holds up to repeated descaling better than some cheaper aluminum or plastic-lined options.
My rule of thumb: if the kettle is over two years old and the issue is electrical (won’t heat, won’t shut off, sparks), replace it. If it’s under a year old and the issue is mechanical (spout drip, lid seal, wobbly base), try the manufacturer’s warranty first. If the problem is limescale, that’s always a fix, not a replacement.
DIY electrical repairs on a kettle are risky. You’re dealing with mains voltage near water. A mistake can be lethal. Unless you have experience with appliance repair and a multimeter, the cost savings aren’t worth the risk. For a similar perspective on when to fix versus replace, our guide on Cuisinart troubleshooting takes the same practical stance.
Frequently Asked Questions
Why does my gooseneck kettle smell like plastic?
New kettles often have a plastic smell from manufacturing oils or the gasket. The fix is to do two or three full boils with a squeeze of lemon juice, dumping the water each time. If the smell persists after that, the kettle likely has a plastic component exposed to the steam path. That’s a design flaw, and it won’t go away. Look for kettles with a 304 stainless steel interior and lid to avoid this from the start.
Can I use filtered water in my electric kettle?
Yes, and you should. Filtered water has fewer dissolved minerals, which means less limescale and better-tasting coffee. But don’t use distilled or reverse osmosis water. These lack the minerals that give coffee its flavor, and some kettles’ sensors can misread the conductivity of pure water, leading to temperature errors.
How long should an electric gooseneck kettle last?
With weekly cleaning and monthly descaling, expect three to five years of daily use. Without descaling, you might get one to two years before the heating element fails or the thermal fuse blows. The kettle’s lifespan is directly tied to your water quality and cleaning habits.
Is it safe to leave water in the kettle overnight?
It’s not dangerous, but it’s not good for the kettle. Stagnant water accelerates mineral buildup and can leave a stale taste. If you live in a hard water area, the overnight sitting is when scale starts to form on the heating element. Empty it when you’re done.
Why does my kettle make a loud rumbling noise before boiling?
That’s the sound of water boiling and bubbles collapsing against the heating element, and it’s normal. If the noise becomes excessively loud or the boil takes much longer than usual, check for limescale. The scale disrupts the smooth heat transfer and causes larger, more violent bubbles to form. A good descaling will quiet it down.
What I’d Tell a Friend
Most gooseneck kettle failures come down to neglect, not manufacturing defects. The heating element is a simple, robust component; it’s the scale you let build up on it that kills it.
- Descale with citric acid monthly, not vinegar. It’s faster and leaves no smell.
- If it won’t heat, check the base pins and the outlet before you check the kettle itself.
- A blown thermal fuse is a warning, not a fluke. Figure out why it overheated.
- Never ignore a sparking base. Unplug it and replace the whole unit.
- Empty the kettle after every use. Stagnant water is the root of most scale and taste issues.
- Don’t try to repair internal electrical faults unless you’re genuinely comfortable with a multimeter and mains voltage.
- If you’re buying new, prioritize a stainless steel interior and a reliable temperature control system. Your future self will thank you during the first descale.
Your kettle is a tool. Treat it like one, and it’ll give you years of consistent pours. If you’re also dealing with a finicky espresso machine, the same diagnostic logic applies to leaking water issues — start with the simple seal, not the complex pump.
Products related to this article
Sponsored / affiliate links. As an Amazon Associate I earn from qualifying purchases. I may earn additional commission from eligible campaigns.