You pull a shot, steam the milk, and then notice it: a small brown puddle spreading across the counter. At first, you wipe it up. But the next day, the puddle is bigger, and it’s now dripping down the side of the machine onto the floor. An espresso machine with milk frother leaking water is annoying, but it’s rarely a death sentence for the appliance. Most leaks trace back to a handful of parts that wear out or get clogged over time.
This guide takes a diagnostic-first approach. Instead of blindly ordering parts, you’ll learn how to pinpoint the leak by when it happens and where it appears. You’ll walk away knowing exactly which fix applies to your machine, what tools you need, and whether the job is a 10-minute gasket swap or a sign that it’s time to shop for a new unit. We’ll cover the common culprits, the step-by-step repair process for the most frequent issue, and the maintenance habits that prevent the problem from coming back.
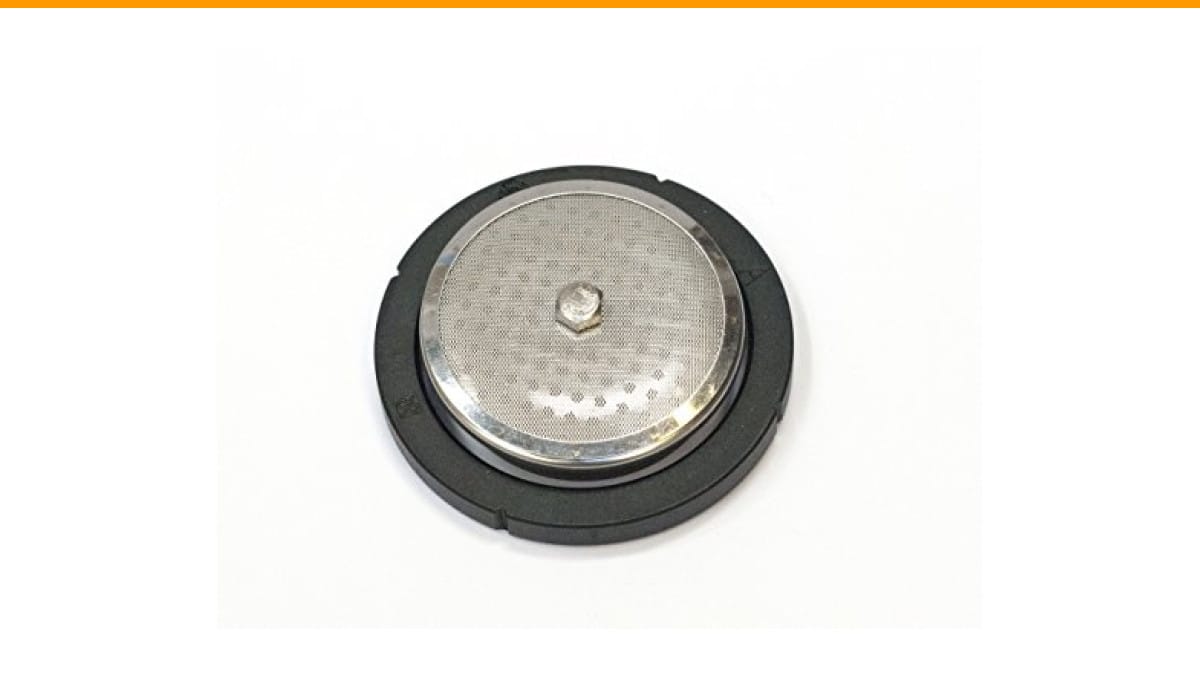
If you own a Rancilio Silvia, a common fix involves replacing the grouphead gasket and screen. The Rancilio Silvia Espresso Machine Repair Kit includes the OEM parts needed to tackle that exact job, which we’ll detail below.
First, Diagnose: Where and When Is the Leak Happening?
Grab a flashlight and a dry towel. Wipe down the entire machine, including the drip tray, the underside of the grouphead, and the back panel. Then, run a cycle. You need to observe the leak in action to fix it correctly.
Timing is your biggest clue. A leak that only appears while brewing points to a grouphead or pump pressure issue. A leak that happens when the machine is idle and cold points to a water tank, valve, or internal hose problem. A leak during steaming points to the steam wand or boiler.
Use this quick diagnostic chart to narrow down the source:
- Leaks during brew cycle: Worn group head gasket, clogged screen, or excessive back pressure from a blocked valve.
- Leaks when idle (machine off): Cracked water tank, loose internal hoses, or a failing inlet valve.
- Leaks while steaming: Steam wand O-ring, loose wand tip, or boiler over-pressure valve.
- Puddle under the machine: Drip tray overflow, cracked drain hose, or a leaky boiler fitting.
Once you know the timing, you can skip 80% of the teardown and go straight to the likely suspect. This saves you time and prevents you from over-tightening fittings that weren’t the problem in the first place.
If the leak is coming from the bottom of the machine, place a piece of cardboard under it overnight. The location of the water stain on the cardboard tells you which side of the internal chassis the leak is on. Left side usually points to the pump; right side often points to the boiler.
For a deeper dive into a related issue, check out our guide on leaking water from automatic machines.
The 4 Most Common Culprits (and How to Test Each)
These four components account for nearly every leak we’ve seen in home espresso machines over the years. Each one has a distinct failure mode and a simple test to confirm it’s the source of your trouble.
Worn Group Head Gasket
This is the rubber ring that seals the portafilter to the grouphead. Over time, heat and pressure harden it, causing it to lose its flexibility. The first symptom is usually water spraying sideways from the portafilter during a shot, or coffee dripping from the gap even when the portafilter is locked in tight.
Test it by locking in an empty portafilter and running the brew cycle. If water seeps around the edges, the gasket is done. Replacing it takes about five minutes and costs very little. This is the most common fix for an espresso machine with milk frother leaking water around the grouphead.
Loose or Cracked Internal Hoses
Inside the machine, water moves through silicone hoses held on by barbed fittings and spring clamps. Constant heating and cooling cycles make these hoses stiff. A loose clamp or a hairline crack develops, and water drips down the chassis until it pools on your counter.
Test this by removing the top panel of the machine and running a brew cycle with the case open. Look for drips along the hose lines. Tighten the clamps with a screwdriver, but do not crank them down hard. Over-tightening strips the plastic barb and creates a worse leak. If the hose feels rock-hard or has visible cracks, replace it with food-grade silicone hose of the same inner diameter.
Blocked Valves and Back Pressure
The three-way solenoid valve releases pressure from the grouphead after you stop the brew. When scale builds up inside it, the valve sticks. The result is a mess: water backs up and pushes out of the grouphead, or it leaks from the valve body itself.
Test this by running a shot without the portafilter locked in. If water continues to drip or spray from the grouphead after the pump stops, the valve is likely blocked. A descaling cycle often clears this. If not, the valve needs to be disassembled and cleaned, or replaced entirely.
Faulty Water Tank or Drip Tray Seating
Sometimes the leak isn’t a leak at all. The water tank might have a crack in the bottom, or the drip tray isn’t seated correctly, allowing water to spill over the back edge instead of into the tray.
Test the tank by removing it and filling it at the sink. Look for water beading on the outside. Test the tray by inserting it and pressing down firmly; it should click into place. A reseated tank or tray fixes the issue in seconds. Check the bottom of the tank for a rubber check valve that might be stuck, preventing water from flowing into the machine.
If your machine is on the louder side, you might also want to read about noisy espresso machine causes.
Step-by-Step Repair: Replacing the Group Head Gasket
This is the most common DIY fix and the one you should master first. You’ll need a flathead screwdriver, a hex key (often 7mm), and a replacement gasket. The Rancilio repair kit we mentioned earlier includes the gasket and screen, which is handy because you should replace both at the same time.
- Depressurize the boiler. This is a safety step people skip, and it’s a mistake. Turn off the machine and open the steam wand. Wait until no more steam or water comes out. This releases the pressure inside the boiler. Never remove parts from a hot, pressurized machine.
- Remove the portafilter and the shower screen. Lock the portafilter in and give it a firm twist to loosen the gasket. Then, use the hex key to remove the single screw holding the shower screen in place. Set the screen aside.
- Pry out the old gasket. Use the flathead screwdriver to hook the edge of the gasket and pull it out. It might be brittle and come out in pieces. That’s fine. Just make sure you get all the chunks out of the groove.
- Clean the groove. Wipe out the recess where the gasket sits. Old coffee oils and scale can prevent the new gasket from seating flush. A damp cloth works; a soft brush is better.
- Install the new gasket. Press it into the groove evenly with your fingers. It should sit flat and not bulge out. Some gaskets have a beveled edge; make sure that edge faces down toward the portafilter.
- Reattach the shower screen. Put the screen back in place and tighten the screw gently. Snug is good; stripping the threads is bad.
- Test with the portafilter. Lock in the portafilter empty and run a brew cycle. Check for drips. If it’s dry, pull a real shot to confirm the seal holds under pressure.
One note on torque: when you lock the portafilter, it should go in with moderate resistance. If you have to force it past the 6 o’clock position, the gasket is too thick. If it swings past 5 o’clock with no resistance, the gasket is too thin. A proper seal needs that slight resistance to create the compression.
Fixing Steam Wand and Boiler-Related Leaks
Leaks from the steam wand are usually simpler than they look. The most common issue is a worn O-ring inside the wand’s swivel joint. This is the part that allows the wand to pivot. Over time, the O-ring dries out and cracks, causing steam to escape from the joint and water to drip down the wand.
To fix this, you need to disassemble the swivel joint. The process varies by brand, but generally involves unscrewing the collar that holds the wand to the boiler. Pull the wand out, remove the old O-ring, and replace it with a food-grade silicone O-ring of the same size. Lubricate the new O-ring with a thin layer of food-grade silicone grease before installing it. This helps it seat properly and extends its life.
Another common spot is the tip of the wand. If the tip is loose or the small rubber insert inside it is worn, steam will spit out the side instead of a smooth stream. Unscrew the tip and check the insert. These parts are cheap and easy to swap.
Boiler leaks are a different beast. If you see water dripping from the pressure relief valve, that’s a sign of over-pressurization. The valve might be faulty, or the boiler might be too hot. This is a safety issue. If the valve is leaking, replace it with the exact OEM part for your model. Do not try to block it or adjust it without proper training.
If the leak is from a boiler fitting, like where the heating element meets the boiler tank, you might be able to tighten the nut slightly. Use a wrench, but do not over-tighten. These fittings are often brass and can crack under excessive force. If tightening doesn’t stop the drip, the gasket or the element itself is likely shot, and that’s a job for a professional or a full boiler replacement.
Preventative Maintenance: The 3-Month Checklist
The best repair is the one you never have to make. Most leaks come from neglected parts. Set a reminder on your calendar for every three months and run through this checklist. It takes about 15 minutes and costs almost nothing.
- Descale the boiler. Mineral buildup is the #1 killer of valves and gaskets. Use a proper espresso machine descaler, not vinegar. Vinegar can damage the internal seals. Follow the manufacturer’s ratio for your water hardness.
- Lubricate the grouphead gasket. A thin layer of food-grade silicone grease on the gasket keeps it flexible and prevents it from sticking to the portafilter. Wipe off any excess.
- Check the steam wand O-rings. Give the wand a wiggle. If there’s any play, plan to replace the O-rings soon. Catching it early means you don’t have to clean up a puddle later.
- Inspect the internal hoses. Open the top panel and look for cracks or discoloration on the hoses. Squeeze them gently. They should feel pliable, not brittle.
- Clean the drip tray and check the drain hose. Remove the tray and check the drain tube that connects to it. A clog here causes the tray to overflow, which looks like a leak but is just a blockage.
This routine takes less time than cleaning up a mess from a leak. It also keeps your shots tasting better, since a clean machine extracts coffee more evenly. For a broader look at keeping your machine in shape, see our automatic vs semi-automatic comparison.
If you have a frother that’s acting up separately, our guide on Breville frother issues might help.
When to Call a Pro vs. When to Replace the Machine
Not every leak is a DIY job. Knowing your limits saves you money and frustration. Use this table to decide your next move based on the leak source and your skill level.
| Leak Source | DIY Difficulty | Estimated Cost (Parts) | Recommended Action |
|---|---|---|---|
| Group head gasket | Easy | $5 – $15 | DIY. Simple swap, no special tools. |
| Steam wand O-ring | Easy | $3 – $10 | DIY. Requires basic disassembly. |
| Internal hose clamp | Moderate | $2 – $10 | DIY if you are comfortable opening the case. |
| Solenoid valve | Moderate | $30 – $60 | DIY with video guidance, or pay a pro $100+. |
| Boiler heating element seal | Hard | $40 – $80 | Professional service recommended. |
| Multiple internal leaks | Hard | $100+ | Consider machine replacement if it’s over 5 years old. |
Here’s the honest math. If your machine is under three years old, a repair is almost always worth it. The cost of a new machine is much higher than the parts. If your machine is over five years old and has multiple issues, like a leaking boiler and a failing pump, the repair bill can approach half the cost of a new unit. In that case, a replacement makes sense.
Professional service rates run between $80 and $150 per hour, with most leak repairs taking one to two hours. Add in the part cost, and you’re looking at $150 to $300 for a typical fix. Compare that to the price of a new machine. If your current machine is a budget model, the repair might not be worth it.
One more consideration: safety. If you smell gas (from a propane conversion) or see electrical arcing, unplug the machine immediately and call a professional. Do not open the case. Water and electricity are a lethal combination.
FAQ: Quick Answers to Urgent Leak Questions
Why is my espresso machine leaking water from the bottom?
A bottom leak almost always means an internal component is failing. Check the drip tray first to rule out an overflow. If the tray is dry, the leak is likely from the pump, a loose internal hose, or the boiler. Place a paper towel under the machine to identify the exact drip point. If it’s near the front, check the solenoid valve drain hose. If it’s in the middle, check the pump connections.
Can I use vinegar to descale my espresso machine?
You can, but you shouldn’t. Vinegar is acetic acid, which is too aggressive for the internal seals, O-rings, and aluminum boiler parts in most machines. It can cause the rubber to swell and degrade, which leads to leaks. Use a commercial descaling solution specifically formulated for espresso machines. It’s designed to dissolve scale without damaging the components.
How often should I replace the group head gasket?
Most manufacturers recommend replacing it every 6 to 12 months, depending on usage. If you pull 2 shots a day, expect to change it yearly. If you pull 10 shots a day, change it every 6 months. The gasket is cheap, so when in doubt, swap it out. A hard, flat gasket is a sure sign it’s past its prime.
Why does water leak from the steam wand when it’s off?
This usually means the steam wand’s valve isn’t sealing completely. Scale buildup on the valve seat is the most common cause. You might be able to fix it by working the steam wand open and closed a few times while the machine is hot, which can knock loose small debris. If that doesn’t work, the valve needs to be disassembled and cleaned, or the O-ring needs replacing.
Is it safe to use the machine if it’s leaking?
Stop using it immediately. A small drip can become a major spray in seconds, and water inside the electrical components of the machine is a serious hazard. Unplug the machine and let it cool down before you start diagnosing the issue. A leaking machine can also damage your countertops and cabinetry, so the longer you wait, the more expensive the repair gets.
Final Verdict: Your Action Plan
You don’t need to be a technician to fix most espresso machine leaks. You just need a logical approach and a little patience. Here’s what to do next:
- Diagnose by timing: during brew, idle, or steaming. This narrows the problem down immediately.
- Test the group head gasket first. It’s the most common culprit and the easiest fix.
- Check the internal hoses for tightness and cracks before you order any expensive parts.
- Descale every three months to prevent scale-related valve failures.
- Lubricate new gaskets and O-rings with food-grade silicone grease to extend their life.
- Always depressurize the boiler before opening any fittings.
- Call a professional if the leak is from the boiler or if you’re not comfortable working on electrical components.
An espresso machine with milk frother leaking water is a fixable problem. A little preventive care keeps the coffee flowing and the counter dry.
Products related to this article
Sponsored / affiliate links. As an Amazon Associate I earn from qualifying purchases. I may earn additional commission from eligible campaigns.
 Coffee Espresso Machine Handle Replacement Parts, Cafe Bracket Handle for Lidl Silvercrest CM4621 CM4218 KF5002 KF500S Barista (for 51mm Portafilter Basket - Not included)
 SOLUSTRE Electric USB Coffee Cup Warmer with Temperature Settings Portable Milk and Beverage Heating Coaster for Office Desk Small Lightweight Design Easy to Clean Surface Multi Functional
 Linnkyfloa Coffee Espresso Maker Handle Replacement for Stovetop Moka Pot or Percolator, Black Plastic for Spare Part Compatible with Italian(9-12 Cup)