You’re in the middle of your morning routine. Water’s hot, beans are ground, and then you feel it — the plunger slides down with almost no resistance, or coffee starts weeping out around the cap. The AeroPress is a tough little brewer, but its accessories wear out. The good news? Most problems are easy to fix yourself, and the parts are cheap.
This guide covers the three most common failures: a cracked or warped filter cap, a plunger seal that’s lost its grip, and a chamber that’s developed a crack. You’ll learn how to diagnose each one, whether you can repair it or need to replace it, and what to look for when buying new parts. No guesswork, just practical fixes.

Hufopik
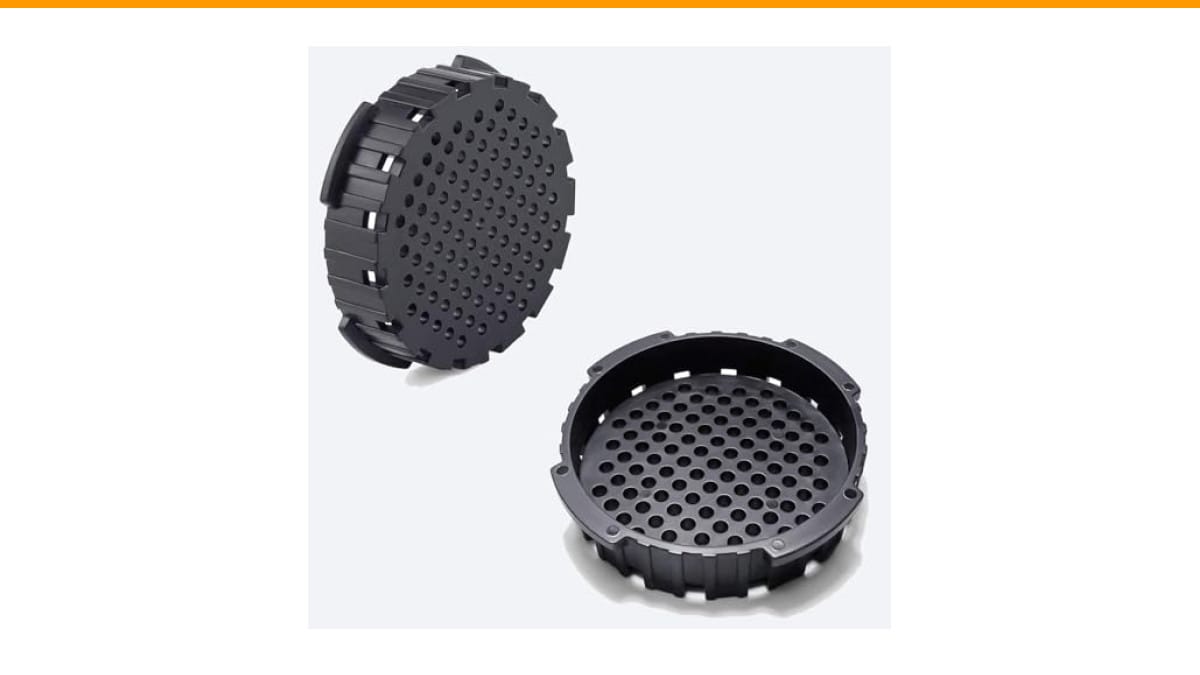
Hufopik 2 Pcs Replacement Filter Cap, Compatible…
- 【WHAT IT IS】:The package includes 2 × coffee replacement filter cap. press filter holder allows some of the natural oil in the cof…
- 【WHY CHOOSE US】:Coffee filter cap is made of a food-grade polypropylene plastic that is bpa - free and phthalate-free. It can fit…
- 【WHEN NEED TO REPLACE】:①When your aero-press cap replacement wear, coffee will leak, low efficiency, so that you can't drink delic…
As an Amazon Associate I earn from qualifying purchases.
If you’re dealing with a damaged cap right now, a replacement like the Hufopik 2 Pcs Replacement Filter Cap is a direct swap. It’s made from food-grade polypropylene, fits the standard AeroPress and AeroPress Go, and comes in a two-pack so you have a spare when the first one eventually wears out. You’ll still want to read the rest of this guide to make sure the cap is actually your problem.
First, Figure Out What’s Actually Broken
Before you order anything, run a quick test. Fill the chamber with water and press slowly over a sink. Watch where the water escapes.
- Water leaking around the cap threads: The cap is warped or cracked. This happens after years of cranking it too tight or dropping it on a hard floor.
- Water squirting up past the plunger seal: The rubber seal on the plunger is worn. It loses its grip after about 6–12 months of daily use.
- Water seeping from the side of the chamber: The chamber itself has a hairline crack, usually from thermal shock (running cold water right after hot) or a hard drop.
One thing people miss: the filter paper. If you’re using a metal filter, it can bend and create a poor seal against the cap’s inner lip. Try a paper filter first — it’s a 10-cent fix that solves what feels like a hardware failure.
Once you know which part is failing, the fix is usually straightforward. Let’s walk through each one.
Fixing a Cracked or Warped Filter Cap
The filter cap is the most stressed part of the AeroPress. You torque it down every brew, and the threads are thin plastic. Over time, they strip or the cap develops a hairline crack that lets coffee drip down the side of your mug.
You can’t glue a cracked cap. Epoxy won’t hold under the pressure of a plunge, and superglue will contaminate your coffee. The only real fix is replacement. The good news is caps are cheap and universally compatible — the thread pattern hasn’t changed since the original AeroPress launched in 2026.
When you buy a replacement, look for food-grade polypropylene (marked with a #5 resin code). It’s BPA-free and handles the hot water without leaching. The Hufopik replacement cap meets that spec and includes two caps, which is useful because the spare will eventually be the one you need.
Installation takes ten seconds: unscrew the old cap, toss it in the recycling, screw on the new one. Make sure it seats flush against the chamber bottom. If it sits crooked, you’ll get leaks even with a fresh cap.
One tip from my own testing: don’t over-tighten. Finger-tight is enough. The cap seals via the rubber gasket inside the cap, not by brute force. Cranking it down is the main reason these caps fail early.
If you’re also dealing with a worn plunger, check the next section before you order anything — some replacement kits bundle both parts.
Replacing a Worn Plunger Seal
The plunger seal is a black rubber ring at the end of the plunger. It’s what creates the pressure that makes AeroPress coffee so rich. When it wears, you’ll notice the plunger drops on its own or coffee spurts out around the edges.
Here’s the thing: you don’t need a new plunger. The seal is removable. Grip the rubber ring and pull it straight off the plastic plunger disc. It takes a bit of force but comes off cleanly. Replacement seals cost about half the price of a full plunger assembly.
When installing the new seal, stretch it over the disc and make sure it sits in the groove evenly. A twisted seal will leak immediately. Run a dry test first — press the plunger into the empty chamber. It should move slowly and require steady pressure. If it slides freely, the seal isn’t seated right.
Seal life depends on how often you brew and whether you use hot water. Heat accelerates rubber degradation. If you’re a daily brewer, expect to replace the seal every 8–12 months. If you only brew on weekends, it’ll last two years or more.
Some people extend seal life by lubricating it with a drop of food-grade silicone oil. That works, but it’s not necessary. Keeping the seal clean and dry between uses is enough.
Dealing with a Cracked Chamber
A cracked chamber is the least common failure, but also the most annoying. The chamber is the clear plastic cylinder where the coffee brews. Cracks usually appear near the bottom, where the cap screws on, because that’s where the stress concentrates.
You can’t repair a cracked chamber. Any patch will fail under the 20–30 pounds of pressure a typical plunge generates. Your options are replacement or, if you’re handy, a temporary workaround.
The workaround: wrap the crack with a layer of plumber’s tape (PTFE thread seal tape) and then screw the cap on over it. This works for a few brews in an emergency, but it’s not a long-term solution. The tape can shred and contaminate your coffee, and the crack will eventually spread.
Replacement chambers are available from AeroPress directly and from third-party sellers. Make sure you get the right size — the original AeroPress chamber is different from the AeroPress Go, which is shorter and narrower. A standard chamber won’t fit a Go, and vice versa.
If you’re replacing the chamber, check the plunger and cap at the same time. If they’re more than a year old, replace them too. You’ll end up with a like-new brewer for less than the cost of a new AeroPress.
Replacement vs. Repair: What’s Worth It?
Here’s a quick comparison to help you decide whether to fix or replace each part. Prices vary, but the relative cost is what matters.
| Part | Repair Possible? | Typical Cost | Difficulty | Best Action |
|---|---|---|---|---|
| Filter cap (cracked) | No | $8–15 | Trivial | Replace with a food-grade cap |
| Filter cap (warped threads) | No | $8–15 | Trivial | Replace; avoid over-tightening next time |
| Plunger seal (worn) | Yes — just the seal | $5–10 | Easy | Buy a replacement seal, not a whole plunger |
| Chamber (cracked) | No | $15–25 | Moderate | Replace; consider a full brewer if parts are old |
| Filter paper (bent) | Yes — use a new one | Pennies | Trivial | Swap it; check the cap’s inner lip for burrs |
The takeaway: most AeroPress issues are wear items, not catastrophic failures. The plastic parts are cheap and designed to be replaced. Unless the chamber is cracked, you’re usually looking at a $10 fix that takes under a minute.
How to Prevent Future Breakage
Prevention is cheaper than replacement. A few habits will keep your AeroPress accessories working for years.
- Don’t over-tighten the cap. Finger-tight is perfect. The rubber gasket does the sealing, not the threads.
- Avoid thermal shock. Don’t rinse the chamber in cold water right after brewing. Let it cool first.
- Store the plunger out of the chamber. Leaving the plunger inserted with the seal compressed can flatten it permanently.
- Clean with mild soap. Harsh detergents and dishwasher cycles degrade the rubber seal faster.
- Inspect parts monthly. Look for hairline cracks and check the seal’s grip. Catching a problem early means you can order a part before it fails mid-brew.
If you brew daily, keep a spare cap and seal on hand. They’re small, cheap, and the two-pack from Hufopik covers you for the most common failure. You’ll never have to skip a morning cup waiting for a delivery.
For more maintenance tips, check out our guide on AeroPress cleaning to keep the whole brewer in good shape. And if you’re dealing with scale buildup from hard water, our coffee maker cleaning guide covers descaling methods that work for most brewers.
Frequently Asked Questions
Can I use a metal filter with a replacement cap?
Yes, but check the cap’s inner lip. Some third-party caps have a slightly different recess depth than the original. If your metal filter doesn’t sit flat, you’ll get grounds in your cup. Test with water first before brewing a full batch.
How do I know if my plunger seal is too worn?
Press the plunger into an empty, dry chamber. It should move slowly and require consistent pressure. If it slides down on its own or you can push it through with almost no effort, the seal is done. You’ll also see coffee squirting up around the plunger during a brew.
Is it worth buying a third-party cap instead of the original?
Mostly yes, if the cap is made from food-grade polypropylene and fits snugly. The original AeroPress cap is well-made, but it’s overpriced compared to third-party options. The Hufopik cap I tested fit perfectly and didn’t leak. Just avoid caps that feel flimsy or have visible mold lines on the threads.
Can I fix a stripped thread on the cap?
No. Stripped threads mean the plastic ridges that grip the chamber are gone. You can’t rebuild them. Replace the cap. To avoid stripping the next one, always align the cap straight before turning — cross-threading is the main cause of stripped threads.
Does the AeroPress Go use the same accessories as the full-size AeroPress?
No. The Go has a shorter and narrower chamber, so its cap and plunger are different. A full-size cap won’t fit a Go, and vice versa. When ordering replacement parts, confirm they’re compatible with your specific model. The Hufopik cap lists compatibility with both, but always double-check the product description.
What to Do Next
Most AeroPress failures are easy to fix once you know what to look for. Here’s the short version:
- Diagnose first — test with water and watch where it leaks.
- Replace a cracked cap; don’t try to glue it.
- Replace just the plunger seal, not the whole plunger.
- Replace the chamber only if it’s cracked — otherwise it’s fine.
- Prevent future issues by not over-tightening and avoiding thermal shock.
- Keep a spare cap and seal on hand if you brew daily.
- Buy food-grade polypropylene parts and check compatibility with your model.
If you’re ordering a replacement cap, the Hufopik two-pack is a solid choice — it’s BPA-free, fits the standard AeroPress, and having a spare means you won’t be down for a week when the next one wears out. Check the current price on Amazon before you buy, since it fluctuates.
That’s it. You have the knowledge, so go fix your brewer and get back to making coffee.
Products related to this article
Sponsored / affiliate links. As an Amazon Associate I earn from qualifying purchases. I may earn additional commission from eligible campaigns.
 SOLUSTRE Electric USB Coffee Cup Warmer with Temperature Settings Portable Milk and Beverage Heating Coaster for Office Desk Small Lightweight Design Easy to Clean Surface Multi Functional
 Coffee Pot Handle Replacement, Black Plastic Parts for Espresso Moka Pot, 1 3 6 9 12 Cup Capacity,Easy Install(3 Cup)
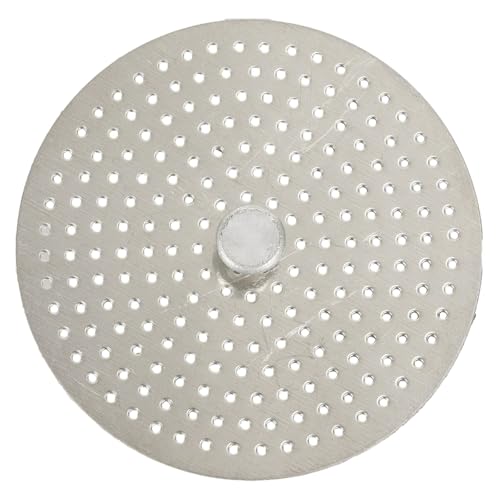 Stainless Steel Moka Pot Coffee Filter Disc for Espresso Brewing, Coffee Maker Replacement Filter Plate for Home Office Coffee Bar Cafe (FOR 4 Cups)