You know that moment. You unscrew the top of your moka pot, expecting that rich, dark coffee aroma, and instead you get a whiff of stale, burnt oil. Or worse, the coffee comes out bitter and muddy, spraying everywhere. It’s not the beans. It’s not your technique. It’s neglect.
Most people treat a moka pot like a cast iron skillet — set it and forget it. That’s a mistake. The moka pot is a precision brewing device that relies on pressure, heat, and a tight seal. When you skip maintenance, that seal degrades, the pressure drops, and your coffee turns sour or bitter. This guide walks through the exact routine you need: daily care, weekly cleaning, monthly descaling, and when to swap out the wear parts. You’ll walk away knowing exactly what to do, why it matters, and what happens if you skip it.

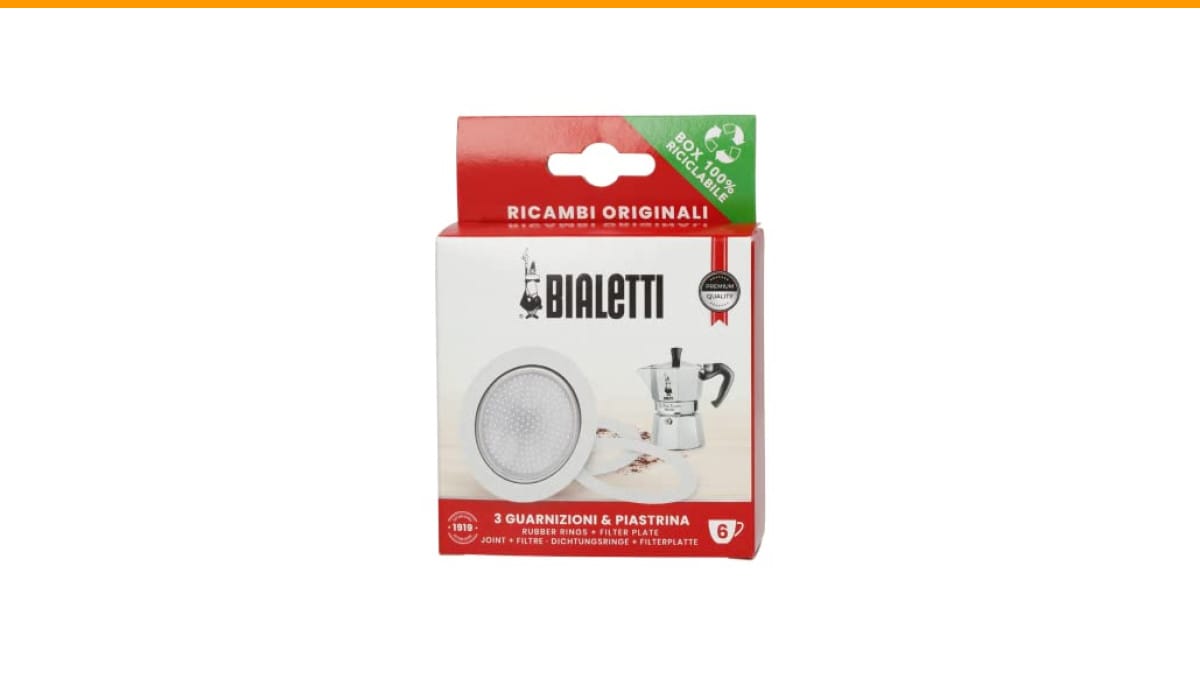
Bialetti
Bialetti Spare Parts, Includes 3 Gaskets and…
- Includes 3 Gaskets and 1 Filter
- Outer Gasket diameter: 72mm / 2,83' Inch
- When in doubt, please measure your old gasket to ensure a proper fit
As an Amazon Associate I earn from qualifying purchases.
If you’ve been using the same gasket for two years and wondering why the coffee tastes off, you’re about to find your answer.
Why Your Moka Pot Needs a Care Routine
The moka pot works by building steam pressure in the lower chamber, forcing hot water up through the coffee grounds. That pressure depends on a perfect seal between the upper and lower chambers. The gasket creates that seal. The filter plate distributes the water evenly. Both parts wear out over time.
Here’s what happens when you ignore them. The gasket hardens, cracks, or loses its springiness. Steam escapes around the edges instead of pushing through the coffee. The water flows too fast, under-extracting the grounds. You get weak, sour coffee. Or the opposite: the filter plate gets clogged with oils, the pressure builds too high, and you get a violent sputter that sprays coffee everywhere.
Beyond the wear parts, coffee oils accumulate inside the chambers. These oils go rancid. That’s the stale, bitter taste you notice after a few weeks of heavy use. A moka pot is not self-cleaning. It needs your help.
There’s also the mineral build-up from hard water. Calcium and limescale coat the inside of the boiler chamber. That scale insulates the metal, so it takes longer to heat up and the temperature becomes less consistent. Scale also flakes off into your coffee. You don’t want gritty bits in your cup.
So the routine breaks down into three timeframes: after every use, weekly, and monthly. Plus a replacement schedule for the gasket and filter.
Daily Maintenance: The 30-Second Habit That Saves Everything
You don’t need to scrub your moka pot after every single brew. You do need to rinse it. Here’s the simple routine:
- Wait for the pot to cool down completely. Running cold water over a hot pot will warp the metal.
- Unscrew the top chamber and dump out any remaining coffee.
- Rinse the top chamber, the funnel basket, and the bottom boiler with warm water. No soap.
- Let all the parts air dry completely before reassembling.
That’s it. Thirty seconds. The key is doing it every day. If you leave coffee sitting in the pot overnight, the oils start to oxidize. By day three, you’re brewing with a layer of stale residue that no amount of fresh grounds can mask.
Why no soap? Soap leaves a residue that can impart a soapy taste to your next brew. It also strips the natural seasoning that builds up on the aluminum. A well-seasoned moka pot develops a slightly protective layer over time. Soap undoes that. If you absolutely must use soap because you’ve let it get truly gross, use a tiny amount and rinse it thoroughly. But make that the exception, not the rule.
One more thing: dry the pot before storing it. Moisture trapped inside the boiler chamber is a breeding ground for mold. You’ll smell it on the next brew. If you live in a humid climate, store the pot disassembled with the lid off.
If you’re wondering about deeper cleaning schedules for other machines, the same principles apply to regular coffee maker maintenance.
Weekly Cleaning: Removing Coffee Oils
Even with daily rinsing, coffee oils build up. You’ll notice it as a dark, sticky film on the inside of the upper chamber. That film is the source of bitter, burnt flavors.
Once a week, do a deeper clean. Here’s the method that works best:
- Disassemble the pot completely: top chamber, funnel basket, filter plate, and gasket.
- Wash each part in warm, soapy water. Use a soft sponge or cloth. Never use steel wool or abrasive scrubbers — they’ll scratch the aluminum, and those scratches become places for oil and residue to hide.
- For stubborn buildup, soak the parts in a solution of warm water and a few drops of dish soap for 15 minutes. Then scrub gently.
- Rinse every part thoroughly with clean water.
- Dry everything completely before reassembling.
Pay special attention to the funnel basket and the filter plate. These are where the coffee grounds pack in tightly. Use a soft brush or a toothpick to clear the tiny holes in the filter plate if they look clogged. You can also soak the filter plate in a vinegar solution (see the descaling section below) to dissolve the oils.
One thing I’ve learned from testing: the gasket needs gentle handling. Don’t pull it out of its groove with metal tools. Use your fingers or a plastic utensil. The gasket is soft silicone or rubber, and it tears easily if you’re rough with it.
For a complete guide on keeping all your coffee gear in shape, check out our coffee machine longevity tips.
Monthly Descaling: Fighting Limescale
If you have hard water, skipping this step is the single fastest way to ruin your moka pot. Limescale builds up inside the boiler chamber — the bottom half. You won’t see it easily, but you’ll taste it. Coffee brewed in a scaled pot tastes flat and metallic.
Here’s the descaling process:
- Fill the bottom boiler with a mixture of one part white vinegar to two parts water. Don’t fill it past the safety valve.
- Do not add coffee. Assemble the pot as if you were brewing.
- Place it on the stove over medium heat. Let it brew as normal — the vinegar solution will rise into the top chamber.
- Turn off the heat and let the pot cool completely.
- Discard the vinegar solution. Rinse the pot thoroughly with clean water.
- Run one or two plain water brews through the pot to flush out any remaining vinegar taste.
Do this once a month if you have moderately hard water. If your water is very hard, do it every two weeks. If you have soft water, every two months is fine. The vinegar smell is strong while you do this — open a window.
One caveat: descaling with vinegar is effective but slow. It takes a full brew cycle. Some people use citric acid powder instead, which works faster and doesn’t smell as bad. Mix one tablespoon of citric acid per liter of water. The process is the same. I prefer citric acid for my own pots because it doesn’t leave that vinegar aroma behind.
After descaling, your moka pot might look slightly duller on the inside. That’s normal — the scale was covering the aluminum. The pot will re-season with use.
Replacing the Gasket and Filter: The 12-18 Month Rule
The gasket and filter plate are consumable parts. They wear out. There’s no way around it. The gasket — the rubber or silicone ring that sits in the groove of the bottom chamber — is under constant pressure and heat. Over time, it hardens, cracks, or loses its flexibility. The filter plate — the small disc with tiny holes that sits on top of the funnel basket — accumulates oils and mineral deposits that no amount of cleaning can fully remove.
Here’s how to tell it’s time:
- Steam leaks from the sides of the pot while brewing.
- The top chamber wobbles or doesn’t screw on smoothly.
- You see visible cracks or hardening on the gasket.
- The coffee flow is faster than usual, or it sputters violently.
- The coffee tastes noticeably more bitter or sour than it did when the parts were new.
Most manufacturers recommend replacing the gasket every 12-18 months with regular use. If you brew daily, lean toward the 12-month mark. The filter plate can last longer — two to three years — but it’s cheap enough that replacing it at the same time makes sense.
When you buy replacements, make sure you get the right size. Moka pots come in different cup capacities, and the gasket diameter varies. A 6-cup pot uses a larger gasket than a 3-cup pot. The Bialetti spare parts kit is specifically for 6-cup models, so double-check your pot’s size before ordering. If you’re unsure, measure your old gasket’s outer diameter — it should be around 72mm for a 6-cup pot.
Replacing the parts is straightforward. Pop the old gasket out of its groove. Clean the groove with a damp cloth. Press the new gasket in, making sure it sits flush all the way around. Place the new filter plate on top of the funnel basket. That’s it. It takes less than a minute.
If you’re handy with tools and want to see how the whole assembly works, our guide on replacing a Bialetti handle shows a similar level of disassembly.
Comparing Maintenance Approaches: What Actually Works
There’s a lot of conflicting advice online about moka pot care. Some people say never wash it with soap. Others say you must boil it in baking soda. Here’s a realistic comparison of the common methods, based on what I’ve tested over years of daily use.
| Method | Frequency | Effectiveness | Risk | Best For |
|---|---|---|---|---|
| Rinse with water only | Daily | Moderate — removes loose coffee, not oils | None | Everyday maintenance |
| Soap and warm water scrub | Weekly | High — removes oils and residue | Low, if rinsed thoroughly | Weekly deep clean |
| Vinegar descaling | Monthly | High — dissolves limescale | Low, but leaves vinegar smell | Hard water areas |
| Citric acid descaling | Monthly | High — faster, no smell | Low, if rinsed well | Hard water, sensitive noses |
| Dishwasher | Never | N/A | High — warps metal, ruins gasket | No one |
| Boiling with baking soda | Occasionally | Moderate — removes heavy buildup | Medium — can be messy, may strip seasoning | Reviving a neglected pot |
The dishwasher is the only method I’d call outright wrong. The high heat and harsh detergents will ruin the aluminum finish and degrade the gasket. Your moka pot will never taste the same.
The baking soda boil is a rescue method, not a maintenance routine. Use it only if you’ve inherited a pot that’s been sitting in a cabinet for years. Otherwise, stick to the daily rinse and weekly soap wash.
Common Mistakes That Shorten Your Moka Pot’s Life
I’ve seen people do all sorts of things to their moka pots. Some are harmless. Others are actively destructive. Here are the ones that cause the most damage.
Running it on high heat. The moka pot needs medium heat. Crank it to high and you’ll scorch the coffee and potentially warp the base. The aluminum expands unevenly, which can cause the pot to sit crooked on the stove and leak steam. Medium heat, always.
Over-tightening the top chamber. You need a snug seal, not a death grip. Over-tightening stresses the threads and the gasket. Over time, the threads can strip, and then the pot is useless. Screw it until it’s finger-tight, then give it a quarter turn more.
Leaving water in the boiler. If you don’t empty and dry the bottom chamber after brewing, the water sits there and accelerates corrosion. Aluminum doesn’t rust like steel, but it does oxidize and pit over time. Always dump the leftover water and dry the chamber.
Using it on an induction cooktop without an adapter. Most moka pots are aluminum, which doesn’t work on induction. If you force it, the pot won’t heat evenly and the base can warp. Check your pot’s base for a magnetic sticker or use a dedicated induction adapter plate.
Ignoring the safety valve. The small valve on the bottom chamber is a pressure release. If it gets clogged with scale or coffee grounds, it can’t do its job. That’s a safety hazard. Check it monthly and clear it with a toothpick if needed.
These mistakes are all avoidable. The moka pot is a simple device, but it rewards attention.
Frequently Asked Questions
Why does my moka pot coffee taste burnt?
Burnt taste usually comes from two sources. First, the coffee is sitting on the heat too long — the brew should stop the moment the top chamber is full. Remove it from the stove immediately. Second, old coffee oils in the pot are rancid. If you haven’t done a weekly soap wash in a while, that’s your problem. Do a deep clean and see if the taste improves.
Can I put my moka pot in the dishwasher?
No. The dishwasher’s high heat and harsh detergents will strip the aluminum’s protective layer, cause pitting, and degrade the gasket. The pot will look dull and taste metallic. Always hand wash. It takes two minutes.
How often should I replace the gasket?
Every 12 to 18 months with regular daily use. If you notice steam leaking from the sides or the top chamber wobbles, replace it sooner. The gasket is a wear part, not a lifetime component. A fresh gasket costs a few dollars and makes a noticeable difference in brew quality.
Is it safe to use vinegar to descale a moka pot?
Yes, white vinegar is safe for aluminum. Use a 1:2 vinegar-to-water ratio and run a full brew cycle without coffee. Rinse thoroughly afterward. The main downside is the smell, which lingers for a day or two. Citric acid is a good alternative if you find vinegar unpleasant.
Why does my moka pot leak from the sides?
That’s almost always a worn or misaligned gasket. Check the gasket for cracks or hardening. If it looks fine, make sure it’s seated properly in its groove. If the leak persists, the threads on the top or bottom chamber may be damaged, which requires replacing the whole pot.
What to Remember for a Lifetime of Good Brews
- Rinse the pot with warm water after every use and let it air dry completely.
- Wash with mild soap and a soft sponge once a week to remove coffee oils.
- Descale monthly with a vinegar or citric acid solution if you have hard water.
- Replace the gasket every 12-18 months, and the filter plate every 2-3 years.
- Never use a dishwasher, steel wool, or high heat on your moka pot.
- Check the safety valve monthly and clear it if clogged.
- Store the pot disassembled and dry between uses.
That’s the whole routine. It’s not complicated, and it takes less than five minutes a week. The payoff is a moka pot that brews consistently rich, balanced coffee for years. Your taste buds will notice. So will anyone else who drinks your coffee.
Products related to this article
Sponsored / affiliate links. As an Amazon Associate I earn from qualifying purchases. I may earn additional commission from eligible campaigns.
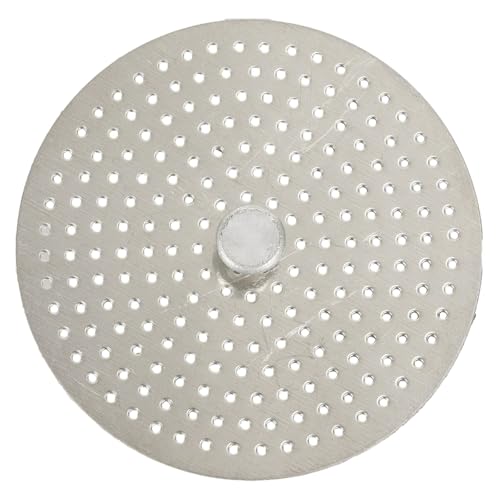 Stainless Steel Moka Pot Coffee Filter Disc for Espresso Brewing, Coffee Maker Replacement Filter Plate for Home Office Coffee Bar Cafe (FOR 4 Cups)
 Coffee Pot Handle Replacement, Black Plastic Parts for Espresso Moka Pot, 1 3 6 9 12 Cup Capacity,Easy Install(3 Cup)
 Belly Moka Coffee Maker Stovetop Espresso Maker 9 Cup Aluminum Moka Pot Percolator 15oz 450ml Easy Brewing for Electric Ceramic Stoves Home Camping Italian Cuban Café Classic Black