You just finished a perfect pour-over. The grinder sits on the counter, still dusted with coffee powder. You wipe the outside, toss it in a drawer, and forget about it for a week. Two weeks later, you pull it out and the burrs feel sticky. The coffee tastes dull, slightly rancid. That’s not the beans’ fault. That’s a storage problem.
Manual grinders are simple machines, but they have a weakness: residual coffee oil. That oil goes rancid, attracts moisture, and can even corrode the burr coating over time. Storing a grinder correctly isn’t about keeping it pretty. It’s about protecting the burrs and keeping your next cup as clean as the last one. This guide covers the exact steps, the gear worth buying, and the mistakes that cost you flavor.

WACACO
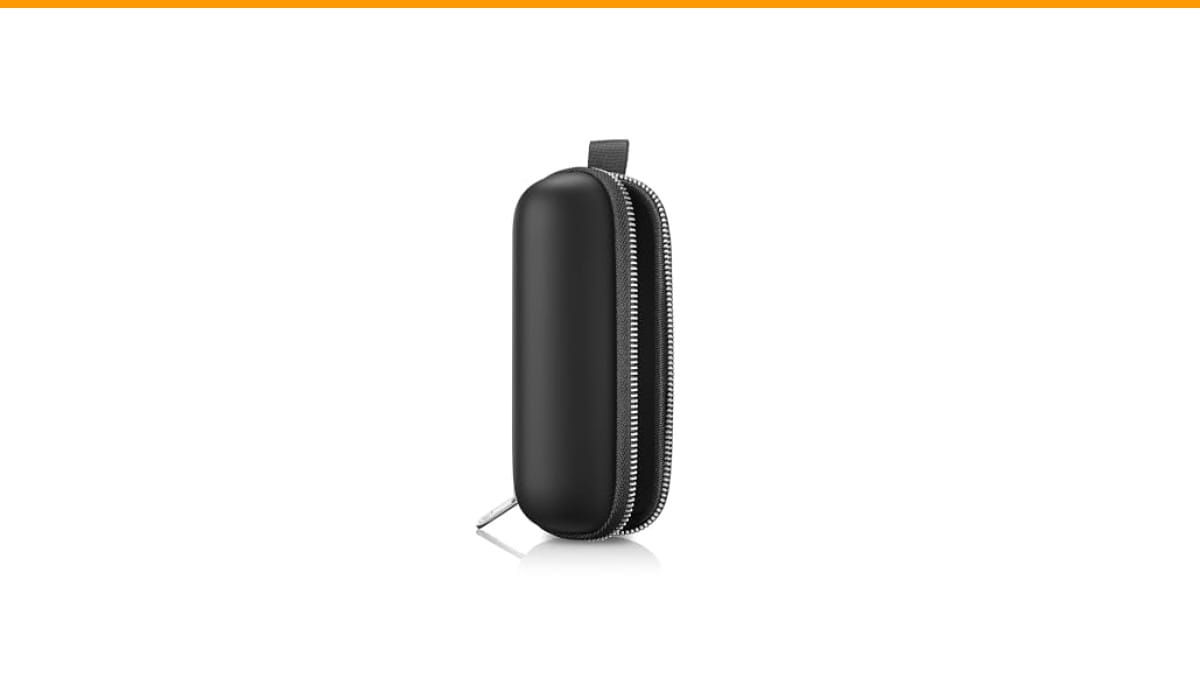
WACACO Exagrind Case, Protective Case for Exagrind,…
- Keep your Exagrind safe and secure with our durable EVA case.
- Designed for a perfect fit, it shields your grinder from bumps, scratches, and dust, ensuring it's always ready for your next coff…
- With its compact and travel-friendly design, this case makes it easy to carry your Exagrind wherever your coffee journey takes you…
As an Amazon Associate I earn from qualifying purchases.
You’ll walk away knowing how to prep a grinder for short-term counter storage, long-term shelf life, and travel. Plus, a quick comparison of storage methods and answers to the questions people actually ask.
If you travel with your grinder or keep it in a bag, a dedicated case solves the biggest problem: crushing. The WACACO Exagrind Case is a hard EVA shell that fits the Exagrind precisely. It absorbs bumps and keeps dust out of the mechanism. The grinder shown in some images is sold separately, so the case is just the protective shell. For anyone who throws a grinder into a backpack, this is the difference between a working tool and a paperweight.
Clean Before You Store, Not After
The single most important rule: never store a grinder with ground coffee inside the burrs. Whole beans are fine for a few days. Ground coffee is not. Grounds have a massive surface area, so they oxidize fast and release oils that turn sticky.
Here’s the routine I use after every session, which takes about 30 seconds:
- Grind a small amount of white rice (about a teaspoon) to pull oils off the burrs. Run it through until it comes out clean.
- Remove the catch cup and knock it against your palm to dislodge loose grounds.
- Use a small brush (a clean paintbrush works) to sweep the burr chamber and the threads where the handle attaches.
- Leave the grinder disassembled for 10 minutes to air dry if you rinsed any parts.
For a deeper clean, you should take the burrs out and brush them thoroughly. That process is detailed in our coffee grinder cleaning guide, but for storage purposes, the rice trick is enough between full teardowns.
One thing I learned the hard way: don’t use water on the burrs unless you dry them completely. Water accelerates rust on carbon steel burrs. Ceramic burrs handle moisture better, but the axle and bearings are still metal. If you rinse, dry every part with a cloth and let it sit out overnight before reassembling.
Moisture and Temperature: The Silent Killers
Coffee is hygroscopic, meaning it pulls moisture from the air. Your grinder’s internal parts are the same. Humidity above 60% starts to affect metal components. Over months, that leads to pitting and rust on the burr edges, which ruins grind consistency.
Store your grinder in a place with stable temperature and low humidity. A kitchen cabinet near the stove is a bad spot because steam from cooking raises humidity. A pantry shelf away from the sink is better. A bedroom closet is even better if you don’t use the grinder daily.
If you live in a humid climate (coastal areas, tropical regions), toss a small silica gel packet into the storage drawer or case. It costs pennies and absorbs ambient moisture. Replace it every few months. This matters more for grinders with carbon steel burrs than for ceramic ones, but it’s cheap insurance either way.
Temperature swings are less critical than humidity, but they cause condensation. If you bring a cold grinder into a warm room, moisture forms on the metal. Let it acclimate for 30 minutes before opening the burr chamber.
Short-Term vs. Long-Term Storage
How you store a grinder depends on how often you use it. Daily use and a six-month hiatus require different approaches.
Short-term (daily or weekly use): Keep it assembled on the counter or in a cabinet. Make sure the catch cup is empty. Leave a few whole beans in the hopper if you want, but empty the grounds. Wipe the exterior with a dry cloth to remove oils that attract dust.
Long-term (a month or more): Disassemble the grinder completely. Remove the burrs, the catch cup, and the handle. Clean every part thoroughly. Let everything dry for 24 hours. Then reassemble loosely or store the parts in separate bags. The reason for disassembly is simple: it prevents any trapped moisture from creating a micro-environment inside the chamber. A fully assembled grinder seals the burrs together, and any residual moisture stays trapped.
For long-term storage, wrap the grinder in a cloth or keep it in its original box. Cardboard absorbs moisture, so add a silica packet inside the box. Do not store it in a plastic bag unless the grinder is completely dry, because plastic traps condensation.
Travel Storage: What Actually Works
Travel is where most grinders get damaged. Dropping a grinder in a backpack without protection is a gamble. The handle bends, the catch cup cracks, or the burr alignment shifts. I’ve seen all three.
A hard case is the best option because it absorbs impact and keeps dust out. The WACACO Exagrind Case is a good example of a purpose-built solution. It’s not a universal pouch; it’s molded to fit the grinder’s shape. That means no rattling around inside. The EVA shell is rigid enough to survive being at the bottom of a duffel bag.
If you don’t want to buy a case, wrap the grinder in a thick microfiber cloth and put it in a hard-sided container, like a lunchbox or a tool organizer. The key is preventing movement. A grinder that slides around inside a bag will eventually hit something hard.
For flights, pack the grinder in checked luggage, not a carry-on. The pressure changes in the cabin don’t affect a manual grinder, but the TSA may flag the metal burrs. Checked luggage avoids that hassle.
| Storage Method | Best For | Protection Level | Cost | Drawback |
|---|---|---|---|---|
| Countertop (daily use) | Home baristas | Low | Free | Exposed to dust and kitchen humidity |
| Cabinet or drawer | Weekly users | Medium | Free | Can get knocked around; need to empty grounds |
| Original box | Long-term storage | Medium | Free | Cardboard absorbs moisture; needs silica gel |
| Cloth wrap + hard container | Occasional travel | Medium-High | Low | Bulky; grinder can still shift |
| Dedicated EVA case (like WACACO) | Frequent travel | High | Medium | Specific to one grinder model |
One more travel tip: never store a grinder with beans in the hopper during transit. The beans act as tiny hammers, knocking against the burrs and shifting alignment. Empty the hopper and the catch cup before you pack.
Common Mistakes and How to Avoid Them
The most common mistake is storing a grinder with the handle attached. The handle sticks out and gets bent when you shove the grinder into a drawer. A bent handle throws off the grinding angle and makes the whole device awkward to use. Always remove the handle for storage.
Another mistake is leaving the grind setting on the finest level. The burrs are pressed together tightly, and if the grinder gets bumped, the burrs can chip. Set the grinder to a medium-coarse setting before storage. This relieves pressure on the burrs and prevents damage from impact.
People also forget to clean the threads where the handle attaches. Coffee oils accumulate there and harden into a gummy residue. After a few months, the handle becomes stiff. A quick brush every few weeks prevents this.
Finally, don’t store a grinder near strong-smelling foods. Coffee absorbs odors. A grinder kept next to spices or onions will impart those smells to your beans. Keep it in a neutral-smelling area.
Can I store my manual grinder with beans in the hopper?
Whole beans are fine for a few days. They don’t release oils the way grounds do. But for anything longer than a week, empty the hopper. Beans go stale and can transfer that staleness to the burrs. Also, beans expand slightly as they age, which can jam the burrs if the hopper is packed tight.
Is it safe to store a grinder in the freezer?
No. Freezing causes condensation when you take it out. That moisture leads to rust on the burrs and axle. The freezer also dries out any rubber or plastic parts, making them brittle. If you freeze your beans, keep them in an airtight container and grind them immediately after removing, but never store the grinder itself in the freezer.
How often should I deep-clean my grinder before storing?
If you store it daily, a quick rice grind and brush is enough. For long-term storage (over a month), do a full teardown and clean every part. This includes removing the burrs and brushing the chamber thoroughly. Any residual oil left for months will turn rancid and affect the first few grinds when you come back.
Does the type of burr (steel vs. ceramic) change storage requirements?
Yes. Carbon steel burrs rust easily and need to be completely dry before storage. Ceramic burrs are more resistant to moisture but the axle and bearings are still steel. In humid climates, both need silica gel. Steel burrs also benefit from a light coat of food-grade mineral oil if you’re storing them for more than six months.
What’s the best way to store a grinder in a small apartment with limited space?
Use a drawer or a cabinet shelf that’s away from the stove and sink. If space is tight, a hanging organizer on the inside of a pantry door works well. Avoid storing it on top of the refrigerator, because heat rises and that spot gets warm. Warmth accelerates oil oxidation.
Simple Rules to Remember
- Always empty the catch cup and brush out loose grounds before storage.
- Run a teaspoon of rice through the grinder weekly to pull oils off the burrs.
- Remove the handle and set the grind to medium-coarse before putting it away.
- Keep the grinder in a dry place below 60% humidity; add a silica packet if needed.
- For travel, use a hard case like the WACACO Exagrind Case to prevent impact damage.
- For long-term storage, disassemble completely, dry all parts, and wrap in cloth.
- Never store near heat sources, open windows, or strong-smelling foods.
Storing a manual grinder is mostly about preventing moisture and oil buildup. Get those two things right, and your grinder will last for years. The burrs are the heart of the machine, and they only stay sharp if they’re clean and dry. A few seconds of prep before you put it away saves you from a dull, rancid cup later. If you run into issues with a grinder that’s already been stored poorly, check our guide on common grinder problems or learn how to maintain your equipment for long life.
Products related to this article
Sponsored / affiliate links. As an Amazon Associate I earn from qualifying purchases. I may earn additional commission from eligible campaigns.
 Cutting Board Oil 12 oz, Food Grade Mineral Oil Added Orange Lemon Scent
 MIBOTE Silicone Cooking Kitchen Utensils Set, Wooden Handle, Coffee
 Coffee Espresso Machine Handle Replacement Parts, Cafe Bracket Handle for Lidl Silvercrest CM4621 CM4218 KF5002 KF500S Barista (for 51mm Portafilter Basket - Not included)