You wake up, stumble to the kitchen, press the brew button, and nothing happens. Or the water heats but barely drips through. Or it makes a sound like a dying whale and then stops. Small coffee makers fail in predictable ways, and most of the time you can fix the problem in under ten minutes without ordering a single part.
This guide walks through the five most common failure points on compact drip machines, pod brewers, and single-serve units. You’ll learn what to check first, what tools you need (usually just a paperclip and white vinegar), and when to stop troubleshooting and buy a new unit. I’ve tested dozens of small brewers over the years, and the same handful of issues account for nearly all breakdowns.

IMPRESA
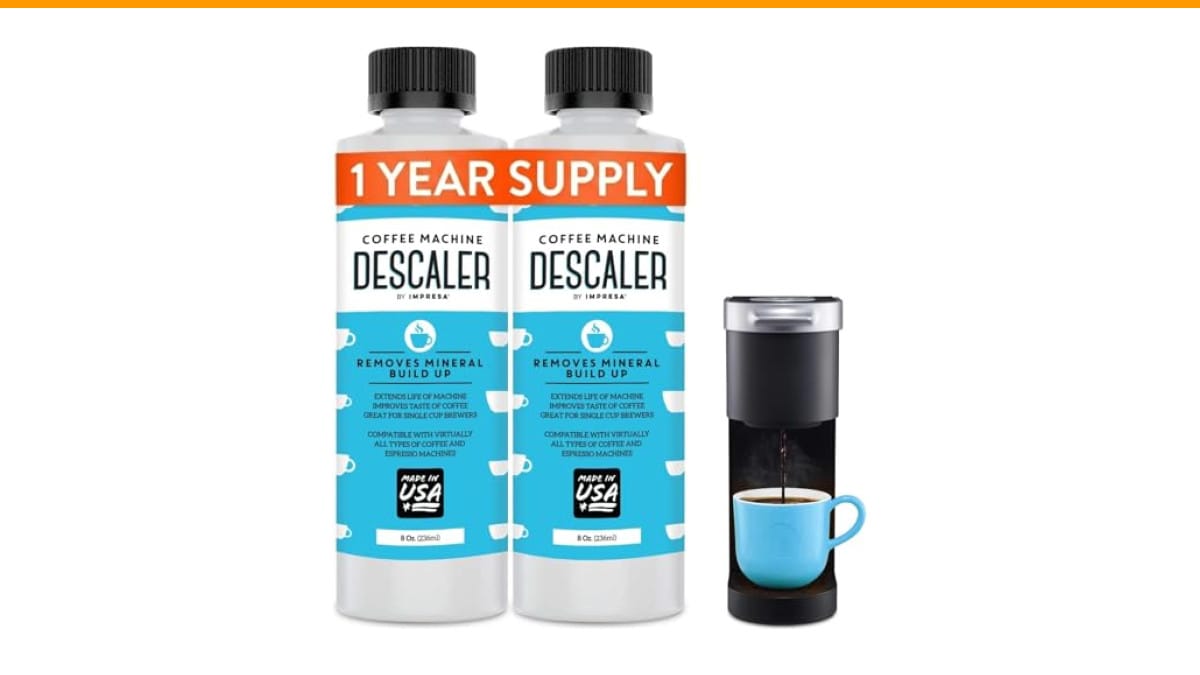
IMPRESA Coffee Machine Descaler, 2-Pack (1-Year Supply)…
- 2-Pack Coffee Descaler and Cleaner - Clean and rinse away residue and oil buildup in your coffee maker with Impresa's Coffee Desca…
- Highly Effective, Made in USA Formula - Unlike most common solutions, our coffee machine cleaner uses just 4 ounces (1/2 bottle) p…
- Preserves Your Machine - Using a coffee descaling solution eliminates limescale and mineral build-up to prevent corrosion, signifi…
As an Amazon Associate I earn from qualifying purchases.
By the end, you’ll know exactly how to troubleshoot a small coffee maker, from a clogged needle to a dead heating element, and you’ll be able to decide whether the fix is worth your time.
Before you start taking things apart, grab a bottle of IMPRESA Coffee Machine Descaler, 2-Pack. This universal descaling solution works with Keurig, Breville, Nespresso, Cuisinart, and most other single-serve machines. It uses just 4 ounces per cleaning session, and the two-bottle pack covers four full descaling cycles. You’ll need it for most of the fixes below.
Why Small Coffee Makers Fail: The Usual Suspects
Small coffee makers share one weakness: they concentrate a lot of heating and pumping hardware into a tiny frame. That means mineral scale, coffee oil, and loose grounds can block things fast. A full-size machine might tolerate a hard-water month; a compact brewer often chokes in two weeks.
Here are the five failure points you’ll run into, ranked by how often I’ve seen them:
- Clogged water lines from limescale or coffee residue
- Blocked exit needle on pod machines (the sharp spike that pierces the pod)
- Air lock in the pump after the reservoir runs dry
- Faulty thermal fuse or heating element from overheating or age
- Dirty or stuck check valve in the water intake line
Each of these has a distinct symptom. Learn to read the symptom and you skip half the guesswork.
If your machine won’t brew at all, check our clogged coffee maker guide first. That’s the most common cause of a dead brewer.
Problem 1: The Machine Turns On But Won’t Brew
This is the classic “pump runs but no water comes out” situation. You hear the motor, maybe see the heating light, but the carafe stays empty.
Start with the simplest explanation: the reservoir is seated wrong. Many small brewers have a reed switch near the reservoir base. If the tank isn’t pressed down fully, the machine thinks there’s no water and refuses to pump. Lift the tank, reseat it firmly, and listen for a click.
If that doesn’t work, you likely have an air lock. This happens when the reservoir runs dry and the pump pulls air into the line. The fix takes thirty seconds:
- Fill the reservoir to the max line.
- Turn the machine on and start a brew cycle.
- Wait ten seconds, then gently lift the reservoir about half an inch and drop it back down. This shifts the water and helps the pump prime.
- Repeat once or twice. Water should start flowing within a minute.
No luck? Then it’s scale. Mineral deposits narrow the tubing until the pump can’t push water through. You need to descale, not just clean. Use the IMPRESA descaler according to the bottle directions, or use a 50/50 white vinegar and water mix. Run a full cycle, then two plain water cycles to rinse. If the machine has been sitting for months, you may need two descaling passes back to back.
Still nothing? The pump itself may be dead. Small brewers use a vibratory pump, and those fail after years of hard use. If you hear a loud buzzing but no water movement even after descaling, the pump is shot. Replacement pumps cost $15–$25 on parts sites, but a new small coffee maker often costs less than $40. At that point, I’d replace the machine.
Problem 2: The Coffee Tastes Bad or Weak
Bad taste usually isn’t a mechanical failure. It’s buildup. Coffee oils oxidize and turn rancid inside the water lines and the carafe. A machine that’s never deep-cleaned will produce bitter, flat, or slightly soapy-tasting coffee no matter what beans you use.
Here’s the test: brew a cup of plain hot water (no coffee) and taste it. If it tastes off, the machine is dirty. If the water tastes fine, the problem is your coffee-to-water ratio or grind size, not the machine.
For a dirty machine, run a cleaning cycle with a descaler, then follow with two full water-only cycles. This clears both mineral scale and oil residue. For ongoing maintenance, you should descale every three to four months, more often if you have hard water. Our cleaning frequency guide breaks this down by machine type.
If the water tastes fine but the coffee is weak, check your ratio. Most small drip machines use a 1:15 or 1:16 coffee-to-water ratio. That means about 10 grams of coffee per 150 ml of water. If you’re using pre-ground coffee that’s too coarse, the water passes through too fast and under-extracts. Grind finer and see if that helps.
One more thing: check the shower head (the flat disc where water comes out). If it’s clogged with old grounds, water won’t spread evenly over the coffee bed. Remove it, soak it in warm soapy water, and scrub with an old toothbrush.
Problem 3: The Machine Leaks Water
Leaks are frustrating because they look catastrophic but are often trivial. The most common leak point on small brewers is the check valve. That’s a tiny rubber flap or ball inside the water intake line that prevents water from flowing backward into the reservoir.
When the check valve gets stuck open, water drains from the heating chamber back into the tank. You’ll notice water pooling around the reservoir base, or the machine gurgles and spits during brewing.
To fix it:
- Unplug the machine and dump the reservoir.
- Look at the bottom of the reservoir well. You’ll see a small plastic nipple or a short tube.
- Use a paperclip or a small screwdriver to gently push the check valve up and down a few times. This often frees a stuck ball or flap.
- Rinse the area with hot water and retest.
Another common leak source is a cracked reservoir. Check the bottom seam for hairline fractures. Plastic tanks crack after repeated thermal cycling (hot water, cold water, hot water). If you see a crack, you can’t repair it reliably. Replacement reservoirs are sometimes available, but they cost almost as much as a new machine.
Pod machines leak at the needle assembly. If the exit needle is clogged, pressure builds and coffee backs up around the pod holder. You’ll see coffee dripping down the sides. Clean the needle with a paperclip (see Problem 4) and the leak usually stops.
Finally, check the carafe lid gasket. If the lid doesn’t seal, coffee drips down the side of the carafe. Replace the gasket if it’s cracked or stretched.
Problem 4: Pod Machine Won’t Puncture or Drains Slowly
Keurig-style machines and other pod brewers have a sharp needle that pierces the pod. That needle clogs constantly. Coffee grounds, pod fibers, and mineral scale all accumulate in the tiny opening.
You’ll know it’s clogged when the brew takes twice as long, or the machine stops mid-cycle with a partial cup. The fix is mechanical:
- Unplug the machine and remove the pod holder.
- Locate the exit needle (the spike at the bottom of the brew chamber).
- Insert a paperclip into the needle opening and twist gently. You’ll feel resistance, then a pop as the clog breaks free.
- Run a water-only cycle to flush out the debris.
Do this every few weeks if you use your pod machine daily. It’s the single most effective maintenance task for these brewers.
If the needle is clear but the machine still drains slowly, descale. Pod machines have narrow tubing, and scale builds up faster than you’d think. Run a descaling cycle with the IMPRESA solution or vinegar. After descaling, the flow rate usually returns to normal.
One caveat: some pod machines have a secondary filter or screen inside the reservoir. That screen can clog with scale too. Remove it and rinse it under hot water if you see buildup.
Problem 5: The Machine Turns On But Doesn’t Heat
If the pump runs and water flows but the coffee comes out cold, the heating element is the problem. This is the most serious failure on the list, and it’s often not worth fixing.
Small coffee makers use a simple resistive heating element wrapped around the water tube. Over time, the thermal fuse (a safety device that cuts power if the element overheats) can blow. When the fuse blows, the machine powers on but nothing heats.
You can test the thermal fuse with a multimeter. It’s usually a small white or black cylinder clipped to the heating element. If it reads infinite resistance, it’s blown. Replacement fuses cost about $2, and soldering in a new one is a 15-minute job for someone comfortable with a soldering iron.
But here’s the honest take: if the heating element itself is dead (not just the fuse), you’re looking at a $10–$20 part plus shipping. A new small coffee maker costs $25–$50. Unless you have sentimental attachment to the machine, replace it. The time you spend sourcing and installing a heating element isn’t worth it for a budget brewer.
Before you declare the element dead, check the obvious things: Is the machine plugged into a working outlet? Is the power cord frayed? Does the on/off switch feel loose? A bad switch is a $5 part and a simple replacement. I’ve seen two machines “fixed” by replacing a worn-out switch.
Comparison Table: Fix vs. Replace Decision Guide
| Symptom | Likely Cause | Fix Difficulty | Fix Cost | Time to Fix | Worth It? |
|---|---|---|---|---|---|
| Pump runs, no water | Air lock or scale | Easy | $0–$12 | 5–30 min | Yes |
| Weak or bad-tasting coffee | Oil buildup or wrong ratio | Easy | $0–$12 | 10–20 min | Yes |
| Leaking from base | Stuck check valve | Easy | $0 | 5 min | Yes |
| Leaking from pod holder | Clogged exit needle | Easy | $0 | 2 min | Yes |
| Slow brew time | Scale buildup | Easy | $0–$12 | 30–45 min | Yes |
| No heat, pump works | Thermal fuse or element | Moderate | $2–$20 | 1–2 hours | Only if fuse, not element |
| No power at all | Switch, cord, or internal failure | Hard | $5–$30 | 1–3 hours | Usually no |
This table assumes you have basic tools: a screwdriver, a paperclip, and possibly a multimeter. If you don’t own a multimeter, skip the electrical diagnostics and go straight to replacement for heating issues.
Preventive Maintenance: Stop Problems Before They Start
The best way to troubleshoot a small coffee maker is to never need to. Two habits make the biggest difference:
- Descale every 3–4 months. Hard water is the enemy. The IMPRESA descaler is formulated for this exact schedule, and one bottle handles two sessions. If you live in an area with very hard water, descale monthly.
- Clean the needle after every 20–30 pods. A paperclip takes two minutes. Set a reminder on your phone if you forget.
Also, empty the reservoir between uses. Stagnant water grows bacteria and leaves mineral deposits. Use filtered water if your tap is hard. And never run the machine with an empty reservoir — that’s how air locks and thermal fuse failures happen.
For a deeper routine, read our proper cleaning method guide. It covers the full teardown and soak process that keeps brewers running for years.
Frequently Asked Questions
Why does my coffee maker make a loud noise but not brew?
That’s almost always an air lock or a clogged line. The pump is running but can’t move water because air is trapped in the system, or scale has narrowed the tubing. Try the reservoir-lift trick described in Problem 1. If that doesn’t work, descale the machine. A loud, strained buzzing noise that continues for more than a minute usually means the pump is working against a blockage.
Can I use vinegar to descale a small coffee maker?
Yes, white vinegar works. Use a 50/50 mix of white vinegar and water. Run a full brew cycle, let it sit for 30 minutes, then run two or three water-only cycles to rinse thoroughly. Vinegar is cheap and effective, but it leaves a smell that takes a few rinse cycles to clear. A commercial descaler like the IMPRESA solution is faster and leaves no odor. Both get the job done.
How often should I descale my coffee maker?
Every three to four months for normal use. If you brew multiple pots daily or have hard tap water, do it monthly. The descaling solution bottle usually lists a schedule, but the real indicator is brew time. If your machine takes noticeably longer to brew than when it was new, descale immediately.
Why does my coffee maker leak from the bottom?
The most common cause is a stuck check valve. That’s the small rubber part in the water intake line. Push it with a paperclip to free it up. If the leak persists, inspect the reservoir for cracks and check the carafe lid gasket. A cracked reservoir is not repairable.
Is it worth repairing a small coffee maker or should I buy a new one?
It depends on the failure. Cleaning and descaling fixes are always worth it — they cost almost nothing. A stuck check valve or clogged needle is a five-minute fix. But if the heating element is dead, or the machine won’t power on and the switch tests fine, replacement is usually smarter. A new basic drip machine costs less than $40. Your time has value too.
What To Do Next: A Simple Action Plan
- Start with the cheapest fix: reseat the reservoir and check the power cord.
- Clean the exit needle with a paperclip if you use a pod machine.
- Descale with a commercial solution or vinegar if brew time has slowed.
- Test the check valve with a paperclip if you see leaks.
- Use a multimeter to test the thermal fuse before replacing the whole machine.
- Replace the machine if the heating element or pump is dead and the unit cost less than $50.
- Commit to a 3–4 month descaling schedule to avoid most of these issues entirely.
A small coffee maker is a simple appliance. Most failures come down to mineral buildup or a tiny piece of plastic stuck in the wrong position. With a paperclip, a bottle of descaler, and ten minutes, you can fix the vast majority of problems yourself. The few that aren’t fixable aren’t worth fixing — and that’s okay. Knowing the difference saves you both time and money.
Products related to this article
Sponsored / affiliate links. As an Amazon Associate I earn from qualifying purchases. I may earn additional commission from eligible campaigns.
 HomeBeyond Espresso Coffee Maker 12 Cups, Classic Stovetop Espresso Maker, 600ml / 20oz Coffeemaker for Gas & Ceramic Stovetops (Silver)
 Belly Moka Coffee Maker Stovetop Espresso Maker 9 Cup Aluminum Moka Pot Percolator 15oz 450ml Easy Brewing for Electric Ceramic Stoves Home Camping Italian Cuban Café Classic Black
 Belly Moka Coffee Maker Stovetop Espresso Maker 6 Cup Aluminum Moka Pot Percolator 10oz 300ml Easy Brewing for Electric Ceramic Stoves Home Camping Italian Cuban Café Classic Silver