You just pulled a shot that looked like dripping mud, tasted harsh, and finished in eight seconds. Or maybe it choked the machine and dripped out like cold molasses. The culprit is almost never the espresso machine. It’s the grind. Getting espresso right at home starts with understanding your grinder, not upgrading your gear. This guide covers the exact steps to use an espresso grinder, how to dial in a new bag of beans, and what to do when your shots run fast or slow.
You’ll walk away knowing how to set your grind size, dose by weight, and use timed grinding effectively. We’ll also compare blade grinders to burr grinders for espresso, because the difference matters more than you think. No fluff, just the workflow that works.

SHARDOR
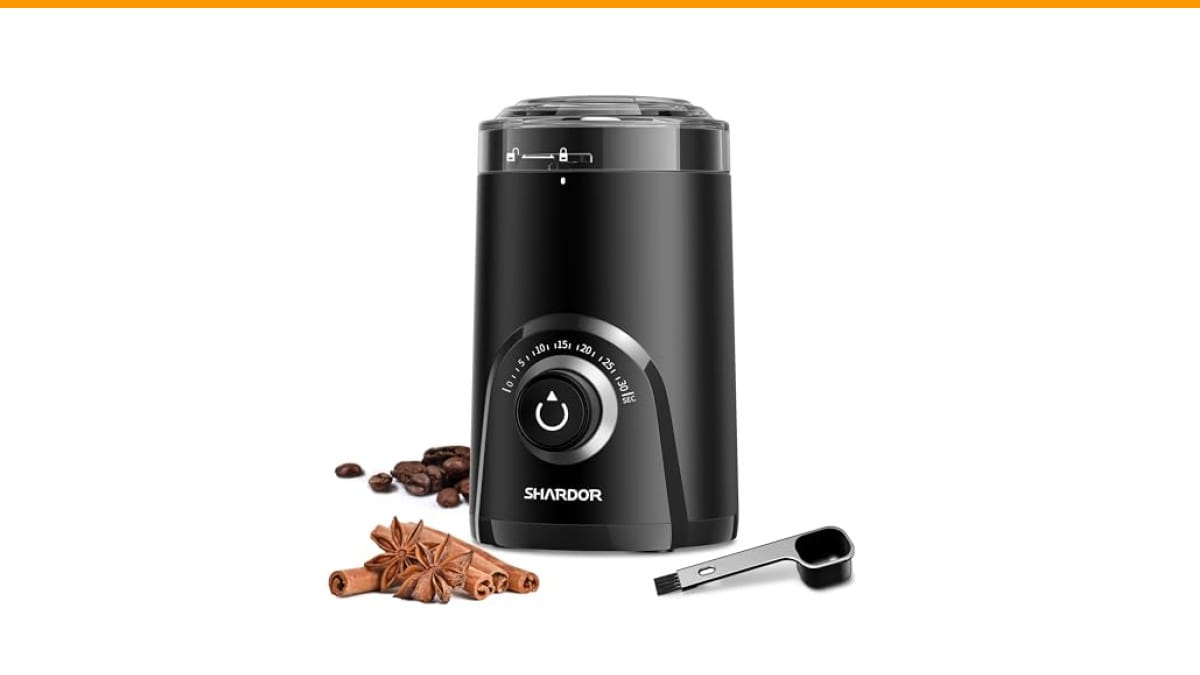
SHARDOR Electric Coffee Grinder, 70g Large Capacity…
- Precision grind control: The visual timing knob is marked in seconds so you can set a consistent grind for espresso, drip, or Fren…
- 70g / 2.5 oz bowl for coffee, spices, herbs, grains, and nuts: One fill handles beans plus dry ingredients such as pepper, cumin,…
- Quiet blade grinder for early mornings: Operates around 63 dB in our in-house test, lower than many traditional blade grinders. Us…
As an Amazon Associate I earn from qualifying purchases.
If you’re using a blade grinder, the blade vs burr debate is worth reading. But for this guide, we’ll focus on getting consistent results from whatever grinder you own.
For home users who want a simple, quiet way to grind for espresso without a huge investment, the SHARDOR Electric Coffee Grinder offers a visual timing knob and 70g capacity. It’s a blade grinder, so it won’t match a burr grinder’s consistency, but the timing control helps you repeat results, which is half the battle.
Why Grind Size Dictates Your Espresso Shot
Espresso needs a fine, uniform grind. Finer than table salt, close to powdered sugar but with a slight grittiness. The reason is pressure. Your machine pushes water at 9 bars through a compacted puck. If the coffee particles are too large, water rushes through. If they’re too small, water can’t pass.
You’re looking for a shot that takes 25 to 30 seconds from the moment you hit the brew button. That time window is your compass. Adjust the grind until you land inside it, then taste to confirm.
Here’s a quick reference for grind sizes across brewing methods:
| Brew Method | Grind Size | Texture Comparison | Brew Time |
|---|---|---|---|
| Espresso | Fine | Powdered sugar, slightly gritty | 25–30 seconds |
| Moka Pot | Medium-fine | Table salt | 3–5 minutes |
| Pour Over / Drip | Medium | Coarse sand | 2–4 minutes |
| French Press | Coarse | Sea salt flakes | 4 minutes steep |
If you’re switching from a pour-over setup, expect to make a big adjustment. Most grinders have a wide range, but espresso lives in the bottom 20% of that range.
Dialing In: The 30-Second Shot Method
Every new bag of beans needs a dial-in session. Even the same roaster changes batches. Here’s the process I use every time, and it takes about 15 minutes.
- Start with a baseline dose. Use 18 grams of coffee for a double basket. Weigh it every time. Guessing the dose makes it impossible to diagnose problems.
- Set your grinder to a medium-fine setting. If your grinder has numbers, start in the middle of the espresso range. For a blade grinder, use the timing knob to start with about 15 seconds of grinding.
- Pull a shot and watch the timer. If it finishes in 15 seconds, your grind is too coarse. Go finer. If it takes 40 seconds and drips, go coarser.
- Adjust in small steps. Change the grind setting by one small increment, then pull another shot. Repeat until you hit that 25–30 second window.
- Taste before you trust the timer. A shot can run 28 seconds and still taste bitter or sour. Bitter means over-extracted, go coarser. Sour means under-extracted, go finer.
This trial-and-error loop is normal. Even experienced baristas pull two or three test shots with a new bag. The goal is consistency, not perfection on the first try.
Dosing and Timing: Two Things Beginners Get Wrong
Dosing is the amount of coffee you put in the basket. Timing is how long you grind. They’re different, and both matter.
For a double shot, 18 to 20 grams is the standard range. Your basket has a rated capacity, usually stamped on the side. Overfilling it makes the puck hit the shower screen. Underfilling it leaves too much headspace, which causes channeling. Use a scale until you know your basket’s sweet spot by feel.
Timing matters when your grinder doesn’t have a dose setting. A blade grinder with a visual timing knob, like the SHARDOR model, lets you repeat the same grind duration. That’s a practical workaround. Grind for 15 seconds, check the shot time, then adjust the knob by a second or two. It’s not as precise as a burr grinder, but it’s repeatable, and repeatability is what you’re chasing.
One common mistake: grinding into the portafilter while it sits on a scale. The scale wobbles, the grinder vibrates, and you get an inaccurate reading. Grind into a small cup or the dosing funnel, then transfer. It’s an extra step, but it keeps your measurements honest.
Blade Grinders vs Burr Grinders for Espresso
I’ll be direct: a burr grinder is the right tool for espresso. The uniform particle size it produces is what allows water to extract evenly. Blade grinders chop beans into a mix of fine dust and coarse chunks. That uneven distribution means some particles over-extract while others under-extract. The result is a shot that’s simultaneously bitter and sour.
That said, a blade grinder can make drinkable espresso if you work around its flaws. The SHARDOR grinder’s timing knob helps, and you can improve consistency by shaking the grinder during operation. Pulse it in short bursts instead of running it continuously. This gives the beans more time to fall back toward the blades and get chopped more evenly.
Here’s a side-by-side look at what each grinder type gives you:
| Feature | Burr Grinder | Blade Grinder |
|---|---|---|
| Particle Consistency | Uniform, precise | Uneven, mixed sizes |
| Grind Adjustment | Stepped or stepless settings | Only by duration |
| Best For | Espresso, repeatable results | Drip, French press, occasional espresso |
| Price Range | Higher | Budget-friendly |
| Noise Level | Moderate | Varies, often louder |
If you’re serious about espresso, save for a burr grinder. If you’re testing the waters or making milk drinks where the coffee flavor is masked, a blade grinder with timing control is a fine starting point. Just know its limits.
Cleaning and Maintenance: The Overlooked Variable
A dirty grinder ruins good beans. Old coffee oils go rancid and stick to the blades or burrs. That stale residue flavors every new batch you grind. You don’t need a deep clean every day, but you do need a quick routine.
After each use, brush out the grinding chamber. Most grinders come with a small brush, and the SHARDOR includes a 2-in-1 spoon with a built-in brush. Run it around the blades and the lid. Once a month, wipe the chamber with a dry cloth. Avoid water near the motor or blades.
For a deeper clean, you can grind a small amount of white rice to absorb oils, then brush it out. This works for both blade and burr grinders. It’s not a substitute for a proper cleaning, but it extends the time between full disassemblies. If you need a step-by-step breakdown, check our guide on how to clean a coffee grinder.
Also, pay attention to your beans. Oily, dark-roasted beans clog grinders faster. They’re stickier and leave more residue. If you drink dark roasts, clean more often.
Common Problems and Quick Fixes
Your shot runs too fast. The grind is too coarse. Go finer and pull another shot. If it’s still fast after two adjustments, check your dose. You might be underdosing, which leaves gaps in the puck for water to flow through.
Your shot runs too slow or doesn’t come out at all. The grind is too fine or the dose is too high. Go coarser or reduce your dose by half a gram. Also check that you’re tamping level. An uneven tamp creates a weak spot in the puck, which causes channeling and stalls the shot.
Your espresso tastes burnt or ashy. This can be a grind issue, but it’s often a temperature or bean issue. Fresh, light-roast beans taste different than stale dark roasts. If your shot timing is correct but the flavor is off, check the roast date on the bag. Our article on why espresso tastes burnt covers this in more detail.
How Fine Should Espresso Grind Be?
Espresso grind should be fine enough to offer resistance to water but not so fine that it turns into powder and clogs. A good reference: it should feel like powdered sugar with a slight grit between your fingers. If it feels like flour, it’s too fine. If it feels like sand, it’s too coarse.
How Many Grams of Coffee for a Double Espresso?
Use 18 to 20 grams for a standard double basket. Start with 18, then adjust based on your basket’s capacity and the shot time. Weigh your grounds, don’t rely on volume.
Can I Use a Blade Grinder for Espresso?
You can, but the results will be less consistent than a burr grinder. Use short pulses and shake the grinder during operation. The timing knob on grinders like the SHARDOR helps you repeat the same duration, which improves consistency.
How Long Should I Grind Coffee for Espresso?
For a blade grinder, start with 12 to 15 seconds of grinding for 18 grams of beans. Adjust by 1 to 2 seconds based on your shot time. For a burr grinder, the grind duration is less relevant because you’re setting the particle size directly.
Should I Grind Finer or Coarser for a Faster Shot?
Go coarser. A coarser grind creates larger particles, which leaves more space for water to flow through. This speeds up the extraction. Conversely, a finer grind slows the shot down.
What to Do Next: Build a Routine
- Weigh your dose every time. 18 grams is a solid starting point for a double shot.
- Use the shot timer on your machine. Aim for 25 to 30 seconds from first drop to stop.
- Change one variable at a time. Grind size first, then dose, then tamp pressure.
- Keep a small notebook or a note on your phone with the grind setting and shot time for each bag of beans.
- Clean your grinder weekly with a brush and monthly with a rice grind.
- Buy beans with a roast date on the bag. Stale beans make the best grinder look bad.
- Don’t chase a perfect shot every morning. Dial in on the weekend, then use that setting during the week.
Espresso is a game of small adjustments. Your grinder is the first place to make them. Learn its quirks, keep it clean, and let the shot timer guide you. The rest is practice.
Products related to this article
Sponsored / affiliate links. As an Amazon Associate I earn from qualifying purchases. I may earn additional commission from eligible campaigns.
 Coffee Espresso Machine Handle Replacement Parts, Cafe Bracket Handle for Lidl Silvercrest CM4621 CM4218 KF5002 KF500S Barista (for 51mm Portafilter Basket - Not included)
 Quick Heating Cup Warmer, Three Temperature Settings, Splashproof and Portable, for Coffee, Milk, Lightweight ABS Material
 HomeBeyond Espresso Coffee Maker 12 Cups, Classic Stovetop Espresso Maker, 600ml / 20oz Coffeemaker for Gas & Ceramic Stovetops (Silver)