You just bought a maintenance kit, or maybe you’re staring at a drawer full of pods and bottles wondering what actually does something. The truth is, most Keurig owners skip the accessories because the instructions on the box are thin. That’s a mistake. A $30 kit can double the life of a $150 machine, but only if you use it correctly.
This guide covers the three core Keurig accessories: descaling solution, rinse pods, and water filter cartridges. You’ll learn exactly when to use each one, how to run them through your specific machine, and what mistakes to avoid. I’ve tested these steps on a K-Classic and a K-Supreme Plus, and I’ll tell you where the official instructions gloss over things.
Keurig
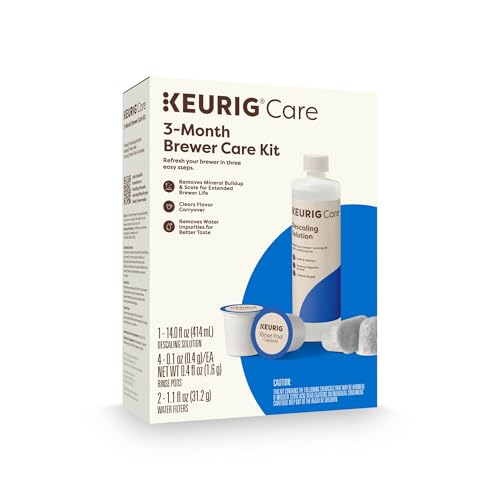
Keurig 3-Month Brewer Care Maintenance Kit |…
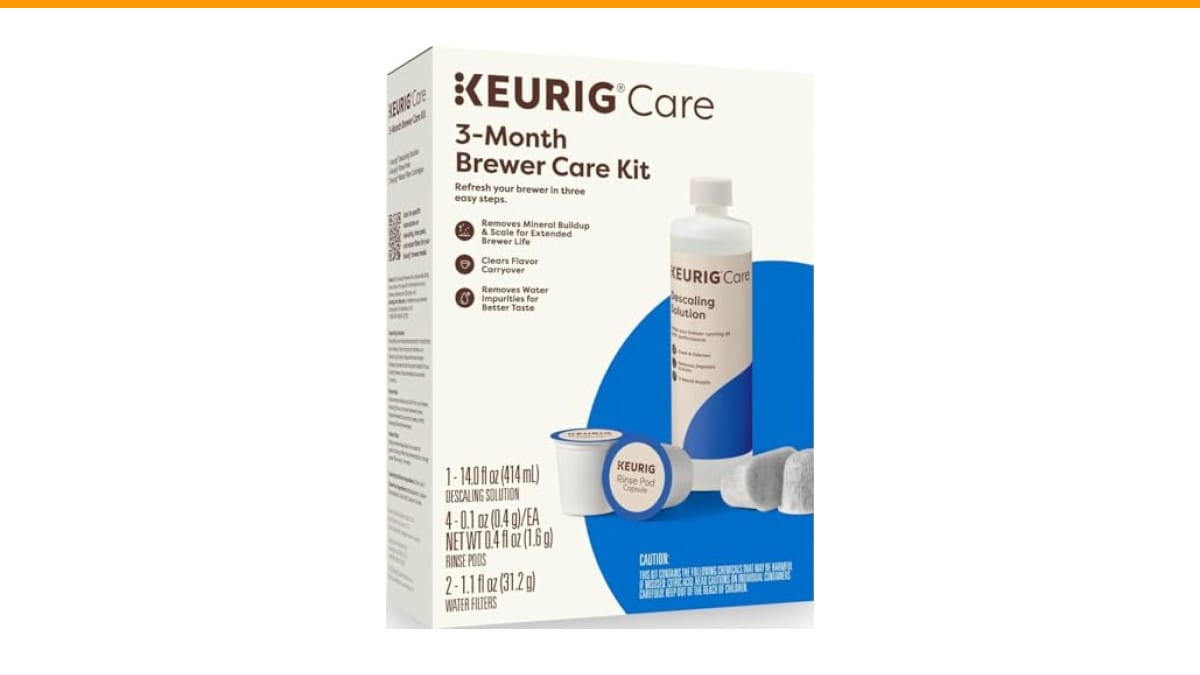
- INCLUDES: 4 Keurig Rinse Pods, 1 Descale Solution, and 2 Water Filter Cartridge Refills
- RINSE PODS: reduces flavor carry-over between brews
- QUICKEST WAY TO CLEAN YOUR K-Cup pod holder: rinse away residue and oils that can build up in your coffee maker
As an Amazon Associate I earn from qualifying purchases.
If you’re looking for a single box that covers all three, the Keurig 3-Month Brewer Maintenance Kit bundles four rinse pods, one descaling solution bottle, and two water filter refills. It’s a solid starting point because the parts are designed to work together, not just thrown in a bag.
Why Your Keurig Needs More Than Just Coffee Pods
Your brewer is a miniature water heater. Every cup leaves behind mineral scale and coffee oils. Scale builds up on the heating element, making your brew slower and your water less hot. Coffee oils cling to the needle and pod holder, giving your next cup a faint, stale taste.
Think of it like a frying pan. You wouldn’t cook eggs in a pan that hasn’t been washed in three months. The Keurig is the same, except you can’t see the grime because it’s inside the machine.
There are three distinct problems, and each accessory solves one of them:
- Descaling solution breaks down mineral scale (calcium, limescale) inside the water lines.
- Rinse pods scrub the needle and K-Cup holder area where coffee oils collect.
- Water filters reduce scale before it enters the machine, so you descale less often.
Using the Descaling Solution: The Full Cycle
Descaling is the most important maintenance task, and it’s also the one people mess up most often. They pour the bottle in, run one cup, and think they’re done. That’s not how it works.
You need a full cycle, which takes about 30 minutes. Here’s the process that works on both 1.0 and 2.0 machines:
- Empty the water reservoir completely. Remove the water filter if you have one installed.
- Pour the entire descaling solution bottle into the empty reservoir.
- Fill the rest of the reservoir with fresh water up to the MAX line.
- Place a large mug or bowl on the drip tray. You’ll be filling it multiple times.
- Turn the machine on. Run a brew cycle without inserting a K-Cup. Use the largest cup size (usually 10 oz or 12 oz).
- Wait until the brew finishes, then pour the liquid out and start another brew. Repeat until the reservoir is empty.
- Once empty, remove the reservoir, rinse it thoroughly with water, and refill it with fresh water only.
- Run at least two full water-only brew cycles to flush any remaining solution out of the lines.
One thing the manual won’t tell you: the descaling solution smells like vinegar, and that smell lingers for a few brews. Run an extra water-only cycle if you’re sensitive to it. Also, don’t use the first cup after descaling. It’s safe, but it tastes slightly acidic.
Descale every three months if you use tap water. Every six months is fine if you use filtered or bottled water. Hard water areas should lean toward the shorter end.
Rinse Pods: The Quick Clean You’re Skipping
Rinse pods look like regular K-Cups but contain a cleaning solution instead of coffee. You pop one in, run a brew cycle, and it flushes out the needle and pod holder. That’s it. No soaking, no scrubbing.
The Keurig kit includes four rinse pods, which is roughly a year’s supply if you use one every three months. Here’s the correct way to run one:
- Empty the K-Cup holder of any old pods or foil lids.
- Place a rinse pod in the holder, just like a coffee pod.
- Put a mug on the drip tray.
- Select the largest cup size (10 oz or 12 oz).
- Brew it. The solution will foam slightly as it works through the needle.
- Discard the pod and the brewed liquid. Run one water-only brew to clear the line.
I’ll be honest: rinse pods are not a substitute for descaling. They clean the top half of the machine, not the heating element. But they do make a noticeable difference in flavor if you drink dark roasts, which leave more oily residue. I run one after every 100 cups or so, and the first brew afterward always tastes cleaner.
If you have a machine that’s clogged and won’t brew a full cup, a rinse pod won’t fix it. That’s a descaling problem. Check our guide on Keurig troubleshooting for that specific issue.
Water Filter Cartridges: Set It and Forget It
The water filter is the accessory that requires the least effort but gives the most long-term benefit. It sits inside the reservoir and filters out scale-causing minerals before they reach the heating element.
Installation is straightforward:
- Soak the new filter cartridge in a cup of fresh water for five minutes. This primes the charcoal and removes any loose dust.
- Rinse it under running water for about 30 seconds.
- Push it into the filter holder at the bottom of the reservoir. It clicks into place.
- Fill the reservoir, then run a water-only brew cycle to prime the line.
Here’s the catch: the filter only lasts about two months or 60 tank refills. The kit includes two filters, so you get roughly four months of coverage. Mark your calendar when you install it, because a dead filter stops working and you won’t notice until the scale builds up.
One note on the K-Supreme Plus: that machine has a filter indicator light that needs to be reset after installation. If you have one and the light stays on, check our write-up on resetting the descale light.
Comparing Your Maintenance Options
Not all maintenance routines are equal. Here’s how the three core accessories stack up against each other, plus what happens if you do nothing.
| Accessory | What It Cleans | How Often | Time Per Use | Difficulty |
|---|---|---|---|---|
| Descaling Solution | Heating element, internal water lines | Every 3–6 months | 30–40 minutes | Moderate |
| Rinse Pods | Needle, K-Cup holder, brew head | Every 1–3 months | 5 minutes | Easy |
| Water Filter Cartridge | Incoming water, prevents scale | Every 2 months | 10 minutes | Easy |
| No Maintenance | Nothing | Never | 0 minutes | Zero effort, but your brewer dies in 12–18 months |
My honest take: if you only do one thing, descale. It’s the difference between a machine that lasts five years and one that dies at two. Rinse pods are a nice bonus for flavor, and filters are the best prevention, but descaling is non-negotiable.
Common Mistakes People Make
I’ve seen three recurring errors in the comments and forums. Avoid these and you’re ahead of most owners.
Using vinegar instead of descaling solution. Vinegar works, but it’s harsher on the internal seals and leaves a smell that takes many cycles to clear. The commercial solution is formulated to be gentler and rinse out more completely. It costs a few dollars more, and it’s worth it.
Running a rinse pod with a water filter installed. The rinse solution can saturate the filter and ruin it. Always remove the filter before using a rinse pod or descaling solution. Put it back after you’ve flushed the system.
Skipping the final flush. That last water-only cycle isn’t optional. It clears the residual solution so your next cup doesn’t taste like cleaning chemicals. Two flushes is better than one.
If your machine is already showing signs of trouble, like brewing a weak cup or taking too long, you might need more than maintenance. Take a look at our guide on fixing a partial brew before you buy a new unit.
Frequently Asked Questions
Can I use rinse pods and descaling solution on the same day?
Yes, but do them in the correct order. Descale first, flush thoroughly, then run a rinse pod. The rinse pod will clear any remaining descaling solution from the brew head. Don’t do it the other way around, or the rinse pod’s cleaning action gets diluted by the scale buildup.
How do I know when to descale if I don’t keep track?
Most Keurig models show a descale light after about 300 brew cycles. If yours doesn’t have a light, go by taste and timing. A slower brew, a quieter pump, or a cup that tastes slightly bitter are all early signs of scale. Don’t wait for the light if you notice those.
Are third-party Keurig accessories as good as the Keurig brand?
For water filters, I’ve had mixed results with generics. Some fit loosely and let unfiltered water bypass the filter. For descaling solution, the active ingredient is usually citric acid, and most brands work fine. Rinse pods are the one item where brand matters, because the plastic shell needs to puncture cleanly in the needle. Stick with the Keurig brand for rinse pods.
Can I reuse a rinse pod?
No. The cleaning solution is depleted after one use. Reusing it just runs hot water through a spent pod, which does nothing. The same goes for water filter cartridges. Once they’re saturated, they stop filtering and can actually leach contaminants back into the water.
What’s the fastest way to clean the K-Cup holder between maintenance cycles?
Take the holder out and rinse it under hot water. It pops out easily on most models. Use a paper clip to clear the needle hole if it’s clogged with coffee grounds. This takes two minutes and makes a real difference in brew speed. It’s not a replacement for a rinse pod, but it’s a good weekly habit.
What to Do Next With Your Maintenance Kit
You’ve got the knowledge, so put it to work. Here’s the short version to remember:
- Descale every 3 months with the full cycle, not a quick run.
- Run a rinse pod every 1–3 months to clear coffee oils from the brew head.
- Replace the water filter every 2 months and mark the date on the box.
- Always remove the water filter before descaling or using a rinse pod.
- Flush with two water-only cycles after any cleaning product.
- If your brew is weak or slow, descale before you buy a new machine.
- Keep a maintenance kit on hand so you don’t skip the job out of laziness.
Your Keurig will run hotter, brew faster, and make better-tasting coffee with twenty minutes of maintenance every quarter. That’s a trade worth making.
Products related to this article
Sponsored / affiliate links. As an Amazon Associate I earn from qualifying purchases. I may earn additional commission from eligible campaigns.
 Quick Heating Cup Warmer, Three Temperature Settings, Splashproof and Portable, for Coffee, Milk, Lightweight ABS Material
 Citric Acid 2 LB Bag - 100% Pure, Food Grade & Non-GMO - Citric Acid Powder For Cleaning, Bath Bombs, Preserving - Fine Granular by Spicy World
 Coffee Espresso Machine Handle Replacement Parts, Cafe Bracket Handle for Lidl Silvercrest CM4621 CM4218 KF5002 KF500S Barista (for 51mm Portafilter Basket - Not included)