You bought a milk frother to save money on café drinks, but your first attempt produced lukewarm milk with bubbles the size of golf balls. That frother on your counter can do better. Most people never get past the basics because they don’t understand what actually happens inside the jug.
This guide walks through the entire process: picking the right milk, setting the correct temperature, choosing the right mode, and cleaning the unit without damaging the coating. You’ll learn why whole milk froths differently than oat milk and why your foam collapses before you finish pouring. By the end, you’ll make better foam at home than most chain coffee shops serve.

Ecoflarix
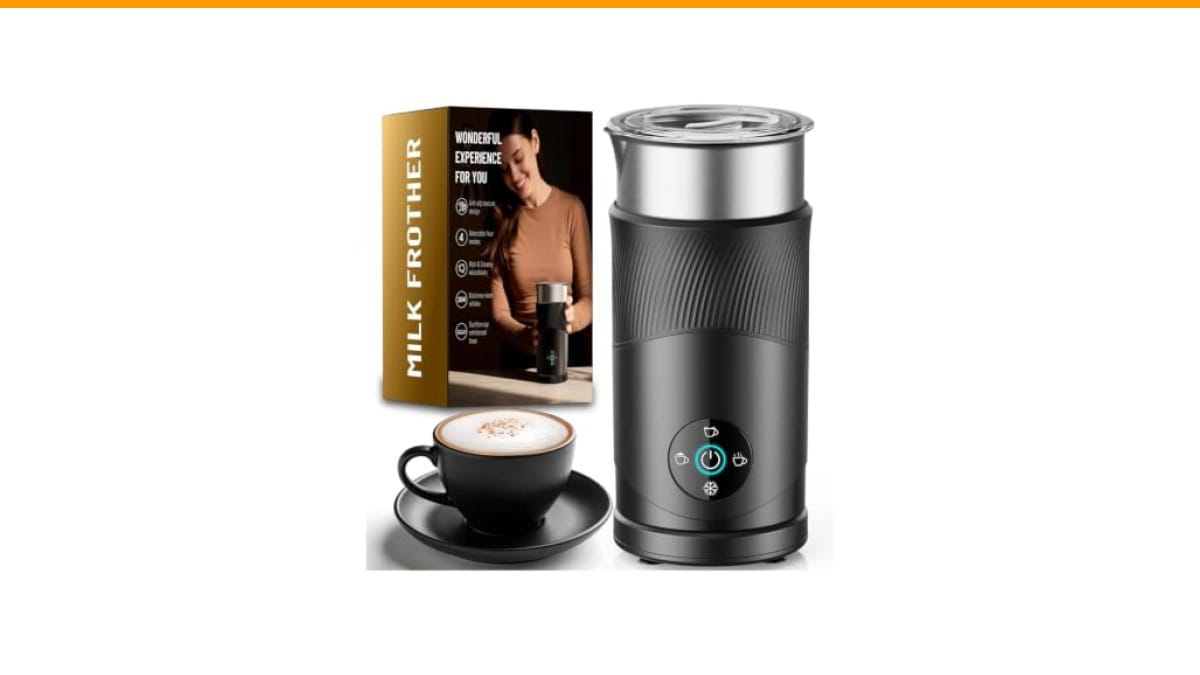
Ecoflarix 4-in-1 Electric Milk Steamer: Milk Frother…
- Professional Barista Performance: Experience café-quality results with our advanced Milk Frother featuring 450W high power and 600…
- Smart Temperature Precision: Designed with intelligent thermal control, the Temperature Control Milk Frother automatically maintai…
- Medical-Grade Safe Materials: Built with premium SUS304 stainless steel interior and dual-layer non-stick coating, our Electric Mi…
As an Amazon Associate I earn from qualifying purchases.
If you’re starting from scratch, the Ecoflarix 350ml Electric Milk Frother handles hot and cold foam with four preset modes, which makes it a forgiving tool while you learn the techniques below.
Know Your Frother Type First
Not all frothers work the same way. The method that works on a handheld whisk will ruin a batch in an electric jug. There are three main types, and each has its own quirks.
- Handheld whisk: A battery-powered wand you plunge into a mug. It injects air aggressively. Best for small batches of hot chocolate or instant coffee, not for latte art.
- Electric jug frother: A base unit with a whisk attachment inside the pitcher. It heats and froths in one step. This is the most common home type and the focus of this guide.
- French press: Not a true frother, but it works in a pinch. Pump the plunger in warm milk for 30 seconds. The mesh creates a decent microfoam, though it takes elbow grease.
This guide assumes you own an electric jug frother. The principles apply to most models, including the Ecoflarix unit we mentioned earlier.
Pick the Right Milk (It Actually Matters)
Milk fat and protein do the heavy lifting. Protein stabilizes the foam bubbles. Fat gives the foam body and sweetness. Skim milk froths like crazy but tastes thin. Heavy cream barely froths at all because the fat coats the protein and prevents it from forming a stable structure.
Here is a quick breakdown of how different milks behave in a frother:
| Milk Type | Protein Content | Foam Quality | Best Used For |
|---|---|---|---|
| Whole milk (3.25%) | ~3.4g per 100ml | Dense, creamy microfoam | Lattes, cappuccinos |
| 2% reduced fat | ~3.4g per 100ml | Lighter, slightly larger bubbles | Everyday lattes |
| Skim (0%) | ~3.4g per 100ml | Very stiff, dry foam | Foam-heavy cappuccinos |
| Oat milk (barista blend) | ~1g per 100ml | Smooth, but can separate if overheated | Vegan lattes |
| Almond milk | ~0.5g per 100ml | Thin, often watery | Not recommended for thick foam |
| Soy milk | ~3g per 100ml | Stable, similar to dairy | Vegan cappuccinos |
Whole milk is the easiest to work with. It froths predictably and doesn’t scorch easily. If you’re learning, start there. Once you master the technique, experiment with oat or soy.
The Right Temperature: The 65°C Sweet Spot
Milk proteins break down above 70°C (158°F). When that happens, the foam collapses and the milk tastes scorched. Below 55°C (131°F), the foam is thin and doesn’t hold its shape. The sweet spot sits between 60°C and 65°C (140°F to 149°F).
Most electric frothers with a heating element, like the Ecoflarix 4-in-1, handle this automatically. The unit stops heating when the milk hits the ideal range. If you have a manual frother or a stovetop steamer, use a thermometer. Pull the milk off the heat at 60°C if you plan to pour it into a cold cup, because the cup will drop the temperature by a few degrees.
One mistake people make is letting the frother run the full cycle twice. The second cycle overheats the milk and destroys the foam. Run the cycle once, pour immediately, and move on.
How to Use an Electric Jug Frother (Step by Step)
Here is the exact process I use when testing frothers side by side in my kitchen. It works for the Ecoflarix and most other jug models.
- Fill to the correct line. Most jugs have two markings: one for frothing (usually 150-180ml) and one for heating only (usually 300-350ml). Overfilling the froth line leaves no room for air to incorporate. Underfilling produces thin foam.
- Use cold milk straight from the fridge. Warm milk doesn’t froth as well. The temperature differential helps the whisk create finer bubbles.
- Select your mode. Hot dense foam for cappuccinos, hot airy foam for lattes, cold foam for iced drinks, or gentle warming for hot chocolate. Each uses a different whisk speed and duration.
- Start the cycle and wait. On the Ecoflarix, that takes about 120 seconds. Resist the urge to open the lid and peek. Letting heat escape interferes with the temperature sensor.
- Tap the jug gently on the counter. This pops large surface bubbles. Swirl the jug in a circular motion to reincorporate the foam into the milk.
- Pour immediately. Hold the cup at a 45-degree angle and pour slowly. For latte art, pour the milk first, then spoon the thick foam on top.
That’s the whole process. It took me a week of daily practice to get consistent results. The first few batches will be ugly. That’s normal.
Cold Foam: The Iced Coffee Trick
Cold foam is just milk frothed at room temperature or colder. It sits on top of iced coffee and cold brew. The key difference is that cold foam is denser and stiffer than hot foam because the fat stays solid at lower temperatures.
Use the cold froth mode on your machine. If your frother doesn’t have one, you can still make cold foam with a handheld whisk and a narrow glass. Fill the glass one-third full with cold milk, tilt it at a 45-degree angle, and whisk vertically for 60 seconds.
Cold foam doesn’t last as long as hot foam. It starts to deflate after about 10 minutes. Make it right before you serve the drink, not ahead of time.
Cleaning Without Ruining the Coating
The non-stick coating inside electric frothers is delicate. Abrasive sponges and dishwasher detergent will strip it over time. Once the coating goes, milk burns onto the surface and every batch tastes bitter.
Rinse the jug immediately after use while the milk residue is still wet. Warm water and a soft cloth handle 90% of the mess. For stubborn residue, fill the jug with warm water and a drop of dish soap, run the heating cycle for 30 seconds, then rinse. This is the same principle as cleaning a steam wand after every use, which we cover in our steam wand guide.
Never submerge the base unit in water. Only the jug and whisk are dishwasher safe, and even then, hand washing is safer for the coating. Dry the whisk attachment completely before storing it to prevent rust on the shaft.
If you notice a burnt milk smell that won’t go away, it’s likely the whisk attachment has residue trapped under it. Soak it in hot water with baking soda for 15 minutes, then scrub gently with a bottle brush.
Common Mistakes and How to Fix Them
You’ll run into problems. Here are the most common ones and what causes them.
- Foam is too watery: You used the heating-only mode instead of the frothing mode. Or you filled the milk past the froth line.
- Foam collapses immediately: The milk overheated. Next time, stop the cycle early or use a thermometer.
- Milk tastes burnt: You ran a second cycle, or the non-stick coating is damaged. Clean the jug thoroughly and check for scratches.
- Loud chugging noise: The whisk is hitting the bottom because there isn’t enough milk. Add more milk to reach the minimum line.
- Large bubbles instead of microfoam: The milk is too warm before frothing. Start with cold milk straight from the fridge.
None of these are fatal. Every frother has a learning curve. The Ecoflarix unit I tested had a slight delay between pressing the button and the motor starting — took me a few uses to realize it wasn’t broken, just a safety delay. That’s typical of most models.
Frequently Asked Questions
Can I use a milk frother for non-dairy milk?
Yes, but results vary. Barista blends of oat and soy milk are formulated with extra fat and stabilizers to froth like dairy. Standard almond milk will produce thin, watery foam. Check the protein content on the label — anything above 1g per 100ml is worth trying.
Why does my foam disappear after a minute?
Two reasons. Either the milk got too hot (above 70°C) and the protein structure broke down, or you used low-protein milk. Skim milk actually holds foam longer than whole milk, but it tastes thinner. Try a barista blend if you’re using plant milk.
Can I froth cold milk in a frother that only heats?
No. A heating-only frother lacks the whisk speed needed to incorporate air. You need a dedicated cold foam mode or a handheld whisk. Some models have a separate whisk attachment for cold foam, but the motor speed matters more than the attachment.
How much milk should I put in the frother?
Use the markings inside the jug. For frothing, fill to the lower line (typically 150-180ml). For heating without frothing, fill to the upper line (typically 300-350ml). Overfilling the froth line is the most common beginner mistake.
Is it safe to leave milk in the frother overnight?
No. Milk left at room temperature for hours will spoil and leave a stubborn film on the jug walls. Rinse the jug immediately after use. If you forget, soak it in warm soapy water for 10 minutes before cleaning.
What to Remember Before Your Next Cup
You don’t need a commercial espresso machine to make good foam at home. A decent electric frother plus fresh cold milk gets you 90% of the way there. Here are the points that matter most:
- Use whole milk or a barista plant blend for the most stable foam.
- Start with cold milk straight from the fridge — never pre-warm it.
- Respect the fill lines. The froth line exists for a reason.
- Stop the cycle at 65°C. Overheating ruins the texture.
- Rinse the jug immediately after pouring. Don’t let milk dry on the coating.
- Tap and swirl the jug before pouring to pop large bubbles and blend the foam.
- Practice daily. Your first week will be inconsistent, and that’s fine.
If you’re shopping for your first frother or replacing an old one, the Ecoflarix 350ml model is worth a look — it handles hot and cold foam without needing a separate gadget. Check the current price on Amazon to see if it fits your budget.
Regular maintenance keeps your gear working. If you notice your espresso machine’s steam wand is getting clogged, that’s a separate issue — see our coffee maker cleaning guide for a full routine.
Products related to this article
Sponsored / affiliate links. As an Amazon Associate I earn from qualifying purchases. I may earn additional commission from eligible campaigns.