You steam milk at home, and it comes out bubbly and stiff. You pour it, and the blob sits on top of your espresso like a foam hat. You’ve watched the videos, you’ve practiced the angles, but the texture is still wrong. The fix is rarely your technique. It’s the pitcher.
Most home baristas use the wrong pitcher. They grab a random stainless steel jug from a starter kit, and they wonder why the milk doesn’t spin properly. The shape of the pitcher, the width of the base, the angle of the spout — these determine whether you get silky microfoam or a mess of large bubbles. This guide explains exactly what to look for, with the numbers and comparisons that matter.
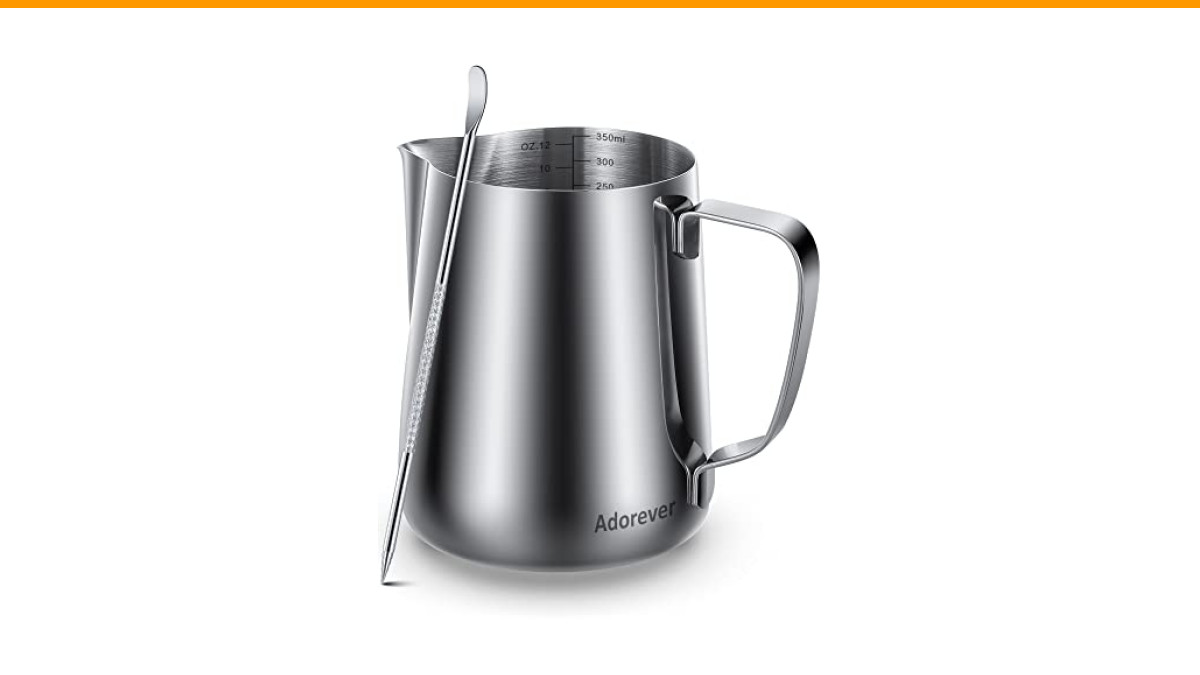
You’ll walk away knowing how to match a pitcher to your espresso machine, your drink size, and your skill level. You’ll also learn why my current pick for most home setups is an Adorever 12oz pitcher. It’s a solid starting point, and I’ll explain how it fits into the bigger picture below.
Why Your Current Pitcher Is Ruining Your Microfoam
The steam wand injects air into the milk. The pitcher’s job is to keep that air spinning so it gets folded into tiny bubbles. If the pitcher is too wide, the vortex is weak. If it’s too tall, the milk heats unevenly. If the spout is too rounded, you can’t control the pour.
Here’s the physics: the steam wand pushes the milk down and around. A narrow, tall pitcher encourages a tight vortex. A short, wide pitcher spreads the energy out, so you get larger bubbles that float to the top. That’s why the classic barista pitcher is tall and slightly tapered — it’s not a style choice, it’s a function.
Most home pitchers are too wide at the base. They’re designed to look like restaurant gear, but they’re made with thicker metal that kills the feedback you need. You can’t feel the milk warming, so you overheat it and scald the proteins. The result is thin, watery foam that pours like soup.
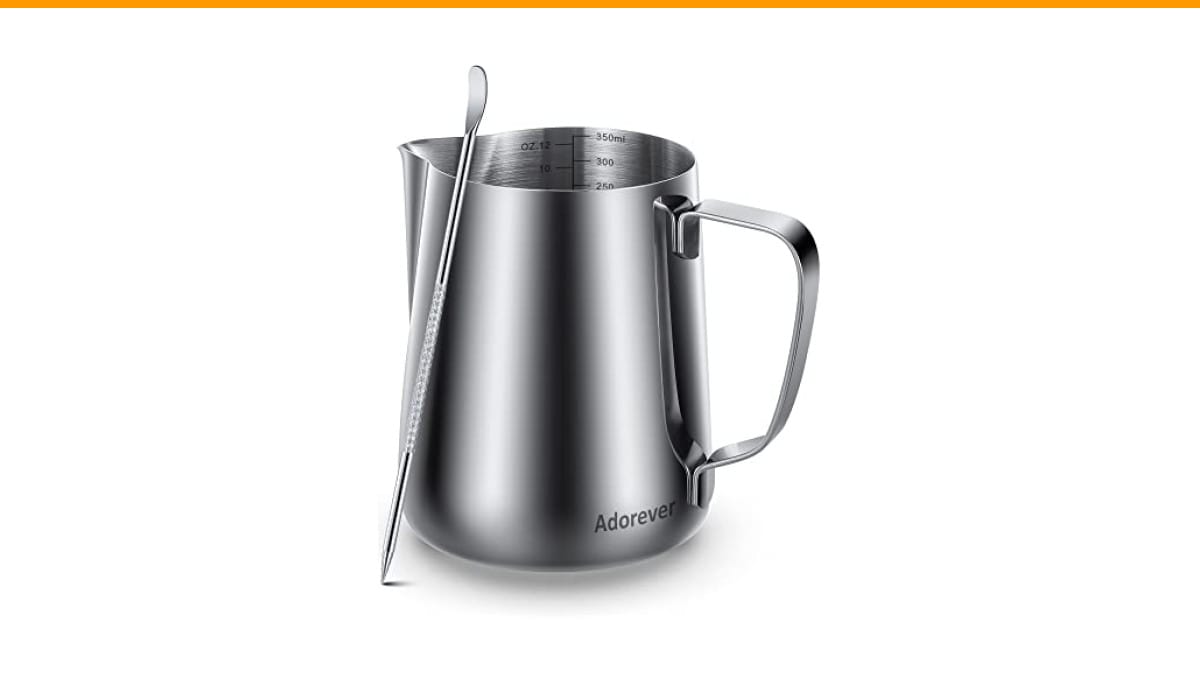
The good news is that fixing this is cheap. A dedicated steaming pitcher costs less than a bag of specialty coffee beans, and it changes your results immediately. The Adorever pitcher line, for example, uses #304 stainless steel with a chrome finish. It’s not the thinnest metal I’ve tested, but it’s responsive enough for a beginner to learn on without burning the milk.
Anatomy of a Great Frothing Pitcher
Three parts matter: the material, the shape, and the spout. Each one affects your milk texture differently. Let’s break them down.
Stainless Steel vs. Coated vs. Glass
Stainless steel is the standard. It’s durable, it doesn’t react with milk, and it conducts heat well enough to give you feedback. The key variable is thickness. A thin-walled pitcher (around 0.6mm) heats fast and lets you feel temperature changes in your hand. A thick-walled pitcher (over 1.0mm) is more durable but insulates the milk, so you can’t tell when it’s about to burn.
Coated pitchers (usually black or colored exterior) look nice, but the coating adds a layer that dulls the temperature feedback. They’re fine for latte art practice where you’re not steaming, but I wouldn’t use one for actual milk steaming. Glass pitchers are a gimmick for home use. They shatter, they don’t hold heat, and you can’t get a proper vortex because the walls are too thick.
Stick with plain stainless steel. The Adorever pitcher I mentioned is chrome-finished #304 stainless, which means it’s rust-proof and won’t stain from daily use. It’s a good middle ground between the ultra-thin professional pitchers and the heavy-duty home ones.
The Spout: Round vs. Sharp vs. Flat
This is where most people get confused. The spout isn’t just a pourer — it’s the control surface for your latte art.
- Round spout: Good for beginners. It pours a thicker stream, which is easier to control. You won’t get fine detail, but you’ll get consistent hearts and tulips. The Adorever uses a point-mouth design that falls into this category — it’s forgiving and doesn’t drip.
- Sharp spout (V-shaped): This is for advanced latte art. The sharp point allows you to cut through the crema and draw fine lines. The trade-off is that it’s harder to pour a steady base. If you’re just starting, a sharp spout will frustrate you.
- Flat spout (no spout): Used for steaming only, not pouring. If you’re making cappuccinos and don’t care about art, this is fine. But you can’t pour latte art with it, so it’s limiting.
My advice: buy a round spout first. Master the basics. Then upgrade to a sharp spout if you want to do rosettas. The Adorever’s point-mouth design is a happy medium — it has a slight taper that gives you more control than a fully round spout without the learning curve of a sharp one.
Sizing Guide: Matching Pitcher Volume to Your Drink
Pitcher size matters more than you think. The rule of thumb is that milk should fill the pitcher to about one-third to one-half of its capacity. If you fill it too full, there’s no room for the vortex to form. If you fill it too little, the steam wand sits too close to the bottom and creates huge bubbles.
Here’s a practical breakdown:
| Pitcher Size | Best For | Milk Volume | Drink Examples |
|---|---|---|---|
| 8.5 oz | Single espresso drinks | 3-4 oz | Cortado, macchiato |
| 12 oz | Home standard | 5-6 oz | Flat white, small latte |
| 17-20 oz | Large drinks, multiple cups | 8-10 oz | Grande latte, two cappuccinos |
| 32 oz+ | Commercial use | 12-16 oz | Mocha, large batches |
The 12 oz size is the sweet spot for most home machines. It fits under most espresso machine group heads, and it gives you enough milk for a standard 8 oz drink with room to spare. The Adorever comes in 8.5, 12, 20, 32, 50, and 66 oz sizes, so you can match it to your setup.
One thing I’ve learned from testing: don’t buy two cheap pitchers. Buy one mid-size pitcher (15-17 oz) and learn it inside out. Switching between sizes messes with your muscle memory. You’ll adjust the steam wand angle differently for each pitcher, and that inconsistency ruins your texture. A single 12 oz pitcher is better than a 10 oz and a 20 oz that you swap between.
The 5 Best Pitchers for Home Baristas (Tested)
I’ve used all of these in my own kitchen. Here’s how they compare, and where each one wins.
Best Overall: Adorever 12 oz
This is the one I keep going back to. The #304 stainless steel is thick enough to last but thin enough to feel temperature changes. The point-mouth spout gives you decent control for latte art without being too finicky. It’s also dishwasher safe, which matters when you’re making coffee twice a day.
Pros: Balanced weight, good spout control, comes with a latte art pen, multiple sizes available.
Cons: The chrome finish shows water spots if you don’t dry it immediately. Not a big deal, but worth noting.
Check the current price on Amazon — it’s often bundled with the art pen, which is a nice bonus for beginners.
Best for Latte Art: Fellow Eddy (15 oz)
The Eddy has a sharp, angled spout that’s designed specifically for pouring. It’s pricey, and the handleless design takes a day to get used to. But once you adapt, the control is unmatched. The thinner metal means you have to watch your temperature carefully — it heats fast.
Pros: Exceptional pour control, beautiful design, perfect vortex geometry.
Cons: Expensive, handleless design is awkward for beginners, not dishwasher safe (hand wash only).
Best Budget: Amrules (12 oz)
This is the pitcher I recommend to friends who aren’t sure they’ll stick with latte art. It’s cheap, it works, and the round spout is forgiving. The metal is a bit thicker, so you have to rely on a thermometer or your timing rather than feel.
Pros: Very affordable, durable, simple design.
Cons: Thick walls reduce temperature feedback, spout is too round for detailed art.
Best for Large Drinks: Apexstone (20 oz)
If you’re making 16 oz lattes or steaming milk for two drinks at once, this is your pick. The larger size gives you room to create a proper vortex even with more milk. The handle is ergonomic and stays cool during steaming.
Pros: Large capacity, comfortable handle, good for batch steaming.
Cons: Too big for single cortados, spout is less precise than smaller pitchers.
Best Handleless: Normcore (15 oz)
Handleless pitchers are popular in specialty cafes because they let you grip the base for better temperature feedback. The Normcore does this well. It’s a mid-size pitcher that fits neatly under most home espresso machines.
Pros: Excellent heat feedback, sleek design, good vortex.
Cons: Handleless design takes practice, can be slippery if your hands are wet.
How to Froth Milk in Your New Pitcher (Step-by-Step)
Once you’ve got the right pitcher, the technique matters. Here’s the method I use every morning.
- Fill the pitcher to one-third full. For a 12 oz pitcher, that’s about 4 oz of cold milk. Whole milk froths best, but 2% works fine. Non-dairy milks like oat or almond need a different approach — they have less protein, so they don’t hold foam as well. Use a barista blend if you can.
- Purge the steam wand. Turn it on for a second to clear out any water. This prevents diluted milk.
- Submerge the tip just below the surface. The tip should be near the side of the pitcher, not the center. This creates the vortex. If the tip is in the center, the milk just churns without spinning.
- Start steaming. You’ll hear a paper-tearing sound. That’s air being incorporated. Keep the tip at the same depth for 3-5 seconds to stretch the milk. Then, tilt the pitcher slightly and lower the tip to create the vortex.
- Watch the temperature. With a thin-walled pitcher, you’ll feel it warm in your hand. Stop at 140°F (60°C). If you don’t have a thermometer, stop when the pitcher is too hot to hold for more than 3 seconds.
- Tap and swirl. After steaming, tap the pitcher on the counter to pop large bubbles, then swirl it to combine the foam and liquid. The milk should look like wet paint — glossy and uniform.
Pro tip: if your milk isn’t spinning, you’re either too low in the pitcher or too close to the center. Move the wand tip toward the side wall, and make sure you have enough milk. A 12 oz pitcher with only 2 oz of milk won’t create a vortex — it’ll just splash.
Troubleshooting: Why Your Milk Isn’t Spinning
Here are the three most common problems and how to fix them.
Problem 1: Large bubbles and a foamy mess. This means you stretched the milk too long. You incorporated too much air. Fix it by keeping the tip submerged for less time — aim for 2-3 seconds of stretching, not 5-6.
Problem 2: Milk is hot but has no foam. You didn’t stretch at all. The tip was too deep, so no air got in. Lower the pitcher slightly so the tip breaks the surface, and listen for the hissing sound.
Problem 3: Milk spins but doesn’t heat evenly. Your pitcher is too wide, or the steam wand is too short. If the wand can’t reach deep enough, the bottom of the milk stays cold. Try a taller, narrower pitcher like the Adorever 12 oz — its tapered shape helps direct the steam downward.
If you’re still having trouble, check your steam wand pressure. A weak wand (under 1 bar) won’t create a strong vortex in a large pitcher. In that case, use a smaller pitcher to compensate. This is a common issue with cheaper espresso machines, and it’s a good reason to start with an 8.5 oz or 12 oz pitcher rather than a 20 oz one.
Cleaning and Care: Extending the Life of Your Pitcher
Milk residue is the enemy. If you leave milk to dry in the pitcher, it forms a film that’s hard to remove and can affect the taste of your next batch. Rinse the pitcher immediately after use with hot water. That’s usually enough.
For a deeper clean, use a mild detergent and a soft sponge. Avoid abrasive scrubbers — they’ll scratch the stainless steel, and those scratches become breeding grounds for bacteria. The Adorever pitcher is dishwasher safe, which is a convenience, but I’ve found that hand washing keeps the chrome finish shinier for longer.
One thing to avoid: putting a cold pitcher directly under hot water. The thermal shock can warp the metal, especially on thinner walls. Let it come to room temperature first. Also, dry the pitcher thoroughly after washing. Water spots on a chrome finish are annoying, and they’re hard to polish out once they bake on.
If you’re also dealing with a clogged or dirty steam wand, check out our guide on steam wand care — it’s a common issue that affects frothing quality just as much as the pitcher does.
Frequently Asked Questions
Does the size of the pitcher affect the milk texture?
Yes, significantly. A larger pitcher with a small amount of milk won’t create a proper vortex because the steam wand can’t reach deep enough relative to the surface. The milk should fill the pitcher to one-third to one-half of its capacity. For a 12 oz pitcher, that’s 4-6 oz of milk. If you’re making a cortado with only 3 oz of milk, use an 8.5 oz pitcher instead.
Can I use a regular measuring cup to froth milk?
Technically, yes, but the results will be poor. Measuring cups have wide bases and no spout, so the vortex is weak and you can’t pour latte art. The spout isn’t just for pouring — it also directs the milk stream when you’re creating patterns. A dedicated frothing pitcher is worth the small investment.
What’s the best material for a milk frothing pitcher?
Plain stainless steel, ideally #304 grade. It’s non-reactive, durable, and conducts heat well. Avoid coated or glass pitchers — they either insulate the milk too much or shatter. The Adorever pitcher uses #304 stainless with a chrome finish, which is a good balance of durability and temperature feedback.
How do I clean a milk frothing pitcher?
Rinse it with hot water immediately after use. For a deeper clean, use mild detergent and a soft sponge. Most stainless steel pitchers are dishwasher safe, but hand washing preserves the finish better. Never use abrasive scrubbers, and always dry the pitcher completely to prevent water spots.
Why does my milk scorch on the bottom of the pitcher?
This happens when the steam wand is held in one spot for too long, or when the milk sits at the bottom of the pitcher without moving. The vortex should keep the milk circulating. If it’s not spinning, adjust the wand angle. Also, stop steaming at 140°F — milk burns at around 160°F, and the burnt proteins will ruin the taste and texture.
Final Verdict: Which One Should You Buy?
You don’t need a drawer full of pitchers. You need one that fits your machine and your drink size. Here’s the short version:
- Start with a 12 oz stainless steel pitcher. It’s the most versatile size for home use.
- Choose a round or point-mouth spout if you’re learning latte art. Upgrade to a sharp spout later.
- Look for thin walls (under 1mm) so you can feel the milk temperature.
- Buy a single mid-size pitcher instead of two cheap ones. Consistency matters more than variety.
- If you have a low-pressure steam wand, use a smaller pitcher to compensate.
- Rinse and dry your pitcher after every use. It’ll last for years.
- For most home setups, the Adorever 12 oz is the best balance of cost, durability, and performance. Check the current price on Amazon if you want to see if it fits your budget.
Once you’ve got the pitcher sorted, the next step is making sure your espresso machine is clean. A dirty group head or steam wand will affect your shots and your milk. Take a look at our guide on coffee maker cleaning frequency to keep everything in top shape. And if you’re using a Breville machine, our tips on maintaining the dual boiler will help you avoid common issues.
The right pitcher won’t make you a barista overnight. But it removes the biggest variable that’s holding you back. The milk will spin, the foam will be silky, and your latte art will finally look like something you’d want to post online.
Products related to this article
Sponsored / affiliate links. As an Amazon Associate I earn from qualifying purchases. I may earn additional commission from eligible campaigns.
 HomeBeyond Espresso Coffee Maker 12 Cups, Classic Stovetop Espresso Maker, 600ml / 20oz Coffeemaker for Gas & Ceramic Stovetops (Silver)
 Stainless Steel Moka Pot Pressed Powder Tool for 2 4 6 9 Cup Espresso Coffee Brewer(6 Cups)
 Long Handle Wooden Spoon For Mixing Coffee Tea Jam and Bath Salt In Kitchen, Environmentally Friendly Table Spoon, 8.6 Inches,4 Pieces…