You press the button, hear nothing, and stare at a dead hunk of plastic that cost you a decent chunk of change. The milk sits there, lukewarm, and your latte dream evaporates. It happens to everyone eventually. A milk frother is a simple machine, but when it stops responding, the silence feels final.
Most of the time, it isn’t final. The fix is often something you can handle in under ten minutes with zero tools. This guide walks through the actual failure points in order of likelihood, explains why each one happens, and tells you exactly what to check. You’ll know whether to fix it yourself or start shopping for a replacement.

LAVMOND
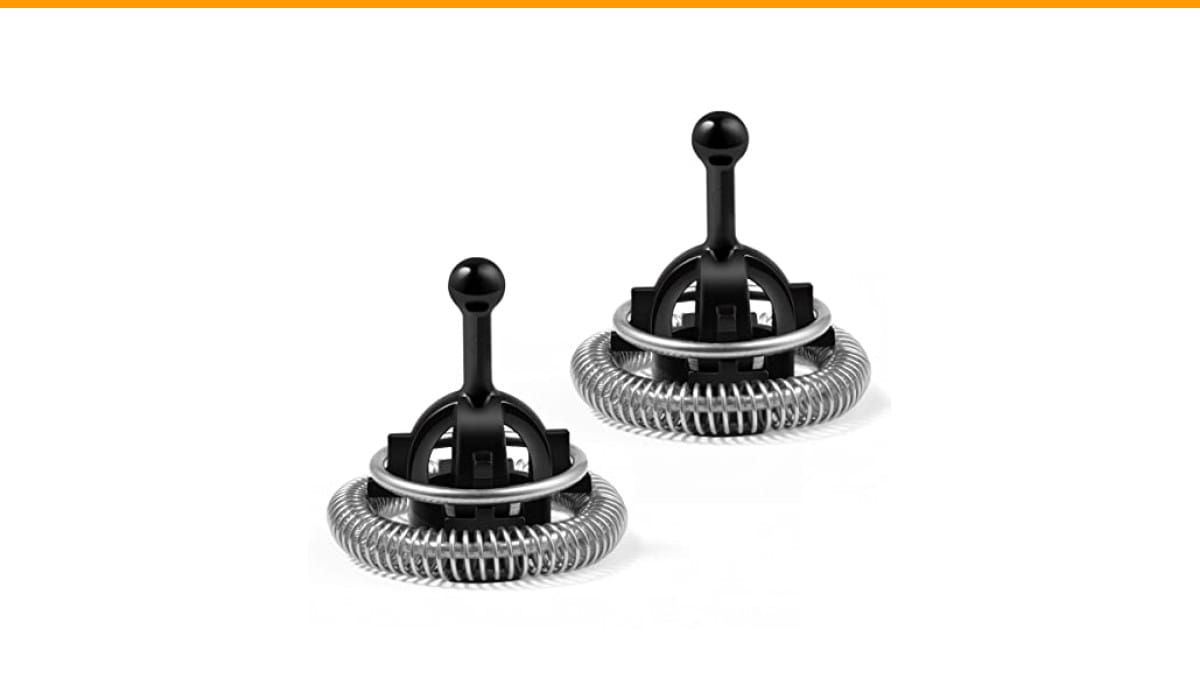
Whisks Compatible with Nespresso Aeroccino 3/4/Plus Milk…
- Compatible with Aeroccino 3/4/Plus Milk Frother Replacement
- Includes 2 Whisks
- Made of rustproof stainless steel 304
As an Amazon Associate I earn from qualifying purchases.
Before diving into the diagnostics, one quick note: if your frother’s motor is fine but the whisk itself is bent, rusted, or worn down, a fresh set of replacement whisks can save you from buying a whole new unit. The LAVMOND two-pack fits Nespresso Aeroccino 3, 4, and Plus models, uses rustproof 304 stainless steel, and runs through the dishwasher without drama. It’s the cheap fix nobody thinks about until the frothing goes weak.
Start With the Obvious: Power and Connections
Check the outlet first. Plug your phone charger into the same socket. If the charger works, the outlet is fine. If it doesn’t, you’ve found your problem — reset the breaker or try another outlet. This sounds too simple, but a dead outlet accounts for a surprising number of service calls.
Next, inspect the base station. Most electric frothers (the Aeroccino, Breville, and Secura models included) use a magnetic connection between the carafe and the base. That base has a power cord, and the cord’s connection to the base can loosen over time, especially if you yank it out by the cord instead of the plug. Wiggle the cord gently where it enters the base. If the frother flickers to life, you’ve got a bad cord or a loose solder joint — that’s a replacement situation.
Also check the bottom of the carafe itself. Those metal contact rings get coated with dried milk film. When the film builds up, it insulates the connection and the frother won’t turn on even though everything looks fine. Wipe the bottom of the carafe and the base contacts with a dry cloth. If there’s stubborn residue, use a cotton swab dipped in white vinegar, then dry thoroughly.
The Magnetic Contacts Are the Real Weak Point
Here’s the part most people miss. The frother carafe doesn’t have a physical on/off switch on the side. The button on the base is a momentary switch that closes a circuit through the magnetic contacts. If the carafe isn’t seated perfectly, or if the magnets have shifted, the circuit stays open and nothing happens.
Look at the bottom of your carafe. You’ll see a small circular plate with two or three metal prongs. Those prongs need to align with the corresponding sockets on the base. If the carafe has been dropped, that plate can rotate slightly out of position. Rotate the carafe while it sits on the base and press the button — sometimes you’ll hit the sweet spot where the contacts align.
Magnet strength also degrades. Older units have weaker magnets that don’t pull the carafe down firmly enough to make solid contact. If your frother is more than three years old and the issue is intermittent, this is a strong suspect. You can test it by pressing down on the carafe while pressing the power button. If it starts, the magnet isn’t holding the carafe firmly enough.
One more thing: the whisk itself. If the whisk is missing or not inserted all the way, many frothers (especially the Aeroccino line) refuse to start. There’s a safety interlock that prevents the motor from running without the whisk seated properly. Pull the whisk out, reinsert it with a firm push, and make sure it clicks or sits flush.
If you find the whisk is bent or stripped at the top where it meets the drive shaft, that’s another reason the motor won’t engage. A bent whisk can jam the drive mechanism. The LAVMOND replacement whisks we mentioned earlier solve exactly this — they’re made of stainless steel so they’re less prone to bending than the stock plastic-hub versions, and the two-pack means you have a spare when one wears out.
Internal Failures: When It’s Not Your Fault
If the contacts are clean, the whisk is seated, and the base has power, the problem lives inside the unit. The most common internal failure is a blown thermal fuse. These fuses are rated to trip at a specific temperature — usually around 150°C to 170°C — and they’re there to prevent overheating. If the frother ran dry or was left on for a long time, the fuse blows and cuts power permanently.
The thermal fuse is a tiny cylindrical component soldered onto the circuit board. Testing it requires a multimeter. If you’re comfortable opening the base (unscrew the bottom, usually four Phillips screws), you can check for continuity across the fuse. No continuity means it’s blown. Replacing it is a $2 part and a 20-minute solder job, but only worth doing if you’re handy. For everyone else, a blown fuse means the unit is done.
The other internal culprit is the motor itself. If you hear a faint hum when you press the button but the whisk doesn’t spin, the motor is seized. This often happens when milk residue gets past the seal and into the motor shaft. The residue dries, hardens, and locks the rotor. Sometimes you can free it by applying a drop of food-grade lubricant to the shaft, but that’s a temporary fix. A seized motor is a replacement scenario.
Comparing Repair vs. Replace vs. Upgrade
Not every dead frother deserves the same response. Here’s a practical breakdown of what to do based on what you find.
| Diagnosis | Time to Fix | Cost | Best Move |
|---|---|---|---|
| Dead outlet or loose cord | 2 minutes | $0 | Try another outlet; replace cord if damaged |
| Dirty contact rings | 5 minutes | $0 | Wipe with vinegar, dry, retry |
| Misaligned carafe or weak magnet | 5 minutes | $0 | Rotate carafe to find alignment; replace if old |
| Whisk missing, bent, or stripped | 10 minutes | $10–$15 | Replace with a two-pack of stainless whisks |
| Blown thermal fuse | 20 minutes if handy | $2 part | Solder new fuse, or replace unit |
| Seized motor | N/A | N/A | Replace the frother |
That middle row is where most people waste money. A whisk replacement costs a fraction of a new frother, and it’s a five-minute swap. I’ve seen people throw away perfectly good Aeroccino units because they didn’t realize the whisk was the problem.
If you do need to replace the whole unit, skip the cheapest models. The $30 frothers tend to have weak magnets and plastic gears that fail within a year. A mid-range unit with a stainless steel whisk shaft and a solid base will last three to five years with regular use.
Prevention: Keep It Running Longer
The single best habit is rinsing the carafe immediately after use. Dried milk is the enemy of everything — it coats the contacts, gums up the whisk hub, and eventually seeps into the motor. Thirty seconds of rinsing under hot tap water prevents 80% of the failures described above.
Don’t submerge the base. Ever. The base contains the motor and the circuit board. Wipe it with a damp cloth. If milk spills onto the base, unplug it immediately, wipe it dry, and let it sit for an hour before using it again.
Use fresh, cold milk. Warm milk froths worse and leaves more residue. Whole milk and barista blends produce the best texture, but they also leave more film on the contacts. If you use milk with high fat content, clean the bottom of the carafe every few uses, not just when it stops working.
Finally, don’t run the frother empty. The dry run is what blows thermal fuses. If you’re heating milk, make sure there’s at least a third of a cup in the carafe. That’s the minimum volume most units need to circulate properly without overheating.
Common Questions, Straight Answers
Why does my frother work sometimes but not always?
Intermittent operation almost always points to a contact issue. The magnetic connection between carafe and base isn’t solid. Clean both surfaces, check the whisk is seated, and press down gently on the carafe while hitting the button. If that fixes it, the magnet is weak and the unit is nearing the end of its life.
Can I use a multimeter to test my frother?
Yes, if you’re comfortable opening the base. Set the multimeter to continuity mode and test the power cord first, then the thermal fuse, then the motor terminals. No continuity across the fuse means it’s blown. No continuity across the motor means the motor windings are open — that’s a dead motor.
Is it safe to open the base of my frother?
It’s safe as long as it’s unplugged. Wait five minutes after unplugging to let the capacitors discharge. The base contains no high-voltage components that hold a charge, but it’s good practice. If you’re not comfortable with a screwdriver, skip this and call the manufacturer or buy a new unit.
Will a replacement whisk fix a frother that won’t turn on?
Only if the whisk was the issue. A missing or bent whisk can trigger the safety interlock, which prevents the motor from starting. If the whisk is present and seated but the frother is still dead, the problem is elsewhere. But a bent whisk can also jam the drive shaft, which can burn out the motor — so inspect it carefully.
How long should a milk frother last?
With weekly use and proper cleaning, expect three to five years. The most common failure point is the magnetic contact, followed by the whisk hub. If you replace the whisk when it wears out, the motor and heating element usually outlast everything else. Units that fail within a year are almost always subjected to dry runs or full submersion of the base.
What to Do Right Now
- Check the outlet with another device before touching the frother.
- Wipe the bottom of the carafe and the base contacts with vinegar.
- Rotate the carafe on the base to find the magnetic sweet spot.
- Pull the whisk out and reinsert it firmly to reset the interlock.
- Inspect the whisk for bends or stripped plastic — replace it if damaged.
- If the thermal fuse is blown, decide if a $2 part is worth your time.
- When in doubt, replace the unit rather than risk a fire hazard from a shorted motor.
Dead frothers are rarely dead. Most are just dirty, misaligned, or missing a proper whisk. Work through the list in order and you’ll likely have hot foam in under ten minutes. And if you do need parts, grab a replacement whisk set before you shell out for a whole new machine — it’s the smarter first move.
Products related to this article
Sponsored / affiliate links. As an Amazon Associate I earn from qualifying purchases. I may earn additional commission from eligible campaigns.
 Quick Heating Cup Warmer, Three Temperature Settings, Splashproof and Portable, for Coffee, Milk, Lightweight ABS Material
 Coffee Espresso Machine Handle Replacement Parts, Cafe Bracket Handle for Lidl Silvercrest CM4621 CM4218 KF5002 KF500S Barista (for 51mm Portafilter Basket - Not included)
 Supvision 4 Cup Thickened Moka Pot 304 Stainless Steel 200ml