Check the main systems in order: power, water flow, heat, and setup; if a brewer still fails after a reset and descaling, consider replacing it rather than chasing individual parts. I have seen people guess at the cause, lose hours, ruin coffee, and miss a leak or heater fault that keeps coming back. This guide gives a symptom-first path for drip, single-serve, and combo machines, plus the fast checks that separate cleaning jobs from simple fixes and end-of-life failures.
Use this diagnostic order before you try a fix



Match the symptom before naming the cause
Coffee maker troubleshooting moves faster when you group the symptom first. A dead machine, a machine that powers up but will not brew, a slow brewer, a leaking brewer, and a bad-tasting brewer point to different systems.
PureHQ identifies four core functions: power, water flow, heat, and a clear brew path. That order matters because one machine can look “failed” when the real problem is a tank sensor, lid switch, or blocked sprayhead, not a heater or control board.
Separate power faults from lockouts and setup errors
Start outside the machine. Plug in a lamp or electric kettle and confirm the outlet actually runs it. Reset the GFCI if the brewer is on a bathroom, garage, kitchen island, or basement circuit. Confirm the plug is fully seated and inspect the cord for cuts, flattened sections, or heat damage.
Only then move to lockouts: carafe missing, basket mis-seated, lid not latched, water tank not aligned, or a control glitch that clears after the machine is unplugged for 10 minutes. PureHQ recommends that unplug-and-wait reset for minor control faults and safety lockouts.
How drip, single-serve, and combo brewers fail differently
Drip brewers most often show trouble through overflow, slow flow, weak extraction, warming plate issues, or leaks around the basket and carafe path.
Single-serve brewers fail more often at the reservoir sensor, pod needle, reusable pod blockage, brew-size mismatch, and maintenance-cycle lockouts. CoffeeMakerUSA notes that a brewer that stops brewing may have reservoir, scale, needle, air, or maintenance-cycle issues.
Combo brewers add another variable: the side that still works can throw you off. If the carafe side brews but the pod side does not, a shared power fault is less likely. If both sides quit, start again at the outlet, control board, and common heater path.
Why won’t my coffee maker turn on?
If a coffee maker will not turn on, the highest-confidence causes are an unpowered outlet, tripped GFCI, loose plug, damaged cord, or a control lockout. Check wall power before touching the machine, then look for reset behavior and indicator lights. Repeated outlet trips are a sign to stop DIY electrical work.
Test the outlet, GFCI, and circuit first
Plug a lamp or kettle into the same outlet. If there is no power, reset the breaker or GFCI and test again. Kitchen circuits already carrying a toaster oven, kettle, or microwave can trip when a brewer starts heating.
A dedicated circuit helps with brewers that trip shared countertop circuits. That is often a household power issue, not a failed coffee maker.
Check plug seating and inspect the power cord
Push the plug in fully. It sounds basic, but partial seating can arc and cause intermittent power. Then inspect the full cord length with a flashlight.
Stop if the cord is burned, split, stiff from heat, or darkened near the plug. That calls for replacement or service, not cleaning.
Look for reset behavior, indicator lights, and control lockouts
If the outlet is live and the cord is intact, unplug the brewer for 10 minutes. That can clear a frozen display, lid-switch lockout, or minor board error. Then reinstall the reservoir, basket, and carafe carefully before the next power-up.
No lights at all after those checks usually point to an internal power path failure, thermal protection event, or dead control board. At that point, opening panels makes sense only for people who know how to work safely around electrical appliances. CoffeeMakerUSA is clear on the first step: disconnect the brewer from power before you remove any panel or cover.
When repeated outlet trips point to an electrical stop point
If the brewer trips the outlet or breaker more than once after moving to a known-good outlet, stop. Internal heater faults, moisture inside the base, and damaged wiring can all cause repeated trips.
A multimeter can help only after the machine is unplugged and only if the user understands continuity and safe isolation. For most home owners, repeated trips mean replacement is smarter than chasing parts.
Why is my coffee maker not brewing or stopping mid-cycle?
A brewer that powers on but does not brew usually has a setup fault, interlock issue, reservoir misalignment, or water-path blockage before it has a failed pump or board. Reseat removable parts first, then inspect the brew path. Mid-cycle stopping often separates clog and sensor problems from total electrical failures.
Reseat the reservoir and confirm sensor alignment
PureHQ says many machine failures come from a tripped outlet, misaligned reservoir, scale-clogged water path, or blocked reusable pod. Reservoir seating belongs near the top of the list because many brewers will power on while refusing to move water if the tank does not press its valve or sensor correctly.
Lift the tank straight off, check that there is enough water for the selected brew size, then wipe the tank base, outlet valve area, and any sensor contact points before setting it back in squarely without forcing it.
Check lid, basket, and carafe interlocks that block brewing
Many home brewers will not start with an open lid, mis-seated basket, or missing carafe. Some show a blinking light. Others simply do nothing.
Check the basket rails, carafe lid, pod holder, and drip-stop mechanism. A basket that sits slightly high can keep an interlock from closing and can also send water to the wrong place once brewing starts.
Inspect the brew path for sprayhead, needle, tube, or valve clogs
If setup is correct, move to the brew path. Bunn groups troubleshooting into cleaning, descaling, overflow/leaks, heat, weak beverage, spitting, and noises/vibrations, which is a good reminder that blockages show up in several ways, not one.
On drip brewers, check the sprayhead holes. The deliming tool description says the pointed end cleans sprayhead holes, and the deliming spring is inserted into the sprayhead tube. On single-serve brewers, inspect the pod needle and any reusable pod for packed grounds.
Use a soft brush, towel, and toothpick or deliming tool. Do not gouge plastic valves or force metal tools into narrow passages.
Tell the difference between a blockage and a failed heating stage
A blocked brewer usually makes some effort: humming, sputtering, drips, or partial output. A failed heating stage often gives a cold tank of water back, a silent brew attempt, or a machine that starts and then shuts down on thermal protection.
Scale is likely when flow has slowed over time, spray is uneven, or rattling has increased. Scale is less likely when the machine stopped overnight after a move, tank cleaning, basket wash, or outlet reset. In those cases, check setup and interlocks again before descaling.
Why is my coffee maker taking so long, overflowing, or making weak coffee?
Slow brewing, basket overflow, and weak coffee often come from restricted flow rather than one single fault. Scale can narrow the water path without stopping it, while too-fine grounds, overfilled filters, wrong brew volume, and poor basket seating can send water over the top or weaken extraction.
How scale slows flow without fully stopping the machine
Descaling matters when the brewer still works but takes longer, spits, rattles, or leaves part of the reservoir behind. WebstaurantStore recommends descaling monthly, especially where hard water builds mineral deposits faster.
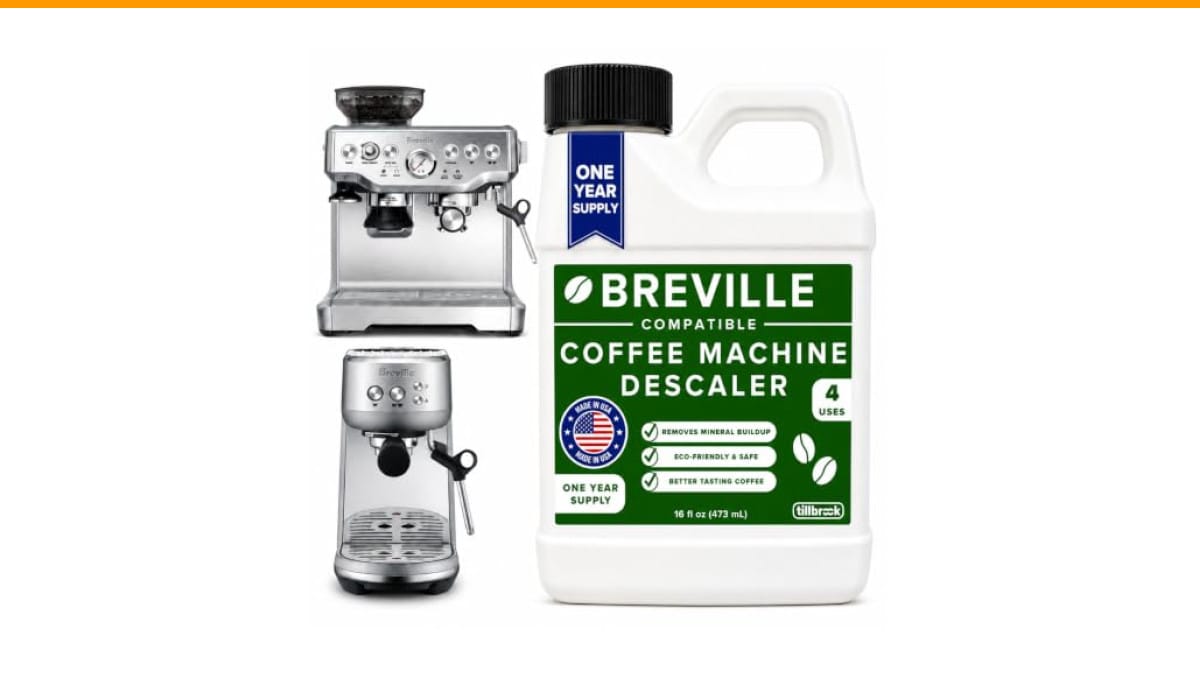
Use a manufacturer-approved descaler when the manual calls for one. If vinegar is acceptable for the model, WebstaurantStore gives a descale mix of 2 parts distilled water to 1 part white vinegar. Follow with full rinse cycles until odor and taste are gone.
Grind size, dose, and filter choice that restrict brewing
Too-fine coffee slows water and can make a pump or heater work harder than necessary. Reusable filters often flow slower than paper filters when they hold fine sediment or are packed too full.
If coffee is weak, the problem may be the opposite: too coarse a grind, too little coffee, bypassed water from a collapsed paper filter, or a brew-size setting larger than the dose can support.
Basket seating, paper filter fit, and brew-volume mismatches
Use the right paper filter shape and size for the basket. A filter folded badly at the seam can block the drip path and force an overflow. Empty the carafe before brewing. Check that the basket is fully seated and the brew-volume setting matches the actual water added.
Overflow prevention is part setup, part flow. If the basket is overfilled with grounds, even a clean machine can flood from the top.
When reusable filters or too-fine grounds cause overflow
Overflow from above usually points to the basket system, not a bottom leak. Remove the reusable filter and try one brew with the proper paper filter and a slightly coarser grind. If the overflow disappears, the machine likely does not need parts.
This is where many owners buy valves or pumps they never needed. Coffee maker troubleshooting should move from the easiest checks to the more invasive ones, as PureHQ recommends.
Why does my coffee maker leak from the bottom or around the basket?
Leaks have to be sorted by location first. Water from the basket area usually comes from overflow, poor basket seating, or lid and carafe alignment. Water from the base points more toward reservoir valve issues, loose tubes, failed seals, or cracks that cleaning will not fix.
Top-side overflow versus true bottom leaks
Dry the machine completely with a towel, then run a short water-only cycle and watch closely for where water appears first. If water appears first at the basket rim or around the lid, diagnose overflow. If the counter gets wet from the base while the top stays orderly, diagnose an internal or tank-to-base leak.
Reservoir seating, overfill, and valve or hose clues
Remove and reseat the water tank. Check for debris around the tank outlet valve. Look for a warped tank, drips at the tank seat, or water that appears before brewing begins.
A leak that starts only once heating begins often points to an internal hose, clamp, or fitting. A leak that starts as soon as the tank is installed points more toward the reservoir valve area.
Carafe, basket, and lid alignment problems that mimic leaks
Misplaced lids can redirect steam and drip water down the front. A carafe that is not fully centered can hold the drip-stop partly closed, making the basket flood and spill. That spill then runs into the base and looks like a bottom leak.
Always separate these by watching the first place the water appears. That first clue tells you more than the final puddle.
Signs a seal, tube, or internal fitting has moved past DIY
Stop if the leak seems to come from inside the base, if there is rust near electrical parts, or if the machine started leaking after being dropped. Those cases often involve hidden tubing, gaskets, or heated joints.
Simple external parts are fair game. Internal wet-electrical faults are not.
Why is my coffee maker brewing cold, half-hot, or burnt-tasting coffee?
Cold or half-hot coffee points first to a heating failure, thermal cutoff event, or thermostat problem. Burnt or stale-tasting coffee often comes from old oils, standing water, or poor rinsing after cleaning. Separate temperature faults from taste faults before blaming the heater or the coffee itself.
Heating element, thermostat, and thermal protection symptoms
If the machine moves water but the brew is cool, the heating system is suspect. Some machines have one heater for brewing and warming; others split those jobs. A brewer that starts strong and then turns cold may be tripping thermal protection mid-cycle.
No heat, no hot plate, and no steam usually mean the common heating path failed. A hot plate that works while brew water stays cool points more toward a brew heater or thermostat issue.
Hot plate faults versus water-heating faults
Test with a fresh water-only cycle. If the carafe fills with cool water yet the plate warms the pot later, the plate circuit works and the brew-heating side does not. If the coffee brews hot enough but cools quickly in the pot, check the warming plate and carafe fit.
When old oils, stale water, or poor rinsing cause bad taste
Bad taste is often maintenance, not failure. WebstaurantStore says cleaning should be done two to three times per week, and in hard-water areas it recommends cleaning daily if possible. Oily residue in the basket, sprayhead, carafe, or pod holder can turn bitter fast.
Descaling also needs rinsing. Vinegar smell or sour carryover after deliming means the machine needs more clean-water cycles before coffee returns.
How to tell taste problems from temperature problems
If the coffee tastes flat and is obviously lukewarm, chase heat first. If it is hot but harsh, stale, metallic, or sour, check oils, old water, filter choice, grind, and post-descale rinsing first.
Temperature faults change extraction and mouthfeel. Residue faults change flavor even when temperature is fine.
The symptom-to-root-cause matrix
How to read the confidence order for each symptom
Start at the left, then move right only when the quick check fails. “Most likely cause” means highest-confidence first pass, not guaranteed final answer. This order is meant to stop wasted disassembly and random part buying.
Quick at-home checks and the tool each one needs
| Symptom | Most likely cause | Quick at-home check | Tool needed | Stop-point for repair replacement |
|---|---|---|---|---|
| No power at all | Dead outlet, GFCI trip, loose plug, bad cord | Test outlet with another appliance, reset GFCI, inspect cord, reseat plug | Flashlight | If cord is damaged or outlet trips again, replace or seek service |
| Lights on, no brew | Reservoir misalignment or interlock not closed | Remove and reseat tank, basket, lid, and carafe | Towel | If display stays locked or sensors fail after reset, replace control-side parts or machine |
| Stops mid-cycle | Scale, blocked needle, air in path, thermal cutoff | Run water-only cycle, inspect sprayhead or needle, descale if flow was slowing before | Soft brush, toothpick or deliming tool | If it repeatedly shuts off hot, stop and replace or service |
| Slow brew | Scale buildup or fine grounds | Try coarser grind, clean sprayhead, descale | Soft brush | If speed does not improve after cleaning and descaling, heater or valve may be failing |
| Overflowing basket | Too-fine grind, wrong filter, overfill, basket mis-seated | Use correct paper filter, reduce dose, reseat basket, empty carafe | Towel | If overflow continues with proper setup and clean basket path, inspect internal flow control or replace |
| Leak from bottom | Tank valve leak, loose hose, internal seal failure | Dry base and watch first drip point during short water-only run | Flashlight, towel | If water reaches the base interior or electrical area, stop DIY |
| Coffee cold or half-hot | Heating element, thermostat, thermal protection | Run water-only cycle and compare brew heat versus hot plate heat | None first; multimeter only if unplugged and qualified | If heater path is dead, replacement often beats repair |
| Bad taste | Old oils, stale water, poor rinse after descale, dirty pod holder | Deep-clean basket, carafe, sprayhead, reservoir; run fresh rinse cycles | Soft brush | If taste remains after full cleaning with fresh beans and water, inspect for hidden residue or replace |
| Loud rattling or sputtering | Scale, air in line, partial blockage | Check reservoir seating, run water-only cycle, descale if noise built up over time | Towel | If noise is sharp, new, and paired with heat loss or leaks, stop and replace |
| Outlet keeps tripping | Internal short, wet base, failing heater | Try one known-good outlet only after machine is dry and cord looks safe | Flashlight | Repeated trips mean stop using it and replace or send for service |
Cleaning, descaling, and the tools worth using
When to use manufacturer-approved descaler and when vinegar is acceptable
Descale for slow flow, sputtering, weak spray, and mineral smell. Use the maker’s descaler if the manual calls for one, especially on machines with sensors that detect maintenance cycles. If vinegar is allowed, the known mix is 2 parts distilled water to 1 part white vinegar.
Do not treat descaling as the answer to every failure. It will not fix a dead outlet, broken cord, cracked tank, or a basket switch that never closes.
Monthly deliming cadence in hard-water homes
WebstaurantStore recommends descaling monthly. Cleaning frequency is separate from descaling frequency: it says cleaning should be done two to three times per week, and in hard-water areas daily if possible.
That schedule matters most in homes where the brewer gets daily use and minerals build quickly in the sprayhead, tube, and valve path.
Post-descaling rinse cycles that remove odor and taste carryover
- Empty the basket, pod holder, and carafe.
- Run the descale solution through as the model allows.
- Let removable parts cool, then clean loosened residue.
- Run repeated fresh-water cycles until vinegar or descaler odor is gone.
- Brew one final water-only cycle and taste the water before making coffee.
Flashlight, soft brush, toothpick or deliming tool, towel, and multimeter
A flashlight helps me spot the first leak point and see sprayhead scale. A soft brush clears oils and loose debris. A toothpick or deliming tool can open clogged sprayhead holes carefully. A towel turns hidden drips into visible evidence.
A multimeter belongs last on the list. It is for unplugged machines only, and only for users who already know safe testing practice.
When to repair, when to replace, and when to stop
Low-cost fixes: cleaning, reseating, filters, and simple external parts
The best value fixes are usually external: reseat the reservoir, correct the paper filter, switch grind size, clean the sprayhead, descale the path, replace a basket, or swap a warped carafe lid. These solve a large share of home brewing faults without opening the base.
Medium-risk fixes: accessible valves, baskets, and removable brew-path parts
If the model has removable brew-path parts, those can be worth replacing when the rest of the machine still heats and controls normally. This makes more sense on higher-end brewers and combo units where one failed removable piece does not mean the whole machine is done.
CoffeeMakerUSA advises using the exact brand, model and symptom for relevant troubleshooting results. That matters here because basket design, sensor location, and reset behavior vary a lot.
Stop points: burning smell, damaged cord, repeated breaker trips, or dead control board
Stop DIY work when there is a burning smell, visible cord damage, repeated breaker or GFCI trips, a dead display after outlet checks and reset, or any sign that water reached internal electrical parts. Those failures can return even after a temporary fix.
If the machine still fails after proper setup checks, a reset, and full cleaning or descaling, replacement is usually the smarter path than buying parts one by one.
Frequently asked questions
what causes a coffee maker to stop working
The main causes are loss of power, reservoir or safety-interlock misalignment, blocked water flow, failed heating parts, and control-board lockouts. The fastest path is to sort the symptom first, then check outlet power, removable-part seating, brew-path blockage, and heat in that order.
why is my coffee maker not working
That phrase covers too many faults by itself, so narrow it to one symptom: dead, no brew, slow brew, overflow, leak, cold coffee, or bad taste. Once the symptom is named, the likely cause group gets much smaller and the wrong fix is easier to avoid.
what causes a coffee maker to stop brewing
A brewer that stops brewing often has a mis-seated reservoir, blocked needle or sprayhead, air in the water path, a maintenance lockout, or a heat-stage shutdown. Reservoir and brew-path checks should come before opening the machine or blaming the control board.
why is my coffee maker taking so long
Slow brewing usually points to scale buildup, partial clogging, too-fine grounds, or a restrictive reusable filter. If the machine got slower over time, descale and clean the spray path. If it became slow right after changing coffee or filters, check grind and filter fit first.
why does my coffee maker leak from the bottom
Bottom leaks usually come from the reservoir valve area, an internal hose, or a failed seal rather than basket overflow. Dry the brewer completely, run a short water-only cycle, and watch the first drip point. If water reaches the base interior near wiring, stop using it.
coffee machine manual vs automatic
For this guide, the focus is automatic home coffee makers, not manual brewers or espresso machines. Manual brewers avoid most electrical and sensor faults, while automatic brewers add heaters, interlocks, control boards, and water-path parts that need a stricter fault-isolation order.
Products related to this article
Sponsored / affiliate links. As an Amazon Associate I earn from qualifying purchases. I may earn additional commission from eligible campaigns.
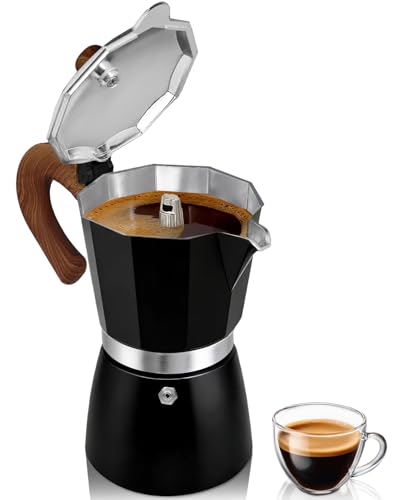 Belly Moka Coffee Maker Stovetop Espresso Maker 9 Cup Aluminum Moka Pot Percolator 15oz 450ml Easy Brewing for Electric Ceramic Stoves Home Camping Italian Cuban Café Classic Black
 Belly Moka Coffee Maker Stovetop Espresso Maker 6 Cup Aluminum Moka Pot Percolator 10oz 300ml Easy Brewing for Electric Ceramic Stoves Home Camping Italian Cuban Café Classic Silver
 HomeBeyond Espresso Coffee Maker 12 Cups, Classic Stovetop Espresso Maker, 600ml / 20oz Coffeemaker for Gas & Ceramic Stovetops (Silver)