You pull a shot, and it takes twice as long as it did last week. The crema looks thin, and the coffee tastes slightly bitter, no matter how fresh the beans are. You’ve cleaned the portafilter and wiped down the steam wand, but the problem persists. That’s the moment you realize the scale inside the boiler is the real culprit.
Limescale builds up silently in machines with a built-in grinder, just like it does in any other espresso machine. The grinder itself doesn’t need descaling, but the boiler, heating element, and brew group do. This guide walks you through the entire process, from choosing the right solution to running the final rinse cycle. You’ll know exactly what to do, how often to do it, and what mistakes to avoid.

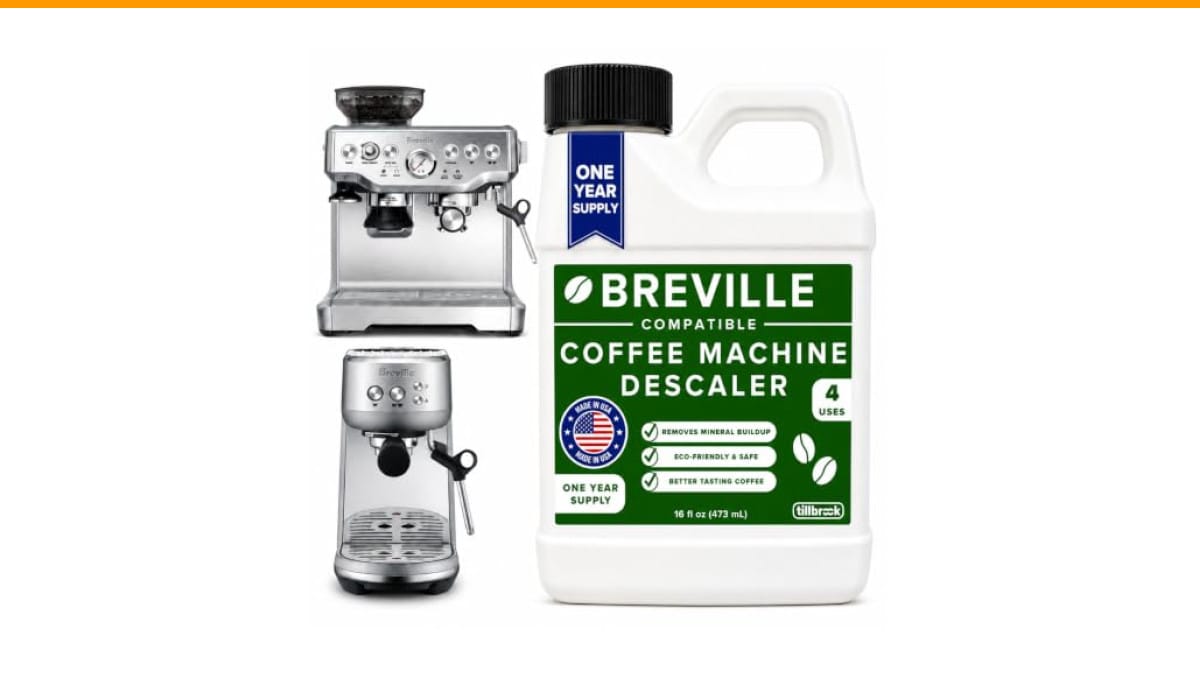
Tillbrook
Breville Espresso Machine Compatible Descaler, 4 Uses,…
- EXCEPTIONAL RESULTS: Introducing Tillbrook Coffee Machine Descaler specifically formulated for Breville—the best choice for removi…
- 1 YEAR SUPPLY: Our concentrated formula is easy to use and provides remarkable value with 4 cleanings per bottle. Simply add 1/2 c…
- SCIENTIFICALLY ENGINEERED: Our advanced descaling solution is carefully crafted with powerful, all-natural ingredients that remove…
As an Amazon Associate I earn from qualifying purchases.
For most home setups, a dedicated descaling solution works better than home remedies. If you need one, the Tillbrook Breville-compatible descaler comes in a 16 oz bottle that handles four cleanings. It’s formulated to break down mineral deposits without leaving an aftertaste, which matters when you’re brewing straight espresso.
Why the Grinder Changes the Descaling Equation
An espresso machine with a built-in grinder isn’t just a machine with a grinder bolted on. The internals are more complex. The grinder sits above the brew group, and coffee grounds can migrate into the chute and around the dosing mechanism. When you descale, you’re running water through the entire system, and that water can push old coffee oils and grounds into places you don’t want them.
That’s why the prep work matters more on these machines. Before you start, remove the bean hopper and give the burrs a quick brush. Use a stiff brush to clear out any loose grounds. If you skip this, you’re essentially washing old coffee dust through your boiler during the descaling cycle. It’s not a disaster, but it’s not ideal.
You also need to think about the water hardness. Machines with grinders are often used daily, sometimes multiple times a day. If your tap water is hard, scale builds up faster. A simple test strip can tell you your water hardness level. If it reads above 150 ppm, consider using filtered water moving forward. That alone will cut down how often you need to descale.
The Complete Descaling Process: Step by Step
Here is the method that works across most consumer machines with grinders, including Breville, DeLonghi, and Gaggia models. Always check your manual first, but this general sequence applies to the vast majority.
- Prep the machine. Remove the hopper, brush out loose grounds, and remove the portafilter and basket. Place a large bowl or tray under the group head to catch the water.
- Mix the solution. Most concentrated descalers require a specific ratio. For a typical 4 oz dose, fill the water tank with the concentrate and then add water up to the max line. Don’t use hot water; cold water helps the solution work more effectively.
- Run a partial cycle. Start a brew cycle but stop it halfway through. Let the machine sit for 15–20 minutes. This gives the acid time to dissolve scale inside the boiler. This soak is the most important step.
- Complete the cycle. Resume the brew cycle and run the rest of the water through the group head. Then run the same volume through the steam wand by turning on the steam function for 10 seconds at a time, letting it cool between bursts.
- Rinse, then rinse again. Empty the tank and fill it with fresh, filtered water. Run two full tanks of water through the group head and steam wand. If you taste any residual sourness in the next shot, run one more rinse cycle. That aftertaste is a sign you didn’t rinse enough.
The whole process takes about 30 minutes, mostly waiting time. The active work is maybe 10 minutes. It’s not hard, but it’s easy to rush the rinse step. Don’t. Residual descaling solution ruins the flavor of your next few shots and can irritate your stomach if you’re sensitive to acids.
Choosing a Descaler: Chemical vs. Natural vs. DIY
You have three main options for descaling: commercial chemical descalers, natural acid-based products (like citric acid), and DIY solutions like vinegar. Each has trade-offs, and the right choice depends on your machine’s warranty and your tolerance for effort.
Commercial descalers are formulated for the specific metals and seals inside espresso machines. They often include corrosion inhibitors that protect brass and aluminum components. The Tillbrook solution falls into this category, and it’s tested across a wide range of machines. It’s the safest option if you’re worried about warranty claims.
Citric acid powder is a solid middle ground. It’s cheap, food-safe, and effective at dissolving limescale. Mix about 2 tablespoons per liter of water. It doesn’t foam like vinegar, which means less mess. The downside is that it doesn’t always remove coffee oil buildup as well as commercial products, so you might need to follow up with a separate cleaning tablet.
Vinegar works in a pinch, but I don’t recommend it for machines with grinders. The acetic acid smell lingers in the internal tubing, and it can take several rinse cycles to fully clear. Plus, vinegar is harsher on rubber seals. Use it only if you have nothing else on hand, and be prepared for a sour-tasting espresso for the next few days.
| Method | Effectiveness | Time Required | Risk to Machine | Best For |
|---|---|---|---|---|
| Commercial descaler | High – removes scale and oils | 30 minutes | Low – includes corrosion inhibitors | Daily use machines, warranty protection |
| Citric acid powder | High on scale, moderate on oils | 30 minutes | Moderate – can be harsh on seals if overused | Budget-conscious users with soft water |
| White vinegar | Moderate – slower action | 45–60 minutes | High – can degrade rubber seals | Emergency descaling only |
Whichever you pick, never mix different descaling agents. Stick with one method for the entire cycle.
How Often Should You Actually Descale?
The standard advice is every 3–4 months, but that’s a rough average. The real answer depends on your water hardness and how many shots you pull per day. A machine used twice daily with hard water needs descaling every 2 months. A weekend-only machine with soft water can go 6 months.
Here are the signs you’re overdue, regardless of the calendar:
- Shot time increases noticeably, even with the same grind setting.
- The steam wand produces weak, sputtering steam.
- You hear a low rumbling sound during the brew cycle.
- The machine’s error message appears, indicating a blocked flow.
If you’re tracking your descaling schedule, mark it on a calendar or set a phone reminder. I’ve found that most people forget until the machine starts acting up. That’s the worst time to descale because you’re already impatient and more likely to rush the rinse cycle. If you want to extend the time between descaling, use filtered water and clean the grinder burrs monthly. This ties into cleaning your grinder regularly, which keeps the whole system running smoothly.
Common Mistakes That Ruin the Process
People mess up descaling in predictable ways. The most common is skipping the steam wand. Scale builds up in the wand and the internal boiler line just as fast as it does in the group head. If you only run the solution through the group head, you’ll leave scale in the steam path, and it’ll eventually clog the wand.
Another frequent error is using too much descaler. More isn’t better. An overly strong solution can damage the machine’s internal seals and leave a chemical residue that’s hard to rinse out. Follow the mixing instructions on the bottle. If the instructions say 4 oz, use 4 oz.
Finally, don’t run the descaling solution through a dirty grinder. The grinder doesn’t need descaling, and the solution can wash oils from old grounds into the brew chamber. That creates a gummy mess that’s harder to clean than the original scale problem. Always brush out the grinder first. For a deeper clean, check out our guide on deep cleaning your coffee machine for the full routine.
Frequently Asked Questions
Can I descale an espresso machine with a grinder using vinegar?
Yes, but it’s not the best choice. Vinegar’s acetic acid is weaker than commercial descalers, so it takes longer to work. It also leaves a strong smell that can persist through multiple rinse cycles. If you use vinegar, dilute it 1:3 with water and run at least three full rinse cycles afterward. Expect the first few shots to taste slightly off.
Do I need to remove the grinder burrs before descaling?
No. You only need to remove the bean hopper and brush out loose grounds. The burrs themselves are not exposed to the descaling solution, so taking them apart is unnecessary and risks misalignment when you reassemble them.
How do I know if my machine needs descaling vs. just cleaning?
Cleaning removes coffee oils and residue; descaling removes mineral scale. If your shots are slow or the machine is loud, it’s scale. If the coffee tastes bitter or the group head looks dirty, it’s oils. Most machines need both, but on different schedules. Clean every week, descale every few months.
Can I use a descaling tablet instead of a liquid solution?
Yes, tablets work fine. They dissolve in the water tank just like a liquid concentrate. The main difference is that tablets often require hot water to dissolve fully, so read the instructions. Liquid solutions are easier to measure precisely, which is why I prefer them for machines with a grinder where the water path is longer.
What happens if I don’t descale my espresso machine?
Scale builds up on the heating element, making it work harder and less efficiently. Over time, the machine can overheat, the boiler can crack, or the pump can fail. You’ll also notice a steady decline in shot quality. In severe cases, the machine stops working entirely and the repair cost often exceeds the price of a new machine. Regular descaling is cheap insurance. If you’re dealing with a machine that’s already making noise, see our troubleshooting guide for loud espresso machine issues.
What to Do After Descaling
Once the rinse cycles are done, dry the steam wand and wipe down the group head. Run a blank shot of plain water to confirm there’s no residual solution. Then pull a real shot and taste it. If it tastes clean and the shot time is back to normal, you’re done.
Here are the habits that keep scale from building up fast:
- Use filtered water in the tank, not straight tap water.
- Empty and refill the tank daily if you use the machine often.
- Run a water-only cycle through the group head at the end of each day.
- Brush the grinder burrs weekly to prevent oil buildup.
- Track your descaling date on a calendar or app.
- Buy a descaler in bulk so you always have one on hand when the time comes.
- Check your machine’s manual for specific descaling instructions, especially if it has a dedicated descaling mode.
The bottom line is simple: descaling isn’t glamorous, but it’s the single most important maintenance task for an espresso machine with a grinder. Do it on schedule, rinse thoroughly, and your machine will deliver consistent shots for years. If you’re buying a new machine or upgrading, consider how easy it is to access the water tank and run a descale cycle. That convenience matters more than you’d think.
Products related to this article
Sponsored / affiliate links. As an Amazon Associate I earn from qualifying purchases. I may earn additional commission from eligible campaigns.
 Coffee Espresso Machine Handle Replacement Parts, Cafe Bracket Handle for Lidl Silvercrest CM4621 CM4218 KF5002 KF500S Barista (for 51mm Portafilter Basket - Not included)
 6 lb Citric Acid Powder Food Grade, Citric Acid Crystals, 100% Pure
 Belly Moka Coffee Maker Stovetop Espresso Maker 9 Cup Aluminum Moka Pot Percolator 15oz 450ml Easy Brewing for Electric Ceramic Stoves Home Camping Italian Cuban Café Classic Black