You’ve measured the water, weighed the beans, and waited 18 hours. Then you take a sip and it tastes like burnt toast soaked in dirt. Or worse, it comes out weak and sour. The culprit isn’t your brewing time or your water quality. It’s the grind size.
Most guides just tell you to go coarse and leave it at that. That’s lazy advice. The best grind size for cold brew coffee maker setups depends on your filter type, your brewer, and the flavor profile you actually want. This guide walks through the exact settings, the science behind the first few minutes of extraction, and a practical test you can run in five minutes to calibrate your grinder.

QHH
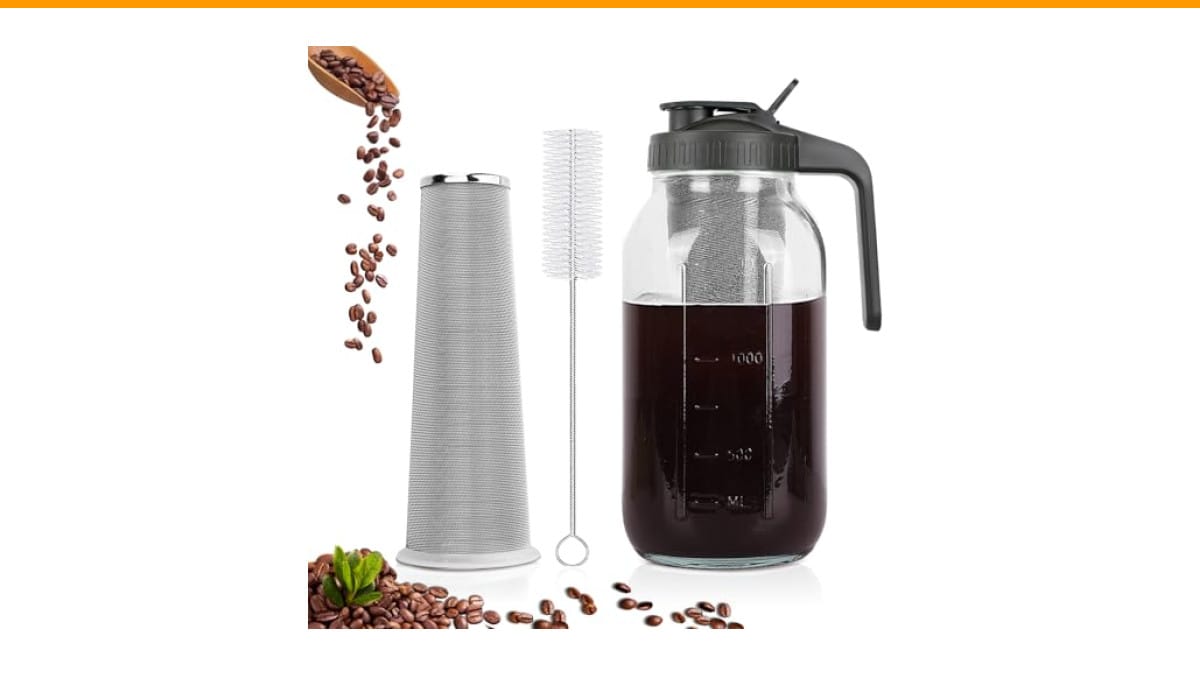
QHH Cold Brew Coffee Maker, 64 oz…
- 【⚠️ Important Usage Warning】: Do not pour boiling water directly into the container; the maximum safe operating temperature is 60°…
- 【What You Will Get】:1 Pcs / 64 oz mason jar pitcher with pour spout lid, 1 stainless stell filter, 1 cleaning brush. Large capacit…
- 【High Quality Material】: The glass pitcher with lid is crafted with heavy duty, food grade soda lime glass and premium plastic lid…
As an Amazon Associate I earn from qualifying purchases.
You’ll leave with a clear fix for every common cold brew failure, whether you’re using a $20 mason jar or a fancy immersion brewer.
If you are starting from scratch, a dedicated pitcher makes the process simpler. The QHH Cold Brew Coffee Maker comes with a 64 oz mason jar and a 160-micron stainless steel filter. That specific micron rating means it catches more fines than a standard mesh, which gives you a cleaner cup without needing paper filters.
The Goldilocks Zone for Cold Brew Grind (And Why It’s Not Just Coarse)
Cold brew is an immersion brewing method. The coffee sits in water for 12 to 24 hours. Because the contact time is so long, you need big particles to slow down extraction. But not all coarse grinds are equal.
Think of a coarse grind as a range, not a single setting. On a scale of 1 to 10, with 10 being the biggest chunks, cold brew usually sits between 7 and 9. That’s roughly the texture of raw sugar or kosher salt. It should feel gritty between your fingers, not powdery.
Go too fine, and you’ll over-extract. The water pulls out too many bitter compounds and tannins. Go too coarse, and you’ll under-extract. The water can’t reach the center of the bean particles, leaving you with a sour, weak concentrate.
The real problem is that most people don’t realize how much their specific filter changes the ideal grind. A paper filter can handle slightly finer grounds because it traps the sediment. A metal mesh lets everything through, so you need to go coarser to avoid a muddy cup.
Let’s break down the variables that actually matter.
The 3 Variables That Matter More Than Your Grinder Setting
Time vs. Temperature vs. Particle Size
Your brew time and water temperature work together with particle size. Cold water (around 40°F) extracts slowly. That’s why you steep for so long. If you use room-temperature water (68°F to 72°F), extraction speeds up. You can shorten the steep time to 12 hours instead of 18.
Here’s the trade-off: if you use warmer water, you need a slightly coarser grind. The heat accelerates extraction, so smaller particles will turn bitter faster. If you brew in the fridge, you can go a touch finer because the cold slows everything down.
Most home brewers don’t control temperature precisely. They just toss the jar in the fridge. That’s fine. Just remember that your fridge’s temperature affects the grind. A colder fridge means you can push toward the finer end of the coarse range.
Why Uniformity Beats Coarseness Every Time
Here’s the dirty secret of blade grinders: they produce a mix of boulders and dust. The dust over-extracts and turns bitter. The boulders under-extract and stay sour. You get both problems in the same cup.
A burr grinder crushes beans between two surfaces, producing particles that are roughly the same size. That uniformity matters more than the actual coarseness. You can get away with a slightly finer grind if it’s uniform, because all the particles extract at the same rate.
If you only have a blade grinder, use the pulse method and shake the grinder between pulses. It’s not perfect, but it helps. Or use the no-grinder hack later in this article.
Particle uniformity also affects the mouthfeel. Uneven grounds create a brew that tastes both bitter and sour simultaneously. That’s the worst of both worlds.
So, what does this mean for your specific brewer? Let’s look at the three most common setups.
Grind Size by Brewer: Toddy, Mason Jar, and OXO
Each brewer has a different filter system. That changes the best grind size for cold brew coffee maker you own. Here’s a comparison based on how the filters behave.
| Brewer Type | Filter Material | Ideal Grind Texture | Grinder Setting (Baratza Encore) | Common Failure |
|---|---|---|---|---|
| Toddy (or felt filter) | Felt / Cloth | Very coarse (raw sugar) | 28-32 | Clogged filter, slow drip |
| Mason Jar (metal mesh) | Stainless steel (150-200 micron) | Coarse (kosher salt) | 24-28 | Silty, muddy coffee |
| OXO (paper filter) | Paper | Medium-coarse (sea salt) | 20-24 | Weak, under-extracted brew |
Felt Filters (Toddy) = Your Safety Net
The Toddy system uses a thick felt pad. That felt traps nearly everything, including the fine particles that cause bitterness. Because of that, you have more room for error. You can grind slightly finer and still get a clean cup.
Go with a very coarse grind here. The felt filter restricts flow, so you don’t want powder clogging the bottom. The texture should feel like raw sugar. If your brew takes more than 30 minutes to drip through the felt, your grind is too fine.
Metal Mesh (Mason Jar) = The Precision Zone
Metal mesh filters, like the one in the QHH pitcher mentioned earlier, let fines pass through. That’s why you need to be more careful. The 160-micron weave catches a lot, but it’s not paper.
For metal mesh, aim for a coarse grind that looks like kosher salt. You want to minimize the production of fines. If you see a layer of sludge at the bottom of your jar after brewing, you’re grinding too fine. That sludge is the over-extracted dust that ruins the flavor.
This is where the silt vs. sludge distinction matters. Silt is a thin layer of ultra-fine particles that settles at the bottom. It’s harmless. Sludge is a thick, muddy layer that makes the brew taste gritty and bitter. If you have sludge, go coarser.
Paper Filters (OXO) = The Clean Cup
The OXO brewer uses a paper filter. Paper traps almost all sediment. That gives you a crystal-clear cup, but it also means you can grind finer without wrecking the texture. A medium-coarse grind works well here.
Don’t go too fine, though. Paper filters can clog, and the extraction rate gets too fast. Stick with a texture like sea salt. This lets the water flow through the grounds and the paper without stalling.
Now that you know the settings for each brewer, let’s talk about why your grind causes bitterness in the first place.
The First 10 Minutes Rule: Why Your Grind Causes Bitterness Early
Extraction isn’t linear. The first 10 minutes of steeping pull out the bright, fruity acids and the caffeine. That’s the good stuff. After that, the rate slows down, and the water starts pulling out heavier compounds like tannins and polyphenols.
Here’s the catch: the finer the grind, the faster that first phase happens. If your grind is too fine, all the desirable flavors extract in the first 30 minutes. The remaining 17 hours just pull out bitter plant material.
You can test this yourself. Brew two batches with the same coffee, but one with a medium grind and one with a coarse grind. Taste both after 6 hours. The medium grind will already taste more developed, but it will also be more bitter. The coarse grind will still be a bit flat. That’s the extraction curve in action.
So, the best grind size for cold brew coffee maker setups is the one that keeps the first phase slow enough to last the whole steep. That’s why coarse wins. It staggers the extraction over the full 18 hours.
If you notice bitterness early, your grind is too fine. Don’t shorten the steep time. Fix the grind.
Dialing In by Taste: Fixing Bitter, Sour, Weak, or Silty Brews
Let’s troubleshoot by symptom. Here’s how to diagnose your brew based on what you taste.
- Bitter and dry: Your grind is too fine. The water over-extracted the coffee. Go coarser and keep the same time. If it’s still bitter, reduce the steep time by 2 hours.
- Sour and sharp: Your grind is too coarse, or your steep time is too short. The water couldn’t extract enough. Go finer or steep longer.
- Weak and watery: Your grind is too coarse, or your coffee-to-water ratio is off. Check the ratio first. You need at least 1 part coffee to 8 parts water by weight. If the ratio is fine, grind finer.
- Silty and gritty: Your grind produced too many fines. This is common with blade grinders. Use a burr grinder, or sift your grounds through a fine mesh strainer before brewing.
One thing I’ve noticed testing side by side: most people mistake bitterness for strength. A bitter brew isn’t strong. It’s just over-extracted. A properly extracted cold brew concentrate should taste sweet and chocolatey, with a clean finish.
If you want to fix a silty brew without changing your grinder, you can double-filter it. Pour the finished brew through a paper coffee filter or a clean cloth. It removes the sludge but doesn’t change the flavor.
Real-World Grinder Settings (Baratza, Fellow, Hand Grinders)
Grinder settings vary by brand, so here are some concrete starting points.
- Baratza Encore: Set it between 24 and 28. Start at 26. This is a popular sweet spot. If you’re using a paper filter, try 22.
- Fellow Ode: Set it between 8 and 10 on the dial. The Ode’s burrs are designed for filter coffee, so it produces very few fines. You can go slightly finer than you would with a Baratza.
- Hand grinders (e.g., Hario, 1Zpresso): Look for the coarse setting, usually around 30-35 clicks from zero. Check the manufacturer’s chart for the filter range, then go 5-8 clicks coarser.
These are starting points, not gospel. Your specific beans and water chemistry will shift the ideal setting by a few clicks. Use the calibration test below to dial it in.
If you don’t have a grinder at all, you’re not out of luck.
The No-Grinder Emergency Hack (And How to Make It Work)
You can make cold brew with pre-ground coffee or whole beans and a rolling pin. It won’t be perfect, but it works in a pinch.
For whole beans, put them in a sturdy zip-top bag. Press out the air, seal it, and crush them with a rolling pin or the bottom of a heavy pan. Aim for pieces that are about the size of a peppercorn. You’ll get a lot of dust, so sift the grounds through a fine mesh strainer after crushing.
For pre-ground coffee, buy the coarsest grind you can find. Many grocery store brands offer a French press or percolator grind. That’s close enough. The problem is that pre-ground coffee is usually ground for drip machines, which is too fine for cold brew. You’ll get a bitter, muddy cup.
To fix that, steep for a shorter time. Use 12 hours instead of 18, and use cold water straight from the fridge. The lower temperature slows extraction and reduces bitterness. It’s a compromise, but it beats no coffee at all.
Before you commit a full batch, run this quick test.
The 5-Minute One-Glass Calibration Test
This test takes five minutes and saves you from wasting a pound of coffee on a bad batch.
- Grind a small amount of coffee (about 10 grams) at your chosen setting.
- Spread the grounds on a white plate or paper towel.
- Look at the particle size. They should be uniform, with no visible powder and no large boulders.
- Pinch a few grounds between your fingers. They should feel like coarse sand, not flour.
- Drop the grounds into a glass of cold water. They should sink slowly. If they sink instantly, they are too fine. If they float on top for more than a minute, they are too coarse.
That’s it. If the grounds sink slowly and look uniform, you’re good to go. If not, adjust the grinder and test again. This takes less time than cleaning a clogged filter.
Remember, the best grind size for cold brew coffee maker isn’t a fixed number. It’s a range that shifts with your equipment. Once you find the right spot, write it down. You’ll never have to guess again.
Final Checklist: Your Perfect Cold Brew Grind
Here’s what to remember next time you brew.
- Coarse grind is the rule, but uniformity is the real goal. Use a burr grinder if you can.
- Match your grind to your filter. Felt filters forgive fines. Metal mesh doesn’t. Paper filters handle medium-coarse.
- Watch the first 10 minutes. If your brew is bitter, your grind is too fine, not your steep time too long.
- Use the one-glass test before you commit a full batch. It takes five minutes and saves you a bad brew.
- If you’re stuck with pre-ground coffee, steep for 12 hours in the fridge and expect some silt.
- Clean your grinder regularly. Burrs packed with old coffee oil will produce inconsistent particles. It’s one of the most overlooked maintenance steps.
- When in doubt, err on the coarser side. You can always steep longer, but you can’t un-extract bitterness.
Getting the grind right is the difference between a bitter, muddy mess and a smooth, sweet concentrate that actually tastes like chocolate. It’s worth the extra two minutes of fiddling with your grinder. Your morning iced coffee will thank you.
Products related to this article
Sponsored / affiliate links. As an Amazon Associate I earn from qualifying purchases. I may earn additional commission from eligible campaigns.
 HomeBeyond Espresso Coffee Maker 12 Cups, Classic Stovetop Espresso Maker, 600ml / 20oz Coffeemaker for Gas & Ceramic Stovetops (Silver)
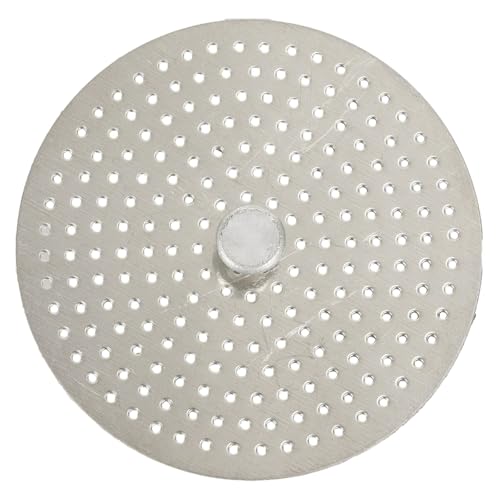 Stainless Steel Moka Pot Coffee Filter Disc for Espresso Brewing, Coffee Maker Replacement Filter Plate for Home Office Coffee Bar Cafe (FOR 4 Cups)
 HouseGem Large Candle Warmer Plate - Coffee Cup Mug Warmer for Desk, Candle Melter, Electric Mug Heater for Beverages, Milk & Tea, Coffee Accessories Ideal Gifts Keep Cup Warm (Black)