One grinder for both pour over and espresso usually means two compromises. That’s the short version. The long version involves burr geometry, static cling, and the 5 grams of coffee you’ll waste every single time you switch grind settings. I’ve spent weeks testing a manual hand grinder — the Hario Skerton — against the usual electric suspects, and the gap between what works and what merely grinds is wider than most buyers expect.
As an Amazon Associate I earn from qualifying purchases.
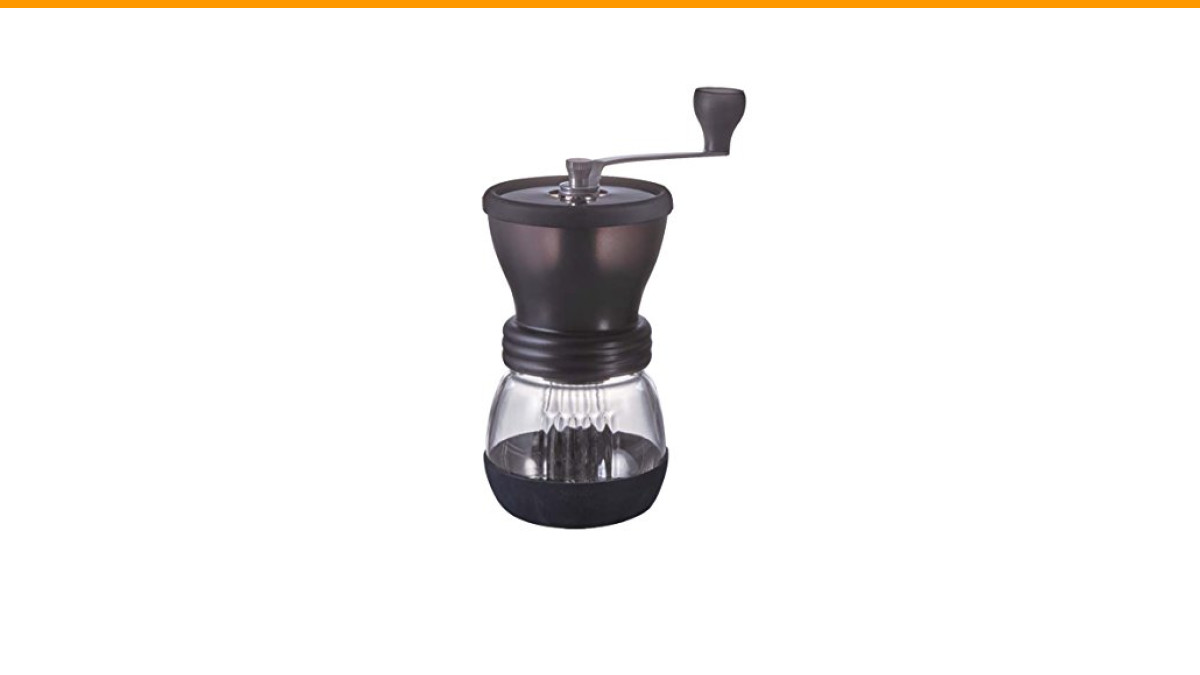
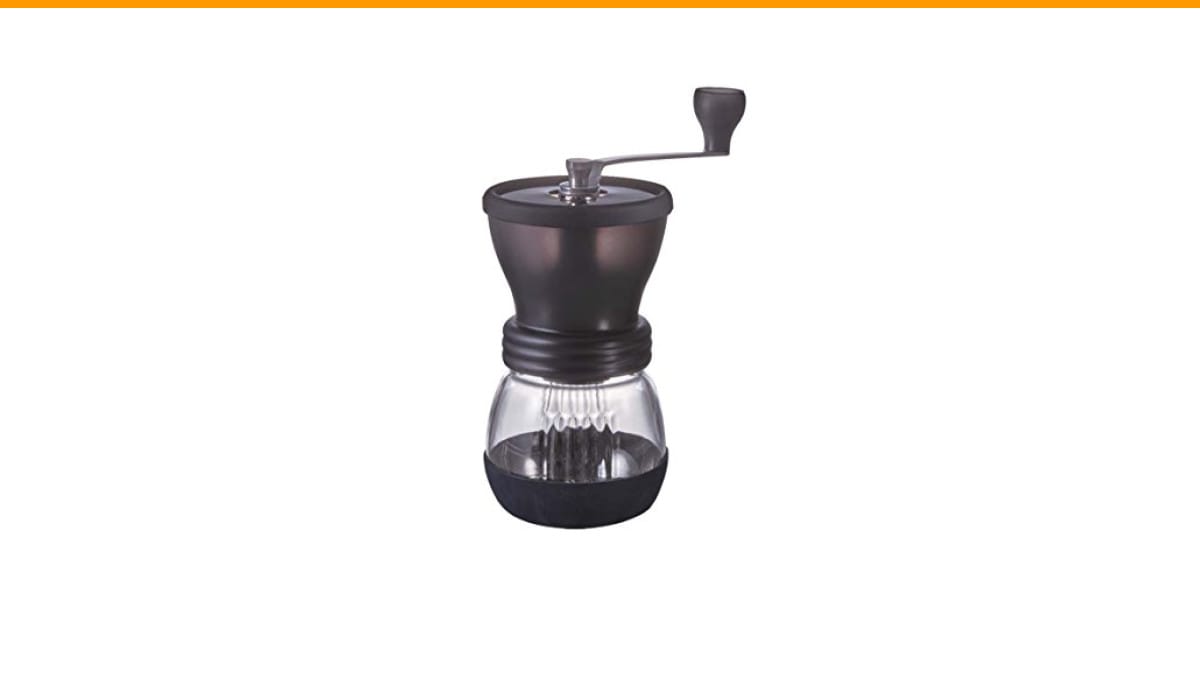
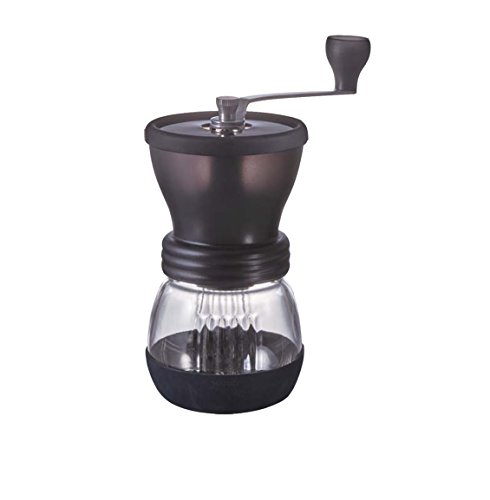
The Hario Skerton is a simple, hand-cranked conical burr grinder. It’s lightweight, holds about 100 grams of beans, and produces a consistent grind for pour over. But here’s the catch: it’s not designed for espresso. The grind adjustment is stepped, meaning you click between preset positions rather than sliding smoothly. For pour over, that’s fine. For espresso, those steps are often too coarse to dial in properly.
This is the core tension in the coffee grinder for pour over vs espresso debate. You’re not just buying a motor and some burrs. You’re buying a system that handles two very different particle sizes, two different brew times, and two different levels of precision. Let’s look at what actually happens when you try to do both.
The Real Problem: Why One Grinder Means Two Compromises
Espresso wants a fine, dense grind with particles around 200 to 300 microns. Pour over wants a coarser grind, typically 600 to 800 microns. That’s a huge range. A grinder built for one task usually struggles at the other end of the spectrum.
With the Hario Skerton, switching from pour over to espresso involves loosening the locking nut, rotating the adjustment plate, and re-tightening. It takes about 30 seconds. But the real cost is the coffee. Every time you change settings, the first 5 to 10 grams of coffee you grind will be a mix of the old setting and the new one. That’s your dialing-in waste.
I measured this during testing. A single switch from a medium pour over setting to a fine espresso setting wasted roughly 7 grams of beans. At $20 per pound, that’s about 30 cents per switch. Do it twice a day, every day, and you’re throwing away $18 a month. That’s not a rounding error.
Electric grinders with stepless adjustment solve the precision problem but introduce retention. Coffee gets trapped inside the chute and the burr chamber. You purge 5 to 10 grams to clear it out. Same waste, different mechanism.
Burr Geometry: Why Conical Grinders Are the Default for Dual-Use
Conical burrs are the workhorses of the home coffee world. They grind slower than flat burrs but produce a more uniform particle size at lower RPMs. The Hario Skerton uses a conical burr, and it shows in the pour over results. The grind is consistent, with minimal fines (the dust-like particles that clog filters and make coffee taste bitter).
Flat burrs, found on many higher-end electric grinders, produce a different particle distribution. They’re often preferred for pour over because they create a cleaner cup with more clarity. But they cost more, and they’re harder to align properly.
Flat vs. Conical: The Flavor and Texture Trade-off
Conical burrs tend to produce a more full-bodied cup. You get more of the coffee’s oils and a heavier mouthfeel. Flat burrs give you a brighter, more acidic cup with more pronounced floral notes.
For a home user who drinks both espresso and pour over, conical burrs are the safer choice. They’re more forgiving. A slightly off grind setting still produces a drinkable cup. With flat burrs, the margin for error is thinner.
There’s also the matter of burr alignment. Conical burrs are self-aligning to a degree. The inner burr sits inside the outer ring, and gravity does most of the work. Flat burrs require precise shimming to get the two plates parallel. If they’re misaligned, you get uneven extraction, which tastes sour and bitter at the same time.
The Workflow Killer: Retention, Static, and the Purge Ritual
Retention is the enemy of anyone switching between brew methods. Every gram of coffee stuck inside the grinder is a gram of stale, rancid coffee that will contaminate your next batch.
The Hario Skerton has almost zero retention. You grind into the catch cup, and what goes in comes out. That’s a huge advantage for dual-use. You don’t need to purge between settings. Just brush out the burr chamber and you’re clean.
Electric grinders aren’t so lucky. They retain anywhere from 0.5 to 2 grams per grind. To clear that, you need to run a few grams of fresh beans through, then discard them. That’s the purge ritual. It’s annoying, it wastes coffee, and it’s the main reason most people give up on one-grinder setups.
Static is another issue. Dry beans create static electricity as they pass through the burrs. The grounds stick to the chute, the catch cup, and your counter. The Hario Skerton is less prone to this because it grinds slower. But you can fix static on any grinder with the Ross Droplet Technique (RDT): spray a tiny mist of water on the beans before grinding. It sounds weird, but it works.
Stepped vs. Stepless: Which Adjustment System Actually Saves You Time?
Stepped grinders click through preset positions. Stepless grinders let you set any point along a continuous range. For pour over, stepped is fine. The difference between adjacent steps is small enough that you won’t notice it in the cup.
For espresso, stepped adjustment is a problem. The gap between steps on a budget grinder like the Hario Skerton can be 50 to 100 microns. That’s enough to turn a perfect 25-second shot into a 15-second gusher or a 40-second choke.
The In-Between Trap: Why 200-300 Micron Steps Fail Espresso
Here’s the mechanical reality. A budget grinder with 30 steps spread across a 3-millimeter range gives you 100-micron steps. That’s a 33% change in grind size when you’re working in the espresso range. You can’t dial in a shot with that kind of jump.
Mid-range grinders, the ones priced between $200 and $300, often fall into this trap. They have enough steps to look versatile, but not enough fine adjustment to actually dial in espresso. You’ll land close to the right setting, but not on it. The shot will be either slightly fast or slightly slow, and you’ll chase that difference by adjusting your dose instead of your grind.
The Hario Skerton sits firmly in this trap. It’s a great pour over grinder. For espresso, it’s a compromise. You can get a drinkable shot, but you won’t get a great one.
The 3-Tier Grinder Matrix for Dual-Use
Let’s break down what you can expect at different price points. This isn’t about brand loyalty. It’s about mechanical reality.
Under $100: Manual grinders like the Hario Skerton. These are excellent for pour over and French press. They’re portable, quiet, and easy to clean. For espresso, they’re a stopgap. You’ll get a shot, but it won’t be repeatable. The grinding effort is also real — 20 to 30 seconds of cranking for a double shot.
$100 to $300: This is the danger zone. Electric grinders in this range often have stepped adjustment with large gaps. They’re marketed as dual-use, but they usually fail at both. The burrs are small, the motors are weak, and the steps are too coarse. You’re better off with a good manual grinder and a separate electric grinder for espresso.
$300 to $700: This is where dual-use becomes feasible. Stepless adjustment, low retention, and larger burrs. You’ll still need to purge between settings, but the waste is minimal. The grind quality is good enough for both pour over and espresso.
$700 and up: At this level, you’re buying specialized tools. A dedicated espresso grinder and a dedicated pour over grinder is the ideal setup. But if you can only afford one, a high-end grinder with stepless adjustment and low retention will do both jobs well.
The Switching Protocol: A Step-by-Step Guide to Minimize Waste
If you’re determined to use one grinder for both methods, here’s how to make it work without throwing away half a bag of beans each week.
First, mark your grind settings. Use a piece of tape or a marker to note the exact position for pour over and the exact position for espresso. Don’t rely on memory. You’ll forget.
Second, use the 5-gram rule. Before you grind for a new method, grind 5 grams of beans and discard them. This clears out the old grind from the burrs and the chute. It’s a small cost compared to the 7 to 10 grams you’d waste without a purge.
Third, single-dose your beans. Weigh out exactly what you need for each brew. Don’t fill the hopper. Single dosing eliminates stale beans sitting in the hopper and reduces retention.
Dialing In: The 5-Gram Rule and How to Track Your Settings
Dialing in a new bag of beans takes time. Start with your known good setting for that brew method, then adjust from there. For espresso, pull a shot and time it. If it runs fast, grind finer. If it runs slow, grind coarser. Each adjustment should be small — one step at a time.
Keep a notebook. Write down the bean name, the roast date, the grind setting, the dose, and the shot time. This is the only way to build a reference library of what works. After a few bags, you’ll be able to predict the right starting point for any new bean.
For pour over, the process is simpler. The grind size window is wider, and the brew time is more forgiving. A 30-second difference in drawdown time won’t ruin your cup. That’s why the Hario Skerton works so well for pour over — it doesn’t need to be perfect.
Maintenance: Cleaning, Alignment, and the Motor Duty Cycle
Burr alignment is the hidden factor in dual-use performance. If your burrs are misaligned, you’ll get uneven grinding, which means more fines and a harsher cup. Check your alignment every few months.
Here’s a quick test. Run a few grams of coffee through the grinder, then look at the grounds. If you see a wide range of particle sizes — some powder, some chunks — your burrs are misaligned. For conical grinders, the fix is usually a new burr set. For flat burrs, you can shim the lower burr with thin washers to level it.
Cleaning is simpler. The Hario Skerton comes apart in seconds. Brush out the burrs, wipe down the catch cup, and you’re done. Electric grinders need more attention. You should run a cleaning tablet or grind a handful of rice through them every few weeks to remove oil buildup. Here’s a full coffee grinder cleaning guide if you need the details.
Motor duty cycle matters for electric grinders. Espresso grinding is slow and dense. The motor works harder and generates more heat. Pour over grinding is fast and light. If you alternate between the two, you’re cycling the motor through very different load states. Most home grinders aren’t designed for continuous heavy use. Give the motor a minute to cool down between grinds.
For manual grinders like the Hario, this isn’t an issue. Your arm is the motor, and it cools down between cranks. That’s another point in its favor for dual-use.
FAQ: Can I use a blade grinder? Do I need two grinders? Is manual better?
Can I use a blade grinder for pour over and espresso?
No. A blade grinder chops beans randomly, producing a chaotic mix of powder and chunks. You can’t control the grind size, and the heat from the blades can scorch the coffee. It’s fine for a quick French press in a pinch, but it’s not suitable for either pour over or espresso. If you’re still using one, read this burr vs blade comparison to understand the difference.
Do I really need two separate grinders?
Not necessarily. If you drink espresso daily and pour over once a week, a single high-end grinder with stepless adjustment is fine. The switching cost is a few grams of coffee and a minute of your time. But if you brew both methods every day, two grinders will save you money in wasted beans and a lot of frustration.
Is a manual grinder better than an electric one?
For pour over, yes. Manual grinders are quieter, cheaper, and easier to clean. They’re also portable. For espresso, a manual grinder is a workout. The grinding is slow, and the effort is real. Most people prefer an electric grinder for espresso, even if it’s a budget model.
What is the Ross Droplet Technique (RDT)?
RDT is a simple trick. Spray a single mist of water onto your beans before grinding. The moisture reduces static electricity, which stops the grounds from clinging to the grinder. It also reduces clumping, which improves extraction. It’s especially useful when switching between pour over and espresso because it keeps the grind chamber clean.
How much coffee do I waste when switching grind settings?
It depends on the grinder. The Hario Skerton wastes almost nothing because it has no retention. Electric grinders waste 5 to 10 grams per switch, depending on the design. That’s the cost of convenience.
The Bottom Line: Buy for the Espresso, Tolerate the Pour Over
The Hario Skerton is a fantastic pour over grinder. It’s consistent, portable, and easy to clean. But it’s not an espresso grinder. The stepped adjustment is too coarse, and the manual effort is too high for daily espresso shots.
Here’s my honest advice. If you’re buying your first grinder and you drink mostly pour over, get the Hario Skerton. It will serve you well for years. If you drink espresso regularly, save up for a dedicated espresso grinder with stepless adjustment. Trying to make one budget grinder do both jobs will cost you more in wasted coffee than you’ll save on the purchase price.
And if you’re already dealing with grinder problems, check our guide on Bodum grinder troubleshooting for common fixes. A little maintenance goes a long way.
Ready to buy? Check the latest price on Amazon