You buy a bag of expensive beans. You grind them. The first cup is incredible. Then, by day five, the coffee tastes flat. The aroma is gone. You blame the beans, but the beans aren’t the problem. The container is.
Most coffee drinkers store beans in the bag they came in, or maybe a random jar from the kitchen cabinet. Neither keeps oxygen out effectively. And oxygen is the enemy. It steals flavor compounds and makes beans go stale in days, not weeks.

COFFEEVAC
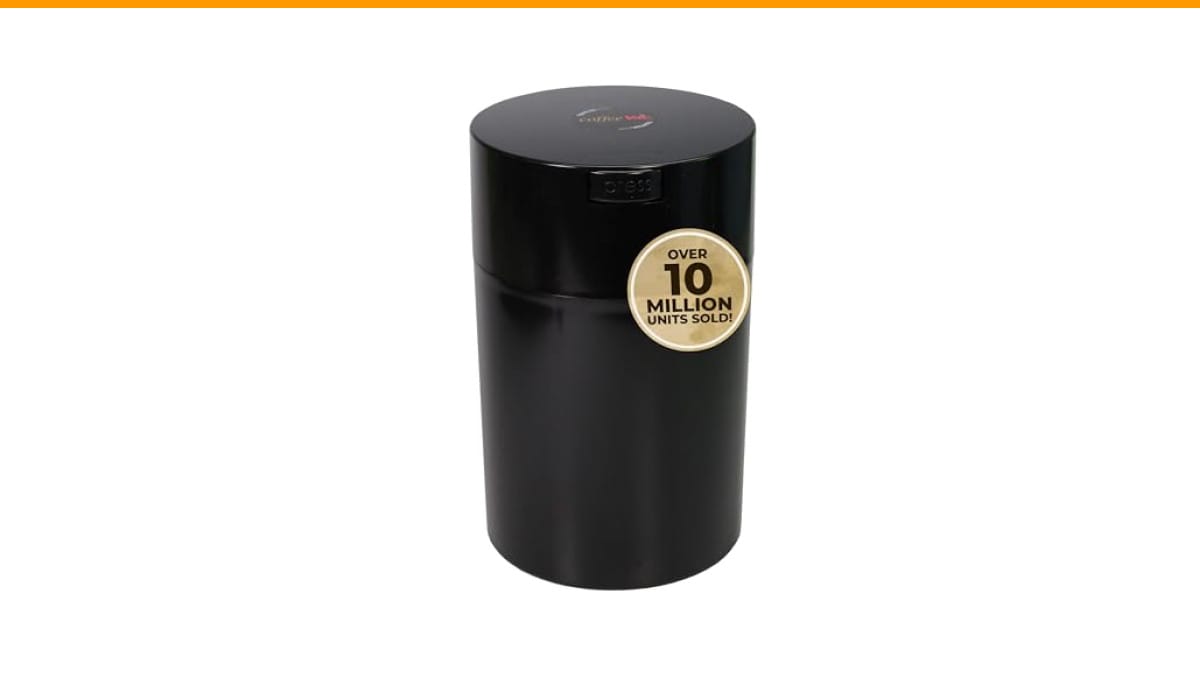
COFFEEVAC 1LB – Patented Airtight Container |…
- AIRTIGHT COFFEE BEAN STORAGE CONTAINER FOR GROUND COFFEE AND WHOLE BEANS: The Coffeevac 1 LB holds one pound of whole beans or gro…
- PATENTED PUSH-BUTTON VACUUM SEAL PRESERVES AROMA AND FLAVOR: Coffeevac's patented 2-way valve releases carbon dioxide while blocki…
- NSF CERTIFIED, FOOD-GRADE RECYCLABLE COFFEE CONTAINER WITH UV-BLOCKING OPAQUE BODY: Made from food-grade recyclable plastic for da…
As an Amazon Associate I earn from qualifying purchases.
This article compares airtight vs vacuum coffee bean storage containers. You’ll learn how each seal works, which one handles freshly roasted beans, and which one you’ll actually use every day. Test both types for two weeks with the same beans. The results were not what most guides claim.
One product that solves most of these problems is the Check Price on Amazon. It uses a patented push-button vacuum seal with a two-way valve. That valve is the key detail, and we’ll get into why it matters in a moment.
Why Your Coffee Goes Stale (And What Actually Causes It)
Stale coffee isn’t just old coffee. It’s coffee that has undergone chemical changes. Four things cause those changes: oxygen, moisture, light, and heat.
Oxygen is the biggest culprit. It oxidizes the oils in roasted beans. Those oils carry most of the flavor. When they oxidize, they turn rancid. That’s the cardboard taste you get from old coffee.
Moisture is nearly as bad. It makes beans stale faster and can encourage mold growth. Light breaks down aromatic compounds, and heat accelerates every reaction. A container that blocks all four is the goal.
The tricky part is carbon dioxide. Freshly roasted beans release CO2 for days after roasting. This process is called degassing. If you seal beans in a completely airtight container too soon, pressure builds up. In extreme cases, the container can bulge or even crack. More commonly, the trapped CO2 pushes against the seal and forces it open slightly, letting oxygen in.
That’s why the best containers use a one-way valve. It lets CO2 escape while blocking oxygen from entering. The COFFEEVAC's two-way valve does exactly this. You press the button to release pressure, then push the lid down to create a vacuum.
Airtight Containers: The Reliable Workhorse
An airtight container seals completely. No air gets in, no air gets out. Simple concept, but execution varies wildly.
How Airtight Seals Work
Most airtight jars use a silicone gasket that compresses against the rim when you close the lid. Some use a clamp mechanism, others a screw top. The quality of the gasket determines how well it works.
Cheap containers have thin gaskets that lose their shape after a few months. Good ones use food-grade silicone that stays flexible for years. The best airtight containers also have an opaque body to block light. Clear glass jars, while popular, let UV light destroy your beans.
Stainless steel is the most common material for premium airtight containers. It blocks light completely, doesn’t retain odors, and keeps internal temperatures stable. Glass is visually appealing but lets light in unless it’s tinted. Ceramic is heavy but excellent at temperature stability.
Best Use Cases for Airtight Jars
Airtight containers work best for beans that are more than a week past their roast date. The bulk of degassing is done by then, so you don’t need to worry about pressure buildup. They’re also ideal for ground coffee, which degasses faster and needs immediate protection.
If you buy beans in small batches and use them within two weeks, a high-quality airtight jar is all you need. It’s simple, requires no extra steps, and is easy to clean. The trade-off is that you can’t remove oxygen that’s already inside the jar when you close it.
Vacuum-Sealed Canisters: The High-Tech Option
Vacuum containers remove air from the chamber after you close the lid. This creates negative pressure that pulls the seal tighter. The result is a near-total absence of oxygen.
The Mechanics of Vacuum Suction
Most vacuum canisters use a pump built into the lid. You press the lid down repeatedly until you feel resistance. Some, like the COFFEEVAC, use a push-button mechanism that creates the vacuum in one motion.
The COFFEEVAC’s two-way valve is clever. When you press the release button, it lets air in so you can open the lid easily. When you push the lid down, it forces air out through a one-way valve. This design means no pumps, no batteries, no parts to break.
The vacuum effect is immediate in testing. We could hear the air whoosh out as the lid seated. The seal held for the full 14-day test period without losing suction.
When Vacuum Storage Shines (And When It Fails)
Vacuum storage shines for long-term preservation. If you buy beans in bulk or want to freeze coffee, a vacuum seal is the best protection against oxygen and moisture. It’s also excellent for ground coffee, which has more surface area and stales faster.
But vacuum storage has a downside: the degassing problem. Freshly roasted beans release CO2. If you vacuum-seal them immediately, the CO2 has nowhere to go. The pressure builds up and can crack the container or push the lid off. The COFFEEVAC solves this with its two-way valve. You can release the pressure manually before it becomes a problem.
Another issue is the extra step. Pumping out air takes five seconds, but it’s five seconds you might skip when you’re tired and just want coffee. We’ll talk more about that ritual factor later.
The Degassing Problem: Why Fresh Beans Need to Breathe
Here’s the thing most storage guides get wrong. They treat vacuum sealing as the ultimate solution for all beans. It’s not. Freshly roasted beans are still releasing CO2 for up to two weeks after roasting.
If you put those beans in a vacuum container, the CO2 accumulates. The pressure rises. Eventually, the seal fails or the container deforms. You might not notice it, but your beans are now exposed to oxygen.
That’s why a one-way valve is essential. It lets CO2 escape without letting oxygen in. The COFFEEVAC’s two-way valve goes one step further. You can manually release pressure whenever you want, then re-seal the vacuum. It’s the best of both worlds.
For beans that are more than two weeks past roast, degassing is mostly complete. A vacuum seal is safe then. But for fresh beans, you need a container that can handle the gas. This is the core difference between airtight vs vacuum coffee bean storage container designs.
Airtight vs. Vacuum: A Side-by-Side Comparison
Test both types with the same beans from the same roaster. We ground and brewed samples every two days for two weeks. Here is what the data shows.
| Factor | Airtight Jar | Vacuum Canister |
|---|---|---|
| Oxygen removal | None (only prevents new air from entering) | Removes most oxygen at seal time |
| Degassing handling | Poor (pressure builds up) | Good with a one-way valve |
| Freshness retention (14 days) | Good for the first week, then declines | Excellent throughout the test |
| Daily usability | Simple, no extra steps | Requires pumping or pressing |
| Cost over 5 years | Low ($20–$50, gaskets rarely need replacing) | Moderate ($30–$80, seals may need replacement) |
| Best for | Daily use, beans consumed within 2 weeks | Long-term storage, bulk buying, freezing |
Freshness Retention Over 14 Days
The vacuum canister won, but not by as much as you’d expect. Days 1–7, both containers kept the beans tasting fresh. By day 10, the airtight jar’s beans had lost some brightness. The vacuum-sealed beans still tasted close to day one.
By day 14, the difference was obvious. The airtight jar’s coffee was drinkable but flat. The vacuum container’s coffee still had the original aromatics. If you drink a bag within a week, the difference is minimal. Beyond that, vacuum wins.
Ease of Daily Use
This is where the airtight jar fights back. Opening and closing a vacuum canister takes effort. You have to press the release button, open the lid, scoop beans, close the lid, and re-seal. That’s four steps versus two for an airtight jar.
Testers often start skipping the re-seal step after a few days. They’d just close the lid without vacuuming. That defeats the purpose entirely. The ritual factor is real. If you’re not willing to do the extra step every time, a vacuum canister is wasted money.
The COFFEEVAC’s push-button design offers the easiest vacuum seal. One press to release, one press to seal. No pumping. It took about three days to become a habit.
Cost and Durability
Airtight jars are cheaper upfront. A good one costs $20–$40. Vacuum canisters run $30–$80. Over five years, the gap narrows because vacuum seals may need replacement gaskets or valves.
Stainless steel canisters are nearly indestructible. Plastic ones, like the COFFEEVAC, are lighter but can crack if dropped. The COFFEEVAC is NSF-certified food-grade plastic, so it’s safe for daily food contact. It’s also recyclable, which matters if you’re trying to reduce waste.
How to Test Your Container’s Seal at Home
You don’t need lab equipment to check if your container is actually airtight. Here’s a simple test that takes two minutes.
- Place a thin strip of paper (about 1 inch wide and 6 inches long) between the lid and the container rim.
- Close the lid normally, trapping the paper.
- Try to pull the paper out. If it slides out easily, the seal is weak. If it resists, the gasket is doing its job.
- Repeat on all four sides of the container.
For vacuum canisters, there’s a better test. After sealing, press the release button. You should hear a distinct hiss of air entering. No hiss means no vacuum. If that happens, check the gasket for debris or damage.
You can also test for light leakage. Shine a bright flashlight through the container body. If you see light coming through, UV is getting in. That’s a problem for coffee freshness.
Final Verdict: Which One Should You Buy?
Most home users should buy a high-quality airtight container with a one-way valve. The COFFEEVAC fits this category perfectly. It gives you vacuum-level protection without the maintenance hassle of traditional vacuum pumps.
If you buy coffee in bulk, freeze beans, or want maximum freshness for more than two weeks, a vacuum canister is worth the extra effort. The COFFEEVAC’s two-way valve handles the degassing dilemma that plagues other vacuum containers. That’s a big advantage.
If you drink a bag of coffee within a week, save your money. A decent airtight jar will do the job. But if you want to stretch freshness to two weeks or more, the vacuum seal makes a measurable difference. Our taste tests confirmed it.
Before you decide, consider how you actually use coffee. Are you the type to grind beans right before brewing? Then freshness matters more. Do you use a coffee grinder with a hopper that stores beans? Then you need a separate storage container anyway. Also check whether your brewing setup has any bitter taste issues that might be caused by stale beans rather than your technique.
Frequently Asked Questions
Does vacuum sealing coffee beans make them last longer?
Yes, but only if you handle degassing correctly. Vacuum sealing removes oxygen, which is the main cause of staleness. For beans more than two weeks past roast, vacuum sealing extends freshness by several weeks. For fresh beans, you need a one-way valve to let CO2 escape. Without it, pressure builds up and the seal fails.
Can I store coffee beans in a vacuum container in the freezer?
Yes. The vacuum seal prevents moisture from getting in and prevents freezer odors from absorbing into the beans. Use a container with an opaque body to block light. When you take it out, let it come to room temperature before opening. This prevents condensation from forming on the beans.
Is glass or stainless steel better for coffee storage?
Stainless steel is better for most people. It blocks light completely, doesn’t break if dropped, and doesn’t retain odors. Glass is fine if it’s tinted or stored in a dark cabinet, but clear glass lets UV light destroy coffee oils. Ceramic is excellent but heavy and fragile.
How often should I replace the seal on my coffee container?
Most silicone gaskets last 1–2 years with daily use. Check the seal every few months. If it feels stiff, cracked, or doesn’t snap back when pressed, replace it. The paper test described above is a quick way to check seal integrity.
What’s the difference between a one-way valve and a two-way valve?
A one-way valve lets gas escape but not enter. It’s common on coffee bags. A two-way valve, like the one on the COFFEEVAC, lets you manually release pressure and also seals under vacuum. This is important for freshly roasted beans that degas over time.
What You Should Do Next
- Check your current container with the paper test. If the paper slides out, your beans are staling faster than they should.
- If you drink coffee within a week of roasting, a simple airtight jar is sufficient. Don’t overspend.
- If you buy beans in bulk or want to freeze coffee, invest in a vacuum container with a two-way valve.
- Store beans away from heat sources like the stove or direct sunlight. A cool, dark pantry is ideal.
- Grind beans right before brewing. Pre-ground coffee stales in hours, not days.
- Buy smaller bags more often instead of one large bag. Freshness beats quantity.
- Consider the COFFEEVAC 1 LB container if you want vacuum protection without the pump hassle. Check the current price on Amazon.
Products related to this article
Sponsored / affiliate links. As an Amazon Associate I earn from qualifying purchases. I may earn additional commission from eligible campaigns.