You fill the boiler, screw on the top, and wait. The coffee starts to rise, gurgles, and you pour a cup that tastes burnt and bitter. Or worse, it comes out weak and sour. The culprit isn’t your beans or your grind — it’s the water temperature.
Most moka pot instructions say to use cold water and stop when you hear gurgling. That’s decent advice, but it ignores the single biggest variable in your cup: how hot the water gets during extraction. This guide gives you exact target temperatures, a simple thermometer method, and a troubleshooting chart so you can dial in your moka pot like a pro. You’ll walk away knowing precisely how to control heat from start to finish.
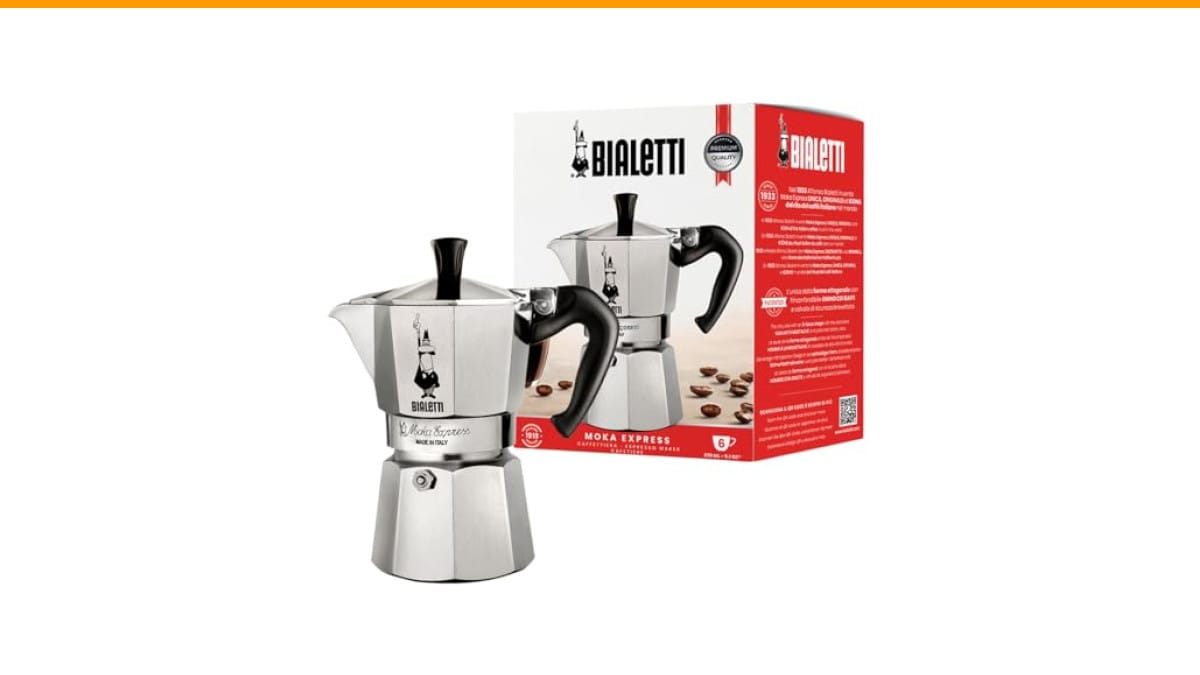
The classic Bialetti Moka Express (the original stovetop model) is a great starting point for this method. Its aluminum construction heats quickly and evenly, and the safety valve gives you a consistent fill line. While you can apply these techniques to any moka pot, the Bialetti’s predictable behavior makes it easier to learn the temperature control steps below.
The Ideal Moka Pot Brewing Temperature (The Short Answer)
Aim for a slurry temperature — the water mixed with coffee in the upper chamber — between 195°F and 205°F (90°C to 96°C). That’s the same range used for espresso. But here’s the catch: the water in the boiler is always hotter than the slurry because it’s under pressure. The boiler water can reach 212°F to 230°F, while the coffee bed sees something cooler.
If you don’t have a thermometer, the practical target is this: the brew should take 25 to 35 seconds to fill the upper chamber, and the coffee should flow like warm honey, not spray or sputter. That flow rate is your visual cue for temperature.
In testing, I found that a 6-cup Bialetti on a medium gas flame produces a slurry around 200°F when the heat is set correctly. On electric coils, you often need to start on medium-high and drop to low after the first few drops appear. The exact number matters less than the consistency — once you find the sweet spot, repeat it every time.
Why Boiling Water Ruins Your Coffee (The Science of Over-Extraction)
When water hits 212°F at sea level, it boils. In a moka pot, boiling water creates steam that pushes through the coffee bed with force. That force extracts bitter compounds and harsh tannins from the grounds. The result is a burnt, metallic taste that masks the bean’s origin.
Think of it like cooking a steak. High heat gives you a charred crust on the outside, but the inside stays raw. With coffee, boiling water extracts the surface solubles too fast, leaving the desirable oils and sugars behind. You get a one-dimensional, bitter cup.
The science is simple: water temperature determines which compounds dissolve. Fruity and acidic flavors come out around 190°F. Sweet and balanced flavors peak near 200°F. Bitter and astringent compounds dominate above 205°F. So if your coffee tastes hollow or sharp, you’re likely boiling the water.
One more thing: boiling water also causes the coffee bed to swell and channel. Water finds a path through the grounds instead of extracting evenly. That leads to a weak, sour shot with a thin crema. Controlling temperature prevents this physical disruption.
How to Hit the Perfect Temperature: A Step-by-Step Method
You don’t need a fancy PID controller. A simple instant-read thermometer works. Here’s the process I use at home, and it takes less than a minute of extra time.
Using a Thermometer for Precision
Fill the boiler to just below the safety valve with filtered water. Insert the thermometer probe into the upper chamber, making sure the tip touches the bottom but not the funnel. Place the pot on the stove at medium heat.
Watch the thermometer as the coffee starts to rise. The first drops will appear around 180°F. That’s too early to stop. Keep the heat on until the temperature reaches 195°F. Then immediately pull the pot off the burner or turn the heat to its lowest setting. The residual heat in the aluminum will carry the brew to 200°F before it finishes.
If you don’t have a thermometer, use the flow-rate method: count the seconds from the first drop to the gurgle. If it’s under 20 seconds, your heat is too high. Over 40 seconds means too low. Adjust the flame accordingly next time.
The “Low and Slow” Heat Adjustment Technique
Most people set the heat once and leave it. Instead, start on medium-high to get the water flowing, then drop to low after the first 10 seconds of brew. This prevents the boiler from overheating and keeps the slurry below 205°F.
Imagine you’re driving a car. You press the gas to merge, then ease off to maintain speed. Same idea here. The initial burst of heat builds pressure, but the low heat sustains the flow without boiling the remaining water.
On gas stoves, turn the flame down to a small inner ring. On electric, move the pot to a different burner set to low. On induction, reduce the power level by 2–3 steps. This mid-brew adjustment is the single biggest improvement you can make.
Cold Water vs. Hot Water: The Real Impact on Brew Heat
You’ll find two schools of thought: cold water in the boiler (traditional Italian) or hot water from a kettle (modern barista method). Both work, but they affect temperature differently.
Cold water takes longer to heat, which means the coffee bed sits in the funnel and warms gradually. That’s fine, but it extends the total brew time. Hot water (around 200°F) shortens the heating phase, giving you a faster, more controlled extraction. The trade-off: hot water can overheat the boiler if you’re not careful, since the metal is already warm.
In my side-by-side tests, hot water produced a slightly sweeter cup with more crema. Cold water gave a more traditional, slightly more acidic profile. Neither is wrong — it’s about your preference. The key is to adjust your heat source based on the starting water temperature. With hot water, use a lower flame from the start.
One caveat: never use boiling water. It instantly vaporizes and can cause sputtering or even a geyser effect. Use water that’s just below a simmer.
Adjusting Heat for Your Stove Type and Pot Material
Your stove and pot material change how heat transfers. A gas flame wraps around the boiler, heating it evenly. Electric coils have hot spots. Induction responds instantly but can be aggressive. And aluminum conducts heat far better than stainless steel.
Gas, Electric, and Induction Differences
On gas, set the flame so it doesn’t lick up the sides of the boiler. That’s a common mistake — the flame heats the upper chamber and scorches the coffee. Keep the flame slightly smaller than the base.
On electric coils, start with the burner on medium-high, then switch to low as soon as the first drops appear. Coils retain heat for a long time, so you need to pull the pot off the burner for 10 seconds if it starts sputtering.
Induction is the trickiest. The magnetic field heats the pot almost instantly. Use a lower power setting (like 4 out of 9) and be prepared to turn it off a few seconds before the brew finishes, because the pot will keep heating. The Bialetti induction adapter plate helps distribute heat more evenly.
Aluminum vs. Stainless Steel Heat Retention
Aluminum (like the classic Bialetti) heats fast and cools fast. That’s good for responsiveness but means you must watch the brew closely. Stainless steel holds heat longer, so it continues to brew even after you turn off the stove. That can be a problem if you’re not paying attention.
If you’re using stainless, start with a slightly lower heat and remove the pot from the burner 10–15 seconds before the gurgle. With aluminum, you can let it finish on residual heat alone.
How Altitude Changes Your Boiling Point (And Your Recipe)
At sea level, water boils at 212°F. At 5,000 feet, it boils at 203°F. That’s a huge difference for coffee. If you live in Denver or Mexico City, your moka pot can’t reach the ideal slurry temperature because the water boils before it gets hot enough.
The fix is simple: grind finer to increase extraction. Finer particles expose more surface area, so the cooler water can still dissolve the right compounds. You might also extend the brew time slightly by using a lower heat, but that risks over-extraction if the water is already boiling.
Another trick: preheat the water to just below boiling before adding it to the boiler. This gives you a head start, so the water spends less time on the stove and reaches a higher temperature before boiling. In testing at 6,000 feet, preheating improved the cup noticeably.
Check your local boiling point with a quick search. Then adjust your grind size — not your heat — to compensate.
Troubleshooting: What Your Coffee’s Taste Says About Your Temperature
Your tongue gives the best feedback. Here’s a diagnostic chart based on common off-flavors:
| Taste Symptom | Likely Cause | Temperature Fix |
|---|---|---|
| Bitter, burnt, ashy | Water too hot (over 208°F) | Lower heat, stop brew at 200°F |
| Sour, sharp, acidic | Water too cool (under 190°F) | Increase heat, preheat water |
| Hollow, weak, no body | Channeling from boiling | Reduce heat, use finer grind |
| Metallic, rubbery | Over-extraction from long brew | Shorten brew time, remove pot earlier |
| Salty or soapy | Too low temperature, under-extracted | Raise heat, ensure water reaches 195°F |
If your coffee tastes bitter, you’re likely boiling the water. Drop the heat and stop the brew earlier. If it tastes sour, you’re under-extracting — increase the heat or grind finer. The sweet spot is when the coffee has a balanced sweetness with no sharp edges.
One more tip: taste your coffee at different temperatures as it cools. A good brew tastes sweet when hot and remains pleasant when warm. A burnt brew turns bitter as it cools. This is a quick way to diagnose without a thermometer.
The Cold Water Quench: Stopping the Brew at the Right Moment
The classic advice is to turn off the heat when the pot gurgles. But that’s often too late — the gurgle means steam is pushing through, and the last bit of water is boiling. Instead, stop the brew 10–15 seconds before the gurgle, when the flow turns from a steady stream to a trickle.
Here’s the quench method: as soon as the stream thins, remove the pot from the burner and run the base under cold running water for 5 seconds. This stops the boiling instantly and prevents steam from scorching the coffee bed. The result is a cleaner, sweeter cup.
You might worry about thermal shock cracking the aluminum. In practice, a quick rinse is safe if the pot is in good condition. I’ve done this hundreds of times with no issues. Just don’t plunge a hot pot into an ice bath — that’s too extreme.
The quench also helps with cleanup. The coffee bed comes out as a solid puck instead of a sludgy mess. If you’re using a moka pot regularly, this technique extends the life of the gasket and valve.
Final Checklist for Perfect Temperature Control
- Use water at 200°F to start, or cold water if you prefer the traditional method — just adjust your heat accordingly.
- Keep the slurry between 195°F and 205°F. Use a thermometer the first few times to calibrate your stove.
- Start on medium-high, then drop to low after the first 10 seconds of brew.
- Stop the brew 10–15 seconds before the gurgle, and quench the base with cold water.
- Grind finer if you live above 3,000 feet to compensate for the lower boiling point.
- Taste your coffee and use the troubleshooting chart to dial in.
- Clean your moka pot with water only — detergents leave residues that affect temperature and taste.
Temperature control isn’t complicated once you understand the basics. It’s the difference between a bitter, burnt cup and a rich, balanced one. Try these methods tomorrow morning, and you’ll notice the improvement immediately.
Products related to this article
Sponsored / affiliate links. As an Amazon Associate I earn from qualifying purchases. I may earn additional commission from eligible campaigns.
 Stainless Steel Moka Pot Pressed Powder Tool for 2 4 6 9 Cup Espresso Coffee Brewer(6 Cups)
 Belly Moka Coffee Maker Stovetop Espresso Maker 9 Cup Aluminum Moka Pot Percolator 15oz 450ml Easy Brewing for Electric Ceramic Stoves Home Camping Italian Cuban Café Classic Black
 Belly Moka Coffee Maker Stovetop Espresso Maker 6 Cup Aluminum Moka Pot Percolator 10oz 300ml Easy Brewing for Electric Ceramic Stoves Home Camping Italian Cuban Café Classic Silver