You grind fresh beans, press brew, and then you hear it — the machine is running, water is moving, but the coffee coming out is lukewarm. Or worse, nothing happens at all. The display lights up, the grinder spins, but there’s no heat. It’s a frustrating spot to be in, especially when you’re already running late.
Most people assume the machine is dead and toss it. But in my experience testing these units, a coffee maker with grinder not heating is often a simple fix. It could be a tripped breaker, a failed thermal fuse, or just a thick layer of mineral buildup. This guide walks you through a real diagnostic flow — symptom to test to fix — so you can decide whether to repair it or recycle it.

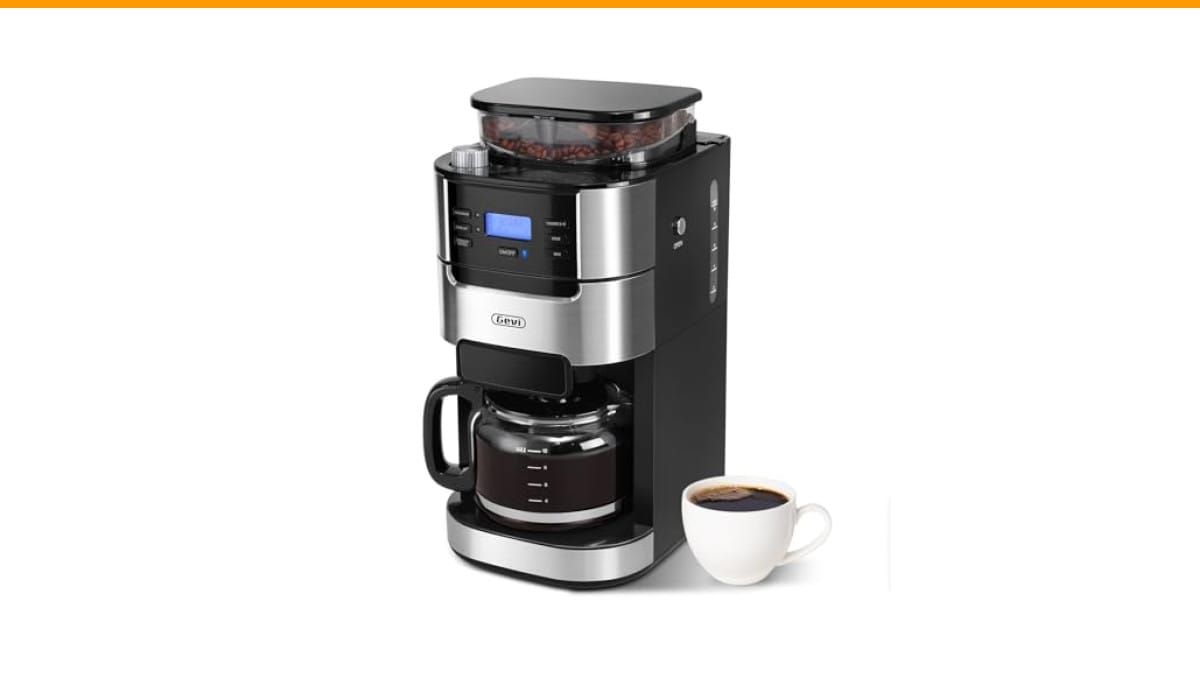
Gevi
Gevi 10-Cup Grind-And-Brew Drip Coffee Maker with…
- 【𝟐-𝟏𝟎 𝐂𝐮𝐩 𝐕𝐞𝐫𝐬𝐚𝐭𝐢𝐥𝐢𝐭𝐲】Enjoy the perfect amount of coffee every time with this drip coffee maker and built-in grinder. Whether you'…
- 【𝐅𝐮𝐥𝐥𝐲 𝐂𝐮𝐬𝐭𝐨𝐦𝐢𝐳𝐚𝐛𝐥𝐞 𝐁𝐫𝐞𝐰𝐢𝐧𝐠】Take control of your coffee experience. Choose from 3 strength levels and 8 grind settings to match yo…
- 【𝐂𝐡𝐞𝐜𝐤 𝐘𝐨𝐮𝐫 𝐂𝐚𝐛𝐢𝐧𝐞𝐭 𝐂𝐥𝐞𝐚𝐫𝐚𝐧𝐜𝐞】Before you buy, be sure to measure your space. With dimensions of 12.36"D x 8.38"W x 16.93"H, this c…
As an Amazon Associate I earn from qualifying purchases.
If you’re in the market for a replacement while you troubleshoot, a model like the Gevi 10-Cup Grind-And-Brew Drip Coffee Maker offers a built-in burr grinder and 8 grind settings, which gives you a solid baseline for what a modern unit should do.
Is Your Coffee Maker Dead or Just Cold? Diagnose the Symptom
Before you open anything, you need to classify the failure. There’s a big difference between “not heating at all” and “not heating enough.”
- Not heating at all: The brew cycle runs, but the water never gets hot. This points to an electrical failure — heating element, thermal fuse, or thermostat.
- Not heating enough: The coffee is warm but not hot, or it starts hot and cools quickly. This usually points to mineral buildup, a failing warming plate, or a miscalibrated thermostat.
Take note of whether the grinder works. If the grinder spins but the heater doesn’t, you’ve isolated the problem to the heating circuit. If nothing works at all, check the power source first.
Safety First: Unplug and Prepare for Troubleshooting
This is the part nobody reads, but it’s the only one that matters. Unplug the machine from the wall. Do not skip this. Water and electricity do not mix, and you’re about to poke around internal components.
Wait at least 15 minutes after unplugging. The heating element stays hot for a while, and capacitors in the control board can hold a charge. Give it time to cool down completely.
You’ll need a few tools before you start: a Phillips-head screwdriver, a multimeter, and a towel to catch any stray water. If you don’t own a multimeter, you can pick one up for around $15 — it’s cheaper than a new coffee maker.
The Quick Checks: Power, Outlet, and GFCI
Start with the boring stuff. I’ve wasted an hour diagnosing a machine that was plugged into a dead outlet.
- Plug the coffee maker into a different outlet in another room.
- Check if the outlet is GFCI-protected. If it is, press the reset button on the outlet itself.
- Look at your home’s breaker panel. A tripped breaker is common if the machine shares a circuit with a toaster or kettle.
If the machine powers on but doesn’t heat, move to the internal checks. If it doesn’t power on at all, you might be dealing with a broken power supply or a blown fuse inside the plug.
Pro tip: Always plug coffee makers into a dedicated outlet. They draw a lot of power, and sharing a circuit with other high-draw appliances causes nuisance trips.
The Auto Shut-Off Trap: Why It Stops Heating Mid-Cycle
Many modern machines have an auto shut-off feature that kills power to the heating element after a set time. It’s a safety feature, but it can also be the culprit when your coffee maker with grinder not heating issue appears mid-cycle.
Here’s the trap: the machine might look dead, but it’s just the control board that’s locked up. If the brew cycle got interrupted and the machine thinks it’s done, it won’t re-energize the heater until you reset it.
To test for this, unplug the machine for a full 60 seconds. Plug it back in, set the brew strength, and run a cycle with water only (no coffee). If it heats up, your machine was just in a stuck state. If it still doesn’t heat, the problem is physical, not logical.
Some machines have a physical reset button on the bottom. Look for a small red or black button near the power cord entry point. Press it with a paperclip.
The Main Suspect: Testing the Heating Element with a Multimeter
The heating element is a metal tube inside the water reservoir. It’s responsible for boiling the water. When it fails, you get zero heat. This is the most common failure point I see in grind-and-brew units.
To access it, you’ll need to remove the bottom plate of the machine. Usually, it’s four to six screws. Once the plate is off, you’ll see the wiring harness and the heating element — a thick metal cylinder with two wire terminals attached.
How to Test for Continuity
- Set your multimeter to the ohms (Ω) setting.
- Touch the two probes together to verify the meter reads 0 (or near 0). This confirms the meter works.
- Disconnect the two wires from the heating element terminals. Use needle-nose pliers if needed.
- Place one probe on each terminal of the heating element.
- Read the display.
What a Reading of “0” vs. “Infinity” Means
If the multimeter reads a low number — anywhere from 10 to 50 ohms — the heating element is fine. The current is flowing through the coil.
If the multimeter reads infinity (often shown as “OL” or “1”), the element is open. The wire inside has broken, and no current can pass through. This is a dead component. You’ll need to replace it or replace the machine.
A reading of exactly 0 is suspicious. It might mean the element is shorted, which can trip your breaker. Either way, a 0 or infinity reading means the part is bad.
The Silent Killer: Thermal Fuse and Thermostat Failure
If the heating element tests fine, move to the thermal fuse. This is a small white or black component with two wires, usually clipped to the side of the heating element or the water reservoir.
The thermal fuse is a one-time safety device. It’s designed to blow if the machine overheats. Once it blows, it’s dead forever — you can’t reset it. It’s a cheap part (a few dollars) that requires a simple replacement.
Test it the same way you tested the heating element. Set the multimeter to ohms, touch the probes to the fuse’s two terminals, and look for a reading near 0. If you get infinity, the fuse is blown. Replace it with an identical rating — usually 240°F or 250°F.
The thermostat is a different beast. It’s a mechanical switch that opens and closes based on temperature. It can fail in two ways: stuck open (no heat) or stuck closed (overheating). Test it with the multimeter at room temperature. It should read near 0 (closed). If it reads infinity, it’s stuck open and needs replacing.
For a deeper look at related grinder issues, check out this guide on grinder troubleshooting.
The Flow Problem: Clogged Water Lines and Mineral Buildup
Here’s the scenario that tricks everyone: the machine heats the water, but the water can’t reach the heating chamber because the lines are clogged with scale. The result? Cold coffee or no coffee, even though the heating element is working fine.
Hard water is the enemy. Calcium and magnesium deposits build up inside the narrow tubing, restricting flow. Over time, the pump works harder, the heater runs dry, and eventually, the thermal fuse blows from the excess heat.
The Descaling Deep-Clean (Not Just Vinegar)
Vinegar works for light buildup, but for a machine that’s been neglected, you need a commercial descaler. These contain stronger acids (citric or sulfamic) that break down scale faster.
Run a descaling cycle with a commercial solution, then run two full cycles with clean water to rinse. If the water flow improves, you’ve solved the problem. If not, you may have a blocked pump or a completely clogged heating tube.
You can extend the life of any machine by using filtered water. It won’t eliminate scale, but it cuts down on it significantly. If you’re looking for a full routine, our guide on cleaning frequency covers the schedule.
The Warming Plate: Why the Coffee is Cold in the Carafe
Sometimes the brew is fine, but the coffee in the carafe goes cold fast. That’s not a brewing problem — that’s a warming plate problem.
The warming plate is a low-wattage heater under the carafe. It’s designed to keep coffee at 140-160°F, not to reheat it. If the plate is dead, your coffee will be cold within 15 minutes.
Test the warming plate with your multimeter. It should show a resistance reading similar to the main heating element but higher — usually 100-300 ohms. If you get infinity, it’s open.
Also check the switch that activates the plate. Many machines only turn on the warming plate when the brew switch is in the “on” position. If the switch is faulty, the plate won’t get power.
Repair vs. Replace: The Cost-Benefit Decision
Here’s where you have to be honest with yourself. A thermal fuse costs $5. A heating element might cost $20. But your time is worth something, and a $100 coffee maker isn’t worth a $60 repair bill.
| Component | Part Cost | Labor Time | Verdict |
|---|---|---|---|
| Thermal Fuse | $3 – $8 | 30 minutes | Worth repairing |
| Thermostat | $5 – $12 | 45 minutes | Worth repairing |
| Heating Element | $15 – $30 | 1 – 2 hours | Only if machine is high-end |
| Control Board | $40 – $80 | 1 hour | Not worth it — buy new |
| Clogged Lines | $5 (descaler) | 1 hour | Always worth trying |
If the machine is under warranty, skip all of this and file a claim. If it’s older than two years, the calculation changes. A $150 machine with a dead heating element is not worth fixing. A $500 espresso machine is.
My rule of thumb: if the repair cost (parts + 1 hour of your time) exceeds 50% of the replacement cost, buy a new one. Your time has value.
When to Call a Professional vs. When to Recycle
If you’ve tested the heating element, thermal fuse, and thermostat, and they all check out, you’re dealing with a control board issue. That’s a complex repair involving soldering and circuit diagrams. Unless you’re comfortable with electronics, this is where I’d draw the line.
Recycling is the right move when the machine is old, the parts are expensive, or you’ve already spent an afternoon on it. Most municipalities accept small appliances at e-waste drop-offs. Don’t throw it in the regular trash — the heating element contains metals that can be recovered.
If you decide to replace it, look for a unit with a stainless steel boiler or a removable heating element. These are easier to service down the road. The Gevi grind-and-brew model we mentioned earlier has a straightforward design that’s easier to access than some of the more compact units on the market.
Frequently Asked Questions
Why is my coffee maker running but not heating water?
The grinder running means the motor circuit is fine. The heating circuit is separate. Check the thermal fuse first — it’s the most common failure. If the fuse is good, test the heating element with a multimeter. A reading of infinity on either means a broken component.
Can I bypass the auto shut-off to test the heater?
Yes, but only for testing. Unplug the machine, locate the control board, and find the relay that switches power to the heating element. You can temporarily jumper across the relay contacts to see if the heater gets power. Do this only for a few seconds to confirm the heater works, then remove the jumper immediately. Don’t run the machine this way — it will overheat without the thermostat in the loop.
How do I know if the thermal fuse is blown?
Use a multimeter set to ohms. Touch the probes to the fuse terminals. A reading of 0 (or near 0) means it’s intact. A reading of infinity (OL) means it’s blown. There’s no visual way to tell — the fuse can look perfect and still be dead.
Why does my coffee maker smell like burnt plastic when heating?
That smell is usually dust burning off the heating element on first use, or it could be a sign of overheating. If the thermostat is stuck closed, the element will get too hot and burn off any residue. If the smell persists after two uses, unplug the machine and check the thermostat.
Is it worth fixing a coffee maker with a grinder?
It depends on the price of the machine. For a $60 basic model, no. For a $200+ unit with a burr grinder, a $10 fuse and an hour of your time is worth it. Just be sure to test the fuse before you order parts — you don’t want to replace a fuse and then find the heating element is also dead.
Three Mistakes to Avoid
Most people skip the multimeter test and just start poking at wires. That’s how you short something out. Test first, then touch.
Another common mistake is replacing the thermal fuse without addressing the cause. If the fuse blew, something got too hot. That something is usually mineral buildup. Clean the machine thoroughly before you install a new fuse, or you’ll blow it again within a month.
Finally, don’t assume a new machine won’t have the same problem. If you had hard water issues, your new machine will suffer the same fate. Use filtered water and descale every 3-6 months. A little maintenance goes a long way. If you need a refresher on the process, this cleaning guide has the details.
When in doubt, trust the multimeter. It doesn’t guess — it tells you exactly where the current stops flowing. That’s the fastest path to hot coffee again.
Products related to this article
Sponsored / affiliate links. As an Amazon Associate I earn from qualifying purchases. I may earn additional commission from eligible campaigns.
 HomeBeyond Espresso Coffee Maker 12 Cups, Classic Stovetop Espresso Maker, 600ml / 20oz Coffeemaker for Gas & Ceramic Stovetops (Silver)
 Quick Heating Cup Warmer, Three Temperature Settings, Splashproof and Portable, for Coffee, Milk, Lightweight ABS Material
 Linnkyfloa Coffee Espresso Maker Handle Replacement for Stovetop Moka Pot or Percolator, Black Plastic for Spare Part Compatible with Italian(9-12 Cup)