You bought a digital scale with a timer because your coffee tasted inconsistent. Some days it was bitter, other days sour, and the bag said to use a 1:15 ratio. You measured the beans, hit the timer, and poured water. Yet the cup still missed the mark. The problem isn’t the scale. It’s how you’re using it.
Most beginners treat a coffee scale like a kitchen appliance from a box store. They weigh the beans, start the timer, and stop when the water hits the target. That sounds simple, but there are seven specific errors that quietly ruin your brew. Each one is easy to fix once you know what to look for. This guide walks through those mistakes, shows you how to verify your scale is telling the truth, and gives you the exact ratios for pour over, French press, and espresso.

Maestri House
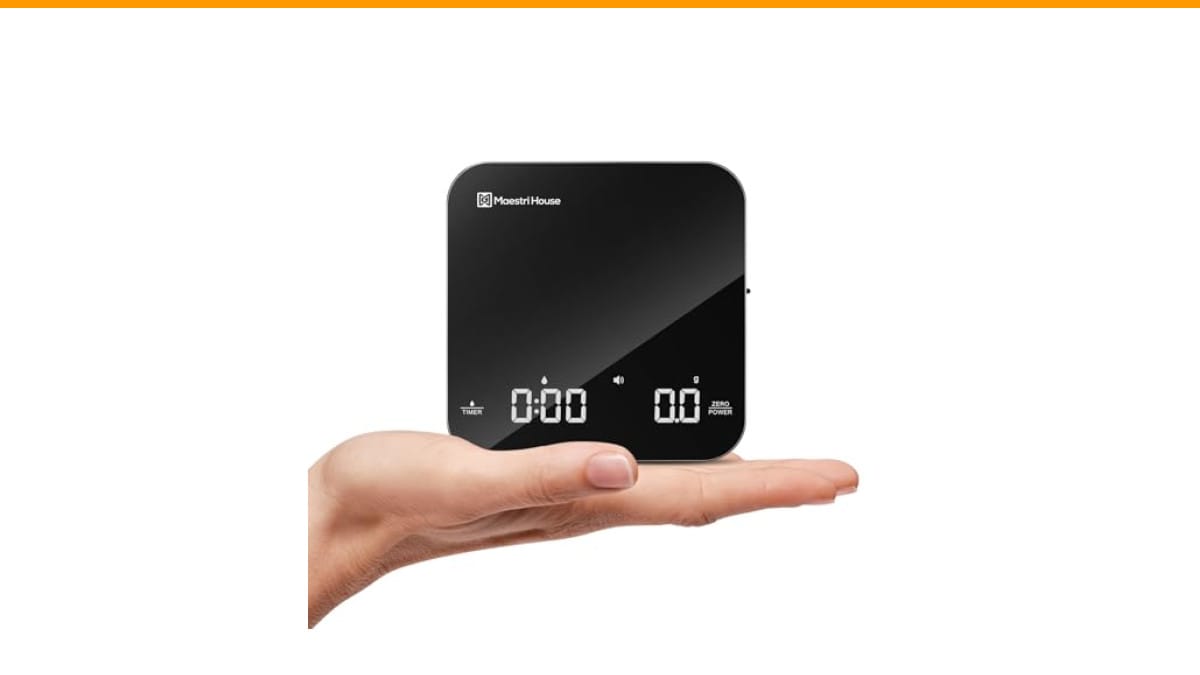
Maestri House S2 Espresso Coffee Scale with…
- 【Ultra Small, Yet Professional】The Espresso Scale is small enough to fit in your palm. It measures 4.13*4.13*0.78 inches and weigh…
- 【0.1g High Precision】This digital kitchen coffee scale is equipped with high-precision sensors and a reliable microprocessor, guar…
- 【Three Units & Dual Timekeeping Modes】The Espresso Digital Timer Scale has three units of measurement (g/oz/ml) that can be conver…
As an Amazon Associate I earn from qualifying purchases.
If you’re shopping for gear, a compact option like the Maestri House S2 Espresso Scale with Timer handles 0.1g precision and has both auto and manual timing modes. It fits on a crowded espresso drip tray, which helps with the placement issue we’ll cover later. Check the current price on Amazon before you buy.
Why Your Coffee Scale Isn’t Fixing Your Brew
Here’s the honest truth: a scale only measures. It doesn’t make decisions. If you weigh 18 grams of beans but your grinder holds back 0.5 grams of fines, your actual dose is 17.5 grams. The scale shows 18 because that’s what you put in the basket. You didn’t weigh the output of the grinder. Small discrepancies like this compound over a 30-second extraction.
Another issue is the difference between resolution and accuracy. A scale with 0.1g resolution displays tenths of a gram, but it may drift by plus or minus 0.3g on a cold morning. That’s fine for pour over. For espresso, 0.3g can shift your extraction enough to taste it. You need to know your specific scale’s behavior, not just its spec sheet.
Let’s treat this as a diagnostic. You’ll identify which of these mistakes matches your symptoms, then fix that one thing. Most people find two or three errors they didn’t know they were making.
Mistake 1: Forgetting to Tare Between Ingredients
Taring resets the scale to zero with the container on top. Sounds obvious, but the mistake is more subtle. Beginners tare the empty cup, add coffee, then pour water directly into that cup without taring again. The scale now shows the combined weight of coffee plus water. Your ratio is off because you’re including the coffee mass in the water measurement.
For a 1:15 ratio with 20g of coffee, you need 300g of water. If you don’t tare after adding the coffee, you’ll stop at 300g total, which means only 280g of water. That’s a 1:14 ratio. The difference is noticeable in the cup—slightly more concentrated, often a bit sour.
The fix is to tare every time you add something. Coffee in, tare. Water in, tare. If you’re using a pour over dripper on top of the cup, tare the whole assembly first. Then add coffee, tare again. Then pour water. It takes two seconds and eliminates a whole class of errors.
Mistake 2: Starting the Timer at the Wrong Moment
This is the most common coffee scale with timer mistakes beginners make. You start the timer when water first touches the grounds. That’s actually correct for most methods. The problem is when you start it before the bloom phase or after you begin pouring.
For pour over, the timer should start the moment you begin the first pour. That first pour saturates the grounds and triggers the bloom—the release of CO2. If you start the timer after you’ve already poured 50g of water, you lose the first 20 seconds of contact time. Your total brew time looks shorter than it actually is, and you’ll under-extract next time when you try to match that short time.
For espresso, the timer should start when you flip the pump switch, not when the first drop hits the cup. There’s a pre-infusion phase that matters. Most scales with auto-timer modes detect the weight change from the espresso stream and start automatically. That’s helpful, but manual mode gives you control over pre-infusion timing. If you’re using a machine with a separate pre-infusion button, start the scale timer manually when you press it.
Mistake 3: Using Volume Instead of Weight (Scoops vs. Grams)
Your grandmother’s measuring cup has no place in specialty coffee. A tablespoon of whole beans weighs different amounts depending on roast level. Dark roasts are less dense, so a scoop of dark roast might weigh 12g while the same scoop of light roast weighs 15g. That’s a 25% difference in dose.
The scale solves this, but only if you actually use it. Some beginners weigh the beans, then switch to scooping water because their kettle has volume markings. Water volume is fine at sea level, but your kettle markings are often inaccurate by 10-20ml. Weight is the only consistent measure.
Here’s the rule: weigh everything that goes into the cup. Beans, water, milk if you’re measuring it. The coffee-to-water ratio is a weight ratio. 1:16 means 1 gram of coffee for every 16 grams of water. A 250ml cup is not 250g of water unless it’s exactly at room temperature and sea level. Close, but not precise. Your scale reads 0.1g increments—use them.
Mistake 4: Ignoring the Yield (Not Just the Input)
You weighed 18g of coffee in. You stopped the shot at 30 seconds. But did you check how much espresso came out? Yield is the output weight. For espresso, a standard ratio is 1:2—18g in, 36g out. If you only watch the timer and stop at 30 seconds regardless of output, you’ll get inconsistent shots.
Some days your grind is slightly finer, so 30 seconds yields 32g. Other days it’s coarser, yielding 40g. Same time, different concentration. The scale with a timer helps here because you can watch both numbers simultaneously. Stop the shot when you hit your target yield, not when the timer hits a number. The timer tells you if the extraction is running fast or slow. The yield tells you when to stop.
For pour over, the same logic applies. Your target water weight is the total you pour, but the yield is what ends up in the cup. If the grounds absorb 20g of water, your cup will have 20g less than you poured. That’s fine—just be consistent about whether you’re measuring the pour or the final yield. Pick one and stick with it.
Mistake 5: Poor Scale Placement and Stability
A scale on an uneven surface gives false readings. A scale on a vibrating espresso machine gives readings that jump around. Beginners often place the scale half-on the drip tray, half-off, or on a towel that shifts during the brew.
Your scale needs a flat, rigid, level surface. The drip tray of most espresso machines works if it’s clean and dry. If your machine vibrates heavily, the scale will struggle to settle on a stable reading. In that case, place the scale on the counter next to the machine and move the cup over after pulling the shot. That’s not ideal for watching the yield in real time, but it’s better than trusting a bouncing number.
Also, check that nothing touches the scale. A towel draped over the edge, a spoon resting against the cup, or the portafilter handle touching the scale body all add false weight. The scale measures force. Any physical contact is force.
Mistake 6: Not Using the Timer for Steep Methods
French press and AeroPress have steep times that matter. The timer on your scale isn’t just for pour over. Beginners often use their phone timer for these methods, which works, but the scale timer keeps everything in one place and starts automatically when you pour.
For a French press, set the scale to auto-timer mode. Place the press on the scale, pour in your water, and the timer starts when the water hits the grounds. That’s your steep time. When it hits 4 minutes, press down. No fumbling for your phone while water is hot.
For an AeroPress, the timer matters even more because the recipe is short. A 90-second steep versus a 2-minute steep changes the extraction significantly. The scale timer lets you watch the weight and the time simultaneously, so you can adjust your grind next brew based on both numbers. The same applies to a Clever Dripper or any steep-and-release brewer.
Mistake 7: Chasing Perfection Instead of Consistency
Here’s the trap: you buy a scale, dial in a recipe that tastes great, then try to replicate it exactly. But you change one variable—grind size, water temperature, pour speed—and the cup changes. You blame the scale and start adjusting everything.
The scale isn’t the variable. It’s the tool that tells you when everything else is the same. The goal isn’t a perfect cup. It’s a repeatable process. If you use the same dose, same yield, and same brew time every day, you’ll get the same cup every day. Then you change one thing at a time and taste the difference.
That’s the real value of a coffee scale with timer. It’s not making your coffee better. It’s making your coffee the same. Once you have consistency, you can improve deliberately. Without a scale, you’re guessing every morning.
How to Test Your Scale’s Accuracy (The Coin Trick)
Your scale might be lying to you. It happens. Cheap scales drift, and even good ones need a reality check. Here’s a simple test using a coin.
A US nickel weighs exactly 5.00 grams. A penny weighs 2.50 grams. A quarter weighs 5.67 grams. Place the coin on the scale and check the reading. If your nickel reads 5.0g, your scale is accurate at that weight. If it reads 4.8g or 5.3g, your scale is off.
Test at multiple weights. Place two nickels for 10g, or a nickel plus a penny for 7.5g. Most scales are accurate in the middle of their range but drift at the low or high end. If your scale fails the coin test, try recalibrating it. Many scales have a calibration mode—check your manual. If it still fails, replace it. A scale that’s off by 0.5g at 20g will ruin your espresso every single time.
Also, check the battery. Low battery is a common cause of inconsistent readings. The Maestri House S2 uses a rechargeable battery, so you don’t swap cells, but a low charge can still cause drift. Keep it charged.
Quick Reference: Ideal Ratios for Pour Over, French Press, and Espresso
Here’s a table you can bookmark. These are starting points, not laws. Adjust to taste, but keep the ratio consistent while you adjust other variables.
| Method | Coffee Dose | Water Weight | Ratio | Brew Time |
|---|---|---|---|---|
| Pour Over (V60) | 20g | 320g | 1:16 | 2:30 – 3:00 |
| French Press | 30g | 480g | 1:16 | 4:00 steep |
| Espresso | 18g | 36g yield | 1:2 | 25 – 30 sec |
| AeroPress | 15g | 225g | 1:15 | 1:30 – 2:00 |
| Clever Dripper | 20g | 300g | 1:15 | 2:00 steep |
These numbers assume a medium-fine grind for pour over, coarse for French press, and fine for espresso. If your brew time is way off, adjust the grind, not the ratio.
FAQ: Tare, Timer, and Troubleshooting
Why does my scale show different readings for the same object?
Check the surface first. A wobbly table or a scale sitting on a towel will cause drift. Then check the battery. Low power causes erratic readings. If both are fine, run the coin test. A scale that fails the test needs recalibration or replacement.
Should I use the auto-timer or manual timer mode?
Auto-timer is great for pour over and French press because it starts when water first hits the scale. Manual mode is better for espresso with pre-infusion, or when you want to start the timer before you pour. Learn both and switch based on the method.
Can I use a regular kitchen scale instead of a coffee scale?
You can, but most kitchen scales only measure in 1g increments. That’s fine for batch brew or French press, but not for espresso or a single pour over where 0.5g makes a difference. You also miss the built-in timer, which is why a dedicated coffee scale is worth the money.
Why does my scale keep turning off mid-brew?
Most scales have an auto-sleep function, often after 2-5 minutes of no weight change. If you’re pouring slowly, the scale might think you’re done. Check if your scale has a setting to disable auto-sleep, or just touch the surface to wake it before your next pour. The Maestri House S2 sleeps after 5 minutes of inactivity, which is usually enough time.
What does 0.1g precision actually do for my coffee?
For espresso, it lets you dial in the dose to a single bean. That’s the difference between a shot that runs 28 seconds and one that runs 32 seconds. For pour over, it lets you repeat a recipe exactly. For batch brew, 0.1g is overkill—1g precision is fine. Buy the precision you need for your primary method.
What to Fix First (Your Next Brew Checklist)
- Tare after every single addition—coffee, then water, then any extras.
- Start the timer at the first drop of water on the grounds, not before, not after.
- Weigh your yield for espresso, not just your dose. Stop at your target weight.
- Place the scale on a flat, dry, vibration-free surface. Keep everything off the scale edges.
- Run the coin test once a month. It takes ten seconds and catches drift early.
- Use the scale timer for French press and AeroPress steeps, not just pour over.
- Pick one ratio and one brew time, then stick with them for a week before changing anything.
Your scale is a measuring tool, not a magic wand. It tells you what’s happening so you can make one change at a time. If you’re still getting bad coffee after fixing these mistakes, check your grinder and your water temperature. A scale can’t fix a dull burr or water that’s off the boil. But it will tell you exactly where the problem lives.
And if you’re cleaning up after a messy brew session, a quick rinse is all the borosilicate glass surface on the Maestri House S2 needs. A clean scale is an accurate scale.
Products related to this article
Sponsored / affiliate links. As an Amazon Associate I earn from qualifying purchases. I may earn additional commission from eligible campaigns.
 Coffee Espresso Machine Handle Replacement Parts, Cafe Bracket Handle for Lidl Silvercrest CM4621 CM4218 KF5002 KF500S Barista (for 51mm Portafilter Basket - Not included)
 Quick Heating Cup Warmer, Three Temperature Settings, Splashproof and Portable, for Coffee, Milk, Lightweight ABS Material
 Coffee Mug Warmer & You are Awesome Mug Set, Electric Cup Warmer for Desk