You’re cranking away at 6 AM, and the handle suddenly stops dead. Or the grind comes out half powder, half boulders. Maybe the whole thing rattles like a maraca. Manual grinders are simple machines, but they’re not indestructible — and they all develop issues over time.
This guide walks you through the most common manual coffee grinder problems and fixes, using a symptom-based approach. You’ll learn what causes each issue, how to fix it with basic tools (most fixes need nothing more than a brush and a screwdriver), and how to prevent problems from coming back. By the end, you’ll know exactly what to do when your grinder acts up — and when it’s time to replace it.

CEVING
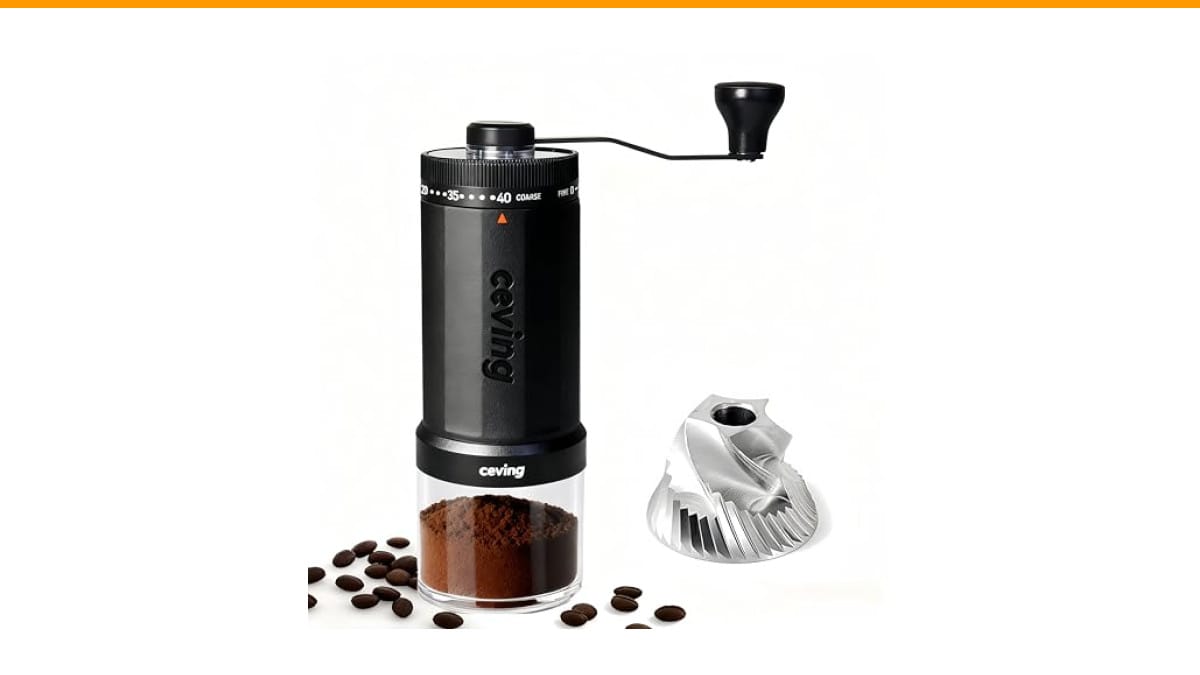
CEVING World's First 60g Large Capacity Manual…
- Tired of small batches? Meet the world's first manual grinder with a massive 60g capacity—Hold twice the beans of the standard gri…
- 40 EXTERNAL SETTINGS - DIAL IN PERFECT BREWS INSTANTLY. Our external click-ring delivers 40 precise settings—effortlessly switch f…
- MASTER-LEVEL PRECISION - LAB-ACCURATE GRINDS, BARISTA-APPROVED FLAVOR. Each click adjusts by just 0.05mm—the finest difference det…
As an Amazon Associate I earn from qualifying purchases.
If you’re shopping for a new grinder and want to skip the headaches altogether, the Check Price on Amazon solves one of the most common annoyances: tiny batch sizes. Its 60g capacity means you can grind a full French press or cold brew batch in one session, and the 40-click external adjustment ring makes dialing in espresso or pour-over much easier than fumbling with hidden internal settings.
Symptom Checker: What’s Wrong With My Grinder?
Before you take anything apart, figure out what you’re dealing with. Here’s a quick reference table for the most common issues.
| Symptom | Likely Cause | Fix |
|---|---|---|
| Hard to turn or jams | Bean bridging, over-tightened burr, debris in threads | Clear beans, loosen burr, deep clean |
| Inconsistent grind size | Burr misalignment, worn burrs, loose shaft nut | Realign burrs, tighten shaft, replace if worn |
| Loud rattling or clicking | Loose crank handle, worn bearing, foreign object | Tighten handle, inspect bearing, remove debris |
| Static cling (grounds fly everywhere) | Dry conditions, plastic catch cup | Rinse beans, use glass cup, anti-static spray |
| Rust or moisture on burrs | Washing, humid climate | Dry thoroughly, use food-grade lubricant |
Grinder is Hard to Turn or Jams
This usually happens for one of three reasons: beans are bridging over the burrs, the burr gap is set too fine for the beans, or debris has built up in the threads.
First, remove the handle and check for beans stuck above the burrs. Tap the grinder gently to dislodge them. If that doesn’t work, adjust to a coarser setting — many grinders have a hidden internal adjustment that you may have accidentally set too fine.
If the problem persists, it’s time for a deep clean. Coffee oils and tiny particles can gum up the threads and make turning difficult. A thorough cleaning with a brush and a dry cloth usually solves it. If you’ve been grinding very oily dark roasts, this is almost certainly the culprit.
I’ve seen grinders that were simply over-tightened after reassembly. The burr should seat snugly, but not forced. Back it off a quarter turn if it feels tight.
Grind Size is Inconsistent
Inconsistent grind size — a mix of powder and chunks — is the most frustrating problem because it ruins your brew. The usual cause is burr misalignment or a loose central shaft nut.
Start by checking the shaft nut. If it’s loose, the burr wobbles and produces uneven particles. Tighten it with a wrench, but don’t overdo it — just snug.
Next, check the burr alignment. Remove the burr and re-seat it, making sure it sits flat and level. Some grinders have a small pin or notch that you need to align. Refer to your manual if you have it.
If alignment looks fine and the nut is tight, the burrs may be worn. After a year or two of daily use, steel burrs dull and produce more fines. Ceramic burrs can chip. At that point, replacement is the only real fix.
Grinder is Loud or Rattling
A rattling grinder is usually just a loose crank handle or a worn bearing. Check the handle first — tighten the screw or nut that holds it to the shaft. If it’s a folding handle, make sure the hinge isn’t worn.
If the noise persists, the shaft bearing may be dry or worn. You can try lubricating it with a food-grade mineral oil. If that doesn’t silence it, the bearing needs replacing. Some grinders have a simple bushing that you can swap out for a few dollars.
Don’t ignore a rattling grinder — it can cause burr misalignment over time, which leads to inconsistent grinds.
Fix #1: Deep Clean Your Burrs and Threads
Regular cleaning is the single best thing you can do for a manual grinder. Coffee oils go rancid, and they mix with ground coffee to form a sticky paste that clogs everything.
Here’s how to do a proper deep clean, step by step:
- Remove the handle and catch cup.
- If your grinder has an external adjustment ring, set it to the coarsest setting. If it’s internal, remove the screw that holds the adjustment dial and take it out.
- Unscrew the top burr carrier (the part that holds the outer burr). This varies by model, but usually it twists off counterclockwise.
- Use a stiff brush to sweep out loose grounds from the burrs and the chamber. A can of compressed air helps for stubborn particles.
- For oily residue, wipe the burrs with a dry cloth. Avoid water — it can cause rust. If you must use water, dry every part completely before reassembly.
- Clean the threads on the adjustment mechanism with a brush and a dry cloth.
- Reassemble carefully, making sure the burr seats flat and the adjustment dial clicks back into place.
Do this every two to four weeks if you use your grinder daily. For occasional use, once a month is fine. You can also run a handful of dry rice through the grinder to absorb oils, but follow with a brush to remove the rice dust.
For a more detailed walkthrough, check out our cleaning guide.
Fix #2: Realign and Re-seat the Burrs
Burr misalignment is a common cause of inconsistent grind size. It happens after a fall, or when you reassemble the grinder carelessly after cleaning.
To check alignment, remove the burr and look at the carrier. There’s usually a keyway or a flat spot that matches a notch in the shaft. Make sure that’s lined up.
When you re-seat the burr, press it down evenly. It should sit flush with the carrier — no rocking. If you feel a slight tilt, lift it and try again.
Some grinders have a shim or washer that you may have misplaced during cleaning. Check your manual or a disassembly video. A missing shim is a common cause of misalignment after a deep clean.
If your grinder has an external adjustment ring, you can also check the zero point. Set it to the finest setting and listen for a faint chirp as you turn the handle. That’s the burrs touching. If you hear it at a different click than the labeled zero, your burrs are slightly misaligned or the ring needs recalibration.
Fix #3: Tighten the Crank Handle and Shaft
A wobbly crank handle is one of the easiest problems to fix. Most manual grinders use a hex bolt or a Phillips screw to hold the handle to the shaft. Grab the right screwdriver or Allen wrench and tighten it.
But don’t just tighten the visible screw — check the shaft nut underneath the burr carrier. On many grinders, this nut holds the inner burr to the shaft. If it’s loose, the burr can wobble, which causes both noise and inconsistent grinds.
To access it, you’ll need to remove the handle and the top burr carrier. Then use a wrench to snug the nut. Don’t crank it down hard — just take out the play. Over-tightening can strip the threads or warp the burr carrier.
If the handle still wobbles after tightening, the problem might be a worn shaft or bearing. At that point, you’re looking at replacement parts. Check with the manufacturer for spare parts, or consider upgrading if the grinder is old.
Fix #4: Fix Static and Clumping
Static cling is annoying, especially in dry climates. Grounds stick to the catch cup, fly out when you open it, and clump together, which makes your pour-over extraction uneven.
The cause is dry coffee beans rubbing against the plastic catch cup during grinding. The fix is simple: add a tiny bit of moisture.
Rinse the beans with water before grinding — just a quick shake in a strainer. This adds enough moisture to reduce static without affecting the grind. Alternatively, use a glass or metal catch cup if your grinder has a removable one. Many people find that glass cups don’t hold static as much as plastic.
You can also spray a little water on the beans (a mist from a spray bottle) — this is a common trick in specialty coffee shops. It reduces both static and clumping, and it’s called the ‘Ross Droplet Technique.’ A quick spray, a shake, and you’re good to go.
If clumping still happens, it’s often due to fines. A quick tap on the counter after grinding usually breaks up the clumps.
Fix #5: Address Rust and Moisture Damage
Rust is the silent killer of manual grinders. It happens when you wash the grinder with water and don’t dry it thoroughly, or when you live in a humid climate.
Check the burrs and the shaft for orange or brown spots. If you catch it early, you can remove the rust with a fine abrasive — a pencil eraser works surprisingly well on light rust. For heavier rust, use a very fine sandpaper (400 grit or higher) and rub gently.
After removing the rust, wipe the surfaces with a food-grade mineral oil. This creates a protective barrier against moisture. Don’t use WD-40 or other petroleum-based lubricants — they’re not food-safe.
To prevent rust in the first place, never soak your grinder in water. Use a brush and a dry cloth for cleaning. If you live in a humid area, store your grinder with a silica gel packet inside the catch cup.
If the rust is deep or pitted, the burrs are compromised and won’t produce consistent grinds. Replace them.
Preventative Maintenance Schedule
Here’s a simple schedule to keep your grinder running smoothly:
- After every use: Tap out the grounds, wipe the catch cup, and give the burrs a quick brush.
- Weekly: Remove the handle and brush the threads and adjustment mechanism. Check for any loose screws.
- Monthly: Do a full deep clean as described above. Check the shaft nut and burr alignment.
- Every 6 months: Apply a tiny drop of food-grade mineral oil to the shaft and bearing. Wipe off any excess.
- Annually: Inspect the burrs for wear. If they look dull or chipped, consider replacing them.
This schedule is a guideline. If you grind daily, you may need to clean more often. If you use your grinder occasionally, you can stretch it out.
When to Upgrade vs. Repair
Not every problem is worth fixing. If your grinder is old, the burrs are worn, and parts are hard to find, it’s probably time to upgrade. A new burr set can cost half as much as a new grinder, so it’s not always a smart investment.
On the other hand, if the grinder is relatively new and the problem is a loose screw or misaligned burr, a 10-minute fix is worth it. You’ll save money and learn more about how your grinder works.
One thing to consider is capacity. If you’re constantly grinding multiple batches for a large pot or a cold brew, the 60g capacity of the CEVING manual grinder eliminates that extra session. It’s a meaningful upgrade over a 30g grinder.
If you’re dealing with an electric grinder that’s giving you trouble, we have a separate guide on Breville grinder problems that covers those issues.
FAQ
Why does my manual grinder produce so many fines?
Fines are tiny particles that extract too quickly and make coffee bitter. They’re caused by burr misalignment, dull burrs, or grinding too fast. If you’re cranking at high speed, slow down — a slower, steady pace produces a more uniform grind. Also check that the burrs are aligned and not worn.
Can I use water to clean my manual grinder?
Yes, but only if you dry every part completely before reassembly. Water can cause rust on the burrs and shaft. If you live in a humid climate, it’s safer to use a brush and a dry cloth. If you do use water, dry the parts with a towel and let them air out overnight.
How do I calibrate the zero point on my manual grinder?
The zero point is the finest setting where the burrs just touch. To calibrate, set the grinder to the finest setting and turn the handle. Listen for a light chirping sound. If you hear it before the dial hits zero, your adjustment ring is off. Loosen the ring, set it so the chirp happens at zero, and tighten it back. This ensures your espresso grind is consistent.
Why does my grinder smell like old coffee?
That’s the coffee oils going rancid. It happens when you don’t clean the grinder regularly. The oils oxidize and develop a stale, musty smell. A deep clean with a brush and a dry cloth usually fixes it. If the smell persists, you may need to replace the burrs.
Is it normal for a manual grinder to leave some grounds in the burrs?
Yes, a few grams of retention is normal. You can minimize it by tapping the grinder after use to dislodge loose grounds. If retention is excessive (more than a few grams), the burrs may be misaligned or the grind chamber is clogged. A deep clean should help.
What You Can Do Right Now
You don’t need to be a mechanic to keep a manual grinder in good shape. Most fixes are simple and take less than five minutes.
- Start every troubleshooting session by cleaning — it solves half the problems.
- Check the shaft nut and crank handle for tightness before you buy any replacement parts.
- If grind size is inconsistent, realign the burrs before replacing them.
- Keep your grinder dry to avoid rust. Use a brush, not water.
- Slow down your grinding speed for a more uniform grind.
- If you’re grinding more than 30g at a time, consider a larger capacity grinder like the CEVING 60g model to save yourself the extra batch.
- If the grinder is old and the burrs are worn, don’t throw money at it — replace it.
Manual grinders are built to last, but they need a little attention. A few minutes of maintenance every month will keep yours running smoothly for years.
Products related to this article
Sponsored / affiliate links. As an Amazon Associate I earn from qualifying purchases. I may earn additional commission from eligible campaigns.
 HomeBeyond Espresso Coffee Maker 12 Cups, Classic Stovetop Espresso Maker, 600ml / 20oz Coffeemaker for Gas & Ceramic Stovetops (Silver)
 Coffee Espresso Machine Handle Replacement Parts, Cafe Bracket Handle for Lidl Silvercrest CM4621 CM4218 KF5002 KF500S Barista (for 51mm Portafilter Basket - Not included)
 Linnkyfloa Coffee Espresso Maker Handle Replacement for Stovetop Moka Pot or Percolator, Black Plastic for Spare Part Compatible with Italian(9-12 Cup)