You pull the lever, and nothing comes out but lukewarm water. The steam wand hisses weakly, or worse, stays silent. Your morning ritual just ground to a halt, and the culprit is usually the same handful of parts inside the machine. Most heating failures come down to four components: the thermal fuse, the thermostat, the heating element, or a layer of limescale acting like a wool blanket around the boiler.
This guide walks you through a diagnostic decision tree. Instead of guessing, you’ll learn which part is cold based on the symptoms, how to test each suspect with a multimeter, and when it’s smarter to call a repair shop. You’ll leave with a clear path forward, whether that’s a 30-minute DIY fix or a decision to replace the machine entirely.

MacMaxe
MacMaxe Heating Element for Oscar & Musica…
- Perfect Fit for Oscar & Musica Machines – Engineered for seamless compatibility.
- Reliable Heating Performance – Maintains consistent water temperature for optimal espresso extraction.
- Premium Quality Replacement – Durable and efficient for long-term use.
As an Amazon Associate I earn from qualifying purchases.
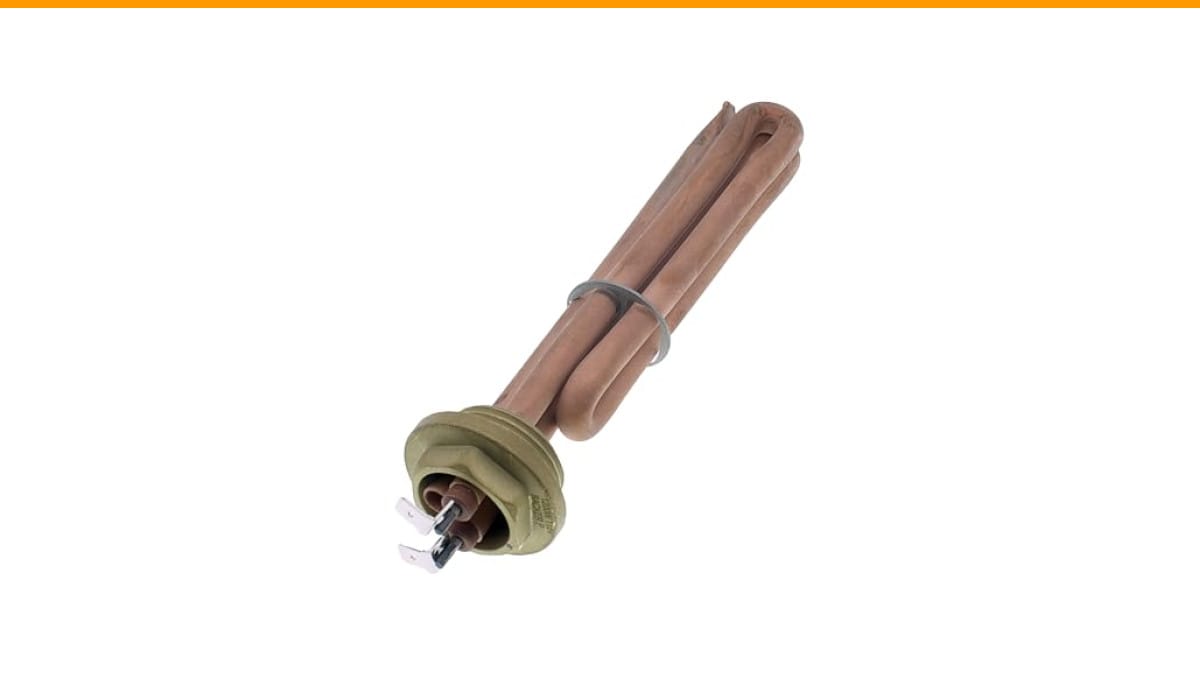
If your machine is a popular model like the Oscar or Musica, the fix might be even more straightforward. A replacement like the MacMaxe Heating Element for Oscar & Musica Espresso Machines is engineered for a seamless swap, so you can get back to pulling shots without hunting for an exact match.
First, Diagnose the Problem: Is It the Brew Water, Steam, or Everything?
Before you open the case, identify what’s actually cold. This narrows the suspect list immediately.
No heat at all, anywhere. The boiler never warms up. The machine might turn on, but the group head and steam wand both deliver cold water. This points to a total electrical failure: a blown thermal fuse, a dead thermostat, or a heating element that’s shorted out.
Brew water is hot, but steam is weak. This usually means the boiler is heating, but the steam thermostat is cutting off too early. It’s a thermostat drift issue, not a total failure.
Machine heats up, then stops after a few minutes. This is the classic intermittent failure. The thermal fuse or thermostat is tripping due to overheating, often caused by limescale buildup or a failing vacuum breaker.
Write down which symptom you have. It will dictate which section of this guide you need. If you’re also dealing with water delivery problems, check our guide on water pump issues — they often show up alongside heating problems.
Safety First: Unplug and Disassemble Your Machine Safely
This step is non-negotiable. A home espresso machine runs on 115V AC, and the boiler stores enough heat to cause serious burns. Wait at least 30 minutes after unplugging before touching anything inside.
You’ll need a few tools: a multimeter with continuity and resistance settings, a flathead screwdriver, a Phillips head screwdriver, and possibly a Torx bit for some European models. A pair of needle-nose pliers helps with stubborn wire connectors.
Remove the outer shell. Most machines have screws on the bottom or back. Keep them organized in a small dish. Take photos with your phone before disconnecting any wires — you’ll thank yourself when reassembling.
Once the shell is off, locate the boiler. It’s the large metal cylinder, usually brass or stainless steel. The heating element sits directly in it, and the thermostat and thermal fuse are attached to its exterior. The wiring is simple: power comes in, hits the thermostat, then the thermal fuse, then the heating element.
The Most Common Culprit: Testing and Replacing a Blown Thermal Fuse
The thermal fuse is a small, white or black component with two wires, often wrapped in a metal bracket on the boiler. It’s a one-time safety device. When the boiler overheats past a set temperature, the fuse blows permanently and cuts all power.
Here’s how to test it safely:
- Set your multimeter to the continuity setting (the symbol that looks like a sound wave).
- Touch the two probes to the two terminals of the fuse.
- Listen for a beep. If the multimeter beeps, the fuse is intact. If it stays silent, the fuse is blown.
A blown fuse means something else caused the overheating. Don’t just replace it and hope — find the root cause. Most often, it’s limescale insulating the boiler and causing the thermostat to lag, or a stuck vacuum breaker that traps air and steam inside.
Replacing the fuse is easy. Cut the old one out, strip the wires, and crimp or solder in a new fuse with the same temperature rating. Wrap the connection in heat-shrink tubing. The rating is printed on the side of the fuse, like 240°F (115°C) or similar. Match it exactly.
The Second Suspect: Checking the Thermostat for Continuity
The thermostat is a mechanical switch that opens and closes based on temperature. When it fails, it usually fails open, meaning no power gets through to the heating element.
Test it the same way as the thermal fuse. Set the multimeter to continuity, touch the probes to the thermostat terminals, and listen for the beep. A working thermostat should show continuity when it’s cool. If it reads open (no beep), replace it.
Some machines have a resettable thermal cutoff instead of a one-time fuse. Look for a small red button on the thermostat. If it’s popped out, press it back in. That may solve the entire problem instantly.
The tricky part is thermostat drift. The switch might have continuity when cold but open up too early once it heats, cutting power before the water reaches brewing temperature. This causes intermittent heating — the machine warms up, then cools down, then warms up again. If you suspect drift, test the thermostat with a heat gun and a thermometer, or simply replace it. They’re inexpensive parts.
The Worst-Case Scenario: Testing the Heating Element for Shorts or Breaks
The heating element is a metal rod inside the boiler that gets red hot when electricity passes through it. When it fails, it either breaks (open circuit) or shorts to ground (which trips your home’s breaker).
First, disconnect the wires from the element terminals. Then set your multimeter to resistance (ohms). Touch the probes to the two terminals. A healthy element reads between 10 and 20 ohms for a 1200W element. If you see infinite resistance (OL on the display), the element is broken and needs replacement.
Next, test for a short to ground. Set the multimeter to continuity. Touch one probe to a terminal and the other probe to the boiler body (metal part). If it beeps, the element is shorted to ground — that’s a dangerous condition that trips breakers and can shock you. Replace it immediately.
Replacing a heating element is more involved than replacing a fuse. You’ll need to drain the boiler, remove the old element, clean the gasket surface, and torque the new element to spec. The MacMaxe replacement element is built for this exact job on Oscar and Musica machines, with all the right dimensions and a 1200W output that matches the original specification.
The Silent Killer: How Limescale Insulates Your Boiler and Blocks Heat
Limescale is the number one cause of premature heating element failure. Hard water leaves calcium and magnesium deposits that crust onto the element’s surface. These deposits act as an insulator, so the element gets hotter internally while the water around it stays cooler.
The thermostat reads the boiler temperature, not the element temperature. So the machine waits longer for the boiler to reach temperature, but the element is actually overheating inside its scale jacket. This leads to a blown thermal fuse or a melted element.
The fix is descaling. A proper descale involves running a solution through the boiler, letting it soak, and flushing it out. For a heavily scaled machine, you may need to remove the element and scrub it directly. Check our home descaling guide for the step-by-step process.
If your machine is in a hard-water area, test your water. A simple TDS meter costs under $15. If your water reads above 150 ppm, consider using filtered or distilled water with added minerals for espresso. It will extend the life of every heating component.
Why Your Machine Heats Intermittently: Thermostat Drift and Air Locks
Intermittent heating is often more frustrating than no heat at all. The machine works fine for a week, then suddenly stops heating mid-shot, then works again the next day.
Two causes dominate. The first is thermostat drift, which we covered earlier. The second is an air lock in the boiler. An air lock happens when the boiler fills with steam and air instead of water. The heating element heats the air, the boiler gets hot, but there’s no water to transfer that heat to the brew group.
Air locks usually occur after a machine has been drained or has sat unused for weeks. The vacuum breaker, a small valve on top of the boiler, is supposed to release air as the boiler heats. If it’s stuck closed, pressure builds and creates the lock.
To fix an air lock, turn the machine on and open the steam wand. The wand acts as a vent. Let it hiss for a few minutes until a steady stream of water comes out. That means the boiler has refilled and the air is gone. This simple trick solves many intermittent heating issues without opening the case.
When to Stop DIY: Signs You Need a Professional Repair Service
Not every repair is a weekend project. Here’s when to put the screwdriver down.
If the control board is suspect. Modern machines have electronic control boards that manage the heating cycle. Testing these requires specialized equipment and soldering skills. A botched board repair can brick the machine.
If you’ve replaced the thermal fuse and thermostat and the element still doesn’t heat. At that point, the issue is likely a wiring harness or the control board. A technician can trace the circuit faster than you can.
If the machine is worth less than $200. A repair bill will easily run $100-$150 just for labor, plus parts. For a budget machine, that’s half the cost of a new one. Compare the repair quote against the replacement price before committing.
For machines over $500, a professional repair is almost always worth it. The build quality justifies the cost, and a good tech will also descale and service the whole unit while it’s open.
Preventative Maintenance: How to Keep Your Machine Hot for Years
Heating failures don’t happen overnight. They’re the result of months or years of neglect. A simple schedule prevents most of them.
- Test your water hardness monthly. Use a TDS meter. If your water is hard, switch to a blend of distilled water and a mineral additive designed for espresso machines.
- Descale every 3 months for regular use, every 6 weeks for heavy use. Frequency depends on your water hardness. A descaling solution like citric acid works fine and costs pennies per use.
- Backflush weekly. This cleans the group head and prevents coffee oils from building up. It doesn’t affect the boiler, but it keeps the whole system healthy.
- Listen for unusual noises. A hissing or popping sound from the boiler usually indicates scale or an air lock. Address it immediately.
- Replace the vacuum breaker annually. It’s a cheap part, and a stuck breaker creates the air locks that cause intermittent heating.
These habits take minutes a week. They save you from a $150 repair bill and a week without espresso.
Frequently Asked Questions: Cold Water, Hot Steam, and Other Oddities
Why is my espresso machine not heating up but the light is on?
The indicator light only shows that the machine has power, not that the boiler is heating. A blown thermal fuse or a failed thermostat will kill the heating circuit while the light stays on. Test those two components first.
Can I use a multimeter to test a heating element without removing it?
Yes, for the resistance test. Disconnect the wires from the element terminals, then test across the terminals. For the ground test, touch one probe to a terminal and the other to the boiler body. Just make sure the machine is unplugged.
Why does my machine trip the circuit breaker when I turn it on?
That’s a classic short to ground. The heating element’s insulation has failed, allowing electricity to leak to the metal frame. Stop using the machine immediately and test the element as described above. This is a fire and shock hazard.
How often should I replace the thermal fuse?
You shouldn’t. The thermal fuse is a one-time safety device. If it blows, find out why. Replacing it without fixing the underlying cause means it will blow again, and the root cause might eventually damage the heating element or boiler.
Is it worth repairing an old espresso machine, or should I buy a new one?
It depends on the machine’s value and your attachment to it. A $150 repair on a $600 machine makes sense. The same repair on a $150 machine doesn’t. Also consider availability of parts. Some older models have parts that are hard to find, which drives up the cost and the wait time.
What to Do Next: Your Cold Machine Isn’t Dead Yet
You now have a clear path forward. Start with the simplest fix and work your way up.
- Diagnose by symptom: total failure points to fuse, thermostat, or element; intermittent failure points to thermostat drift or air lock.
- Unplug and wait 30 minutes before opening the case. Safety first, always.
- Test the thermal fuse for continuity with a multimeter. No beep means replace it.
- Check the thermostat the same way. Look for a resettable button before buying a new one.
- Test the heating element for resistance (10-20 ohms) and for shorts to ground.
- Descale your machine if you haven’t in the last three months. Limescale is the root cause of most heating failures.
- If you’ve replaced multiple parts and the machine still won’t heat, call a professional. For machines under $200, consider replacement instead.
Most home espresso machine heating problems are fixable in an afternoon with a $10 multimeter and a $20 part. The diagnostic process is straightforward once you understand the circuit. And if you do need a new heating element for an Oscar or Musica, the MacMaxe replacement part is a direct fit that gets you back to brewing without guesswork.
If you’re weighing whether to repair or upgrade, our automatic vs. semi-automatic comparison can help you decide if a new machine fits your routine better. And for a broader look at options, check our best automatic espresso machines under $1000 guide. Your next great shot is closer than you think.
Products related to this article
Sponsored / affiliate links. As an Amazon Associate I earn from qualifying purchases. I may earn additional commission from eligible campaigns.
 Coffee Espresso Machine Handle Replacement Parts, Cafe Bracket Handle for Lidl Silvercrest CM4621 CM4218 KF5002 KF500S Barista (for 51mm Portafilter Basket - Not included)
 Quick Heating Cup Warmer, Three Temperature Settings, Splashproof and Portable, for Coffee, Milk, Lightweight ABS Material
 Linnkyfloa Coffee Espresso Maker Handle Replacement for Stovetop Moka Pot or Percolator, Black Plastic for Spare Part Compatible with Italian(9-12 Cup)