You bought a bag of beans that cost more than your lunch. Then you brewed a cup, tossed the soggy paper filter in the trash, and realized you just paid roughly 50 cents for the privilege of throwing something away. That nagging feeling is why you’re here. You want to know if switching to a reusable filter actually saves money, or if it’s just a trendy way to add more chores to your morning routine.
This guide breaks down the real cost of ownership—not just the sticker price. You’ll see the break-even math, the hidden costs like cleaning time and replacement cycles, and how each filter type changes the flavor in your cup. By the end, you’ll have a specific budget number that makes sense for your brewing habits, not a vague ‘it pays for itself eventually’ promise.
MJULY
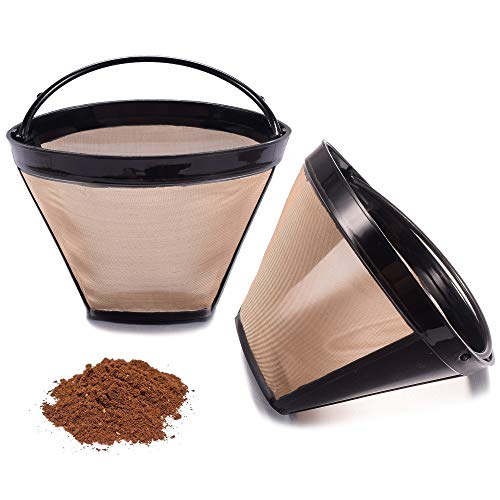
Reusable No.4 Cone Coffee Maker Filters for…
- Package come with 2 PCS #4 Cone Permanent Coffee Filters,easy to clean, repeated use,Save more money than disposable filters paper
- Using food grade stainless-steel woven mesh,the fine mesh makes the filtered coffee taste better.
- #4 cone coffee filter for Ninja coffee bar brewer.8-12 cups.As a replacement coffee filter for your coffee makers.
As an Amazon Associate I earn from qualifying purchases.
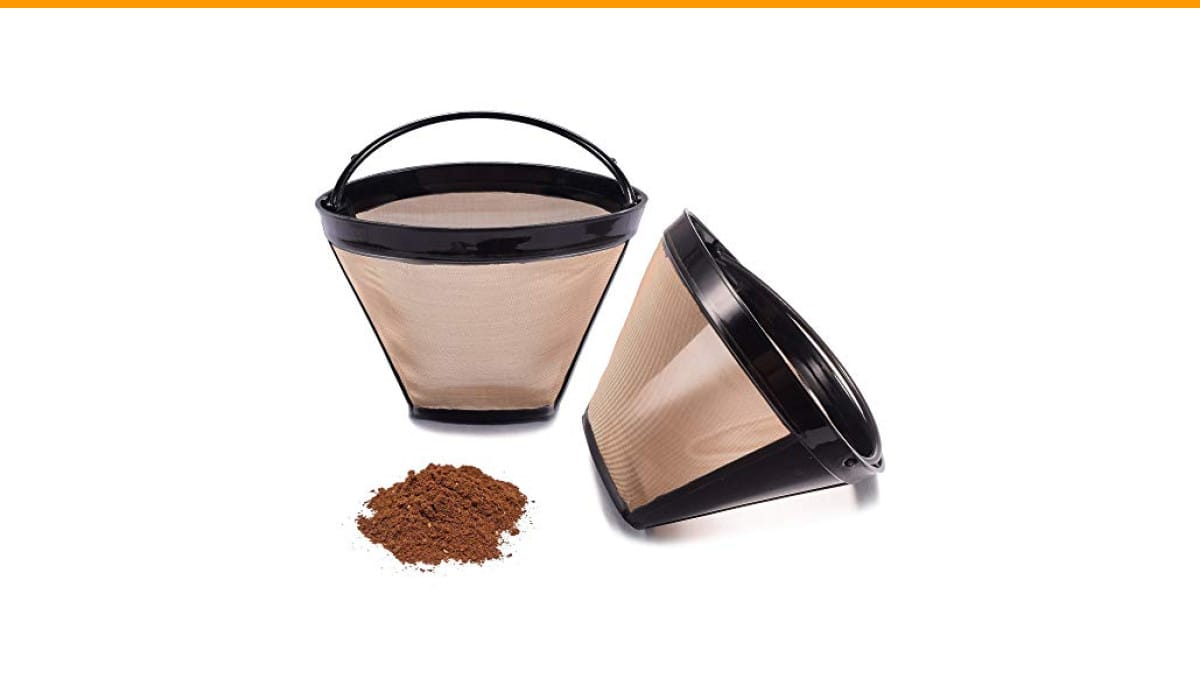
If you’re using a Ninja Coffee Bar or a similar #4 cone drip machine, a solid starting point is a stainless steel option like this reusable No. 4 cone filter set from MJULY. It comes with two filters, which solves the ‘one is dirty and I need coffee now’ problem immediately.
The Real Cost of Your Morning Cup: Paper vs. Reusable
Most people compare the price of a pack of 100 paper filters (around $5–$10) to a single reusable filter (anywhere from $7 to $30). That math is too simple. It ignores the cost of the coffee that soaks into the paper, the water that heats up for an extra minute, and the time you spend walking to the trash can.
Let’s get specific. A standard #4 paper cone filter costs about 6 to 10 cents each. If you brew one pot a day, that’s roughly $2.50 to $3.50 per month. A year of daily brewing costs you $30 to $42 just for the paper. In two years, that’s $60 to $84.
A decent stainless steel filter costs between $10 and $20. A cloth filter costs $8 to $15 but needs replacing every 6 to 12 months. A gold-tone plated filter sits at $15 to $25. The upfront cost of metal is higher than a single box of paper, but it’s a one-time purchase if you treat it right.
The real variable isn’t the filter price. It’s your habit. Are you brewing one cup or a full 12-cup carafe? Do you drink coffee seven days a week or just on weekends? The break-even point swings wildly based on those answers.
The Break-Even Point: How Much You Actually Save
Here’s where the ‘total cost of ownership’ idea kicks in. You’re not just buying a filter. You’re buying a system that includes cleaning supplies, replacement parts, and your own labor.
A Simple Formula to Calculate Your Savings
Use this to find your personal break-even number:
- Annual paper cost: (Cups per day × 365) × cost per paper filter.
- Reusable filter cost: Purchase price + (replacement filters × their price) + cleaning supplies per year.
- Savings: Annual paper cost – reusable filter cost.
Example: You brew 2 cups a day. Paper filters cost $0.08 each. That’s 730 filters × $0.08 = $58.40 per year.
Now buy a $15 metal filter that lasts 3 years. Your cost is $5 per year plus maybe $3 a year for a brush and occasional vinegar soak. Total: $8 per year. You save roughly $50 every year after the first month.
If you only brew on weekends, the math changes. That’s 104 cups a year. Paper costs $8.32. A $15 filter will take almost two years to pay for itself. For light users, the savings are real but slow. For daily drinkers, the payback period is usually under two months.
The Hidden Costs (Cleaning Time, Replacement Cycles)
Nobody talks about the 30 seconds it takes to rinse a metal filter. That’s not a dealbreaker, but it’s a cost. Over a year, 30 seconds a day adds up to about 3 hours. If your time is worth $20 an hour, that’s $60 of ‘labor’—which technically wipes out your savings.
But here’s the thing: you’re already standing at the sink. You rinse the carafe, you wash your mug. Adding a filter rinse takes 10 seconds if you do it immediately after brewing. If you let it dry with coffee oils on it, you’ll spend 5 minutes scrubbing later. The trick is to rinse it while it’s still hot.
Cloth filters have a replacement cycle that most people forget. A cotton or hemp filter lasts 6 to 12 months with heavy use. At $10 a pop, that’s $10 to $20 a year. That’s still cheaper than paper, but it’s not a one-time purchase. Metal filters, especially 304-grade stainless steel, can last a decade or more if you don’t bend them.
How Filter Type Changes Your Coffee’s Flavor and Body
This is the part most cost calculators ignore. The filter isn’t just a sieve. It’s a flavor tool. The same beans brewed through different filters taste like different coffees.
Metal Filters: Bold and Oily
Stainless steel mesh has holes big enough to let coffee oils and fine particles through. That means a heavier body, a thicker mouthfeel, and a flavor profile that’s rich and sometimes a little gritty. Light roasts shine here because their delicate floral notes aren’t stripped away. Dark roasts can taste muddy if the brew time is too long.
In testing, a metal filter gives you a cup that’s closer to French press than drip. If you like a clean cup with no sediment, this isn’t it. You’ll see a thin layer of sludge at the bottom of your mug. That’s the trade-off for more flavor.
Cloth Filters: The Balanced Middle Ground
Cloth sits between paper and metal. It absorbs some oils but not all. You get a clean cup with a bit of body. The flavor is brighter than metal but less crisp than paper. The downside is maintenance. Cloth needs to be boiled occasionally to remove trapped oils, and it holds onto smells. If you switch from a dark Sumatra to a light Ethiopian, you might taste the old coffee for a brew or two.
Paper Filters: Clean and Bright
Paper catches almost everything. The cup is crystal clear, bright, and clean. It strips the oils that carry flavor and body, which is why some people say paper-filtered coffee tastes ‘thin.’ It’s also the most forgiving. You can’t really mess up a paper brew. The cost is ongoing, and you have to deal with the waste.
Matching the Filter to Your Brew Method (AeroPress, Pour-Over, Drip)
Your brewer dictates the filter shape, but you still have choices.
- Drip machines (Ninja, Mr. Coffee, Cuisinart): #4 cone or basket filters. Metal cones work well here. They let the coffee drain at a natural pace. Avoid cloth in drip machines unless you like cleaning a slimy fabric pouch every day.
- Pour-over (V60, Chemex): V60 uses a thin paper filter that drains fast. A metal V60 filter changes the flow rate and can over-extract if your grind is too fine. Chemex is famous for its thick paper filters. A metal filter for Chemex defeats the purpose—you’ll get a totally different, much heavier cup.
- AeroPress: This is where metal and cloth shine. The AeroPress uses pressure, so a metal filter gives you an espresso-like body without the machine. Paper gives a cleaner, tea-like cup. You can also use a reusable metal disc that fits the AeroPress cap.
For a Ninja Coffee Bar specifically, the MJULY #4 cone filter set is sized to match the brew basket. The package includes two filters, so you can rotate them while one air-dries. Just check the dimensions against your existing basket before buying—some Ninja models have a slightly different shape.
The Environmental Impact: Beyond Just Trash
Paper filters are compostable. That’s a fair point in their favor. But most people don’t compost them. They go in the trash, wrapped in a wet coffee ground lump, and end up in a landfill where they break down slowly without oxygen.
Reusable filters produce zero daily waste. The environmental cost shifts to manufacturing and shipping a metal product once. The energy used to make a stainless steel filter is higher than a box of paper, but that footprint is amortized over thousands of brews. After about 30 uses, a metal filter has a lower environmental impact than using paper filters every day.
There’s also the water factor. Rinsing a metal filter uses about 8 ounces of water. Washing a cloth filter in the sink uses more. If you’re in a drought-prone area, that’s a real consideration, though it’s minor compared to the water used to grow and process the coffee itself.
If you’re worried about grounds going down the drain, check out our guide on coffee grounds and plumbing before you start rinsing your filter over the sink.
Maintenance and Lifespan: What to Expect
Metal filters are nearly indestructible. They can bend if you drop them or warp if you twist them, but normal use won’t hurt them. The mesh can clog over time if you don’t rinse it. Coffee oils build up and make the water drain slower. A weekly soak in a vinegar solution fixes that. You can also put most stainless steel filters in the dishwasher, but hand washing is gentler on the mesh.
Cloth filters wear out. The weave loosens, the edges fray, and they start to smell even after cleaning. You’ll know it’s time to replace when the coffee tastes stale or the filter looks stained beyond cleaning.
Gold-tone filters are stainless steel with a gold plating. The plating can flake off if you use abrasive cleaners or a metal brush. Once it flakes, the filter still works, but it’s no longer non-reactive. Stick to a soft sponge.
One thing that kills reusable filters faster than anything is leaving them in a damp, dark place. Mold grows on coffee oils. If you use a cloth filter, let it dry completely before storing it. For metal, a quick towel dry after rinsing prevents any musty smell.
Common Problems and Quick Fixes (Clogging, Sediment, Staining)
You’ll run into three issues with reusable filters. Here’s how to fix them.
Clogging: Water pools on top of the grounds and takes forever to drain. This happens when the mesh is blocked by oils. Fix it by soaking the filter in a 1:3 vinegar-to-water solution for 30 minutes, then scrubbing with a soft brush. If it still drains slow, your grind is too fine. Go one step coarser on your grinder.
Sediment in your cup: This is normal with metal filters. The mesh lets fine particles through. If it bothers you, let the coffee sit for a minute after brewing so the sediment settles to the bottom. Don’t drink the last sip. Or switch to a cloth filter, which catches more fines.
Staining: Coffee stains are cosmetic, not a health issue. You can’t get a stainless steel filter perfectly white again unless you boil it in baking soda. That’s a waste of time. The stains don’t affect flavor. If they bother you, a quick soak in a descaling solution helps. Keep your machine descaling routine separate from your filter cleaning.
The Verdict: What Should You Spend?
Here’s a clear budget range based on your habits.
| Brewing Frequency | Recommended Filter Type | Reasonable Price Range | Payback Period |
|---|---|---|---|
| Daily (2+ cups) | Stainless steel mesh | $12 – $20 | 1 – 2 months |
| Weekly (weekends only) | Cloth or cheap metal | $8 – $12 | 6 – 12 months |
| Occasional (few times a month) | Stick with paper | $0 (use paper) | N/A |
| Espresso (AeroPress) | Metal disc or cloth | $10 – $15 | 3 – 4 months |
If you brew daily, spending $20 on a filter is smart. It pays for itself in under two months and then saves you $30 to $50 a year. If you brew once a week, a $10 filter is the ceiling. Anything more and you’re waiting over a year to break even. If you brew less than twice a month, don’t bother. The paper filters will cost you less than $5 a year anyway.
The MJULY set at roughly $15 for two filters fits the daily brewer perfectly. You get a backup, which is worth the extra few dollars over a single filter. The second filter means you never have to scramble when one is dirty or lost.
Frequently Asked Questions
How long does a stainless steel coffee filter last?
With normal use and regular rinsing, a 304-grade stainless steel filter lasts 5 to 10 years. The mesh doesn’t degrade. The only failure point is physical damage—bending the rim or poking a hole with a sharp object. Cloth filters are different; they need replacing every 6 to 12 months.
Does a metal filter make coffee taste stronger?
It tastes bolder, not stronger in caffeine. Metal lets the natural coffee oils pass through, which adds body and mouthfeel. The flavor is richer and more textured. You might perceive it as stronger because the taste is more intense. The caffeine content is the same.
Can I use a reusable filter in my Keurig?
Yes, but only if you buy the specific pod-shaped reusable basket for Keurig machines. A #4 cone filter won’t fit. The reusable K-cup pods cost $10 to $15 and work well with medium or coarse grounds. They’re messier than a drip filter, but they save you about 50 cents per pod.
Why is my coffee cloudy with a metal filter?
That’s sediment—micro-fine coffee particles that slip through the mesh. It’s harmless and actually adds to the body. If you want a clearer cup, use a slightly coarser grind or switch to a cloth filter. You can also let the coffee sit for two minutes after brewing; the sediment will settle at the bottom.
Is it safe to put a metal coffee filter in the dishwasher?
Most are dishwasher-safe, but it’s not the best idea. Dishwasher detergent is abrasive and can dull the finish over time. It can also knock the filter around and bend the rim. Hand washing with warm water and a soft brush takes 15 seconds and keeps the filter in better shape. If you do use the dishwasher, place it on the top rack away from the heating element.
What to Do With This Information
- Calculate your annual paper filter cost before buying anything. Use the formula above with your actual cup count.
- Set a budget cap: $20 for daily brewers, $10 for weekend warriors, $0 for occasional sippers.
- Buy a two-pack if you brew daily. The backup filter saves you from the ‘it’s dirty and I need coffee now’ panic.
- Rinse your metal filter immediately after brewing. Hot water does the work; cold water leaves oils stuck on the mesh.
- Expect sediment with metal filters. It’s a flavor trade-off, not a defect.
- Replace cloth filters every 6 months. They’re cheap, but they do wear out.
- Clean your filter weekly with a vinegar soak to prevent clogging. Your coffee maker cleaning routine should stay separate from this.
The best filter is the one you’ll actually maintain. A $30 filter that you hate cleaning is worse than a $5 box of paper. Pick the option that fits your routine, do the math, and enjoy the cup.
Products related to this article
Sponsored / affiliate links. As an Amazon Associate I earn from qualifying purchases. I may earn additional commission from eligible campaigns.
 Stainless Steel Moka Pot Coffee Filter Disc for Espresso Brewing, Coffee Maker Replacement Filter Plate for Home Office Coffee Bar Cafe (FOR 4 Cups)
 Coffee Espresso Machine Handle Replacement Parts, Cafe Bracket Handle for Lidl Silvercrest CM4621 CM4218 KF5002 KF500S Barista (for 51mm Portafilter Basket - Not included)
 HomeBeyond Espresso Coffee Maker 12 Cups, Classic Stovetop Espresso Maker, 600ml / 20oz Coffeemaker for Gas & Ceramic Stovetops (Silver)