You grind your beans, brew a great cup, and put the grinder back on the shelf. A week later, the handle turns harder. The grind size looks uneven. Your coffee tastes a little flat, a little bitter, but you can’t place it. The culprit isn’t the beans or your brew method. It’s the stale coffee dust and oils caked into your burrs.
Manual grinders get dirtier than most people realize. Because you use them by hand, you feel the resistance change before you taste the difference. But the flavor damage happens long before the handle gets stiff. This guide covers exactly how often to clean a manual coffee grinder, based on how many cups you grind per day, plus the dry-cleaning methods that protect steel burrs from rust.

Urnex
Urnex Grindz Professional Coffee Grinder Cleaning Tablets…
- Removes coffee residue and oils in standalone coffee grinders (not for super automatic espresso machines)
- Patented, all-natural, food safe and gluten-free tablet absorbs and loosens coffee grounds
- Effectively cleans grinders without disassembling burrs or casings
As an Amazon Associate I earn from qualifying purchases.
You’ll walk away with a simple daily, weekly, and monthly routine. No guesswork, no disassembly anxiety, and no ruined burrs.
For quick maintenance between deep cleans, many home users keep a jar of Urnex Grindz cleaning tablets on hand. They absorb and lift coffee residue without taking your grinder apart, which makes them a solid option for the monthly reset we’ll discuss later.
Why Manual Grinders Need More Attention Than Electric Ones
Electric grinders hide their mess. You press a button, and the machine does the work. The motor masks the friction of dirty burrs. A manual grinder gives you direct feedback. You feel every bit of clogged coffee dust in the handle’s resistance.
Manual grinders also retain more grounds. Without a motor’s vibration to shake loose the fines, coffee dust settles into every crevice of the burr chamber. That trapped dust goes stale within 24 to 48 hours. The next time you grind, those stale particles mix with fresh beans and taint the flavor.
There’s also the rust factor. Most manual grinders use uncoated steel burrs. Water is the enemy. Electric grinder guides often suggest rinsing parts under a faucet, but that advice can ruin a hand grinder. You need a dry-cleaning approach that removes oils without introducing moisture.
The Golden Rule: Cleaning Frequency Based on Usage
The standard advice of “clean it once a month” is too vague. Your schedule depends on how many cups you grind. Here’s the breakdown I use after testing several popular hand grinders side by side.
Light Users (1-2 cups/day)
If you grind one or two cups daily, you’re in the low-residue zone. A quick dry brush-out after every few uses keeps things acceptable. You can get away with a full disassembly clean every two weeks. The burrs won’t be caked, but coffee oils will still build up slowly.
For light users, the bigger risk is flavor transfer. If you switch between a dark roast and a light fruity Ethiopian bean, the old oils will linger. A weekly wipe-down of the burrs with a dry cloth prevents that crossover.
Heavy Users (3+ cups/day)
Grinding three or more cups daily means your grinder works hard. Coffee residue accumulates fast. You need the full routine: brush after every use, deep clean weekly, and a tablet or rice reset monthly.
Heavy use also means more static. That static charge makes grounds stick to the plastic catch cup and the burr chamber walls. Stuck grounds turn into hard, oily clumps that affect grind consistency. If you notice your grind size looking inconsistent, dirty burrs are often the reason before the burrs themselves wear out.
The 2-Minute Daily Routine (Dry Brush Only)
This is the habit that keeps your grinder performing. Do it after your last grind of the day. It takes two minutes.
- Remove the handle and the catch cup.
- Use a stiff brush (a dedicated grinder brush or a clean paintbrush) to sweep the burrs and chamber.
- Tap the grinder gently on a cutting board to dislodge loose grounds.
- Brush the threads of the adjustment dial. Coffee dust loves to hide there.
- Wipe the catch cup with a dry microfiber cloth.
That’s it. No water, no soap, no disassembly. This routine removes the bulk of fresh coffee residue before it has a chance to go stale. It also keeps the handle turning smoothly.
Skip this for a week, and you’ll feel the difference. The grind becomes slower, and you’ll hear a higher-pitched squeak from the burrs as they struggle through oily buildup.
The Weekly Deep Clean (Disassembly & Dry Wipe)
Once a week, take the grinder apart. This is where you get the coffee oils that the daily brush can’t reach.
Step-by-Step Disassembly for Common Manual Grinders
Most manual grinders follow a similar pattern. The handle screws off. The top bearing assembly unscrews. The shaft and burr come out. The adjustment dial loosens from the bottom.
Check your model’s manual for specifics, but here’s the general flow:
- Remove the handle and the top knob.
- Unscrew the top bearing holder.
- Pull the shaft out from the top.
- Remove the outer burr from the chamber.
- Unscrew the bottom adjustment dial and remove the inner burr.
Lay all parts on a clean towel. Use the brush to remove loose grounds from every surface. Then take a dry microfiber cloth and wipe each burr face. You’ll see a brown film on the cloth. That’s the coffee oil residue.
How to Remove Stubborn Coffee Oils Without Water
Some oils are baked on hard. A dry cloth won’t shift them. Do not reach for soap and water. Instead, use a slightly damp cloth — barely wet, then wrung out thoroughly. Wipe the burrs, then immediately dry them with a separate dry cloth.
Even better: use a cleaning tablet. Grind a few Urnex Grindz tablets through the grinder. The tablet’s porous structure absorbs the oils and breaks down the residue without any moisture touching the steel. It’s the safest option for rust-prone burrs.
Let all parts air dry for 30 minutes before reassembling. This ensures no hidden moisture remains in the threads.
The Monthly Reset: Using Rice or Cleaning Tablets
Once a month, your grinder needs a deeper purge. This clears out the oils that have polymerized onto the burr edges. Two options exist: rice or cleaning tablets.
Rice is the budget option. Use instant rice, not regular long-grain. Instant rice is softer and less likely to damage burrs. Run about two tablespoons through the grinder at a coarse setting. The rice acts as an abrasive to scrub the burrs. The downside? Rice leaves starchy dust behind. You’ll need to grind a few tablespoons of fresh beans afterward to flush it out.
Cleaning tablets like Urnex Grindz are the better choice. They’re designed to absorb and lift coffee residue without scratching steel. They don’t leave starch behind, and they’re food-safe. The tablets cost more per use, but they do a cleaner job.
Here’s the cost-benefit reality. Rice is nearly free but leaves residue. Tablets cost a bit per cleaning but save you time and protect the burrs. For a $100+ manual grinder, the tablet route is worth it.
To use tablets: set your grinder to a medium-coarse setting. Add one tablespoon of beans and grind. Then add the tablets (about 30 grams for a standard dose) and grind through. Finally, grind another tablespoon of fresh beans to clear the chamber. Discard all the output.
How Bean Roast Level Changes Your Cleaning Schedule
Not all coffee creates the same mess. Dark roasts are oilier. The roasting process pushes oils to the bean’s surface. Those oils transfer directly to your burrs. If you drink dark roast daily, expect to deep clean twice as often as a light roast drinker.
Light roasts are drier and harder. They create more fines — the dusty particles that clog the burr chamber. So light roast users deal with more dust buildup, while dark roast users deal with more oily film.
Flavored beans are the worst. The added syrups and flavorings leave a sticky residue that hardens like glue. If you use flavored beans, run cleaning tablets after every bag. Otherwise, the flavor will permanently transfer to every subsequent bean you grind.
Signs Your Grinder is Dirty (Beyond Bad Taste)
Bad coffee is the obvious sign, but other symptoms appear first.
- Inconsistent grind size: If your grounds look like a mix of powder and boulders, the burrs are likely coated and dulled by oil buildup.
- Slower grinding: A clean grinder should chew through beans at a steady pace. If the handle slows down, residue is adding friction.
- Handle wobble or stiffness: Coffee dust in the threads makes the adjustment mechanism feel gritty.
- Stale smell: Open the catch cup and sniff. If it smells rancid rather than like roasted coffee, oils have gone bad.
- Static cling: Dirty burrs generate more static, making grounds fly everywhere when you open the catch cup.
Any one of these signs means you’ve waited too long. The daily brush routine prevents all of them.
Common Mistakes That Ruin Manual Grinders
People destroy their hand grinders with good intentions. Here are the mistakes I see most often.
Washing parts in the sink. Steel burrs rust within hours of water exposure. Even if you dry them, water seeps into the shaft bearing and corrodes it from the inside.
Using soap. Soap leaves a film that tastes like chemicals in your next cup. It also strips any factory lubrication on the shaft.
Putting it back together wet. A quick wipe-down isn’t enough. The threads hold moisture. Let everything dry completely.
Grinding rice on a fine setting. Fine grind settings create more friction and heat, which can damage the burr edges. Always use a coarse setting for rice or tablets.
Over-tightening the handle. After cleaning, users often screw the handle on too tight. This stresses the shaft threads. Hand-tighten only.
If you avoid these five mistakes, your grinder will last for years. If you make them, you’ll be shopping for a replacement sooner than you’d like.
Frequently Asked Questions
Can I use soap and water on my manual grinder?
No. Soap and water are the fastest way to ruin steel burrs. The water causes rust, and the soap leaves a chemical film that ruins coffee flavor. Stick to dry brushing and cleaning tablets. If you must use moisture, use a barely damp cloth and dry immediately.
How do I fix a jammed burr after cleaning?
A jam usually means the burr isn’t seated correctly after reassembly. Remove the handle and shaft. Check that the inner burr aligns with the drive pin. Reinstall the adjustment dial and turn it to the coarsest setting before grinding. If it still jams, disassemble again and check for any trapped coffee dust in the threads.
Does cleaning tablets affect the taste of the next batch of coffee?
No, as long as you follow the instructions. The tablets absorb oils and leave a neutral residue. Grinding a small amount of fresh beans afterward flushes out any remaining tablet dust. Your first cup after cleaning should taste cleaner and brighter.
How often should I replace the burrs on a manual grinder?
With regular cleaning, steel burrs last 5 to 10 years for home use. You’ll know they’re worn when you can’t achieve a consistent grind size even after a deep clean. The burrs will feel smooth rather than sharp. Replacement burrs are available for most popular models.
Is it okay to use compressed air to clean my grinder?
Yes, but carefully. Use short bursts from a can of compressed air to blow out the burr chamber. Hold the grinder upside down so dust falls out. Avoid blowing air into the shaft bearing, as that can push dust deeper into the mechanism. The brush method is safer and more thorough.
What Actually Works: A Simple Schedule to Follow
- Brush out the burr chamber after every grinding session. Two minutes, no disassembly.
- Deep clean with a dry cloth and disassembly once a week if you grind 3+ cups daily, or every two weeks for lighter use.
- Run cleaning tablets or instant rice once a month to purge baked-on oils.
- Switch to a weekly tablet clean if you use dark roasts or flavored beans.
- Never use running water on steel burrs. A barely damp cloth, dried immediately, is the maximum moisture allowed.
- Watch for inconsistent grind size or a stiff handle — those are your early warning signs.
- After any cleaning, let parts air dry completely before reassembly to prevent rust.
Cleaning a manual grinder isn’t complicated. It just requires consistency. The daily brush habit takes almost no time and prevents 90% of the problems. The weekly and monthly routines handle the rest. Stick to this schedule, and your grinder will deliver consistent, flavorful coffee for years.
Products related to this article
Sponsored / affiliate links. As an Amazon Associate I earn from qualifying purchases. I may earn additional commission from eligible campaigns.
 SOLUSTRE Electric USB Coffee Cup Warmer with Temperature Settings Portable Milk and Beverage Heating Coaster for Office Desk Small Lightweight Design Easy to Clean Surface Multi Functional
 Coffee Espresso Machine Handle Replacement Parts, Cafe Bracket Handle for Lidl Silvercrest CM4621 CM4218 KF5002 KF500S Barista (for 51mm Portafilter Basket - Not included)
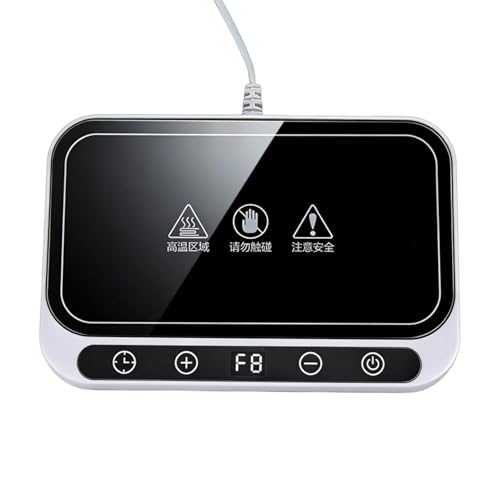 Cup Warmer for Coffee 8 Temperature Setting Adjustment