You notice it on a Tuesday morning. The brew cycle takes longer than it used to, the coffee tastes slightly bitter or flat, and maybe there’s a faint white crust around the water tank opening. That’s limescale. It builds up from hard water in every single serve machine, whether it’s a Keurig, Nespresso, or a generic pod brewer. If you ignore it, the scale clogs the internal lines, slows the pump, and can eventually kill the heating element. That’s a $100+ mistake you can avoid with a 20-minute descaling session.
This guide walks you through the entire process step by step. You’ll learn the difference between vinegar and commercial descaler, how often to actually do this, and the exact mistakes that ruin machines during descaling. No fluff, just the procedure I use on my own machines and recommend to friends who ask.
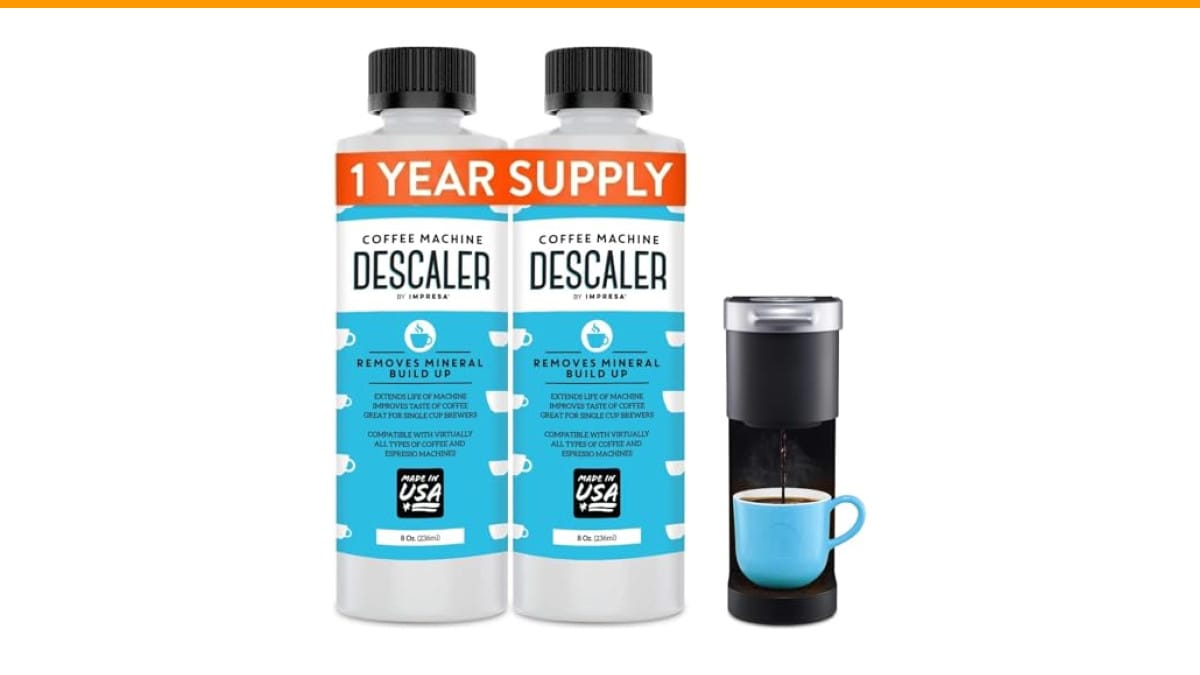
Before we get into the mechanics, a quick note on supplies. You can use white vinegar, but a dedicated descaling solution does a better job without leaving that vinegar smell behind. I’ve been using the IMPRESA Coffee Machine Descaler for over a year now. It comes in a two-pack, and each 8-ounce bottle handles two descaling sessions. It’s made in the USA and works with virtually every single serve machine I’ve tested it on, including Keurig, Nespresso, and Cuisinart models. The formula is strong enough to break down mineral deposits but gentle on the internal plastic and rubber parts.
Why Scale Builds Up and How It Hurts Your Machine
Every time you brew, water heats up inside the machine. That heat causes calcium and magnesium in the water to separate and cling to surfaces. Over time, those minerals form a hard crust. You can’t see most of it because it’s inside the heating tube and the needle assembly that pierces the pod.
Scale acts as an insulator. The heating element has to work harder to heat the same amount of water, which wastes energy and stresses the machine. The narrow water lines get partially blocked, so the pump struggles to push water through. That’s why your brew time stretches from 45 seconds to two minutes. Eventually, the pump can burn out completely, and that’s a repair that costs more than a new machine.
Scale also affects flavor. The mineral deposits trap old coffee oils and residue, which then leach into your fresh brew. That stale, bitter taste you’ve been blaming on the coffee beans? It might be your machine. Regular descaling removes those deposits so you taste the coffee, not the buildup.
If you want to understand the broader picture of why this matters, check out this piece on regular coffee maker cleaning. It covers the difference between daily rinsing and deep descaling, and why both matter.
Descaling with Vinegar vs. Commercial Solution
Vinegar works. It’s cheap, you probably have it in your pantry, and it dissolves calcium carbonate effectively. But it has downsides. The smell lingers for several brew cycles, and some manufacturers warn that vinegar can degrade the rubber seals inside the machine over time. If you use vinegar, you need to run at least three or four plain water cycles afterward to flush it all out.
A commercial descaler like the IMPRESA solution is formulated specifically for coffee machine internals. It dissolves scale faster, doesn’t leave a smell, and requires fewer rinse cycles. Most commercial solutions use citric acid or sulfamic acid, which are strong on minerals but safe for the plastics and seals used in coffee makers. The trade-off is cost — you’re paying a few dollars per session instead of pennies for vinegar.
There’s also the option of citric acid powder you buy in bulk. It’s the active ingredient in many commercial descalers, and you can mix it yourself. A tablespoon of citric acid powder dissolved in a liter of water works well. It’s cheaper than bottled descaler and doesn’t smell like vinegar. The downside is that you need to measure carefully — too much acid can be harsh on the machine, and too little won’t dissolve the scale effectively.
Here’s a practical comparison to help you decide:
| Method | Cost per Session | Smell | Rinse Cycles Needed | Best For |
|---|---|---|---|---|
| White Vinegar | ~$0.30 | Strong, lingers | 3-4 full cycles | Emergency descale, budget users |
| Citric Acid Powder | ~$0.50 | None | 2 full cycles | DIY enthusiasts, frequent descaling |
| Commercial Descaler (e.g., IMPRESA) | ~$2-$3 | None | 1-2 full cycles | Most users, all machine types |
For most people, I recommend a commercial solution. The convenience and lack of smell are worth the small price difference. If you’re on a tight budget, vinegar works fine — just be patient with the rinsing.
If you’ve been dealing with a machine that’s already clogged or brewing slowly, read our guide on cleaning a clogged coffee maker before you start descaling. Sometimes the issue is a blocked needle, not just scale.
Step-by-Step: How to Descale a Single Serve Coffee Maker
Here’s the exact process I use. It works for Keurig, Nespresso, Cuisinart, Hamilton Beach, and most other single serve machines. Check your manual first — some machines have a specific descaling mode. If yours does, follow the manual’s instructions for the solution-to-water ratio. If not, this general process works.
- Empty the water tank. Remove any remaining water and take out the water filter if your machine has one. The filter can absorb the descaling solution, which ruins it and reduces its effectiveness.
- Mix your descaling solution. For the IMPRESA solution, use half the bottle (4 ounces) and fill the rest of the tank with fresh water. For vinegar, use a 1:1 ratio of vinegar to water. For citric acid, dissolve 2 tablespoons in a full tank of water.
- Start the brew cycle without a pod. Place a large mug or bowl under the spout. Run a brew cycle with the solution, then discard the water. Repeat until the tank is empty. This pushes the solution through the internal lines and heating element.
- Let it sit. After the last brew cycle, let the machine sit for 15-30 minutes. This gives the solution time to dissolve stubborn scale. Don’t skip this step — it’s where most of the actual descaling happens.
- Rinse thoroughly. Fill the tank with fresh water. Run at least two full brew cycles without a pod. Discard the water each time. If you used vinegar, run a third or fourth rinse cycle to eliminate the smell.
- Clean the exterior and needle. While the machine is empty, wipe down the exterior with a damp cloth. Use a paperclip or the cleaning tool that came with your machine to gently clear any debris from the needle that pierces the pod. Clogged needles are a common cause of slow brewing.
That’s it. The whole process takes about 30 minutes, most of which is waiting for the solution to sit. If your machine has a descaling mode, it will handle the brew cycles automatically — just follow the prompts and keep the tank filled.
One thing I’ve learned from testing: don’t use a tiny mug for the rinse cycles. The solution can come out with some scale chunks, and you want a container that holds at least 12 ounces so you don’t have to empty it mid-cycle. A large measuring cup works well.
How Often Should You Descale?
There’s no single answer because it depends on your water hardness. If you live somewhere with hard water — think most of the Midwest or Southwest in the US — you should descale every 1 to 2 months. If you have soft water or use a filter, every 3 to 4 months is usually enough.
Here’s a simple test: if you see white flakes in your brewed coffee or on the water tank, you’re overdue. Another sign is a longer brew time than when the machine was new. Pay attention to how long it takes — if it’s noticeably slower, scale is building up.
Most manufacturers recommend descaling every 3 months as a baseline. The IMPRESA bottle is designed for that schedule — one bottle gives you two sessions, and the two-pack covers a year of quarterly descaling. If you brew heavily, like multiple pots a day, move to every 2 months.
For a deeper understanding of the full cleaning routine, our guide on cleaning your coffee maker properly covers everything from daily rinses to monthly deep cleans. It’s worth reading if you’ve never thought about the difference between wiping down the outside and actually cleaning the internals.
Common Mistakes That Ruin Machines During Descaling
I’ve seen people wreck their coffee makers trying to descale them. Here are the mistakes to avoid.
Using too much solution. More isn’t better. A concentrated solution can corrode the internal seals and plastic tubing. Always follow the ratio on the bottle or the manual. The IMPRESA solution is designed to be used at 4 ounces per session, not the whole bottle.
Skipping the rinse cycles. The descaling solution is acidic. If you leave it in the lines, it will slowly eat away at the rubber seals. Always run at least two full rinse cycles with fresh water. If you used vinegar, run three or four.
Descaling with a water filter installed. The filter will absorb the acid, and then you’ll be brewing through a filter full of vinegar or citric acid. Remove the filter before starting and reinstall it after the descaling and rinsing is complete.
Forgetting to empty the drip tray. The descaling solution will fill up the drip tray, and if it overflows, you’ll have a mess. Empty the tray before you start and check it between cycles.
Using the machine immediately after descaling. Give the machine a few minutes to air dry after the final rinse. This lets any remaining moisture evaporate and prevents the next brew from tasting like solution.
If your machine is already showing signs of failure, like flashing lights or buttons that don’t respond, descaling might not fix it. Check our troubleshooting guides for Cuisinart flashing lights or Braun not brewing if you’re dealing with those specific issues.
Frequently Asked Questions
Can I use apple cider vinegar instead of white vinegar?
You can, but you shouldn’t. Apple cider vinegar contains organic compounds that leave a sticky residue inside the machine. White vinegar is distilled and doesn’t have that problem. Stick with white vinegar or a commercial descaler.
How do I know if my machine needs descaling?
The most obvious signs are slower brew time, a louder pump, and a change in coffee taste. You might also see white mineral flakes in your cup or around the water tank. If you have hard water, don’t wait for these signs — just descale on a regular schedule.
Does descaling remove coffee stains from the water lines?
Yes and no. Descaling removes mineral scale, which is the hard white crust. It also helps loosen coffee oils and residue, but it’s not a substitute for cleaning with a coffee-specific cleaner. If your coffee tastes bitter, you might need both descaling and a cleaning cycle with a detergent-based cleaner.
Can I descale a Nespresso machine the same way as a Keurig?
Mostly, yes. The general process is the same — run the solution through, let it sit, rinse thoroughly. However, Nespresso machines have a specific descaling program that you should activate. Check your manual. The IMPRESA solution is compatible with Nespresso machines, but the machine’s firmware may require a specific sequence of buttons to enter descaling mode.
Is it safe to drink the coffee brewed right after descaling?
No. You need to run at least two full rinse cycles with fresh water before brewing your next cup. The descaling solution is not safe to consume, and even after rinsing, the first cup might have a slightly odd taste. Discard that first post-descale cup.
What to Do Differently Going Forward
Descaling is maintenance, not a one-time fix. Here are the habits that will keep your single serve machine running for years.
- Descale every 1-3 months, depending on your water hardness. Hard water means more frequent descaling.
- Use filtered water for brewing. It reduces mineral buildup significantly and makes your descaling sessions more effective.
- Remove the water filter before descaling and reinstall it afterward. The acid will ruin the filter.
- Run a plain water brew cycle every week to flush out loose coffee oils and residue. This keeps the lines cleaner between descaling sessions.
- Empty the water tank if you’re not using the machine for a few days. Stagnant water encourages mineral deposits and bacterial growth.
- Keep the needle that pierces the pod clean. A clogged needle can cause slow brewing even if the machine is fully descaled.
- Keep a bottle of commercial descaler on hand. The IMPRESA two-pack lasts a year, so you won’t be tempted to skip a session because you’re out of solution.
Descaling takes 30 minutes every few months. That’s a small investment compared to the cost of a new machine. Set a reminder on your phone, keep the descaler in a visible spot, and treat it like changing the oil in your car — regular maintenance that prevents bigger problems down the road.
Products related to this article
Sponsored / affiliate links. As an Amazon Associate I earn from qualifying purchases. I may earn additional commission from eligible campaigns.
 HomeBeyond Espresso Coffee Maker 12 Cups, Classic Stovetop Espresso Maker, 600ml / 20oz Coffeemaker for Gas & Ceramic Stovetops (Silver)
 Belly Moka Coffee Maker Stovetop Espresso Maker 9 Cup Aluminum Moka Pot Percolator 15oz 450ml Easy Brewing for Electric Ceramic Stoves Home Camping Italian Cuban Café Classic Black
 Belly Moka Coffee Maker Stovetop Espresso Maker 6 Cup Aluminum Moka Pot Percolator 10oz 300ml Easy Brewing for Electric Ceramic Stoves Home Camping Italian Cuban Café Classic Silver