You just dialed in a perfect shot, pulled it, and now the grinder sits there — full of coffee oils, a few stray grounds, and the lingering aroma of yesterday’s beans. Most people ignore it until the next morning. But if you’re about to store that grinder for a week, a month, or longer, the way you handle it now determines whether your first shot after the break tastes like chocolate or like cardboard.
Storing an espresso grinder isn’t complicated, but it does require a few deliberate steps. The enemy is always the same: moisture, stale coffee oils, and the slow oxidation of whatever beans are left inside the hopper. This article walks you through short-term storage (overnight to a few days), long-term storage (weeks to months), and travel scenarios. You’ll also see a comparison of storage methods, answers to common questions, and a practical checklist you can use right now.

Ohtomber
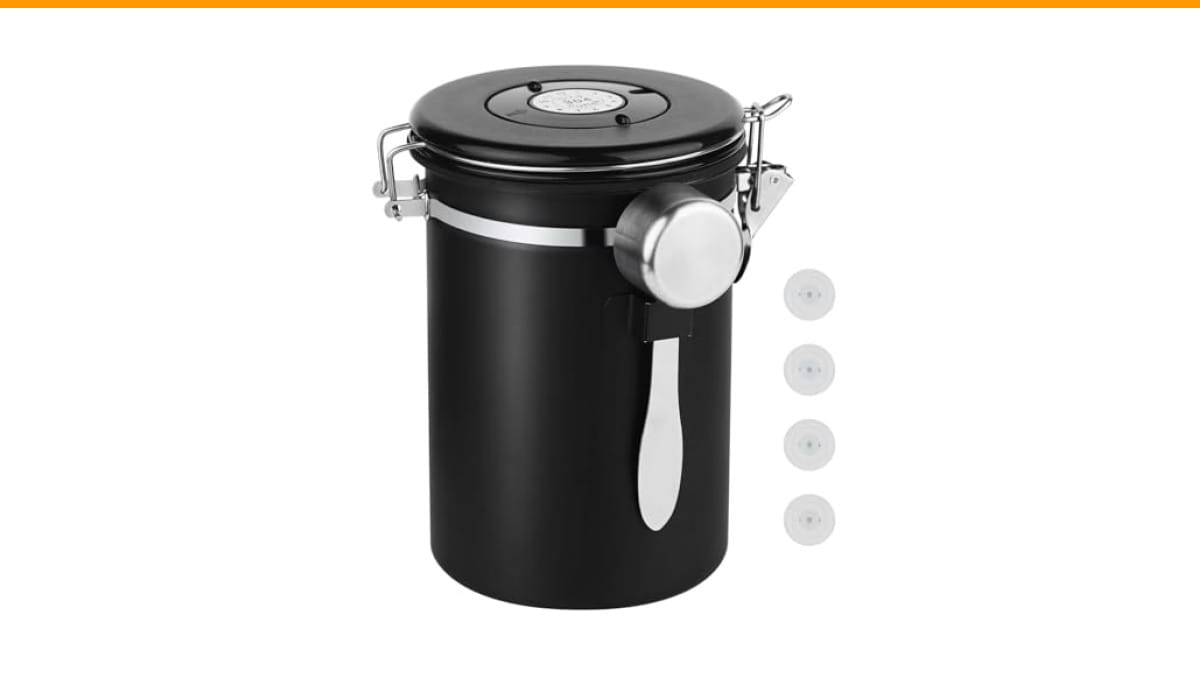
Ohtomber 22oz Stainless Steel Airtight Coffee Canister…
- Sturdy & Safe Materials- Ohtomber coffee canister is made of food grade 304 stainless steel material, which is safe and sturdy, no…
- Effectively Maintain Freshness- Ohtomber coffee bean storage jar has a locking design and a one-way venting valve, which effective…
- Date Tracking Design & Bonus Scoop - Our coffee jar storage container come with a date tracker and a coffee measuring scoop. The c…
As an Amazon Associate I earn from qualifying purchases.
One tool that makes a real difference here is a proper airtight canister. I keep my daily beans in an Ohtomber 22oz Stainless Steel Airtight Coffee Canister — it has a one-way valve that lets CO2 escape without letting oxygen in, plus a date dial on the lid so I know exactly when I opened the bag. That’s the kind of simple habit that keeps your grinder feed fresh.
Clean Before You Store — Every Single Time
The biggest mistake people make is storing a grinder with old grounds still in the burrs. Coffee oils go rancid. They turn sticky, attract dust, and become a breeding ground for off-flavors. If you pull the grinder out of a cabinet three months later, those rancid oils will coat your first few batches of fresh beans.
Here’s the cleaning routine I use before any storage period longer than overnight:
- Empty the hopper completely. Use a brush or a vacuum attachment to get the loose grounds out.
- Run a few grams of grinder cleaning tablets (like Urnex Grindz) through the machine. These are food-safe, abrasive pellets that scrub the burrs without damaging them. Run about 10 grams, then discard the output.
- Run 10–15 grams of fresh, cheap coffee beans through to clear out any tablet residue. Discard those grounds too.
- Wipe the hopper, the chute, and the exterior with a dry microfiber cloth. Never use water unless the manufacturer says the parts are removable and dishwasher-safe — most burr grinders are not.
If you’re storing for less than 48 hours, you can skip the tablets and just brush out the loose grounds. But for anything longer, do the full clean. Your future self will thank you when the first shot after the break tastes like it should.
If you need a deeper clean every few months, check out our step-by-step grinder cleaning guide — it covers the full teardown for both flat and conical burrs.
Short-Term Storage: Overnight to a Few Days
Most home baristas store their grinder on the counter overnight. That’s fine, but there are two things to get right.
First, empty the hopper. Leaving beans in the hopper overnight exposes them to air and light, which accelerates staling. Even with a hopper lid, the seal is rarely airtight. A 22oz canister like the Ohtomber keeps beans sealed and blocks light — two things a clear plastic hopper can’t do.
Second, leave the grinder plugged in but powered off. Some grinders have a standby mode that keeps the burrs slightly warm, which can help with static. But if you’re not using it for more than a day, unplug it. There’s no reason to let a motor sit energized for days on end.
If you live in a humid climate, consider placing a small silica gel packet inside the hopper (with the hopper empty) to absorb moisture. Humidity is the quiet killer of espresso grinders — it makes grounds clump and accelerates rust on uncoated burrs.
Long-Term Storage: Weeks or Months
Long-term storage is where most people make irreversible mistakes. Here’s the checklist I follow when I know I won’t use a grinder for a month or more:
- Clean the burrs thoroughly using the tablet method above. Do not skip this.
- Remove the hopper if it detaches. Wash it by hand with mild soap and water, dry it completely, then store it separately. If it’s not removable, wipe it dry and leave it empty.
- Lightly coat the burrs with food-grade mineral oil. This is optional but recommended for carbon steel burrs. It prevents rust during long idle periods. Before your first use after storage, run 20–30 grams of cheap beans through to remove the oil.
- Wrap the grinder in a plastic bag or cloth to keep dust off. Do not seal it in an airtight container — you want some airflow to prevent condensation.
- Store it in a dry, temperature-stable place. Avoid garages, attics, or anywhere near a water heater. Temperature swings cause condensation inside the motor and electronics.
One thing I learned the hard way: never store a grinder with the burrs touching. If your grinder has an adjustment ring, open it to the coarsest setting before storage. This relieves pressure on the burr edges and prevents them from developing flat spots over time.
Travel and Seasonal Storage
If you’re taking a grinder on a trip or moving it between homes, the rules change slightly. The main risk is physical damage to the burrs and the motor shaft.
For travel, empty the grinder completely and remove the hopper if possible. Wrap the body in a thick towel or bubble wrap. Place it in a hard-sided bag or box so nothing presses against the adjustment dial. If you’re flying, pack it in checked luggage — the burrs are heavy and will almost certainly be flagged by TSA if in a carry-on.
For seasonal storage (say, you only drink espresso at your cabin in the summer), follow the long-term checklist above. But add one more step: before you store it, run a few grams of unroasted (green) coffee beans through the grinder. Green beans are dense and dry, and they leave a neutral residue that protects the burrs from moisture. Run fresh roasted beans through before first use to clear it out.
If you’re storing multiple grinders, label them with a date and the burr type. I use painter’s tape and a sharpie. It sounds silly until you have three grinders in a closet and can’t remember which one has the SSP burrs.
Storage Method Comparison
| Method | Best For | Timeframe | Key Steps | Risk Level |
|---|---|---|---|---|
| Counter with beans in hopper | Daily use, same-day | Up to 24 hours | None | Low — but beans stale faster |
| Counter, hopper empty | Daily use with separate bean storage | 1–3 days | Brush out loose grounds | Very low |
| Cabinet, hopper empty | Occasional use | 3 days – 2 weeks | Brush, wipe exterior, keep dry | Low |
| Full clean + sealed container | Seasonal or travel | 2 weeks – 3 months | Cleaning tablets, remove hopper, coarsest setting | Medium — moisture risk if not dried |
| Full clean + oiled burrs + dry storage | Long-term idle | 3 months + | Clean, mineral oil, wrap, cool dry place | Low if done right |
The takeaway from this table: the longer you store, the more effort you put into cleaning and moisture control. There’s no shortcut for a 6-month idle period.
Common Questions About Grinder Storage
Can I store my grinder with beans in the hopper?
You can, but you shouldn’t — not for more than a day. Whole beans in a hopper go stale faster than beans in an airtight container because the hopper lets air circulate. Even with a lid, most hoppers have a gap around the lid seal. Store beans separately in an airtight canister, and you’ll taste the difference in the cup.
Should I store my grinder plugged in or unplugged?
Unplug it if you’re not using it for more than a day. A grinder in standby mode still draws a small amount of power and keeps the electronics warm. That warmth can attract dust and, over months, degrade the capacitors. Unplugging is free and takes two seconds.
Is it okay to store a grinder on its side?
No. Always store it upright. Laying a grinder on its side can cause the burr carrier to shift, and if there are any residual oils, they can seep into the motor housing. Upright is the only safe orientation.
How long can I leave a grinder unused before it needs a full clean?
If it’s been unused for more than a week, do at least a brush-out. If it’s been a month, run cleaning tablets through it. If it’s been three months, do the full clean plus oil the burrs if they’re carbon steel. The timeline depends on humidity — in a dry climate you can stretch it, in a humid one you can’t.
Does storing a grinder affect its calibration?
It can. If you store it with the burrs touching (finest setting), the pressure can cause slight misalignment over time. Always set the adjustment to the coarsest position before long-term storage. When you bring it back, re-dial in your espresso by running a few shots and adjusting — don’t assume the old setting still works.
What to Do Right Now
You don’t need to do a deep clean every night. But you should build a simple habit based on how often you actually use your grinder.
- Empty the hopper at the end of each day if you won’t pull a shot within 24 hours.
- Brush out loose grounds every 2–3 days — a cheap bellows brush works great.
- Run cleaning tablets once a month if you use the grinder daily.
- Set the burrs to the coarsest position before any storage longer than a week.
- Keep your daily beans in an airtight, light-blocking canister — the Ohtomber stainless steel canister is a solid pick for this.
- For long-term storage, oil the burrs and wrap the grinder in cloth.
- Never store a grinder in a humid room, garage, or near a heat source.
If you’re dealing with a grinder that’s already been stored badly and tastes off, start with a thorough clean before you blame the beans. And if you’re comparing burr types before your next purchase, our burr grinder versus blade guide explains the difference in practical terms. Storing your grinder correctly is a small habit with a big payoff — the first shot after any break should taste as good as the last one before it.
Products related to this article
Sponsored / affiliate links. As an Amazon Associate I earn from qualifying purchases. I may earn additional commission from eligible campaigns.
 Coffee Espresso Machine Handle Replacement Parts, Cafe Bracket Handle for Lidl Silvercrest CM4621 CM4218 KF5002 KF500S Barista (for 51mm Portafilter Basket - Not included)
 Linnkyfloa Coffee Espresso Maker Handle Replacement for Stovetop Moka Pot or Percolator, Black Plastic for Spare Part Compatible with Italian(9-12 Cup)
 Belly Moka Coffee Maker Stovetop Espresso Maker 9 Cup Aluminum Moka Pot Percolator 15oz 450ml Easy Brewing for Electric Ceramic Stoves Home Camping Italian Cuban Café Classic Black