You just pulled your last shot before a three-week vacation. Or you’re swapping machines because the counter is getting crowded. Either way, you’re staring at a $1,500 super automatic espresso machine and wondering if you can just unplug it and shove it in a cabinet.
Short answer: don’t. Super automatics hold water in their internal boiler, brew group, and milk system. Left alone, that water breeds mold, leaves scale, and can ruin seals. Storing one correctly takes about 20 minutes of work, but it saves you from a repair bill that’s often half the machine’s value.

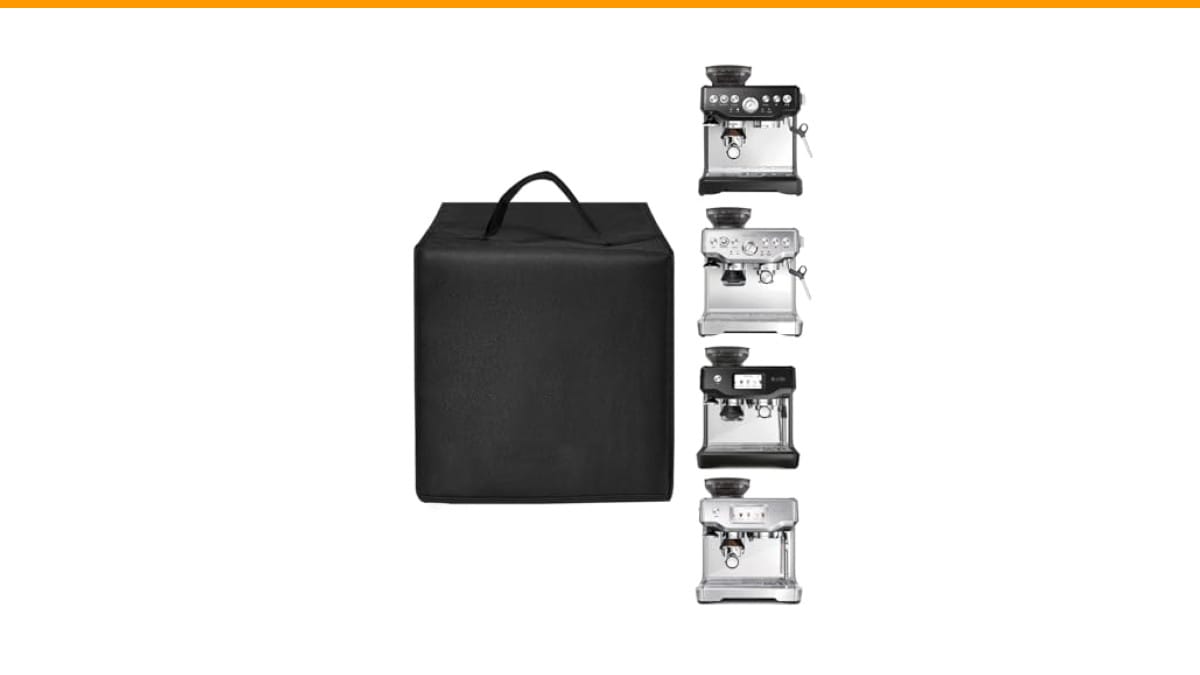
EiiJugaloo
Espresso Machine Cover for BES870XL/ BES880BSS/BES876BSS Coffee…
- Coffee Maker Cover size:15.8"W x 15.4"D x 15.8"H (40x39x40cm),cover compatible with Express Espresso Maker BES870XL/BES870BSXL/BES…
- Waterproof Nylon: Cover made of durable heavy duty 600D nylon, it is waterproof, scratch resistant and anti-static; it provides re…
- Kitchen Protective Cover:Keep the kitchen and dining room clean; avoid the trouble of dust, oil smoke and cooking steam; prolong t…
As an Amazon Associate I earn from qualifying purchases.
This guide covers the full process: pre-storage cleaning, drying every internal system, choosing the right cover, and the environmental conditions that keep your machine working when you pull it back out. No fluff, just the steps I’ve used after testing dozens of machines in my own kitchen.
While you’re prepping your machine, a decent cover keeps dust and kitchen grease off the exterior. The EiiJugaloo Espresso Machine Cover is a solid pick for Breville models like the BES870XL or BES880BSS. It’s made from waterproof 600D nylon, has a bottom opening for airflow, and folds flat when you don’t need it. It won’t do the internal cleaning for you, but it keeps the outside looking new while the machine sits idle.
Why Most People Store Their Machine Wrong
Here’s the mistake I see constantly: people run a cleaning cycle, empty the drip tray, and think that’s enough. It isn’t. The water that stays in the boiler and brew group is exactly what causes problems.
Stagnant water inside a super automatic does three things:
- It allows bacteria and mold to grow in the brew group and milk frother lines. You’ll taste it in your first cup after storage — a sour, musty flavor that no amount of descaling fixes quickly.
- It leaves mineral scale behind as water evaporates. Scale acts like an insulator on the boiler’s heating element, making it work harder and eventually fail.
- It can cause rubber gaskets and seals to dry out or swell, leading to leaks when you fire the machine back up.
So the real question isn’t if you should dry the machine before storage. It’s how thoroughly you need to do it. The answer is: more thoroughly than you think.
You don’t need to disassemble the entire machine. You do need to run the right cycles and let it air out completely. Let me walk you through the exact sequence.
Step-by-Step: Preparing Your Machine for Storage
Start this process a day before you actually need to store the machine. Rushing it leaves moisture behind.
1. Run a Full Cleaning Cycle
Use the manufacturer’s cleaning tablet or liquid. Run the dedicated cleaning program your machine has — usually a button labeled Clean or Calc-Clean. This flushes the internal lines and brew group. If you’ve been skipping this, now is the time to do it right.
After the cycle finishes, empty the drip tray and the coffee grounds container. Wash both with warm, soapy water and dry them completely.
2. Flush the Milk System
If your machine has an integrated milk frother or carafe, this is the step most people forget. Milk residue sours fast and is nearly impossible to scrub out once it dries.
Run hot water through the milk tube until the water runs clear. Then, if your machine allows it, soak the milk carafe and tube in a mild detergent solution. Rinse thoroughly. Let every part air dry on a towel for at least a few hours.
3. Drain the Boiler and Water Tank
Empty the water tank completely. Don’t just dump it in the sink — wipe the inside with a clean cloth to remove any film.
For the boiler, you have two options. Some machines have a drain valve at the bottom. If yours does, use it. If not, run the hot water dispenser until no more water comes out. Then turn the machine off. The internal boiler will still hold a small amount of residual water — that’s normal. The key is to remove the bulk of it.
4. Air Dry the Brew Group
If your machine has a removable brew group, take it out. Rinse it under cold water (no soap — it can leave residue), then let it dry fully on a rack. This takes several hours. Don’t rush it with a towel; you want air circulation to reach every crevice.
If your brew group isn’t removable, run the cleaning cycle, then leave the machine door or service panel open overnight. This lets air circulate around the internal components.
Leave the water tank off the machine, the drip tray out, and the service door open. You want maximum airflow for at least 12 hours before you close anything up.
Choosing the Right Cover and Storage Location
Once the machine is bone dry, it’s time to think about where it will sit and what will protect it.
Your storage location matters more than you might expect. Here’s what to look for:
- Temperature: Keep it between 50°F and 80°F. Extreme cold can crack plastic parts; extreme heat can warp them.
- Humidity: Basements and garages are often too damp. High humidity promotes mold growth even on a dry machine. A climate-controlled closet or pantry is ideal.
- Sunlight: Direct sunlight fades the plastic housing and can dry out rubber parts. Keep it in a dark cabinet or under a cover.
Now, the cover. A cover isn’t optional if you’re storing the machine on an open shelf. Kitchen dust is oily and fine, and it gets into every crevice. The EiiJugaloo cover I mentioned earlier is a good example of what to look for: waterproof fabric, a snug fit, and a bottom opening so air can still circulate. Airtight covers trap moisture, which defeats the entire purpose of drying the machine.
If you’re storing the machine in a closed cabinet, you can skip the cover. Just make sure the cabinet isn’t above a dishwasher or stove, where heat and steam rise.
Comparing Storage Methods: Covered vs. Uncovered vs. Original Box
| Storage Method | Best For | Pros | Cons |
|---|---|---|---|
| Covered on open shelf | Short-term (1-4 weeks) or rotating machines | Easy access; protects from dust and oil; looks tidy | Still exposed to temperature swings; cover adds a layer to remove |
| Uncovered in closed cabinet | Medium-term (1-3 months) | No cover needed; consistent environment; less dust | Harder to access; risk of forgetting it’s there |
| Original box, padded | Long-term (3+ months) or moving | Maximum protection; keeps all accessories together; best for shipping | Bulky; machine must be completely dry or mold grows inside box |
| Closet floor, no protection | Not recommended | None | Dust, pets, accidental bumps, and humidity all damage the machine |
The original box method is the most protective, but it has a hidden trap: people pack the machine up while it’s still slightly damp inside. Then it sits in a sealed box for months. When you open it, you get a musty smell and a moldy brew group. If you use the box, double-check that the machine has been air-drying for a full 24 hours first.
Bringing the Machine Out of Storage
You can’t just plug it in and pull a shot. The machine has been sitting dry, so the internal seals and pump need a moment to rehydrate.
Here’s the routine I use:
- Fill the water tank with fresh, filtered water.
- Plug in the machine and turn it on. Let it heat up fully.
- Run a full water flush through the group head (no coffee). This pushes out any air pockets and re-wets the seals.
- If you have a milk system, run hot water through it for 10-15 seconds.
- Run a cleaning cycle with a fresh tablet, even if you cleaned it before storage. This primes the lines and removes any residual stale water taste.
- Pull a blank shot (water only) and discard it. Your first actual espresso should taste clean.
If you hear grinding or rattling noises during the first flush, that’s normal — it’s air in the pump. Let it run. If the noise continues for more than 30 seconds, check that the water tank is seated properly and there’s no air lock in the line.
One thing I’ve learned the hard way: don’t skip the cleaning cycle after storage. Even a perfectly dried machine can have a slightly stale taste in the first few shots. That cycle clears it out. It’s worth the 10 minutes and one tablet.
Frequently Asked Questions
How long can I store a super automatic espresso machine?
You can store one for 6 to 12 months without issue if you follow the drying steps above. The main risk is not the storage itself, but the moisture left behind. A completely dry machine can sit for a year and fire right back up. I’ve done it with a machine stored in a closet for 8 months.
Do I need to descale before storing?
Yes, if your machine is due for it. Descaling before storage is better than after, because scale left inside the boiler continues to corrode while the machine sits. Run a descaling cycle, then flush with fresh water, then dry. If you just descaled a month ago, you can skip this step.
Can I store the machine on its side?
No. Never lay a super automatic on its side. Water trapped in the boiler or lines can seep into electronics or the grinder motor. Always store it upright, exactly as it sits on your counter.
Should I leave the porta-filter and basket attached?
Remove them. Store them separately in a ziplock bag or the original box. Leaving them attached puts stress on the group head gasket and can deform it over time. It also traps stale coffee oil against the machine.
What’s the biggest mistake people make when storing these machines?
Storing it wet. Most people run a rinse cycle, empty the drip tray, and call it done. That leaves water in the boiler and brew group. The second biggest mistake is storing it in a humid basement without any protection. Both lead to mold or scale damage that’s expensive to fix. Take the extra 15 minutes to dry it out properly.
What to Do Right Now
- Empty the water tank and run the hot water dispenser until it stops producing water.
- Remove and hand-wash the drip tray, grounds container, and any milk carafe. Air dry everything for at least 12 hours.
- If your brew group is removable, take it out, rinse it, and let it dry on a rack.
- Leave the service door and water tank off the machine overnight to promote airflow.
- Choose a storage spot that’s cool, dry, and out of direct sunlight. Avoid basements and garages.
- Get a fitted cover like the EiiJugaloo cover if the machine will sit on an open shelf.
- When you bring it back, run a cleaning cycle and a water-only flush before pulling your first shot.
Storing a super automatic isn’t complicated, but it’s a sequence of small steps that all matter. Skip one and you’ll taste it later. Do them all, and your machine will pick up right where it left off — ready for that first cup after your trip.
If you’re dealing with a machine that was already stored improperly, check our guide on deep cleaning before you give up on it. And if storage isn’t the issue but your machine is acting up, our troubleshooting guide covers the common failures. For long-term maintenance habits that keep your machine alive, read our maintenance tips.
Products related to this article
Sponsored / affiliate links. As an Amazon Associate I earn from qualifying purchases. I may earn additional commission from eligible campaigns.
 Coffee Espresso Machine Handle Replacement Parts, Cafe Bracket Handle for Lidl Silvercrest CM4621 CM4218 KF5002 KF500S Barista (for 51mm Portafilter Basket - Not included)
 MRS. MEYER'S CLEAN DAY Automatic Dishwasher Pods, Lavender, 20 Count - Pack of 3 (60 Total Pods)
 AirheadStorm Coffee Espresso Moka Stove Pot Handle, Mocha Pot Handle, Moka Express Handle Replacement Handle Parts for Espresso Pots 1 3 6 9-12 Cups(6 Cup)