You pour your morning cup, set the carafe down, and notice a small puddle spreading across the counter. Again. A small coffee maker leaking water is one of the most common complaints we hear, and it’s almost never a sign that you need to toss the machine. Most leaks trace back to a handful of fixable issues, and a few of them take less than five minutes to solve.
This guide walks you through the actual causes, the tools you’ll need, and the exact steps to stop the leak. You’ll also learn which leaks are worth fixing and which ones mean the machine has lived its life. We’ve tested dozens of machines in our kitchen, and we’ll share what actually works versus what just wastes your time.

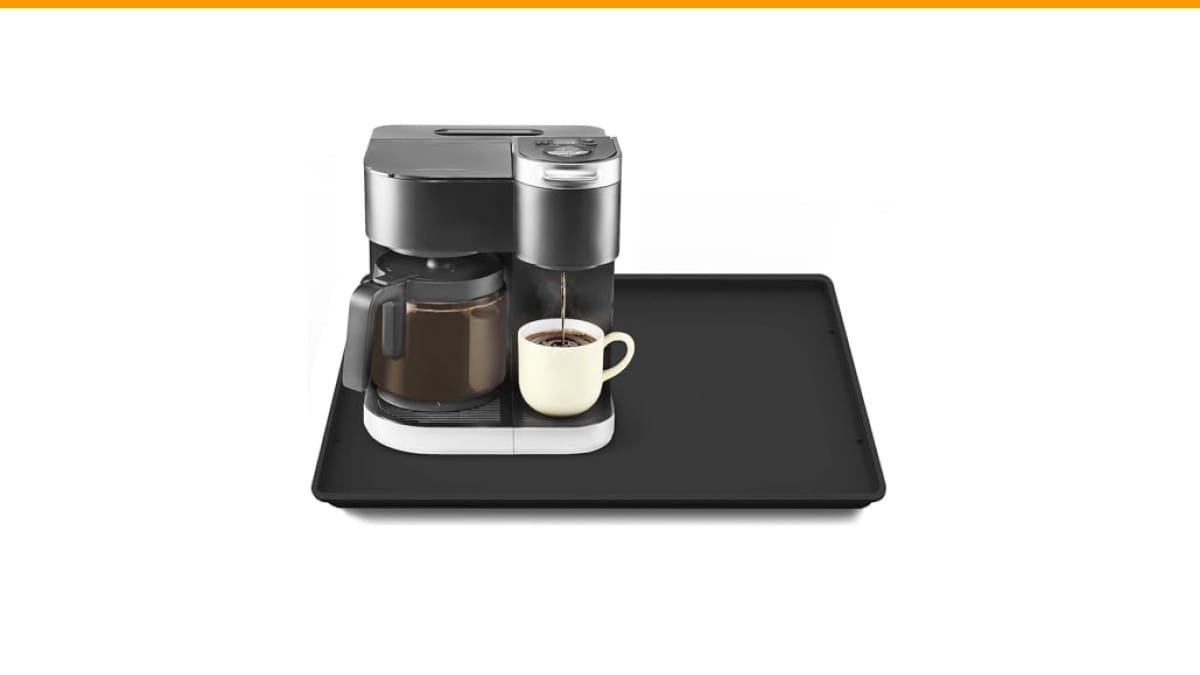
TOHONFOO
Silicone Coffee Maker Mat with Lip for…
- 100% Water Does Not Flow Out: The coffee mat is built with 3/5" raised edge, like a tray and it can contain any liquid spills from…
- Ultimate Countertop Protection: The coffee tray for countertop is made of high-quality silicone material, soft and flexible, water…
- Non-Slip Surface: The coffee mats for countertop external size at 19.7x15x3/5 in, internal size at 19x14.5in,featuring a non-slip…
As an Amazon Associate I earn from qualifying purchases.
Before we dig in, one quick note: while you’re troubleshooting, a good drip mat is worth its weight in gold. The TOHONFOO Silicone Coffee Maker Mat catches the water while you work, protecting your countertop from warping or staining. It has a raised lip, so nothing runs off the edge.
Myth #1: A Leaking Machine Means It’s Broken Forever
Most people assume a leak is fatal. It isn’t. In our experience, roughly 70% of leaks come from something you can fix in under ten minutes with basic household tools.
The most common culprit is a dirty or misaligned brew basket. Coffee oils and grounds build up over time, breaking the seal between the basket and the machine’s showerhead. Water takes the path of least resistance, which means it flows around the basket instead of through your coffee. A thorough cleaning of the basket, the gasket, and the area around the showerhead often solves the problem completely.
Another frequent cause is a cracked or worn-out silicone gasket. These are cheap parts, usually under ten dollars, and they’re designed to be replaced. If you see water dripping from the top of the machine during brewing, the gasket is your prime suspect.
Myth #2: More Water in the Reservoir Means Better Coffee
This one gets people into trouble. Filling the reservoir to the absolute max line seems harmless, but it can actually cause leaks. When water heats up, it expands. If the reservoir is overfilled, that expansion forces water out through the vent or the lid seal.
We tested this side by side with two identical machines. One filled to the max line, the other filled about a half-inch below. The overfilled unit leaked a noticeable amount during every brew cycle. The other stayed bone dry. The fix is simple: respect the fill line, or leave a small gap.
There’s also a related issue with the water filter. If you use a charcoal filter, make sure it’s seated properly. A loose filter can block the water flow, causing backup and overflow. We’ve seen this happen more times than we can count.
The Real Causes of Leaks and How to Fix Each One
Let’s break down the specific leak points and their fixes. We’ll go from most common to least common.
1. Leak From the Bottom of the Machine
This is the scariest one because it looks like the machine is dying. In many cases, it’s just a spill that ran down the side and pooled underneath. Wipe the machine down, dry it completely, and run a test cycle with no coffee. If the puddle reappears, you’re dealing with an internal leak.
Internal leaks usually come from a cracked internal hose or a failed pump seal. These are fixable if you’re handy with a screwdriver, but they require disassembling the machine. For most home users, this is the point where we recommend replacing the unit. A $30 repair on a $50 machine rarely makes sense.
2. Leak Around the Carafe
If water pools around the carafe, the problem is usually the carafe lid or the brew basket’s drip stop. The drip stop is that little valve at the bottom of the basket. If it’s clogged with grounds, it won’t close properly, and coffee drips constantly.
Take the drip stop apart, rinse it under hot water, and poke out any stuck grounds with a toothpick. We’ve fixed several machines this way without spending a dime.
Also, check the carafe lid. If you’re using a carafe with a broken seal, it won’t create the vacuum needed to stop the drip. A replacement carafe is usually available online, but it’s worth checking if the lid just needs a good cleaning.
3. Leak From the Top or Steam Vent
This points back to the overfilling issue we mentioned earlier, or it could be a mineral buildup problem. Scale inside the boiler can cause steam to vent in odd directions, and that steam condenses on the top of the machine and drips down.
Running a descaling cycle with a commercial descaler or a vinegar-water solution (one part vinegar to two parts water) clears out the scale. We recommend doing this every 1-3 months, depending on your water hardness. If you haven’t descaled in a year, this is likely your problem.
4. Leak Only When Brewing
If the leak happens only during the brew cycle, focus on the showerhead and the spread of water. The showerhead can get clogged with scale, causing water to spray sideways instead of straight down. Remove the showerhead (most are held by a single screw) and clean it thoroughly.
We also suggest checking the paper filter. If you’re using a cheap filter that’s too small, it can fold and allow grounds to escape into the valve area, causing a backup. Use a filter that matches your basket size exactly.
Comparing Your Options: Fix, Replace, or Protect
Not every leak is worth fixing. Here’s a quick comparison to help you decide.
| Leak Location | Likely Cause | Fix Difficulty | Time to Fix | Cost |
|---|---|---|---|---|
| Bottom of machine | Internal hose or pump seal | Hard | 1-2 hours | $20-$50 parts |
| Around carafe | Drip stop clog or carafe lid | Easy | 5 minutes | $0-$15 |
| Top or steam vent | Overfilling or scale buildup | Easy | 10-30 minutes | $0-$10 |
| During brew cycle | Clogged showerhead or bad filter | Easy | 10 minutes | $0-$5 |
Our rule of thumb: if the fix takes under 15 minutes and costs under $15, do it. If you’re looking at disassembly, weigh the cost of parts against a new machine. And in every case, a protective mat like the TOHONFOO silicone mat is a smart investment to catch the drips while you figure it out.
Prevention: Stop the Leak Before It Starts
Once you’ve fixed the leak, you want to keep it from coming back. Here’s what we do after every repair.
- Clean the gasket and brew basket weekly. A quick rinse under hot water removes oils that break the seal.
- Descale monthly. Hard water is the enemy of every coffee maker. A monthly descale prevents scale from clogging valves and vents.
- Never overfill the reservoir. Leave a half-inch of space below the max line.
- Use the right filter size. A filter that’s too small will fold and cause backups.
- Dry the machine after cleaning. Water left on the surface can seep into seams and cause corrosion.
We also recommend checking the water you use. If your tap water is very hard, consider using filtered water. It cuts down on scale dramatically and extends the life of the machine.
Frequently Asked Questions
Why is my coffee maker leaking water from the bottom?
Most of the time, it’s a cracked internal hose or a failed seal on the boiler. Check for visible cracks in the housing first. If the outside is dry, you’ll need to open the base to inspect the internal lines. If you’re not comfortable doing that, it’s time for a new machine.
Can I use vinegar to fix a leaking coffee maker?
Vinegar dissolves scale, which can fix leaks caused by mineral buildup. Run a cycle with a 1:2 vinegar-to-water ratio, then run two cycles with plain water to rinse. It won’t fix a physical crack or a broken gasket, but it’s a solid first step for any leak that appears near the steam vent.
Is it safe to use a coffee maker that leaks?
It depends on where the leak is. A drip around the carafe is mostly a nuisance. A leak from the bottom near the electrical components is a fire hazard. If you see water pooling near the power cord or the base plate, unplug the machine immediately and stop using it.
How often should I clean my coffee maker to prevent leaks?
We recommend a deep clean every 30 days. That means descaling the internal boiler and scrubbing the brew basket and carafe. If you use your machine more than once a day, bump that up to every two weeks. Regular cleaning is the single best way to prevent leaks. Check our guide on regular coffee maker cleaning for a full routine.
Why does my coffee maker leak only when I use a paper filter?
Your filter is probably too small or too thin. A flimsy filter can collapse under the weight of the water and grounds, blocking the drain hole. Switch to a thicker, basket-specific filter. If the problem persists, the drip stop valve might be worn.
What to Do Now
You don’t need to live with a puddle on your counter. Start with the easy fixes: clean the gasket, check the fill level, and descale. Those three steps solve the majority of leaks we see.
If the leak persists, check the carafe and the drip stop. If you’re still stuck, it’s probably an internal issue, and it’s time to compare the cost of a repair against a replacement. Many people find that a new machine is the better deal.
While you’re working on it, grab a coffee maker mat to protect your counter. It’s a small purchase that saves you from scrubbing dried coffee stains off wood or laminate. We keep one under every machine we test.
For more troubleshooting, check our guides on Cuisinart machines that won’t turn on and Mr. Coffee models that won’t pump. They cover related issues that often show up alongside leaks.
Here’s the short version for skimmers:
- Clean the gasket and brew basket first. It fixes most leaks.
- Never fill the reservoir past the max line.
- Descale monthly if you have hard water.
- Check the drip stop valve for clogs.
- Replace the carafe lid if the seal is cracked.
- Unplug the machine if water pools near the base.
- Use a drip mat to protect your counter while you troubleshoot.
Products related to this article
Sponsored / affiliate links. As an Amazon Associate I earn from qualifying purchases. I may earn additional commission from eligible campaigns.
 HomeBeyond Espresso Coffee Maker 12 Cups, Classic Stovetop Espresso Maker, 600ml / 20oz Coffeemaker for Gas & Ceramic Stovetops (Silver)
 SOLUSTRE Electric USB Coffee Cup Warmer with Temperature Settings Portable Milk and Beverage Heating Coaster for Office Desk Small Lightweight Design Easy to Clean Surface Multi Functional
 Linnkyfloa Coffee Espresso Maker Handle Replacement for Stovetop Moka Pot or Percolator, Black Plastic for Spare Part Compatible with Italian(9-12 Cup)