You bought a nice espresso machine or a reliable drip brewer. Then one morning, the coffee tastes bitter, the brew takes longer, and you notice white crust around the water tank. That’s limescale. It’s not just ugly — it’s slowly killing your machine.
Picking a descaler sounds simple, but the wrong one can void your warranty or corrode internal parts. This guide walks you through the chemistry, material compatibility, and cost math so you can choose the right product for your specific brewer. You’ll know exactly what to look for, what to avoid, and why the cheapest bottle isn’t always the best deal.
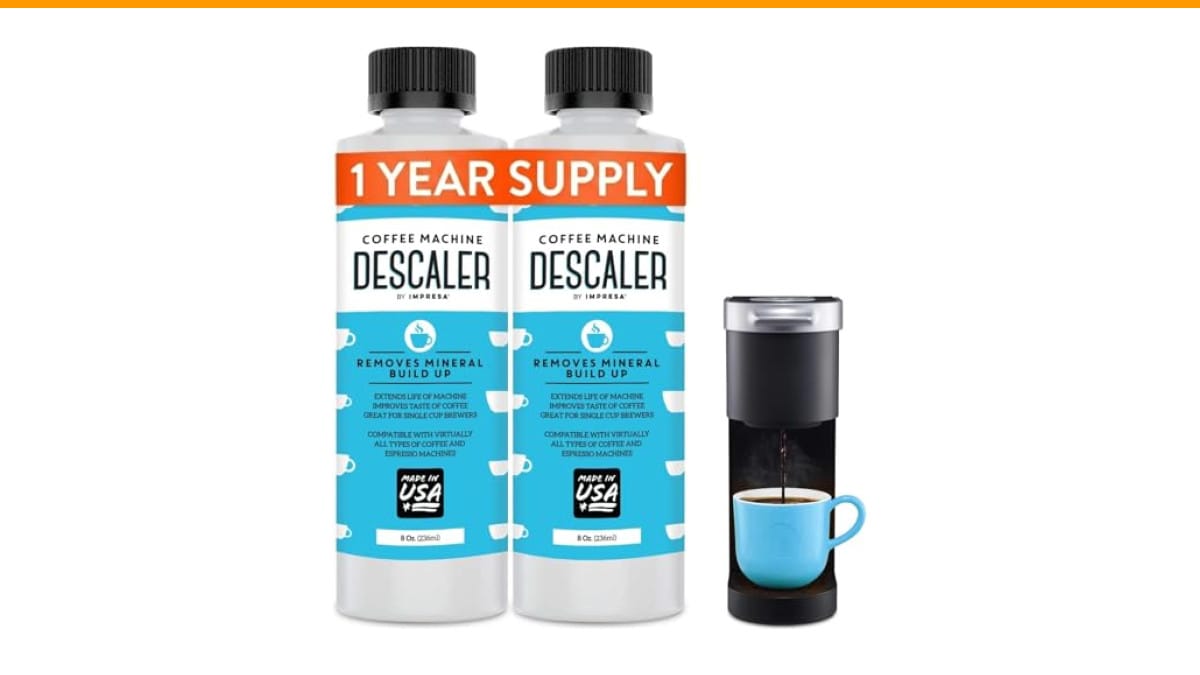
If you’re in a hurry, a universal liquid like the Check Price on Amazon covers most home machines. It’s made in the USA, works with Keurig, Breville, Nespresso, and others, and each 8-ounce bottle handles two descaling sessions. But let’s dig into the details so you can make an informed choice.
Why Choosing the Right Descaler Matters More Than You Think
Limescale acts like a blanket inside your boiler and heating element. It insulates the water from the heat source, so the machine works harder and uses more energy. Over time, that extra heat stress cracks seals, clogs valves, and shortens the life of the pump. A good descaler removes mineral deposits without damaging the parts underneath.
The catch: different machines use different materials. Aluminum boilers need a gentler acid. Stainless steel can handle stronger formulas. Plastic lines can degrade with harsh chemicals. So the first rule is to match the descaler to your machine’s internals, not just the brand name.
Another reason this matters — warranties. Many manufacturers require descaling with a specific type of solution. If you use a cheap vinegar or an aggressive industrial descaler, you risk voiding your warranty. That’s a real cost, not a hypothetical.
Here’s the thing: the right descaler doesn’t just clean. It protects your investment and keeps your coffee tasting fresh. That’s worth a few extra dollars per year.
Before you buy, think about what you’re trying to fix. If your machine is slow to brew, sputters, or leaves chalky residue in your cup, you need a descaler. If you just want to remove coffee oil and residue, that’s a cleaner, not a descaler. They’re different products. We’ll cover that distinction later.
Descaler Chemistry 101: Acids Explained (Citric, Lactic, Sulfamic)
All descalers work by dissolving mineral deposits with an acid. But not all acids are created equal. Here’s what you’ll find on the label:
Citric Acid
Citric acid is the most common active ingredient in home descalers. It’s derived from citrus fruits and is effective on limescale. It’s also relatively mild, which makes it safe for most machines, including aluminum boilers. The downside: it can leave a faint citrus smell if not rinsed thoroughly, and it’s not as aggressive on heavy buildup.
Lactic Acid
Lactic acid is even gentler than citric. It’s often used in food-safe descalers and is great for machines with aluminum components. It’s slower-acting, so you may need to run a longer cycle or repeat the process. But it’s less likely to damage seals and gaskets.
Sulfamic Acid
Sulfamic acid is a stronger, crystalline acid that handles heavy limescale quickly. It’s common in commercial descalers and some home products. It works well on stainless steel boilers, but it can be too aggressive for aluminum or old rubber seals. If you use a sulfamic-based descaler, follow the dilution instructions exactly.
Other acids you might see: acetic acid (vinegar), phosphoric acid, and formic acid. Vinegar is cheap but not recommended for most machines because it can damage rubber seals and leave a lingering taste. Phosphoric acid is effective but can be harsh on some materials.
So, which acid is best? It depends on your machine. Check your manual or contact the manufacturer to see what they recommend. If you’re unsure, a citric or lactic acid formula is the safest bet for home use.
How to Match the Descaler to Your Coffee Machine Type
Your machine’s material and design determine which descaler is safe. Here’s a breakdown:
Material Compatibility (Aluminum, Brass, Plastic)
- Aluminum boilers: Common in smaller espresso machines. Use only citric or lactic acid. Sulfamic acid can cause pitting and corrosion.
- Stainless steel boilers: Found in higher-end machines. They can handle all acid types, but sulfamic works fastest. Always rinse thoroughly.
- Brass boilers: Rare in home machines but present in some commercial models. Brass is sensitive to acidic solutions. Use a descaler specifically labeled for brass or stick to citric acid at half strength.
- Plastic lines and reservoirs: Most descalers are safe for plastic, but some harsh acids can cause clouding or cracking over time. If your machine has plastic internal tubing, avoid sulfamic acid.
If you don’t know your boiler material, check the manual or look up the model online. It’s worth the 5 minutes to avoid a costly repair.
Manufacturer Certifications and Warranty Risks
Some brands require their own descaling solution. For example, Keurig and Nespresso sell branded descalers. Using a third-party product might void your warranty if it damages the machine. However, many universal descalers are compatible and safe. The key is to check the label for compatibility with your brand and model.
Look for certifications like NSF or UL. These indicate the product has been tested for safety and performance. It’s not a guarantee, but it’s a good sign.
If you’re worried about warranty, stick to the manufacturer’s recommended product. If you want flexibility, choose a reputable universal descaler that lists your machine brand on the label.
Liquid vs. Powder vs. Tablets: Which Format Wins?
You’ll find descalers in three forms: liquid, powder, and tablets. Each has pros and cons.
| Format | Pros | Cons | Best For |
|---|---|---|---|
| Liquid | Easy to measure, dissolves instantly, no residue | Can be more expensive per use, bulky to store | Most home users |
| Powder | Cheaper per use, compact, long shelf life | Needs mixing, can clump if not dissolved fully | Budget-conscious users |
| Tablets | Pre-dosed, no measuring, portable | Can be pricey, may not dissolve completely in all machines | Travel, single-serve brewers |
Liquids are the most foolproof. You pour the right amount, add water, and run the cycle. Powders save money but require careful mixing. Tablets are convenient but not universal — some machines can’t handle the fizzing or residue.
Personally, I prefer liquids for espresso machines because they’re easier to control. For drip coffee makers, tablets work fine. Just check that the tablet dissolves completely to avoid clogging the valve.
The Hidden Cost of Descaling: Price Per Use vs. Bottle Price
The sticker price doesn’t tell the whole story. A $10 bottle that does 2 descales costs $5 per use. A $15 bottle that does 4 descales costs $3.75 per use. The per-use cost is what matters.
Most liquid descalers require 8 to 16 ounces per session. Some concentrated formulas need only 4 ounces. The IMPRESA descaler uses just 4 ounces per session, so each 8-ounce bottle gives you 2 descales. That’s a decent value if you descale every 3-4 months.
Powders are usually cheaper per use. A 2-ounce packet might cost $1.50, but you have to mix it correctly. Tablets are the most expensive per use, often $2-3 each.
Here’s a quick comparison:
| Format | Typical Cost per Use | Ease of Use | Effectiveness |
|---|---|---|---|
| Liquid (concentrated) | $3-5 | Easy | High |
| Liquid (ready-to-use) | $5-7 | Very easy | High |
| Powder | $1-3 | Moderate | High |
| Tablets | $2-4 | Easy | Medium |
Don’t forget the cost of water and electricity for the rinse cycles. It’s minor, but it adds up if you descale monthly.
How Water Hardness Dictates Your Descaling Schedule
Water hardness is the biggest factor in how often you need to descale. Hard water contains more calcium and magnesium, which form limescale faster. If you live in an area with hard water, you might need to descale every 1-2 months. Soft water can go 6 months or more.
You can test your water hardness with a simple strip test from a hardware store. Or check your local water utility’s annual report online. The scale is usually in grains per gallon (gpg) or parts per million (ppm).
- Soft water: 0-3 gpg (0-50 ppm) — descale every 6 months
- Moderate hardness: 3-7 gpg (50-120 ppm) — descale every 3-4 months
- Hard water: 7-10 gpg (120-180 ppm) — descale every 2 months
- Very hard water: 10+ gpg (180+ ppm) — descale monthly
If you use a water filter, it can reduce but not eliminate mineral buildup. You still need to descale, just less often.
One tip: if your machine has a water hardness setting, set it correctly. Many espresso machines use this to calculate descaling reminders. If you ignore it, you’ll get an annoying alert every few weeks.
Step-by-Step: How to Descale Without Damaging Your Machine
Here’s a safe descaling process that works for most machines:
- Read the manual: Check the manufacturer’s instructions for descaling frequency and recommended solution.
- Remove the filter and coffee grounds: Take out any water filter and empty the portafilter or basket.
- Prepare the solution: Mix the descaler with water according to the label. Use the correct ratio — too strong can damage parts.
- Fill the reservoir: Pour the solution into the water tank. Do not overfill.
- Run a brew cycle without coffee: Run the machine as if making coffee, but with no grounds. Collect the water in a container.
- Let it sit: After the cycle, let the solution sit in the machine for 15-30 minutes to dissolve stubborn scale. Don’t leave it longer than the label says.
- Rinse thoroughly: Fill the reservoir with fresh water and run 2-3 full cycles to flush out all the descaler. This is critical — leftover acid can ruin the taste of your coffee.
- Clean the brew head and portafilter: Wipe down the brew head and rinse the portafilter to remove any residue.
- Run a final rinse: If you still smell descaler, run another rinse cycle.
This process takes about 30 minutes. Don’t skip the rinse steps — that’s where most people mess up.
Common Descaling Mistakes That Ruin Coffee Makers
Even with the right descaler, you can damage your machine with these mistakes:
- Using too much descaler: More isn’t better. Over-concentrated acid can eat away seals and gaskets.
- Leaving the descaler in too long: 30 minutes is usually enough. Overnight soaking can corrode metal parts.
- Not rinsing enough: Residual acid will make your coffee taste metallic and can damage the boiler over time.
- Descaling with vinegar: Vinegar is acetic acid, which is harsher than citric or lactic acid. It can damage rubber seals and leave a lingering smell.
- Descaling a clogged machine without cleaning first: If your machine is clogged with coffee oil, descaling won’t fix it. You need to clean the brew group separately.
- Ignoring the water hardness setting: This leads to over- or under-descaling, both of which cause problems.
If you’ve made these mistakes and your machine still underperforms, check for clogs in the brew head, clean the grinder, and consider a deep clean. Sometimes the issue isn’t limescale but old coffee residue.
Frequently Asked Questions About Coffee Machine Descalers
Can I use vinegar instead of a commercial descaler?
Technically, yes, but I don’t recommend it. Vinegar is acetic acid, which is less effective on limescale than citric or lactic acid. It also leaves a strong smell that can linger for weeks. Plus, it can damage rubber seals in some machines. If you’re in a pinch, use it at half strength and rinse thoroughly, but a proper descaler is safer and works better.
How often should I descale my coffee machine?
It depends on water hardness and usage. As a rule, every 3-4 months for moderate water hardness, monthly for very hard water, and every 6 months for soft water. If your machine has a descaling indicator, follow that.
What’s the difference between cleaning and descaling?
Cleaning removes coffee oil, residue, and grounds from the brew group and portafilter. Descaling removes mineral deposits (limescale) from the internal boiler and pipes. You need both. Clean your machine weekly, descale every few months. Check out our deep clean guide for more.
Can I use the same descaler for my Keurig and espresso machine?
Most universal descalers work for both. The IMPRESA descaler is compatible with Keurig, Nespresso, Breville, and many others. Just check the label for your specific model.
Is it safe to descale a machine with a plastic water tank?
Yes, most descalers are safe for plastic tanks. However, avoid sulfamic acid if your tank is thin or old. Citric and lactic acid are gentle enough. Always rinse the tank with fresh water after descaling.
Final Verdict: The Smartest Way to Buy a Descaler
Here’s what I tell people when they ask how to choose coffee machine descaler:
- Match the acid type to your machine’s boiler material. Citric or lactic acid for aluminum, sulfamic for stainless steel if you need heavy duty.
- Check the manufacturer’s recommendation first. If they sell a branded descaler, that’s the safest bet for warranty.
- Calculate cost per use, not bottle price. A concentrated liquid that uses 4 ounces per session often beats a cheap bottle that requires 16 ounces.
- Buy a universal descaler if you have multiple machines. It simplifies things and saves money.
- Don’t skip the rinse cycle. That’s the #1 cause of bad taste after descaling.
- Test your water hardness to set the right descaling schedule. It’s a 5-minute strip test that saves you from over- or under-descaling.
- When in doubt, go with a reputable brand like IMPRESA. It’s affordable, effective, and safe for most home machines.
For a deeper dive into the descaling process, check out our step-by-step descaling guide. And if your machine still isn’t brewing right after descaling, it might be time for a proper cleaning.
Pick a descaler that protects your machine, fits your budget, and matches your water hardness. Your coffee — and your wallet — will thank you.
Products related to this article
Sponsored / affiliate links. As an Amazon Associate I earn from qualifying purchases. I may earn additional commission from eligible campaigns.
 Coffee Espresso Machine Handle Replacement Parts, Cafe Bracket Handle for Lidl Silvercrest CM4621 CM4218 KF5002 KF500S Barista (for 51mm Portafilter Basket - Not included)
 HouseGem Large Candle Warmer Plate - Coffee Cup Mug Warmer for Desk, Candle Melter, Electric Mug Heater for Beverages, Milk & Tea, Coffee Accessories Ideal Gifts Keep Cup Warm (Black)
 Quick Heating Cup Warmer, Three Temperature Settings, Splashproof and Portable, for Coffee, Milk, Lightweight ABS Material