You bought a compact espresso machine to save counter space, not to drink sad coffee. Yet here you are, pulling shots that taste sour or bitter, wondering if the machine is the problem. It isn’t. Most compact machines can make genuinely good espresso if you work with their strengths and accept their limits.
This guide covers the practical fixes that actually change what lands in your cup. You’ll learn why your shots taste off, how to adjust for a smaller boiler, and which habits matter more than the machine itself. No magic beans, no expensive gadgets — just measurable steps you can take today.

Amrules
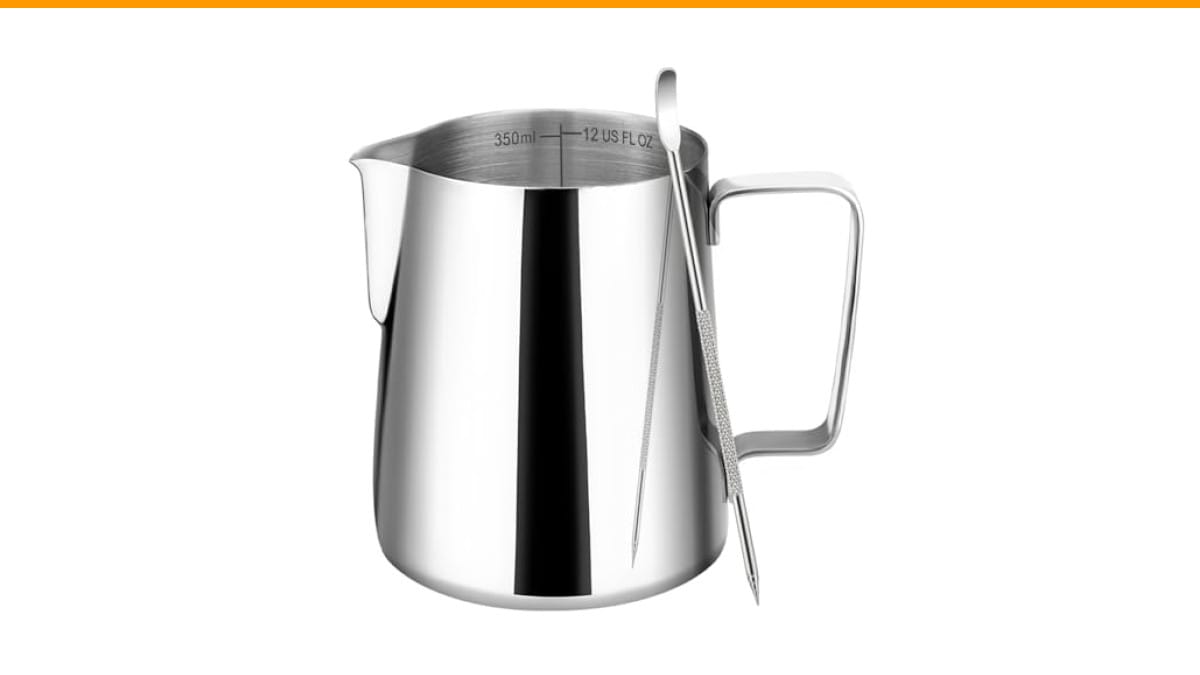
Amrules Milk Frothing Pitcher 12oz Frother Cup…
- 304 STAINLESS STEEL: Amrules 12oz creamer pitcher are crafted of 18/8 food grade stainless steel. The pitcher features external mi…
- PROPER CAPACITY: The coffee frother cup has precise scale mark inside for you to control the milk needed easily. The marks are las…
- MOUTH DESIGN: The smooth mouth is specially designed to facilitate milk pools together to ensure a steady flow of milk froth.The m…
As an Amazon Associate I earn from qualifying purchases.
One tool that helps more than people expect is a proper Amrules Milk Frothing Pitcher 12oz. The laser-printed scale marks inside let you measure milk precisely, so you stop guessing and start controlling texture. The narrow mouth also gives you cleaner pour control, which matters when you’re steaming smaller quantities on a compact wand.
Myth: More Pressure Means Better Espresso
Compact machines love to advertise 15 or 20 bars of pressure. That number sounds impressive, but it’s mostly marketing. Real espresso extraction happens around 9 bars. Anything higher just pushes water through the puck faster, which under-extracts the coffee and leaves you with sour, thin shots.
Your machine’s pressure gauge, if it has one, is showing pump pressure, not brew pressure. The pump can push 15 bars, but the coffee puck itself creates resistance. Most compact machines regulate down to roughly 9 bars during the shot anyway. So stop chasing pressure and start chasing consistency.
What actually matters is the grind. If your shots run too fast (under 20 seconds), the grind is too coarse. If they drip slowly or choke (over 35 seconds), it’s too fine. Aim for 25–30 seconds for a double shot. That timing window fixes more bad espresso than any machine upgrade.
The Real Problem: Temperature Stability
Compact machines have small thermoblocks or boilers. That means they heat water fast, but they also lose heat fast. Pull two shots back-to-back and the second one often runs cooler, which changes the flavor profile completely.
Here’s the fix that costs nothing: wait longer between shots. Give the machine 60 to 90 seconds to recover after steaming milk or pulling a shot. If you’re making multiple drinks, pull both shots first, then steam milk. That order alone will improve taste noticeably.
Another trick is to flush the group head for 3–5 seconds right before locking in the portafilter. This clears stale water from the lines and brings fresh hot water to the brew head. It’s a small habit, but it stabilizes temperature better than most people realize. If you’re dealing with buildup that affects temperature, check our descale guide.
Grind Size and Dose Are Everything
You can’t fix a bad grind with a better machine. Compact machines need a fine, consistent grind — but not as fine as commercial machines. The smaller portafilter baskets (usually 51mm or 54mm) need a slightly coarser grind than a standard 58mm basket, or the shot will choke.
Dose matters just as much. Most compact machines come with a single wall basket that holds 10–14 grams. Weigh your coffee instead of eyeballing it. A scale costs under $20 and removes the biggest variable in espresso. Use 14 grams for a double shot and adjust from there.
Distribution is the step everyone skips. After grinding into the portafilter, tap it gently to settle the grounds, then use a distribution tool or even a toothpick to break up clumps. Level the surface before tamping. An uneven puck creates channels where water rushes through, giving you a bitter, over-extracted shot with sour notes mixed in.
Milk Texture Changes Everything
If you’re drinking milk drinks, the espresso is only half the story. Poorly steamed milk masks good espresso and makes bad espresso worse. The goal is microfoam — tiny bubbles that make milk glossy and sweet, not big frothy bubbles that sit on top.
On a compact machine, steam pressure is weaker than commercial wands. That means you need to be patient. Start with cold milk, purge the wand briefly, then position the tip just below the surface. You want a gentle hissing sound, not a violent splashing. Keep the tip at the surface for 5–8 seconds to stretch the milk, then submerge it to create a whirlpool.
Stop steaming when the pitcher feels warm to the touch — around 140°F. Any hotter and the milk proteins break down, leaving a thin, flat texture. The Amrules pitcher helps here because the internal hairline finish gives you better control over the whirlpool, and the ergonomic handle stays comfortable during the 30–45 seconds of steaming.
If your milk always tastes scalded, you’re probably overheating it. Pull the pitcher off the wand 10 degrees earlier than you think. The wand keeps heating the milk for a second after you stop, so a little early is better than a little late.
| Variable | Too Low | Sweet Spot | Too High |
|---|---|---|---|
| Shot Time | Under 20s (sour) | 25–30s | Over 35s (bitter) |
| Dose (double basket) | Under 12g | 14–16g | Over 18g (chokes) |
| Water Temp | Under 190°F | 195–202°F | Over 205°F (burnt) |
| Milk Steaming Temp | Under 130°F | 135–145°F | Over 150°F (scalded) |
| Grind Setting | Coarse (fast flow) | Fine, like table salt | Powder (chokes) |
Water Quality Is the Silent Killer
Tap water with high mineral content leaves scale inside your machine. That scale insulates the boiler, making temperature unstable and shots taste dull. If your water is hard, you’ll notice it within a few months of daily use.
Use filtered water or bottled spring water. Distilled water alone is too aggressive — it strips minerals and can damage the machine. Look for water with moderate hardness, around 50–100 ppm of calcium. That range extracts coffee well without scaling quickly.
If you’ve been using tap water for a while, descale before you change anything else. Scale buildup makes every other fix less effective. Our limescale removal guide covers the process step by step.
Myth: You Need a New Machine
It’s tempting to blame the equipment. But most compact machines can produce espresso that’s 90% as good as a $2,000 setup. The missing 10% comes from consistency, not capability.
Try this test: pull five shots in a row with the same beans, same grind, same dose. If they taste different from each other, the problem is technique or maintenance, not the machine. If they’re all consistently bad, then tweak one variable at a time — grind first, then dose, then temperature.
One thing that does help is a proper cleaning routine. Old coffee oils go rancid and coat the group head, making every shot taste bitter and muddy. Backflush with a cleaning tablet weekly if you drink espresso daily. Deep clean the portafilter and basket monthly. Check our deep cleaning guide for the full routine.
Beans: Freshness Over Everything
Pre-ground coffee loses flavor within 15 minutes of grinding. Whole beans stay fresh for 2–3 weeks after roasting. If you’re buying pre-ground, switch to whole beans and grind at home. Even a cheap burr grinder beats pre-ground coffee every single time.
Look for beans roasted 5–14 days ago. Too fresh (1–3 days) and the coffee releases too much CO2, making extraction uneven. Too old (over a month) and the flavor is flat. Buy in small batches — 250 grams at a time — so you’re always using beans in their prime window.
Store beans in an airtight container away from light and heat. Don’t refrigerate them. The fridge introduces moisture and odors that ruin the coffee. A dark cabinet at room temperature works perfectly.
Frequently Asked Questions
Why does my espresso taste sour even with fresh beans?
Sourness means under-extraction. The water didn’t pull enough flavor out of the coffee. Fix the grind first — make it finer. Then check your dose. If you’re using too little coffee, the water flows through too fast. Increase dose by 1 gram and see if the sourness fades.
Can I use regular table salt to clean my espresso machine?
No. Salt won’t dissolve scale, and it can corrode internal parts. Use a commercial descaling solution or citric acid diluted in water. Never use vinegar on a machine with aluminum parts — it damages the metal. Stick to products made for espresso machines.
Why does my milk taste burnt no matter what I do?
You’re overheating it, or the steam wand is too deep in the milk. Keep the tip near the surface during the first few seconds to incorporate air. Stop steaming at 140°F, not when it looks hot. Also, use fresh cold milk — milk that’s been sitting out steams worse and scalds faster.
Should I use a pressurized basket or a regular one?
Pressurized baskets are forgiving but produce fake crema and muted flavor. If you’re using pre-ground coffee, keep the pressurized basket. If you’re grinding fresh, switch to a non-pressurized basket. You’ll get thinner crema but much better taste. It takes a week to dial in, but the difference is worth it.
How often should I clean my compact espresso machine?
Rinse the portafilter and group head after every shot. Wipe the steam wand after every use. Backflush weekly if you make 2+ drinks daily. Descale every 2–3 months depending on water hardness. A machine that’s clean tastes better than a machine that’s expensive.
What Actually Changed My Shots
Here are the five adjustments that made the biggest difference in my own testing. They’re ranked by impact, not effort.
- Weigh your dose every single time. A scale is non-negotiable.
- Grind finer than you think. Most home shots run too fast.
- Wait 90 seconds between steaming and pulling your next shot.
- Flush the group head for 3 seconds before locking in the portafilter.
- Use filtered water and descale on a schedule, not when you remember.
None of these require new gear. They’re habits, not purchases. But if you’re in the market for one upgrade, a proper milk pitcher with measurement marks — like the Amrules frothing pitcher — removes the guesswork from steaming. That consistency carries over into every latte and cappuccino you make.
Your compact machine isn’t holding you back. The gap between your current shots and great shots is smaller than you think. Fix the variables one at a time, and you’ll close it within a week.
Products related to this article
Sponsored / affiliate links. As an Amazon Associate I earn from qualifying purchases. I may earn additional commission from eligible campaigns.
 Coffee Espresso Machine Handle Replacement Parts, Cafe Bracket Handle for Lidl Silvercrest CM4621 CM4218 KF5002 KF500S Barista (for 51mm Portafilter Basket - Not included)
 Quick Heating Cup Warmer, Three Temperature Settings, Splashproof and Portable, for Coffee, Milk, Lightweight ABS Material
 Coffee Mug Warmer & You are Awesome Mug Set, Electric Cup Warmer for Desk