You bought a self-heating mug so your coffee stays hot through a long meeting or a slow morning. Then, three weeks in, the coffee starts tasting a little off. Not bad, just stale, with a faint oily film on top. The heating element still works, but the mug feels less clean than it should.
That’s the trade-off nobody mentions: a self-heating mug has electronics inside, so you can’t just toss it in the dishwasher like a regular ceramic cup. You need a different routine. The good news is that routine isn’t complicated. You just need to match your cleaning frequency to how often you actually use the mug.

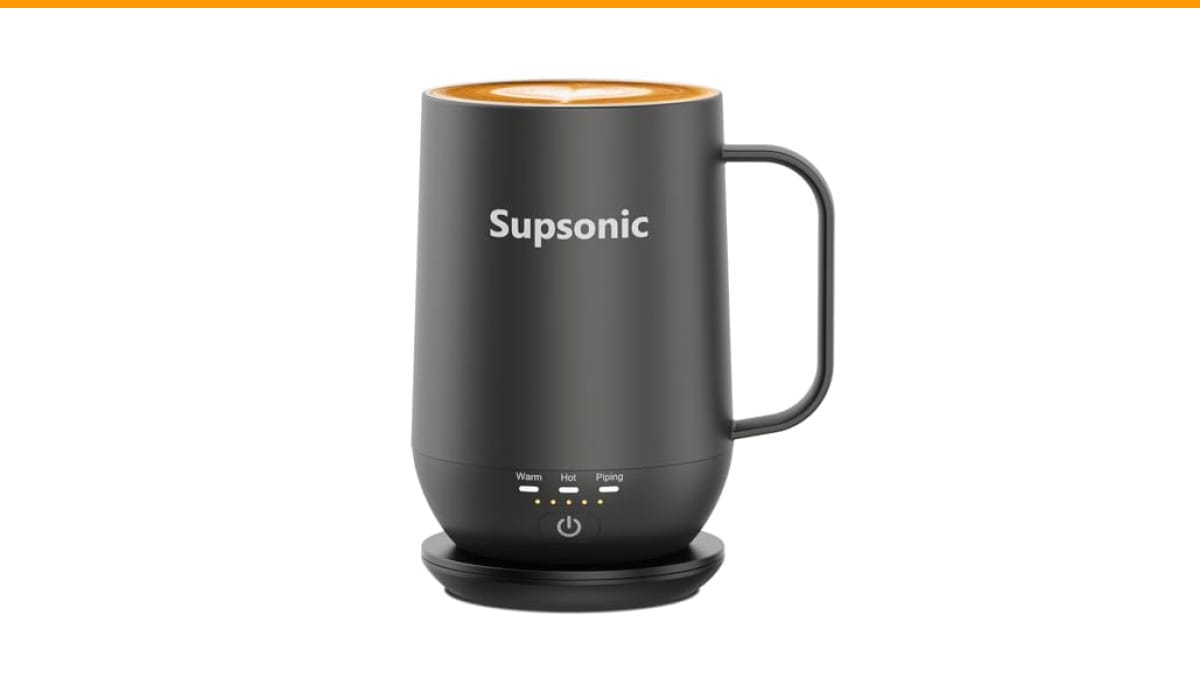
Supsonic
Supsonic - 16oz Self Heating Coffee Mug,…
- 3-Touch Precision: Get barista-level temperature control at your fingertips. Choose Piping (149°F) for a fresh-brewed feel, Hot (1…
- Warmth That Lasts: Supsonic heated coffee mug features a built-in battery that provides long-lasting power, enough to meet your ne…
- Smart Safety: Designed for real life. Supsonic self heating mugs feature a 2-hour auto-shutoff and dry boil protection keep you sa…
As an Amazon Associate I earn from qualifying purchases.
This guide walks through a practical maintenance calendar for your self-heating mug, covering daily rinses, weekly deep cleans, and monthly care for the charging contacts and heating plate. You’ll also learn which cleaning agents are safe for the interior coating and how to tell if your mug is dirty or actually dying.
If you’re shopping for a mug that makes this routine easier, the Check Price on Amazon has a stainless steel interior that resists staining and a removable lid for thorough cleaning. It also offers three temperature presets, so you’re not fiddling with buttons while holding a hot mug.
Why Cleaning Frequency Matters for Your Self-Heating Mug
Regular coffee mugs get away with a quick rinse because they’re just glass or ceramic. Your self-heating mug is different. It has a heating element bonded to the bottom, a temperature sensor, and a battery pack. Coffee oils, milk residue, and sugar don’t just sit on the surface. They bake onto the heating surface each time the mug reheats your drink.
That baked-on residue does two things. First, it ruins the taste. Old coffee oils turn rancid and bitter, and they transfer that flavor to every fresh cup you pour. Second, it reduces heating efficiency. A layer of grime acts as an insulator between the heating element and your liquid. The mug has to work harder and use more battery power to hit the same temperature.
There’s also a hygiene angle. A warm, damp environment is exactly where bacteria like to multiply. A mug that’s only rinsed occasionally can develop a biofilm on the interior. You can’t see it, but you can taste it, and it’s not something you want to drink from.
Anatomy of a Self-Heating Mug: What Gets Dirty and What Breaks
Before you start cleaning, understand what you’re working with. A typical self-heating mug has four distinct zones that need different care.
- Interior surface: Usually stainless steel or a non-stick coating. This is where coffee oils and milk residue collect.
- Lid and seal: The rubber gasket and sliding mechanism trap coffee, sugar, and saliva. This is often the smelliest part of the mug.
- Heating plate (bottom interior): The metal disc at the bottom that transfers heat. Food residue bakes onto this surface first.
- Charging contacts and base: The metal pins and the exterior base that connect to the charging dock. These get dusty and can corrode if exposed to moisture.
The most common failure point isn’t the battery or the heating coil. It’s the charging contacts. People wipe the interior, then set the mug on the dock while the exterior is still wet. Water seeps into the base, corrodes the pins, and the mug stops charging. That’s a repair you can’t make.
So the cleaning strategy is simple: keep the interior clean to prevent buildup, and keep the exterior dry to protect the electronics.
Daily Cleaning Routine (After Every Use)
Your daily routine should take less than a minute. If you skip it, you’ll need a longer deep clean every few days, and the mug will start tasting stale faster.
The 60-Second Rinse Protocol
Immediately after you finish your drink, do this:
- Empty any remaining liquid into the sink.
- Rinse the interior with warm tap water. Swirl it around to dislodge loose residue.
- Use a soft sponge or your thumb to wipe the interior surface, especially the bottom heating plate. You don’t need soap for this step if the mug is still warm.
- Rinse again and shake out the excess water.
- Dry the exterior with a towel, especially the bottom and the charging contacts.
That’s it. The warm water is enough to remove 90% of the residue from a single use. Save the soap for the weekly deep clean.
Lid and Seal Care
The lid is where the gross stuff hides. Coffee splashes into the sliding mechanism, and milk dries into the rubber gasket. Rinsing the lid under the tap isn’t enough.
Pop the lid off and rinse it separately. Run a fingernail or a soft brush along the gasket groove to dislodge any trapped grounds. If the lid has a rubber seal, pull it out and rinse it on its own. Let all the parts air dry fully before reassembling. Trapped moisture under the seal is a breeding ground for mold.
Weekly Deep Cleaning Schedule
Once a week, or after every five to seven uses, give the mug a proper wash. This removes the oily film that a plain water rinse leaves behind.
The Baking Soda Paste Method
Baking soda is your best friend here. It’s mildly abrasive, so it removes stains and odors without scratching stainless steel or the non-stick coating.
- Mix two tablespoons of baking soda with a small amount of water to form a thick paste.
- Apply the paste to the interior with a soft sponge or cloth.
- Scrub in circular motions, paying extra attention to the bottom heating plate.
- Let the paste sit for five minutes to absorb odors.
- Rinse thoroughly with warm water.
This method handles coffee stains, tea tannins, and the faint musty smell that develops in mugs that aren’t washed often. It’s also safe for the cleaning routine you’d use for a standard coffee maker, but you don’t need to run a full cycle here.
Vinegar Solution for Odor and Scale
If you have hard water, mineral scale can build up on the heating plate. That white chalky film reduces heating efficiency. A vinegar rinse fixes it.
- Mix one part white vinegar with two parts water.
- Fill the mug halfway with the solution.
- Let it sit for 15 to 20 minutes. Don’t turn the heating function on during this time.
- Empty the mug and rinse it thoroughly with fresh water.
- Wash once more with a drop of dish soap to remove the vinegar smell.
Use this method only when you see scale or notice a lingering odor. Vinegar is acidic, and using it every day will eventually degrade the interior coating. Once a month is plenty for most people.
Monthly Maintenance: Cleaning the Heating Element and Charging Contacts
This is the step most owners skip, and it’s the one that determines how long your mug lasts. The heating element and charging contacts need dry, careful attention.
Start with the charging contacts. These are the metal pins on the bottom of the mug or on the charging base. Use a dry cotton swab to wipe away dust and lint. If you see dark spots or greenish corrosion, dip the swab in a tiny bit of rubbing alcohol and wipe the pins. Let them dry completely before placing the mug on the charger.
Never use water or liquid soap on the exterior base. Water will find its way into the seams and short out the battery. If you spill something on the outside, wipe it with a barely damp cloth and dry it immediately.
For the heating plate on the interior, you don’t need to scrub it aggressively. The weekly baking soda paste is sufficient. What you should check is the seam where the heating plate meets the wall of the mug. Over time, coffee can seep into this gap and harden. Use a toothpick or a soft brush to gently dislodge any buildup there. Do not use a metal knife or any sharp object, as it can puncture the seal and allow liquid into the electronics.
How Often to Clean Based on Your Usage Habits
Your cleaning schedule should match how often you actually reach for the mug. Here’s a practical breakdown:
| Usage Pattern | Rinse After Each Use | Deep Clean (Soap/Scrub) | Vinegar Rinse | Contact Cleaning |
|---|---|---|---|---|
| Daily use (5+ times/week) | Yes, always | Every 3 days | Every 2 weeks | Weekly |
| Several times a week (2-4 times) | Yes, always | Weekly | Monthly | Every 2 weeks |
| Occasional use (1-2 times/week) | Yes, always | Every 2 weeks | Monthly | Monthly |
| Rare use (couple times a month) | Yes, always | Before each use | Before each use | Monthly |
Notice the pattern: the rinse is non-negotiable. Even if you’re in a rush, a 10-second rinse prevents the baked-on residue that makes deep cleaning harder later.
Common Mistakes That Ruin Self-Heating Mugs
Most self-heating mugs don’t die from old age. They die from user error. Here are the mistakes that kill them fastest.
- Submerging the mug in water: The base is not waterproof. Soaking it in the sink will destroy the battery and the heating element.
- Running it through the dishwasher: The high heat and harsh detergents will degrade the non-stick coating and warp the seals. Check the manufacturer’s instructions, but most self-heating mugs are hand-wash only.
- Using metal utensils to scrub: Steel wool or a metal spoon will scratch the interior coating. Those scratches become hiding spots for bacteria and coffee residue.
- Ignoring the charging contacts: A layer of dust can interrupt the connection. The mug won’t charge, and you’ll think the battery is dead.
- Leaving milk or sugary drinks in the mug overnight: Milk proteins and sugar create a sticky film that’s much harder to remove once it dries.
If you’re also dealing with a standard coffee maker, the same rule about avoiding harsh chemicals applies. Check out this guide on cleaning with vinegar for a method that works across different appliances.
Signs Your Mug Needs Replacement vs. Just a Deep Clean
Sometimes a mug is actually broken, not just dirty. Here’s how to tell the difference.
If your coffee tastes stale or bitter even after a deep clean, the interior coating may be worn away. Once the non-stick surface is gone, the underlying metal absorbs odors permanently. No amount of baking soda will fix that.
If the mug takes noticeably longer to heat up than it did when new, check the heating plate for scale first. A vinegar rinse usually fixes this. If it’s still slow after descaling, the heating element is degrading, which is a sign of end-of-life.
If the charging contacts are corroded, you’ll see green or white crust on the metal pins. You can try cleaning it with alcohol, but once corrosion starts, it usually spreads. A mug that won’t hold a charge is beyond a simple fix.
If the lid seal is cracked or warped, replace the lid if you can find a spare. A broken seal means heat escapes and liquid can leak into the electronics.
FAQ: Frequency and Safety Questions Answered
Can I put a self-heating mug in the dishwasher?
No. The electronic base and battery are not waterproof. Dishwasher detergent is also too harsh for the non-stick coating. Hand wash the interior and wipe the exterior with a damp cloth.
Is it safe to use soap on the interior?
Yes, but use a mild dish soap and rinse thoroughly. Avoid antibacterial soaps or detergents with strong fragrances, as they can leave a residue that affects the taste of your next drink.
How do I clean the heating element without submerging it?
You don’t need to submerge it. Fill the mug halfway with warm soapy water, swish it around, and use a soft sponge to clean the bottom plate. Never turn the mug upside down or run water over the exterior base.
What’s the best way to get rid of coffee odors?
Baking soda paste is the most effective odor remover. Let it sit for 10 minutes before rinsing. For stubborn odors, a vinegar rinse followed by a soap wash works well.
How often should I clean the charging base?
Wipe the charging base with a dry cloth once a week. If you notice dust accumulating, use a dry toothbrush to brush it out. Never use water on the base.
Final Checklist for a Long-Lasting Mug
- Rinse the interior with warm water after every single use.
- Deep clean with baking soda paste every 3-7 days, depending on your usage.
- Run a vinegar rinse monthly to clear mineral scale.
- Wipe the charging contacts with a dry swab weekly.
- Never submerge the mug or run it through the dishwasher.
- Replace the lid seal if it cracks or warps.
- Watch for slow heating or persistent odors as signs the mug is beyond cleaning.
Treat the cleaning routine like brushing your teeth. A minute a day prevents a bigger problem later. Your coffee will taste better, and the mug will last years instead of months.
Products related to this article
Sponsored / affiliate links. As an Amazon Associate I earn from qualifying purchases. I may earn additional commission from eligible campaigns.