You pull a shot, and instead of a clean stream of espresso, you get water pooling around the base of the machine. Or maybe you wake up to a wet countertop and a puddle on the floor. A leaking espresso machine is annoying, and it can damage your countertops if left alone. The good news is that most leaks are not fatal. Many are simple fixes you can do in ten minutes with a basic tool.
This guide walks you through the entire process. You will learn how to diagnose where the leak is coming from, how to fix the five most common causes, and when it’s time to call a professional. I have repaired several Rancilio Silvia machines and other home units, so I will share the specific torque specs and tricks that most generic guides miss. Let’s get your countertop dry.

Rancilio
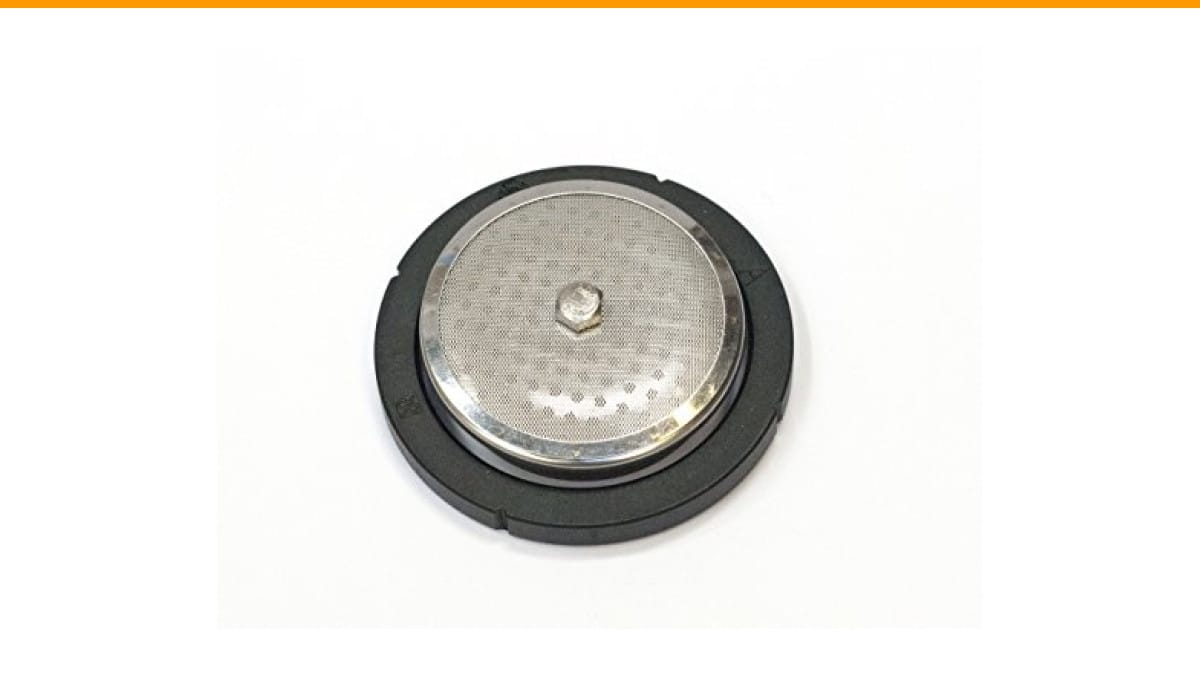
Rancilio Silvia Espresso Machine Repair Kit.
- This OEM repair kit can help you to fix some of the most common Rancilio Silvia problems.
- Water leaking around the portafilter: Usually the grouphead gasket needs to be replaced.
- Flow or no flow of water from grouphead. Your screen is probably clogged and needs to be replaced.
As an Amazon Associate I earn from qualifying purchases.
If you own a Rancilio Silvia, one of the most common culprits is a worn grouphead gasket. The Rancilio Silvia Espresso Machine Repair Kit includes the OEM gasket and screen you need to fix that leak and restore proper flow.
Diagnose First: Where and When Is the Leak Happening?
Do not take the machine apart yet. The fastest path to a fix is figuring out the timing of the leak. Put a dry paper towel under the machine and run it through different cycles. This will tell you where to look.
Leak Timing Chart
| When Leak Happens | Most Likely Source | Difficulty of Fix |
|---|---|---|
| Machine is idle, turned off | Water tank crack, loose tank connection, or internal hose | Easy to Moderate |
| Only during brewing (pulling a shot) | Group head gasket, clogged screen, or over-tightened portafilter | Easy |
| During steaming | Steam wand tip, O-ring on the wand, or boiler overfilling | Easy to Moderate |
| After the machine shuts off (dripping) | Back pressure in the boiler, faulty vacuum breaker valve, or leaking OPV (over-pressure valve) | Moderate |
| Constant drip from the bottom | Cracked boiler, failed pump seals, or loose internal hose clamp | Hard / Professional |
Quick Visual Inspection Checklist
Before you buy any parts, do a 60-second check. You will need a flashlight and a dry cloth.
- Check the water tank: Look for hairline cracks, especially around the bottom corners and the valve where it connects to the machine.
- Check the drip tray: Is it full? A full drip tray is not a leak. But if it fills up fast without you pulling shots, water is bypassing the group head and draining there.
- Check the internal hoses: If you can see inside the machine (many have a removable top or side panel), look for wet spots on the hoses. Pay attention to the drain hose and the hose connecting the pump to the boiler.
- Check the portafilter: Lock the portafilter in without coffee. If water leaks around the edge when you run the pump, the gasket is hard or worn.
Write down what you see. That will point you to the right fix below.
The 5 Most Common Leak Causes and How to Fix Them
Here are the fixes I have performed most often. They are listed in order of how common they are. For each one, I will tell you the tools needed and the time it takes.
Fix 1: Reseat or Replace the Water Tank
This is the easiest fix. Many tanks have a check valve on the bottom that connects to the machine’s intake. If the tank is not pushed down all the way, or if the valve is dirty, water will leak around the base.
- Remove the tank and dump the water.
- Clean the rubber valve on the bottom of the tank with warm soapy water.
- Dry the area where the tank sits on the machine.
- Reinstall the tank, pressing down firmly until you hear a click or feel it seat fully.
- Run a shot to see if the leak stops.
If it still leaks, hold the tank up to a light and flex it slightly. A hairline crack can be hard to see. If you find one, you need a new tank. This is a cheap part for most machines, and you can often find a generic replacement on Amazon that fits your model.
Fix 2: Replace the Group Head Gasket (With Step-by-Step)
This is the classic culprit. The group head gasket is a rubber ring that seals the portafilter to the machine. Over time, heat and limescale make it hard and brittle. You will see water dripping around the portafilter during brewing. This is a 15-minute job.
- Remove the shower screen screw and the metal screen. You will need a flathead screwdriver or a hex key, depending on your machine.
- Use a small pick or a flathead screwdriver to pry out the old gasket. It might be stuck. Be careful not to scratch the metal.
- Clean the groove where the gasket sits. Use a damp cloth to remove any coffee oils.
- Press the new gasket into the groove. It should sit flush. Do not use tools to force it; use your fingers.
- Reinstall the shower screen and screw.
- Lock the portafilter in place. Here is the key: Do not overtighten it. The handle should be at the 6 o’clock position (pointing straight down) or slightly to the right, at about 5 o’clock. If you force it past 4 o’clock, you will crush the new gasket and cause another leak.
After installing, run a blank shot (water only) to test the seal. If you have a Rancilio Silvia, the repair kit I mentioned earlier has exactly the right gasket and screen for this job.
Fix 3: Tighten or Replace Loose Internal Hoses and O-Rings
If the leak is coming from the bottom of the machine, it is often a loose hose clamp. Vibration from the pump can loosen these over time. Unplug the machine and open the casing. Look for any hose that has a wet spot or a white crust (dried minerals).
- Loose clamp: Use a screwdriver to tighten the hose clamp. Do not overdo it; you can crack the plastic barb.
- Cracked hose: If the hose itself is cracked, cut out the bad section and push the ends together, or replace the whole hose with a food-grade silicone hose.
- O-rings: There are small O-rings on the steam wand and on the hot water spout. If they are leaking, they are cheap to replace. Just remove the old ring, clean the groove, and install the new one with a tiny bit of food-safe silicone grease.
One thing to watch: many cheap O-rings are not rated for high heat. Use silicone or PTFE rated rings, not standard rubber. They will last much longer.
Fix 4: Clear a Blocked Drain Hose or Valve
Your machine has a drain hose that carries water from the brew group to the drip tray. If this hose gets clogged with coffee grounds, water backs up and leaks out of the top of the group head or the side of the machine.
You can test this easily. Remove the drip tray and look at the drain hole. Pour a cup of water into the group head area (with the machine off). If the water does not drain through to the tray, you have a clog.
To fix it, you need to clean the drain valve. On most machines, this is a small plastic valve with a rubber duckbill. Remove it, soak it in hot water with a drop of dish soap, and use a pipe cleaner to push out any debris. Reinstall it and test the flow again.
Fix 5: Descale to Address Limescale Buildup
Hard water is the enemy of espresso machines. Limescale can build up on the boiler’s heating element and around the seals. This causes the boiler to overheat and build up excess pressure, which can force water out of the safety valve or the steam wand.
If you have not descaled in over six months, do that first. Use a commercial descaling solution (like the Joe Glo cleaner mentioned in the repair kit listing) or a citric acid solution. Follow the manufacturer’s instructions for your specific machine. Do not use vinegar; it can damage the rubber seals and leave a bad taste.
After descaling, run several tanks of fresh water through the machine to rinse out all the cleaning solution. Then check the leak again. If it stopped, it was likely limescale holding a valve open. If it did not stop, proceed to the next section.
When It’s Not a Simple Fix: Cracked Boiler or Pump Seals
Sometimes the leak is not a gasket or a hose. If you have water pooling under the machine constantly, even when it is off, you might have a cracked boiler or a failed pump seal. This is a serious issue.
A cracked boiler is usually caused by freezing (if you stored the machine in a garage) or by severe limescale expansion. This is not a DIY repair for most people. Welding a boiler is possible, but it is often cheaper to replace the whole boiler assembly or buy a new machine.
Pump seals are another story. The vibration pump has internal rubber seals that can wear out. If the pump is leaking, you can often replace just the pump. It costs around $40 to $80 for a new pump. However, accessing it requires disassembling the bottom of the machine. If you are not comfortable with electrical wiring and high-pressure water lines, this is a good place to stop and call a pro.
I have seen people spend three hours trying to fix a pump seal, only to break a plastic fitting. Sometimes, the smartest move is to pay a technician if your machine is still leaking after these checks.
Safety First: What to Do Immediately After a Leak
Water and electricity do not mix. Before you do anything else, unplug the machine. Do not just turn it off. Unplug it.
Then, soak up the water with towels. Do not let water sit on your countertop, especially if it is wood or laminate. Water can warp wood and delaminate particleboard within hours.
Once the machine is unplugged and dry, wait 30 minutes before opening the casing. The capacitors inside can hold a charge, and the boiler is hot. Let it cool down completely to avoid burns.
If the leak was large, check the floor underneath the cabinet. Water can travel along the countertop and drip down the back of the cabinet. Use a fan to dry the area thoroughly to prevent mold.
DIY vs. Professional Repair: Cost and Time Comparison
You need to decide if this is a weekend project or a phone call. Here is a realistic breakdown based on what I have seen in the market.
| Repair Type | DIY Cost (Parts) | DIY Time | Professional Cost (Parts + Labor) |
|---|---|---|---|
| Group head gasket replacement | $10 – $25 | 15 – 30 minutes | $60 – $100 |
| Water tank replacement | $15 – $40 | 5 minutes | $50 – $80 (if they have the part) |
| Internal hose replacement | $10 – $20 | 45 – 60 minutes | $80 – $150 |
| Pump replacement | $40 – $80 | 1 – 2 hours | $150 – $250 |
| Boiler replacement | $100 – $200 | 2 – 3 hours | $250 – $400 |
These are estimates. Check the current prices on Amazon for parts, and call a local shop for a quote. The rule of thumb is simple: if the repair costs more than 50% of the price of a new machine, buy a new machine. A new automatic espresso machine under $1000 will have a warranty and modern seals.
How to Prevent Future Leaks: A Maintenance Schedule
Most leaks are preventable. Here is the schedule I follow with my own machines.
- Weekly: Empty and rinse the drip tray. Wipe down the group head gasket with a damp cloth to remove coffee oils. Backflush with water only if your machine has a blind basket.
- Monthly: Backflush with a mild espresso cleaner (like Joe Glo). This removes oils that can make the gasket slip. Check the water tank for any mineral buildup.
- Quarterly: Inspect the internal hoses for cracks or wet spots. Tighten any loose clamps. Check the steam wand tip for clogs.
- Every 3-6 months: Descale the machine. Use a proper descaling solution. The frequency depends on your water hardness. If you have hard water, descale every 3 months. If you use filtered water, you can stretch it to 6 months.
- Yearly: Replace the group head gasket proactively, even if it looks fine. It is a $10 part that prevents a $100 headache. Check the pump seals for any weeping.
If you notice your shots are pulling slow, or the machine is making loud noises, that is often a sign of scale buildup. Address it before it becomes a leak.
FAQ: Quick Answers to Urgent Leak Questions
Why is my espresso machine leaking water from the bottom?
This is usually a loose internal hose, a cracked water tank, or a failed pump seal. Unplug the machine, remove the casing, and look for wet spots. If the hoses are dry, the leak is likely from the pump or boiler. Check the OPV (over-pressure valve) if you have one; they can drip if the spring is worn.
Is it safe to use my machine if it is leaking?
No. Stop using it immediately. Water can short-circuit the electrical components. Even a small drip can cause a fire hazard or ruin your countertops. Unplug it and fix the leak first.
Why does water leak around the portafilter?
The group head gasket is worn or hard. You need to replace it. Also, make sure you are locking the portafilter in straight. If you force it at an angle, you can miss the gasket and cause a leak.
Why does my machine leak after turning it off?
This is often the vacuum breaker valve. When the boiler cools, it creates a vacuum. The valve opens to release pressure, and a few drops of water escape. If it leaks a lot, the valve might be stuck open or the spring is broken. Clean it or replace it.
Can I use vinegar to descale my espresso machine?
You can, but I do not recommend it. Vinegar is acidic and can degrade the rubber seals and gaskets over time. It also leaves a residue that can make your espresso taste sour. Use a commercial descaling powder designed for espresso machines. It is cheap and works better.
Final Verdict: Your Action Plan for a Dry Countertop
You have the knowledge now. Here is the order of operations to get your machine drying up.
- Unplug the machine and dry the area. Safety first.
- Identify the leak source using the timing chart above.
- Start with the cheapest fix: reseat the water tank and check the drip tray.
- Replace the group head gasket if the leak is around the portafilter. Do not overtighten the handle.
- Inspect and tighten internal hoses. Look for white mineral crusts.
- Descale if you have not done it in six months. Use a real descaler, not vinegar.
- If the leak persists after these steps, call a professional. Do not risk electrical damage.
Most of these fixes take less than an hour and cost less than $30 in parts. You will save money and learn a lot about your machine. And if you need parts, look for OEM (Original Equipment Manufacturer) kits like the Rancilio Silvia repair kit to ensure the exact fit. A dry countertop is a happy countertop.
Products related to this article
Sponsored / affiliate links. As an Amazon Associate I earn from qualifying purchases. I may earn additional commission from eligible campaigns.
 Coffee Espresso Machine Handle Replacement Parts, Cafe Bracket Handle for Lidl Silvercrest CM4621 CM4218 KF5002 KF500S Barista (for 51mm Portafilter Basket - Not included)
 Linnkyfloa Coffee Espresso Maker Handle Replacement for Stovetop Moka Pot or Percolator, Black Plastic for Spare Part Compatible with Italian(9-12 Cup)
 SOLUSTRE Electric USB Coffee Cup Warmer with Temperature Settings Portable Milk and Beverage Heating Coaster for Office Desk Small Lightweight Design Easy to Clean Surface Multi Functional