You know that moment: you pop in a fresh K-Cup, hit brew, and instead of coffee, you get a sad, sputtering stream. Or worse, the cup tastes like last week’s dark roast even though you switched to a light breakfast blend. That’s not the machine’s fault — it’s the accessories. The needle, the pod holder, the reservoir, the filter basket — every piece that touches water or coffee collects oils, scale, and grit over time.
This guide walks you through cleaning every removable and non-removable Keurig accessory, with the exact steps and frequencies that actually work. You’ll learn what to soak, what to wipe, what to replace, and what not to do (please don’t put the reservoir in the dishwasher — more on that below). By the end, you’ll know how to clean a Keurig accessories kit like a pro, and your coffee will taste noticeably better.
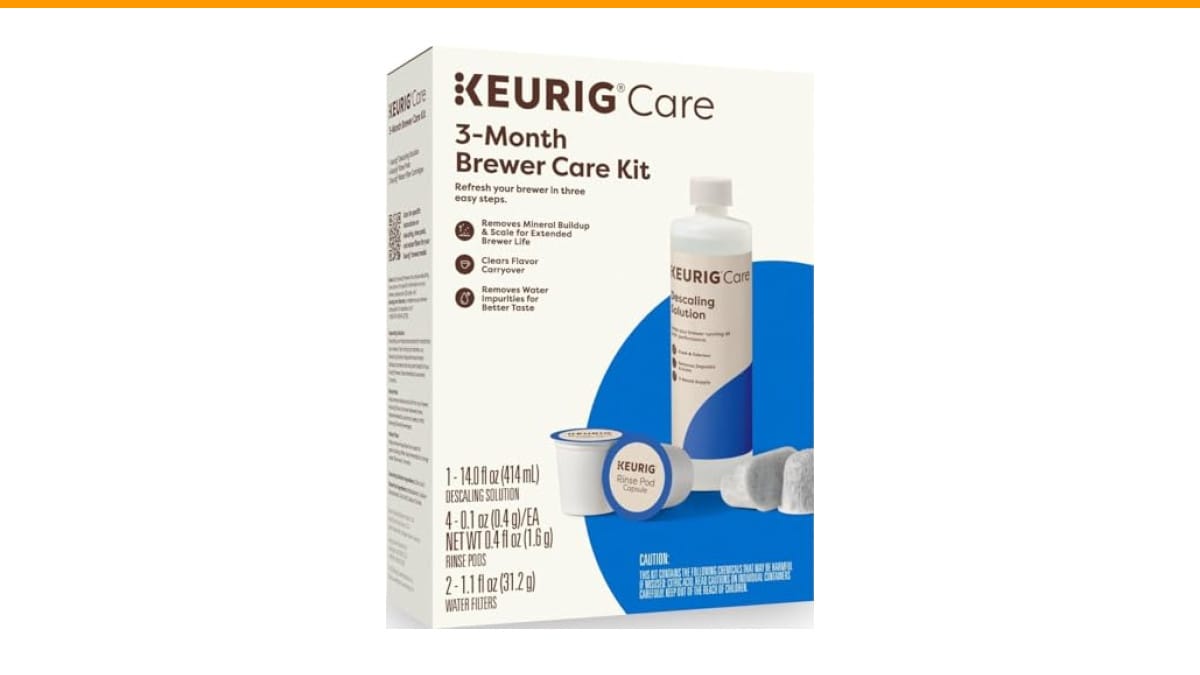
If you’d rather skip the DIY and use a purpose-built kit, the Keurig 3-Month Brewer Maintenance Kit bundles four rinse pods, one descaling solution, and two water filter refills — enough for a full maintenance cycle. It’s the same stuff Keurig recommends, so you don’t have to guess.
What Actually Needs Cleaning (and How Often)
Most people clean the outside of the machine and call it done. The inside is where the funk lives. Here’s the honest breakdown of what needs attention and when:
- Water reservoir — wipe and rinse weekly, deep-clean monthly. If you use tap water, you’ll see mineral film in about two weeks.
- K-Cup pod holder (the funnel with the needle) — rinse every 2–3 weeks. Coffee oils and ground fines accumulate here and directly affect flavor.
- Upper needle (the one that pierces the top of the pod) — check monthly. A clogged upper needle causes slow brewing or no brew at all.
- Water filter basket — replace the filter every 2 months or after 60 tank refills, whichever comes first. Rinse the basket itself when you swap the filter.
- Drip tray and plate — wash weekly with soapy water. They get gross fast if you leave wet grounds sitting.
- Exterior and cord — wipe down weekly with a damp cloth. Nothing special needed.
If you’re the kind of person who forgets until something breaks, set a recurring reminder on your phone. It takes less than 10 minutes to do the full routine.
Step-by-Step: Cleaning Each Accessory
Let’s go piece by piece. Unplug the machine first — this is non-negotiable, especially when you’re working near the reservoir and needles.
1. Water Reservoir
Remove the reservoir from the machine. Empty any leftover water. Wash it in the sink with warm water and a drop of dish soap. Use a soft sponge or bottle brush — avoid abrasive pads that scratch the plastic. Rinse thoroughly so no soap residue remains.
If you see mineral scale (white flakes or a chalky film), fill the reservoir with a 50/50 mix of white vinegar and water. Let it sit for 30 minutes, then scrub and rinse. For stubborn deposits, use a long-handled bottle brush.
Don’t put the reservoir in the dishwasher. The heat can warp the plastic and damage the water level sensor. Hand washing takes two minutes.
2. K-Cup Pod Holder
The pod holder is the plastic funnel that sits under the brewing head. It has a sharp needle at the bottom. To remove it, open the machine and lift the pod holder straight up — it usually pulls out with a gentle tug. Some models have a small tab you press.
Rinse the holder under running water to remove loose grounds. Then soak it in warm soapy water for 10 minutes. Use a soft brush (a clean toothbrush works) to scrub the needle and the small holes around it. Pay attention to the area where the K-Cup sits — oils cling there.
Rinse again and let it air dry completely before reinserting. If you have a Keurig 2.0, the holder is slightly different but the same principle applies.
3. Upper Needle
This needle is inside the brew head and pierces the top of the K-Cup. It’s easy to overlook because you can’t see it. Over time, coffee grounds plug it up, causing slow or weak brews.
To clean it, use a paper clip or a specialized cleaning tool. Straighten a paper clip and gently insert it into the needle’s opening to dislodge any ground coffee. Do this carefully — the needle is sharp. Then run a water-only brew cycle to flush out the debris.
If you have a Keurig that’s been brewing slowly, this is the first thing to check. A clogged upper needle is the most common cause of weak coffee.
4. Water Filter Basket
The water filter basket sits inside the reservoir. Remove it and discard the old filter. Rinse the basket under running water to remove any slime. Insert a new filter — the Keurig brand filters are a standard size, but compatible ones work too.
Soak the new filter in a cup of water for 5 minutes before placing it in the basket. This activates the carbon and removes any loose dust. Then snap the basket back into the reservoir.
5. Drip Tray and Plate
These are the easiest. Remove the tray and the plastic plate on top. Wash both in warm soapy water. Use a sponge to get into the corners. Rinse and dry. If there are coffee stains, a paste of baking soda and water works well — just scrub gently.
Check the tray for mold, especially if you live in a humid area. If you see any black spots, soak the tray in a bleach solution (1 tablespoon bleach per gallon of water) for 15 minutes, then rinse thoroughly.
Descaling: The Deep Clean You Can’t Skip
Cleaning the visible parts handles dirt and oil, but mineral scale builds up inside the internal tubing. That scale affects heating efficiency and can eventually clog the machine. Descaling is the only way to remove it.
Keurig recommends descaling every 3 months. If you use hard water, do it monthly. The process takes about 45 minutes, so plan accordingly.
You have two options: use the Keurig descaling solution (included in the maintenance kit) or make your own with white vinegar. The Keurig solution is odorless and doesn’t leave a vinegar taste, but it costs more. Vinegar is cheap and works fine, but you’ll need to run several water-only cycles afterward to rinse out the smell.
Here’s the descaling process for either solution:
- Empty the reservoir and remove the water filter (if you have one).
- Fill the reservoir with the descaling solution (or a 50/50 vinegar-water mix) up to the MAX fill line.
- Place a large mug or bowl on the drip tray.
- Turn the machine on and run a brew cycle without a K-Cup. Discard the liquid.
- Repeat until the reservoir is empty. This may take 5–6 cycles.
- Let the machine sit for 30 minutes.
- Refill the reservoir with fresh water and run 2–3 brew cycles to rinse.
After descaling, your machine should brew faster and hotter. If it still runs slow, check the upper needle again — sometimes scale loosens and clogs it.
Comparing Cleaning Methods: What Works Best
| Method | What It Cleans | Time | Cost | Best For |
|---|---|---|---|---|
| Soap and water | Reservoir, pod holder, drip tray | 10 minutes | Free | Routine maintenance |
| Vinegar descale | Internal tubing, scale buildup | 45–60 minutes | ~$1 | Budget-friendly deep clean |
| Keurig descaling solution | Internal tubing, scale buildup | 45 minutes | ~$15–20 (kit) | No vinegar smell, thorough clean |
| Rinse pods | Pod holder, needle, internal lines | 5 minutes | ~$0.50 per pod | Quick flavor refresh between descales |
I’ve used all four methods. The rinse pods are surprisingly effective for a quick fix — they dissolve coffee oils that soap can’t reach. But they don’t remove scale, so you still need to descale periodically. Vinegar works, but the smell lingers for a couple days unless you run extra rinse cycles. The Keurig solution is the most convenient and leaves zero aftertaste.
Real Questions People Ask About Keurig Accessory Cleaning
Can I put the K-Cup pod holder in the dishwasher?
Check your model’s manual, but most Keurig pod holders are top-rack dishwasher safe. I’ve washed mine in the dishwasher dozens of times without issue. The needle can get knocked around, so use a basket or place it securely. If you’re unsure, hand washing is safer.
How do I unclog the needle in the pod holder?
Use a straightened paper clip. Insert it gently into the needle’s opening and move it around to break up any coffee grounds. Then rinse the holder under hot water. If the clog is stubborn, soak the holder in hot soapy water for 15 minutes first. Never use a toothpick — it can break off and make things worse.
Is it safe to use vinegar to descale my Keurig?
Yes, white vinegar is safe and effective. Use a 50/50 mix with water. The main downside is the smell, which can linger for a few brews. Run at least two full water-only cycles afterward to rinse. If you’re sensitive to the taste, use the Keurig descaling solution instead.
How often should I replace the water filter?
Every 2 months or after 60 tank refills, whichever comes first. If you use tap water with high mineral content, replace it monthly. The filter doesn’t affect the machine’s function, but it improves water taste and reduces scale buildup.
Why does my Keurig taste like old coffee even after cleaning?
Most likely, there’s residual oil in the pod holder or the upper needle. Coffee oils are sticky and don’t rinse away with water alone. Use a rinse pod or soak the pod holder in hot soapy water. Also, check the water reservoir for biofilm — a slimy film that can harbor bacteria. Wash it with soap and warm water.
Final Tips to Keep Your Keurig Running Like New
- Rinse the pod holder every 2–3 weeks — it’s the number one cause of off-tasting coffee.
- Descale every 3 months (or monthly if you have hard water).
- Use filtered water in the reservoir to reduce scale and improve taste.
- Clean the drip tray weekly — it’s the easiest thing to forget and the most visible.
- Replace the water filter every 2 months.
- Run a water-only brew cycle before making your first cup of the day — it flushes out any stale water.
- Never put the reservoir in the dishwasher — hand wash only.
If your Keurig is still acting up after a thorough cleaning, the issue might be internal. Check out our guide on Keurig troubleshooting for common fixes. And if you’re dealing with a clogged machine, our clogged coffee maker guide covers similar steps for other brewers.
Cleaning your Keurig accessories isn’t glamorous, but it’s the difference between a cup that tastes like coffee and one that tastes like regret. Set a recurring reminder, keep a paper clip near the machine, and your brewer will thank you with every sip.
Products related to this article
Sponsored / affiliate links. As an Amazon Associate I earn from qualifying purchases. I may earn additional commission from eligible campaigns.