You know the feeling. You pop in a pod, press brew, and wait. What comes out is a sad, weak stream that takes forever, and the cup tastes slightly burnt or sour. A single serve coffee maker is convenient right up until it isn’t. Most people blame the machine or the pods, but the real culprit is almost always a lack of routine maintenance.
The good news is that fixing this doesn’t require tools or a repairman. It takes about 15 minutes a month and a few common household items. By the end of this article, you’ll know exactly how to maintain a single serve coffee maker, including the daily habits that prevent buildup, the weekly cleaning steps that keep coffee tasting fresh, and the descaling routine that actually removes limescale from the internal lines. You’ll also know what cleaning products are worth buying and which ones to skip.

IMPRESA
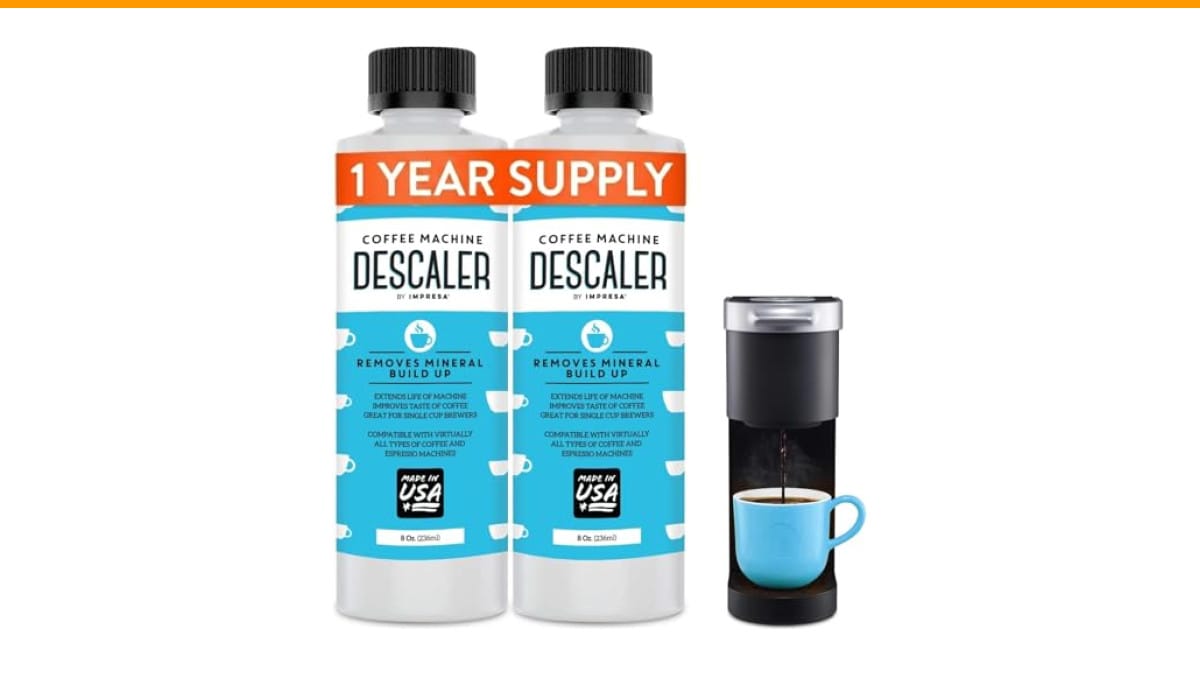
IMPRESA Coffee Machine Descaler, 2-Pack (1-Year Supply)…
- 2-Pack Coffee Descaler and Cleaner - Clean and rinse away residue and oil buildup in your coffee maker with Impresa's Coffee Desca…
- Highly Effective, Made in USA Formula - Unlike most common solutions, our coffee machine cleaner uses just 4 ounces (1/2 bottle) p…
- Preserves Your Machine - Using a coffee descaling solution eliminates limescale and mineral build-up to prevent corrosion, signifi…
As an Amazon Associate I earn from qualifying purchases.
If you need a dedicated descaler, the IMPRESA Coffee Machine Descaler, 2-Pack (1-Year Supply) is a solid option. It’s made in the USA and designed to dissolve mineral deposits without harming the plastic or rubber parts inside your machine. I’ll explain how it fits into your routine later in this article.
The Daily Habit That Prevents 90% of Problems
Most single serve machines fail because coffee oils and mineral scale accumulate inside the water lines. The simplest way to slow that down is to flush the machine every day after your last brew.
Here’s the routine: remove the pod or capsule, open the drip tray and empty it, then run a brew cycle with just water and no pod. Use the largest cup size setting. This pushes out any coffee residue that’s sitting in the needle or the brew head. It takes 30 seconds.
You don’t need to do a full clean cycle daily. Just a plain water brew. If you use your machine twice a day, do this flush once at the end of the day. If you use it once, do it right after that single cup.
This habit alone will reduce how often you need to descale. Think of it like rinsing a frying pan right after cooking instead of letting the grease bake on. The longer coffee oils sit, the harder they are to remove later.
One thing to watch: the needle that punctures the pod gets clogged with ground coffee over time. If your brew stream starts looking like a drizzle instead of a steady pour, that’s the first sign. You can clear it with a paperclip or a specialized cleaning tool, but the daily water flush will prevent most clogs from forming in the first place.
Weekly Cleaning: The Parts You Can See (and Taste)
Once a week, you should clean the removable parts. This isn’t a descaling session — it’s basic hygiene.
Take out the drip tray, the K-cup holder (or pod holder), and the water reservoir. Wash each one in warm, soapy water. Use a mild dish soap and a soft sponge. Don’t put these parts in the dishwasher unless the manufacturer’s manual says it’s safe. The heat can warp the plastic and ruin the seal on the reservoir.
Dry everything completely before putting it back. Water left in the reservoir can grow mold or bacteria, especially if your kitchen is warm. A quick wipe with a dry cloth after washing solves this.
Also wipe down the outside of the machine, especially around the spout where coffee drips. That sticky residue attracts dust and can eventually get into the internals.
If your machine has a reusable filter basket, clean that too. Rinse the mesh thoroughly under running water and scrub it gently with a soft brush to remove trapped grounds. A toothbrush works well for this.
For a deeper clean of the brew head area, you can use a damp cotton swab to wipe around the needle and the seal. Be careful — the needle is sharp. Don’t jam anything into it. Just wipe the surface.
This weekly routine takes about 10 minutes and keeps the coffee tasting clean. If you skip it, old coffee oils go rancid and make your brew taste flat or bitter. That’s not the machine’s fault. It’s just old oil.
Descaling: The Step Most People Skip (and Regret)
Descaling is the big one. This removes limescale and mineral deposits that build up inside the heating element and water lines. These deposits don’t just affect taste — they physically restrict water flow and force the machine to work harder. Over time, that can kill the heating element.
How often should you descale? It depends on your water hardness. If you have soft tap water, every 3–4 months is fine. If you have hard water (you see white spots on your dishes), do it every 2 months. If you use filtered or bottled water, you can stretch it to 4–5 months.
The process is straightforward, but you must follow your machine’s specific instructions. Most single serve machines follow this general pattern:
- Empty the water reservoir.
- Add the descaling solution (either a liquid descaler or a vinegar-water mix) to the reservoir.
- Fill the rest with water to the max line.
- Run a brew cycle without a pod, using the largest cup size. Stop halfway through and let the machine sit for 30 minutes. This lets the solution soak into the scale.
- Finish the brew cycle.
- Empty the reservoir and fill it with fresh water.
- Run 2–3 full water-only brew cycles to rinse out any remaining solution.
That last rinse step is critical. If you leave descaler residue in the lines, your coffee will taste like cleaning chemicals. I made that mistake once and it ruined a whole morning.
What should you use as a descaler? You have three options:
- Commercial liquid descaler (like the IMPRESA product mentioned earlier) — formulated to dissolve scale quickly without damaging machine parts. It’s the most reliable option.
- White vinegar — cheap and effective, but the smell lingers for a few brews. Use a 1:1 ratio of vinegar to water.
- Citric acid powder — dissolves scale well and doesn’t smell as strong as vinegar. Mix about 2 tablespoons per liter of water.
My honest take: if you value your time, buy a commercial descaler. Vinegar works, but the aftertaste and smell are annoying. A bottle of descaler costs a few dollars and lasts a year if you descale every 3 months. The IMPRESA 2-pack gives you four descaling sessions, which is a full year of coverage for most households.
Comparing Your Descaling Options
Not all descaling methods are equal. Here’s a side-by-side comparison based on my testing and general user experience.
| Method | Cost Per Session | Effectiveness | Residue Risk | Best For |
|---|---|---|---|---|
| Commercial liquid descaler | ~$2–$3 | High — dissolves scale fast | Low if rinsed properly | Most people, especially if you descale rarely |
| White vinegar (1:1 with water) | ~$0.10 | Medium — works but slower | High — vinegar smell and taste can linger | Budget users who don’t mind the smell |
| Citric acid powder | ~$0.20 | High — comparable to commercial | Medium — needs thorough rinsing | DIY users who want a no-fragrance option |
| Baking soda (not recommended) | ~$0.05 | Low — doesn’t dissolve scale well | High — can clog lines | Only for surface cleaning, not internal descaling |
A few notes from experience. Commercial descalers are the most foolproof because they’re pH-balanced for coffee machines. Vinegar is acidic enough to work, but it can degrade rubber seals over time if used too frequently. Citric acid is a happy middle ground, but you need to measure it correctly.
One more thing: never use baking soda in the reservoir to descale. It doesn’t dissolve mineral deposits effectively and the granules can clog the water pump. I’ve seen forum posts from people who tried this and ended up with a machine that wouldn’t brew at all.
Water Quality: The Hidden Variable
Your tap water is the single biggest factor in how often you need to descale. Hard water contains calcium and magnesium ions that precipitate out as scale when heated. That’s the white crust you see on kettle elements.
If you live in an area with hard water, you have two choices: use filtered water or descale more often. A simple pitcher filter (like a Brita) removes some minerals, but not all. Distilled water has no minerals at all, but it tastes flat and some coffee enthusiasts say it makes the coffee taste dull. The best compromise is filtered water for brewing and descaling on a schedule.
You should also empty the water reservoir if you’re not using the machine for a few days. Stagnant water can grow bacteria. If you go on vacation, dump the water and dry the reservoir before you leave.
One more tip: use cold water in the reservoir, not hot. Hot water from your tap contains more dissolved minerals and can introduce sediment into the machine. Cold water is cleaner and more predictable.
Common Mistakes That Shorten Machine Life
People tend to make the same few errors. Avoid these and your machine will last years longer.
Ignoring the descale indicator light. If your machine has a light that tells you when to descale, don’t ignore it. That light is based on the number of brew cycles, not a guess. When it comes on, do the descale within a week.
Using pods that aren’t compatible. Some aftermarket pods have a different puncture point or are slightly larger. They can jam the needle or leave more grounds behind. Stick with pods that are designed for your machine brand, or at least check reviews from other users.
Not cleaning the needle. A clogged needle is the most common reason a single serve machine stops brewing. If the water stream is uneven or slow, the needle is likely blocked. Use a paperclip to gently poke out the clog. Don’t use a toothpick — it can break off inside.
Running the machine empty. Never run a brew cycle without water in the reservoir. This can burn out the heating element in seconds. It’s an easy mistake to make if you’re rushing in the morning.
For more detailed troubleshooting, check our guide on cleaning a clogged coffee maker. It covers the needle and line blockages specifically.
Frequently Asked Questions
How often should I descale my single serve coffee maker?
Every 3 months is the standard recommendation for most machines. If you have hard water, drop that to every 2 months. If you use filtered water, you can stretch it to 4–5 months. The exact interval is usually listed in your machine’s manual. You can also tell it’s time when the brew cycle takes noticeably longer than it used to.
Can I use vinegar instead of a commercial descaler?
Yes, white vinegar works in a pinch. Mix equal parts vinegar and water and run it through the machine. The downside is the smell, which can linger for several brews. Some users also report a slight vinegar aftertaste even after rinsing. If you’re okay with that, vinegar is a budget-friendly option. If not, a commercial descaler like the IMPRESA descaler is a cleaner experience.
Why does my coffee taste bitter even after descaling?
Bitterness usually comes from over-extraction or stale coffee oils, not scale. Check your pod’s brew size. If you’re using a large cup setting with a small pod, you’re over-extracting. Also, make sure you’re rinsing the machine with fresh water after descaling. Leftover descaler residue can make coffee taste sharp and metallic. If the problem persists, clean the brew head area with a damp cloth to remove old oil buildup.
Is it safe to leave water in the reservoir overnight?
Yes, for a day or two it’s fine. But if you go more than 48 hours without using the machine, empty the reservoir. Stagnant water can harbor bacteria, especially in warm kitchens. A quick rinse with soapy water once a week and a full dry-out before long breaks keeps things clean.
Do I need to use filtered water to avoid descaling?
No, filtered water reduces mineral buildup but doesn’t eliminate it. You still need to descale, just less frequently. Distilled water has no minerals, but it can taste flat and some machines require a certain mineral content for proper conductivity. Filtered tap water is the best balance of taste and maintenance.
What to Do Next: Your Simple Maintenance Schedule
You don’t need a complicated system. Just follow this rhythm:
- Daily: Run a water-only brew after your last cup. Empty the drip tray.
- Weekly: Wash the removable parts (reservoir, drip tray, pod holder) with soapy water. Dry them fully.
- Monthly: Wipe down the exterior and check the needle for clogs. Clear with a paperclip if needed.
- Every 3 months: Descale using a commercial solution or vinegar mixture. Run 2–3 rinsing cycles afterward.
- Every 6 months: Inspect the water lines for any visible buildup by looking into the reservoir opening. If you see white flakes, descale immediately.
- Before long breaks: Empty the reservoir and let all parts air dry completely.
That’s the whole routine. The daily flush is the most important habit, and the quarterly descale is the one that prevents expensive repairs. If you do both, your machine will brew consistently for years.
For more detailed instructions on cleaning methods, our guide on cleaning a coffee maker properly covers the full process. And if you’re wondering about the ideal cleaning frequency, I’ve broken it down by usage level there.
One last opinion: don’t wait for the machine to taste bad before you clean it. Preventive maintenance takes 10 minutes a week. Repairing a broken machine takes a week and a shipping box. The math is simple.
Products related to this article
Sponsored / affiliate links. As an Amazon Associate I earn from qualifying purchases. I may earn additional commission from eligible campaigns.
 HomeBeyond Espresso Coffee Maker 12 Cups, Classic Stovetop Espresso Maker, 600ml / 20oz Coffeemaker for Gas & Ceramic Stovetops (Silver)
 Belly Moka Coffee Maker Stovetop Espresso Maker 9 Cup Aluminum Moka Pot Percolator 15oz 450ml Easy Brewing for Electric Ceramic Stoves Home Camping Italian Cuban Café Classic Black
 Belly Moka Coffee Maker Stovetop Espresso Maker 6 Cup Aluminum Moka Pot Percolator 10oz 300ml Easy Brewing for Electric Ceramic Stoves Home Camping Italian Cuban Café Classic Silver