You pour your first cup, and there it is: a puddle spreading across the counter, dripping down the front of the machine, or pooling underneath the base. A 12 cup coffee maker leaking water is one of the most common kitchen annoyances. It makes a mess, wastes coffee, and leaves you wondering if your machine is about to die.
The good news? Most leaks are fixable. The bad news? You have to do a little detective work first. That’s what this guide is for. I’ll walk you through a leak source map so you can pinpoint the problem in under a minute, then give you the exact steps to fix it. I’ll also cover when it’s genuinely smarter to stop repairing and buy a new machine, plus a maintenance routine that prevents most leaks from ever starting.

SURPOUF
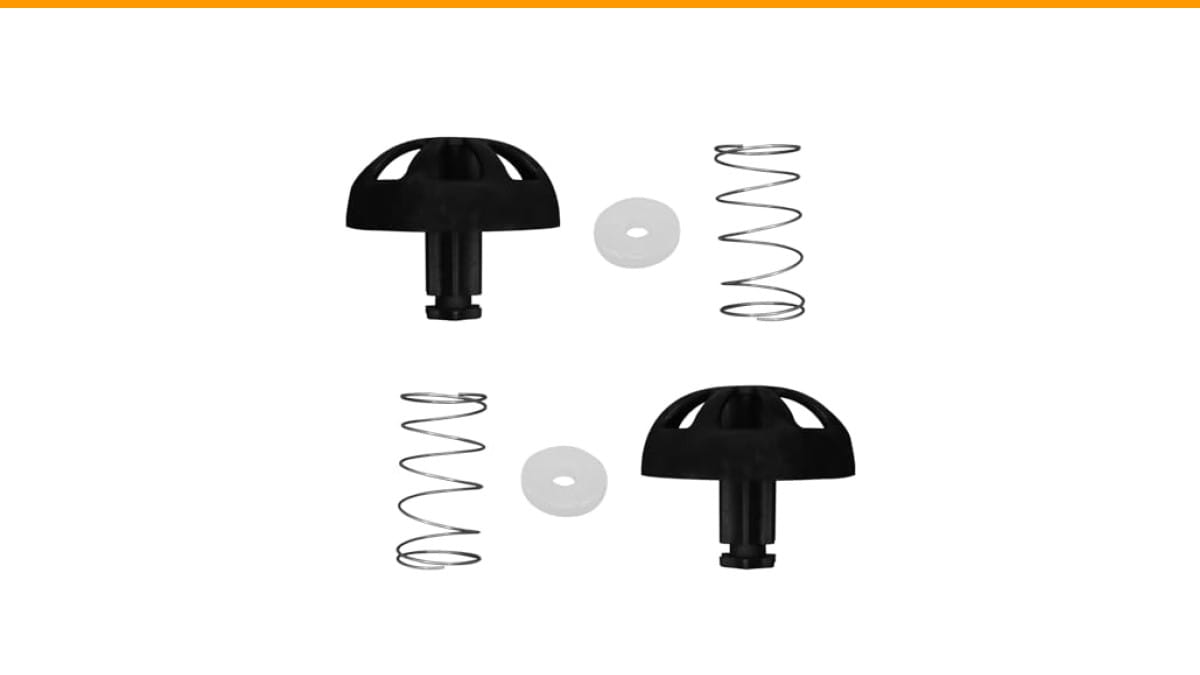
2-Pack Coffee Replacement Brew Basket Spring Loaded…
- The coffee machine spring stop kit is located at the bottom of the coffee replacement brewing basket and is suitable for 112435-00…
- We have learned from feedback from multiple users that they have received multiple complete coffee blues, but the springs at the b…
- This component has high compatibility and is suitable for models such as 49947, 49954, 49957, 49966, 49976 for Mr. Coffee; Black a…
As an Amazon Associate I earn from qualifying purchases.
You’ll walk away knowing exactly what to do with that dripping coffee maker, and you’ll save money by not replacing a machine that just needed a $5 part.
Before we dive into diagnostics, there’s one small part that causes a surprising number of leaks: the spring-loaded stopper assembly at the bottom of the filter basket. If your leak is coming from the basket area, that stopper can wear out or lose its tension. A replacement kit like the SURPOUF 2-Pack Coffee Replacement Brew Basket Spring Loaded Stopper Kit fits many Mr. Coffee, Black + Decker, and Hamilton Beach models. It’s a cheap fix compared to a new machine.
First, Find Where the Leak Is Coming From
Don’t just start taking things apart. A quick visual inspection saves you time and prevents you from replacing the wrong part. The leak’s location tells you almost everything.
Here’s your leak source map:
- Leak from the bottom (under the machine): Internal problem. Likely a cracked reservoir, a failed pump, or a clogged valve forcing water out of the wrong place.
- Leak from the filter basket area (drips down the front): Usually a clogged basket, an overfilled basket, or a worn stopper valve. This is the most common leak and the easiest to fix.
- Leak from the carafe or lid: A cracked carafe or a misaligned lid. Sometimes the carafe is fine but the brew basket is sitting crooked.
- Steam or water around the water tank lid: A cracked reservoir or a loose seal at the top of the tank.
Wipe the machine dry, run a brew cycle with water only, and watch where the first drops appear. That single observation narrows the problem down to one or two causes.
Coffee Maker Leaking from the Bottom: Causes & Fixes
Water under the machine is the most serious leak. It usually means something inside is cracked, clogged, or failed. Here are the usual suspects.
Worn Gaskets and O-Rings
Every coffee maker has rubber seals that keep water where it belongs. The most important one is the O-ring around the pump inlet or the gasket where the water tank meets the base. Over time, heat and mineral deposits make these seals brittle. They crack, shrink, and stop sealing.
If you see water dripping from the very bottom corner of the base, a worn gasket is a strong possibility. The fix is straightforward: find the part number in your manual, order a replacement gasket kit, and swap it out. It’s a 15-minute job with a screwdriver.
Cracked Water Reservoir or Base
Dropping the carafe, over-tightening the tank, or just years of thermal stress can crack the plastic water reservoir. The crack might be hairline and hard to see. Fill the tank with water, dry the outside completely, and watch closely. You’ll see a slow weep line where the crack is.
A cracked reservoir is a bigger job. Some machines let you replace just the tank. Others have the tank molded into the base, which means you’re looking at a new machine. If the crack is in the base itself, don’t bother repairing it. Replace the unit.
Clogged Internal Tubes and Valves
Mineral scale from hard water is the silent killer of coffee makers. Scale builds up inside the narrow tubes and the one-way valve that controls water flow. When the valve gets clogged, pressure builds up behind it. Water finds the path of least resistance, which is often out through a seam or the bottom of the machine.
This is one of the most common reasons a 12 cup coffee maker leaks water from the bottom. The good news: descaling often fixes it. I’ll give you the exact descaling procedure in the step-by-step section below.
For a deeper dive on machines that won’t pump water at all, check out our guide on Mr. Coffee not pumping — the same clogged valve issue shows up there.
Coffee Maker Leaking from the Filter Basket: Causes & Fixes
This is the leak you’ll see most often. Water drips down the front of the machine or pools in the carafe lid area. It’s messy, but it’s rarely a fatal problem.
Overfilled Basket or Wrong Filter Size
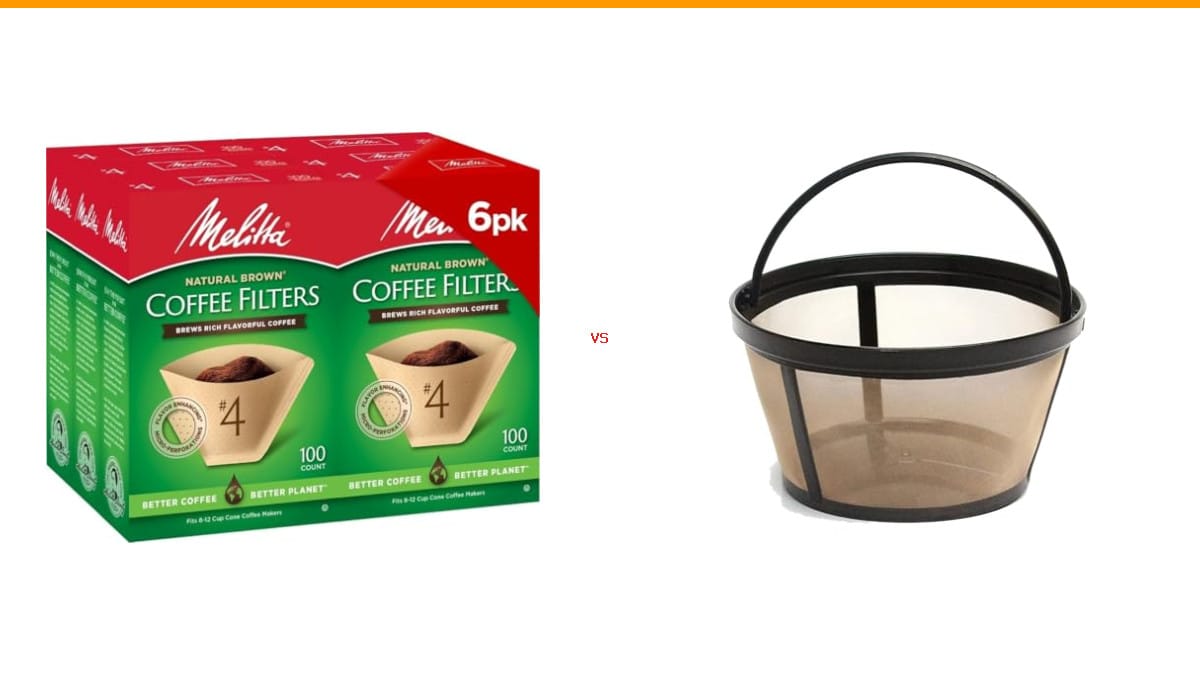
It sounds obvious, but you’d be surprised how many people jam a #4 filter into a basket designed for #2. The filter folds over, coffee grounds spill into the drain hole, and water backs up over the rim.
Check your manual for the correct filter size. For a 12-cup machine, you usually need a #4 cone or flat-bottom filter, but not always. Also, don’t heap the grounds above the basket’s fill line. The basket needs room for the coffee to bloom and for water to drain through.
Clogged Drain Holes
The bottom of the filter basket has one or more small holes that let brewed coffee flow into the carafe. Fine coffee grounds wash through and plug those holes over time. When the holes clog, water sits in the basket and eventually spills over the sides.
Take the basket to the sink, rinse it under hot water, and use a toothpick or a pipe cleaner to clear the holes. If the basket has a spring-loaded stopper valve (the part that opens when the carafe pushes against it), check that it moves freely. A stuck or weak spring means water can’t drain properly. That’s exactly the scenario where the replacement stopper kit mentioned earlier comes in handy.
Coffee Maker Leaking from the Carafe or Lid: Causes & Fixes
Sometimes the machine is fine, but the carafe is the problem. You’ll notice water on the counter but the machine’s base is dry.
Cracked Carafe vs. Worn Lid Seal
Run your finger along the inside and outside of the carafe. A hairline crack near the rim or handle is easy to miss. Fill the carafe with water, set it on a dry paper towel, and wait a minute. If the towel gets wet, the glass is compromised. Replace the carafe — it’s not worth the risk of it shattering while holding hot coffee.
The lid is another suspect. The lid’s rubber gasket wears out, especially if you put the carafe in the dishwasher. A worn gasket lets water escape around the lid instead of flowing cleanly into the carafe. Replacement lids are often available online. Just match the model number.
Also make sure the carafe is sitting squarely on the warming plate. If it’s tilted, the brew basket’s drip stop won’t open fully, and water will spill around the lid.
How to Fix a Leaking Coffee Maker: Step-by-Step Guide
Once you’ve found the leak, here’s the full repair sequence. Do these steps in order. Most leaks are fixed by step 2 or 3.
Tools You’ll Need
- Phillips-head screwdriver
- White vinegar or commercial descaling solution
- Soft cloth or paper towels
- Toothpick or pipe cleaner
- Replacement gaskets or O-rings (if needed)
- Replacement spring stopper kit (if the basket valve is the issue)
Step 1: Unplug and Disassemble
Unplug the machine first. This is non-negotiable. Water and electricity don’t mix, and you’ll be working with both. Remove the carafe, filter basket, and water reservoir. Set them aside. Wipe down the exterior so you can see new drips clearly.
Step 2: Inspect and Clean the Valve/Pump
Look at the bottom of the filter basket. You’ll see the spring-loaded stopper. Press it with your finger. It should move smoothly and spring back. If it sticks or feels weak, clean it first. Soak the basket in warm soapy water, then work the stopper back and forth. If it still doesn’t spring back, replace it with a new stopper kit.
Next, check the carafe’s drip-stop mechanism on the machine itself (if it has one). It’s a small plastic nub that gets pushed up when the carafe is in place. Make sure it’s not stuck in the down position.
Step 3: Replace Seals or Gaskets
If you found a cracked or brittle gasket, replace it. Most gaskets are held in place with a simple clip or a couple of screws. Take the old gasket to the hardware store or look up your model number online. Match the size and shape exactly. A slightly larger gasket won’t seal; a smaller one will leak worse.
Step 4: Descale the Internal System
This is the fix for about half of all bottom leaks. Fill the water reservoir with a 50/50 mix of white vinegar and water. Or use a commercial descaler and follow the package directions. Run a full brew cycle with the carafe in place. Let the machine sit for 30 minutes, then run two more cycles with plain water to flush out the vinegar.
Scale is the reason your machine leaks. It’s also the reason it brews slower over time. If you’re dealing with a severely clogged machine, our guide on cleaning a clogged coffee maker has more aggressive methods.
When to Stop Fixing and Buy a New Coffee Maker
Not every leak is worth fixing. Here’s a simple cost-benefit check. A new 12-cup drip machine costs anywhere from $25 to $100. A replacement part costs $5 to $20. If the fix is a $10 gasket and you have the tools, do it. If the machine has a cracked base, a dead pump, or a heating element that’s shorting out, you’re better off replacing it.
There’s also a safety angle. A leak that reaches the electrical components is a shock hazard. If you see water pooling near the power cord or the heating plate, stop using the machine immediately. That’s not a repair job; that’s a fire risk.
Consider the age of the machine. If it’s more than five years old and you’re on your second leak, the internal plastic is getting brittle. You’ll be chasing leaks for the next year. A new machine with a fresh warranty is the smarter investment, and it’ll likely be more energy-efficient too.
One more thing: mold. A leaking machine that sits damp will grow mold in the reservoir and internal tubes. If you smell a musty odor, the mold has already taken hold. Cleaning it out of every crevice is nearly impossible. Replace the machine.
Preventing Future Leaks (Maintenance Routine)
Leaks are almost always preventable. Here’s the routine I use and recommend to anyone who asks.
- Descale every 1-3 months, depending on your water hardness. Hard water means monthly descaling. Soft water means every three months. Use the vinegar method above; it’s cheap and effective.
- Clean the filter basket after every use. Rinse it under hot water and clear the drain holes with a toothpick once a week.
- Use filtered water. This cuts down on scale dramatically. It’s the single best thing you can do for your machine’s lifespan.
- Don’t leave water in the reservoir overnight. Stagnant water breeds bacteria and can degrade seals faster.
- Inspect the gaskets and carafe every month. Look for cracks, brittleness, or discoloration. Catch problems early.
- Run a cleaning cycle with a commercial cleaner every 3-6 months to break down coffee oils that vinegar doesn’t touch. Our guide on how often to clean a coffee maker has a full schedule.
This routine takes about 10 minutes a month. It will save you the headache of a 12 cup coffee maker leaking water at 7 AM on a Tuesday.
Frequently Asked Questions
Why is my coffee maker leaking water from the bottom?
The most common cause is a clogged one-way valve or internal tube. Mineral scale builds up, pressure rises, and water pushes out through the seams. A thorough descaling fixes this in most cases. If descaling doesn’t help, check the O-rings and gaskets near the pump and water tank.
Can I use my coffee maker if it’s leaking?
No. If the leak is anywhere near the electrical components, you risk a short circuit or shock. Unplug the machine and diagnose the leak before using it again. A leak from the filter basket that you can clearly see and fix is one thing; a leak from the bottom is a hard stop.
How often should I descale my coffee maker?
Every 1 to 3 months, depending on your water hardness. If you see white flakes in your kettle or scale on your faucets, your water is hard, and you should descale monthly. Use a 50/50 vinegar-water mix or a commercial descaler.
Is it worth repairing a leaking coffee maker?
It depends on the part. A $10 gasket or a $15 stopper kit is worth fixing. A cracked base, a dead pump, or a leaking heating element is not. If the machine is over five years old and needs a major part, buy a new one.
Will a new filter basket stop my coffee maker from leaking?
Sometimes. If the leak comes from the basket area and the basket’s spring-loaded stopper is weak or stuck, a new basket or a replacement stopper kit will fix it. But if the leak is from the machine’s base, a new basket won’t help. Check the leak source first.
What to Do With This Information
You’ve got the diagnosis map and the fix list. Here’s the short version to act on right now.
- Find the leak source before buying any parts. Bottom leak means internal; basket leak means basket; carafe leak means carafe.
- Descale the machine first. It fixes half of all leaks and costs about 50 cents in vinegar.
- Check the spring-loaded stopper in the filter basket. A weak spring is a common, cheap fix.
- Replace worn gaskets and O-rings. They’re cheap and easy to swap.
- If the base is cracked or the pump is dead, stop. Buy a new machine.
- Never run a leaking machine. Unplug it and diagnose before the next brew.
- Start a monthly descaling routine. It’s the cheapest insurance against future leaks.
A 12 cup coffee maker leaking water doesn’t have to end in a trip to the store. Most of the time, it’s a 15-minute fix. Now you know exactly where to look.
Products related to this article
Sponsored / affiliate links. As an Amazon Associate I earn from qualifying purchases. I may earn additional commission from eligible campaigns.
 SOLUSTRE Electric USB Coffee Cup Warmer with Temperature Settings Portable Milk and Beverage Heating Coaster for Office Desk Small Lightweight Design Easy to Clean Surface Multi Functional
 HomeBeyond Espresso Coffee Maker 12 Cups, Classic Stovetop Espresso Maker, 600ml / 20oz Coffeemaker for Gas & Ceramic Stovetops (Silver)
 Linnkyfloa Coffee Espresso Maker Handle Replacement for Stovetop Moka Pot or Percolator, Black Plastic for Spare Part Compatible with Italian(9-12 Cup)