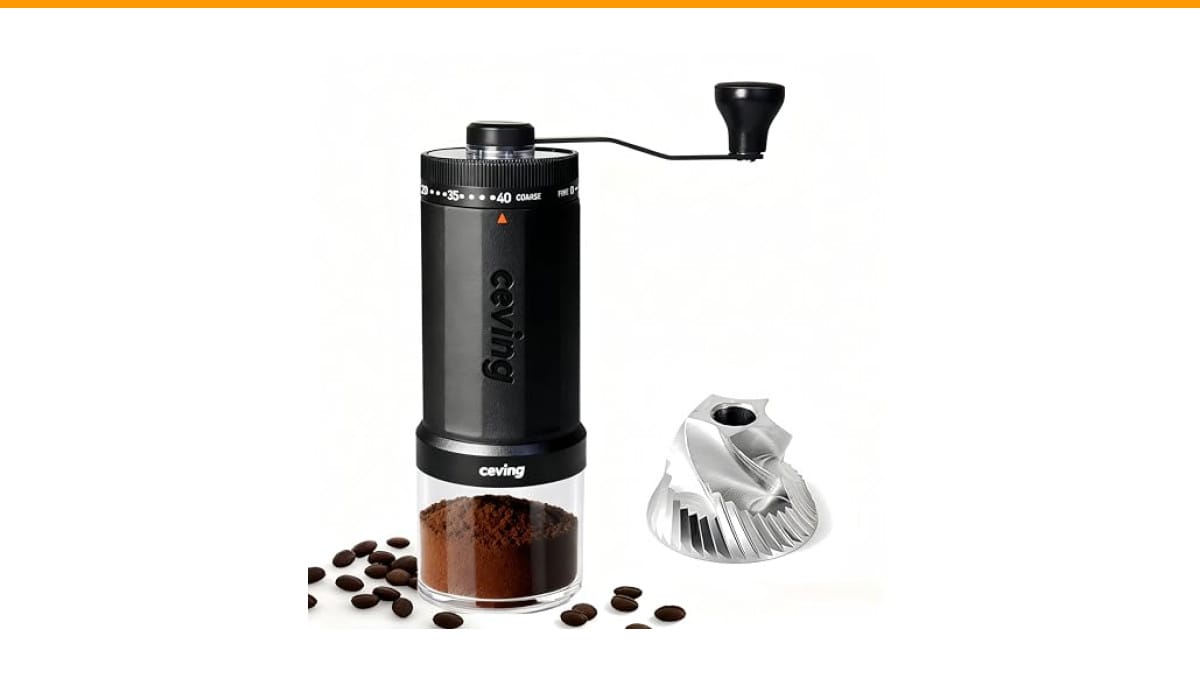
You pull out your favorite hand grinder, load the beans, and start cranking. The handle meets resistance, but something feels off. The grind looks inconsistent, and the coffee tastes a little flat. You’re not imagining it. That grinder has been working hard for months, and it’s carrying a layer of coffee oils and micro-fines that are messing with your brew.
This guide covers how to descale a manual coffee grinder properly. You’ll learn the difference between cleaning and descaling, the exact steps for rice and tablet methods, and how to deep-clean the burrs without damaging them. You’ll also see a comparison of the three main approaches so you can pick the one that fits your routine.

Urnex
Urnex Grindz Professional Coffee Grinder Cleaning Tablets…
- Removes coffee residue and oils in standalone coffee grinders (not for super automatic espresso machines)
- Patented, all-natural, food safe and gluten-free tablet absorbs and loosens coffee grounds
- Effectively cleans grinders without disassembling burrs or casings
As an Amazon Associate I earn from qualifying purchases.
Before we get into the methods, one tool makes this job almost too easy. The Urnex Grindz Professional Grinder Cleaning Tablets are food-safe, gluten-free tablets that absorb the oils and residue stuck to your burrs. You run them through the grinder just like coffee beans, and they pull out the gunk without you needing to take the grinder apart. It’s a solid shortcut for weekly maintenance.
Why Your Manual Grinder Needs More Than a Brush
Most people brush out their grinder after every use. That’s good, but it’s not enough. The brush gets the loose grounds, but the oils from your beans cling to the burr surfaces and the inside of the chamber. Over time, those oils turn rancid. That rancid layer is what makes your coffee taste bitter or stale, even when you’re using fresh beans.
Descaling is technically about removing mineral scale, which matters for machines that heat water. A manual grinder doesn’t have water, so what you’re really doing is deep-cleaning the oils and resinous build-up. But the term has stuck, and the process is the same. You’re breaking down the sticky residue that a dry brush can’t touch.
You also need to think about the burr material. Steel burrs are common on budget and mid-range hand grinders. They’re tough, but they can rust if you introduce water. Ceramic burrs are lighter and don’t rust, but they’re more brittle. The method you choose has to respect the material, or you’ll end up with a dull grinder or worse, chipped edges.
Let’s break down the three ways to handle this job, from the quickest to the most thorough.
Method 1: The Rice Trick (Fast, Cheap, and Slightly Risky)
The rice method is the old barista hack. You toss a quarter cup of uncooked white rice into the hopper and grind it through. The hard rice grains knock the oils off the burrs and push the residue out the chute.
It works, but I’ll be honest: it’s not perfect. Rice is harder than coffee beans, and on some grinders, it can stress the burr alignment or leave starchy dust behind. I’ve used it on a cheap steel burr grinder with no problems, but I wouldn’t run rice through a premium grinder with tight tolerances. The risk of chipping a ceramic burr is real, especially if the rice has any hard hulls left on it.
If you go this route, use plain white rice, not brown or wild rice. Run about two tablespoons through on a coarse setting, then grind a small amount of fresh coffee beans to clear out the rice residue. That coffee grounds will be terrible, so toss it.
This method is fine for a quick fix, but it doesn’t dissolve the oils. It just knocks them loose. For a deeper clean, you want the tablet approach.
Method 2: Cleaning Tablets (The Right Tool for the Job)
The Urnex Grindz tablets are designed specifically for this. They’re made of a food-safe, gluten-free material that absorbs oils and then breaks apart as it passes through the burrs. You don’t need to disassemble anything, which is a huge time saver.
Here’s how to use them properly. First, empty the grinder of any beans. Set the grind dial to a coarse setting, similar to what you’d use for French press. Drop one tablet into the hopper and grind it through. The tablet will break down into a powder that carries the oils out with it.
After the tablet is through, run a tablespoon of fresh coffee beans through the grinder. This clears out any remaining tablet residue and re-season the burrs with coffee oils. Toss that first batch of grounds. Your next cup should taste noticeably cleaner.
The tablets are a little pricey compared to rice, but they’re much safer. They won’t chip ceramic burrs, and they actually absorb the residue rather than just scraping it. For most home users, this is the method I recommend. It’s also the one I use on my own grinders about once a month.
Method 3: Full Disassembly and Deep Clean (The Thorough Route)
Sometimes you need to take things apart. If your grinder has visible build-up on the burrs, or if you’ve never cleaned it since you bought it, a full disassembly is the way to go.
Start by removing the handle and the adjustment dial. Most manual grinders have a locking mechanism that lets you pull the shaft out. Check your manual, but the general process is: remove the bottom nut, slide the washer off, and pull the burr carrier out. Keep track of the order of parts. Take a photo with your phone before you start.
Once the burrs are out, use a stiff brush to remove the loose grounds. Then, for steel burrs, wipe them down with a dry cloth. If you need more power, dampen a cloth with a tiny bit of isopropyl alcohol (not water) and wipe the burr surfaces. Let them dry completely before reassembly.
For ceramic burrs, you can use a mild soap and water solution, but you must dry them thoroughly. Ceramic is porous, and moisture can get trapped. I’ve seen ceramic burrs crack from thermal shock when hot water was used. Stick to room-temperature water and dry them with a cloth, then let them air out for an hour.
This method takes about twenty minutes, but it gives you the best results. You can see exactly what’s happening inside your grinder, and you can address any other issues, like a misaligned shaft or a loose bearing, while you’re in there.
If you’re dealing with a grinder that’s seized up or not working, the issue might be more than just oil build-up. Check out our grinder troubleshooting guide for common fixes.
Comparing the Three Descale Methods
Here’s a quick reference table to help you decide which method to use based on your situation.
| Method | Time | Cost | Burr Safety | Effectiveness | Best For |
|---|---|---|---|---|---|
| Rice | 5 minutes | Pennies | Risky for ceramic | Removes loose oils | Quick fix on steel burrs |
| Cleaning Tablets | 10 minutes | Moderate | Safe for all types | Absorbs and removes residue | Regular monthly maintenance |
| Full Disassembly | 20-30 minutes | Free | Safe if careful | Deep clean, removes all build-up | Annual deep clean or heavy use |
You’ll notice the table doesn’t include a water-based descaling solution. That’s intentional. Water is the enemy of most manual grinders, especially those with steel burrs. Even if the burrs are coated, the shaft and bearings are not. Introducing water can lead to rust and grinding issues down the line.
How Often Should You Actually Do This?
Frequency depends on how much you use the grinder. If you grind coffee once a day, a tablet clean every four to six weeks is reasonable. If you grind multiple times a day, or if you switch between different types of beans (like caffeinated and decaf), clean it every two to three weeks.
You’ll know it’s time when you notice the grind size becoming less consistent, or when the handle feels harder to turn than it used to. The resistance comes from the oils making the grounds stick to the burr faces. That’s a clear sign to clean.
Don’t forget the outside. Wipe down the body and the catch cup with a dry cloth. Coffee dust gets everywhere, and it can make the moving parts feel gritty. A quick wipe after each use goes a long way.
For a broader look at keeping your whole setup clean, including your electric machine, read our coffee grinder cleaning guide. And if you’re wondering about the water-based side of things, our guide on descaling coffee machines covers that separately.
Frequently Asked Questions About Descaling Manual Grinders
Can I use vinegar to descale my manual grinder?
No. Vinegar is acidic and can corrode metal parts, including the shaft and the burr carrier. It can also leave a lingering smell that ruins your next few batches of coffee. Stick to dry methods or the cleaning tablets.
Will descaling tablets leave a chemical taste in my coffee?
If you use them correctly, no. The tablets are food-safe and designed to break down into an inert powder. The key is to run a small amount of fresh coffee beans through the grinder afterward to clear out any residual powder. That first batch of grounds should be discarded.
My grinder has ceramic burrs. Can I use the rice method?
I would avoid it. Ceramic is harder than steel but more brittle. A hard grain of rice, especially one with a tough husk, can chip the cutting edge of a ceramic burr. Once chipped, the burr is ruined and you’ll need a replacement. Use tablets or disassembly instead.
How do I know if I’ve damaged my burrs from descaling?
Look for visible chips or dull spots on the cutting edges. Run a test grind and compare the particle size to what you got when the grinder was new. If the grind is wildly inconsistent, or if you hear a metallic scraping sound, you’ve likely damaged the burrs. Stop using the grinder and inspect it under a bright light.
Is it necessary to disassemble the grinder for a deep clean?
Not every time. For monthly maintenance, tablets are sufficient. Disassembly is for when you notice build-up that won’t come off with a brush or tablet, or if you’re doing a seasonal deep clean. If you’re comfortable with tools, it’s worth doing once a year to check the condition of the internal parts.
What to Remember Next Time You Clean
- Brush out loose grounds after every single use. It takes ten seconds and prevents 80% of the build-up.
- Use cleaning tablets monthly if you grind daily. They’re the safest and most effective option for regular maintenance.
- Reserve the rice trick for emergencies only, and never use it on ceramic burrs.
- Do a full disassembly once a year to check for wear and tear on the shaft and bearings.
- Never introduce water to the internal parts of a steel burr grinder. Dry cloths and alcohol wipes only.
- Always run a small batch of fresh beans after any cleaning method to re-season the burrs.
- If your grinder feels gritty or hard to turn, stop using it and clean it immediately. That friction is wearing down the parts.
Keeping your manual grinder clean is a small habit that pays off in every cup. The first coffee you brew after a proper descale will taste noticeably brighter and more defined. That’s the reward for taking care of the gear.
If you’re still deciding between a manual grinder and an electric one, the maintenance is similar. But the choice between burr and blade grinders matters more for your workflow. Burr grinders need this kind of care, while blade grinders just need a wipe down.
Products related to this article
Sponsored / affiliate links. As an Amazon Associate I earn from qualifying purchases. I may earn additional commission from eligible campaigns.
 SOLUSTRE Electric USB Coffee Cup Warmer with Temperature Settings Portable Milk and Beverage Heating Coaster for Office Desk Small Lightweight Design Easy to Clean Surface Multi Functional
 Coffee Espresso Machine Handle Replacement Parts, Cafe Bracket Handle for Lidl Silvercrest CM4621 CM4218 KF5002 KF500S Barista (for 51mm Portafilter Basket - Not included)
 Quick Heating Cup Warmer, Three Temperature Settings, Splashproof and Portable, for Coffee, Milk, Lightweight ABS Material