You’re mid-pull, milk steaming, and the shot timer is already counting. You fumble for the scale, knock over the dosing cup, and coffee grounds scatter across the counter. Sound familiar? Using a coffee scale with a timer shouldn’t feel like a circus act. But most people make it messier than it needs to be because they’re doing it wrong.
In this guide, I’ll show you the exact workflow I use in my own kitchen—no spills, no wasted coffee, no frantic cleanup. You’ll learn how to set up your scale, dose without scattering grounds, and time your brew without losing your rhythm. I’ll also bust a few myths that keep people making a mess in the first place.

Maestri House
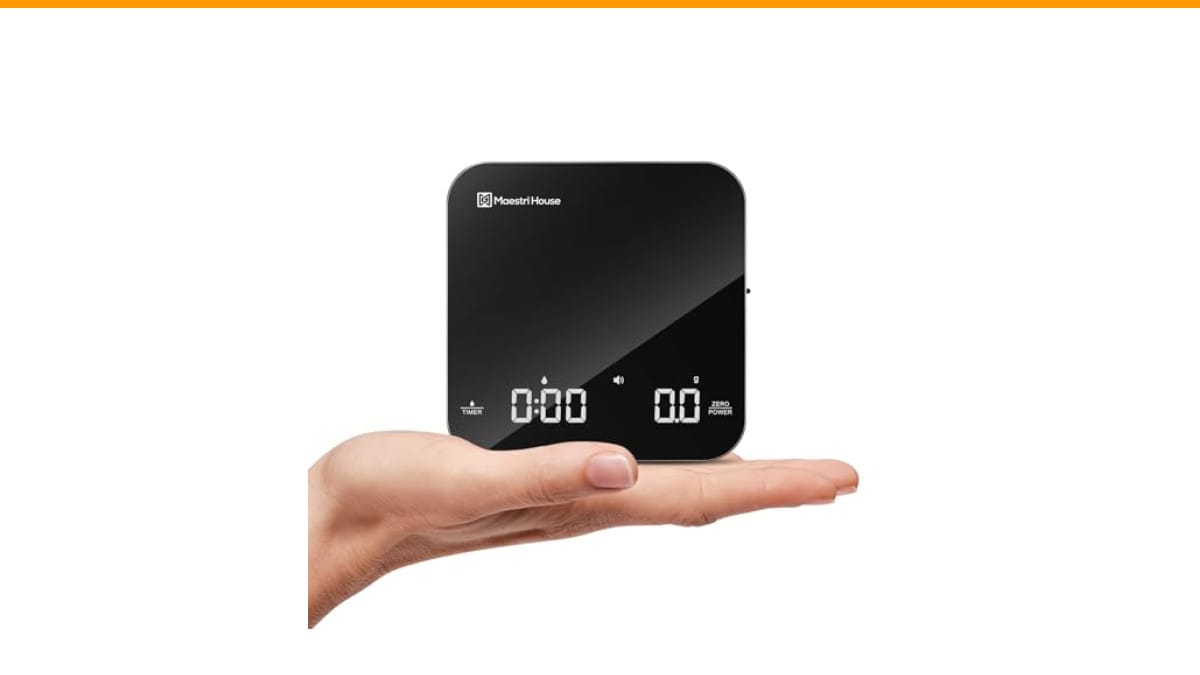
Maestri House S2 Espresso Coffee Scale with…
- 【Ultra Small, Yet Professional】The Espresso Scale is small enough to fit in your palm. It measures 4.13*4.13*0.78 inches and weigh…
- 【0.1g High Precision】This digital kitchen coffee scale is equipped with high-precision sensors and a reliable microprocessor, guar…
- 【Three Units & Dual Timekeeping Modes】The Espresso Digital Timer Scale has three units of measurement (g/oz/ml) that can be conver…
As an Amazon Associate I earn from qualifying purchases.
If you don’t own a scale with a built-in timer yet, the Maestri House S2 Espresso Coffee Scale with Timer is a compact option that fits most machines and pour-over setups. It’s got a 0.1g precision and a hidden LED display, which makes it easy to read without leaning over your dripper. But the techniques below work with any scale that has a timer.
Myth #1: You Need to Tare Every Single Time
Most people assume you must press the tare button before every dose. That’s not true—and it’s often what causes the mess. If your scale has a stable zero and you’re using the same portafilter or dripper, you can leave it on the scale and just add coffee. The timer starts when you hit the button, not when you add beans.
Here’s the clean way to dose: put your empty portafilter or dripper on the scale, tare once, then grind directly into it. Keep the grinder chute close to the basket so grounds don’t bounce out. If you’re using a hand grinder, use a dosing funnel—it’s a cheap tool that eliminates most spills.
For pour-over, place the dripper on your mug or carafe, then set the whole thing on the scale. Tare once. Add the ground coffee, then tare again to zero out for water. That way you’re not juggling multiple containers.
The real trick is to keep your scale in one spot and move the coffee to it, not the other way around. Set it on a stable surface, preferably with a non-slip mat or the silicone pad that comes with the Maestri House S2. That pad does more than protect the scale—it stops it from sliding when you bump it.
Myth #2: The Timer Is Only for Espresso
People think the timer on a coffee scale is just for pulling shots. That’s a narrow view. The timer is equally useful for pour-over, French press, and even cold brew. The key is understanding what the timer is actually timing: contact time between water and coffee.
For pour-over, start the timer the moment you start pouring the bloom water. That’s your zero point. Then you can follow a recipe like 1:16 ratio, 45-second bloom, then pour in stages. The scale tells you when you’ve hit the target weight, and the timer tells you when to move to the next step. No more guessing.
For French press, start the timer when you pour the water, then set it aside. The scale isn’t needed during the steep, but the timer is. If your scale has a separate timer mode—like the Maestri House S2 does with its manual and auto modes—you can use it even without weighing anything.
That’s the part most people miss: the timer and the scale are independent tools. You can use the timer for steeping while the scale sits idle. You don’t need to have something on the scale for the timer to be useful.
How to Set Up Your Scale for a Clean Workflow
Setup matters more than you think. A messy workflow usually starts with a cluttered counter. Here’s the order I use every morning:
- Place the scale on a dry, flat surface. Wet counters cause slips.
- Put your brewing vessel (portafilter, dripper, or carafe) on top.
- Press the tare button to zero out the vessel’s weight.
- Grind coffee directly into the vessel. Use a funnel if you have one.
- Check the weight. Add or remove grounds with a small spoon—don’t shake the vessel.
- Press the timer button to start timing your pour.
- Watch the weight as you pour. Stop when you hit your target.
That’s the whole process. It sounds simple, but the details make the difference. For example, when you’re pouring water, keep the kettle spout low and close to the coffee bed. High pours create splashes that land on the scale and change the reading—and make a mess.
Another thing: don’t put the scale near the edge of the counter. You’ll knock it off when you reach for a towel. Give it a dedicated spot, even if it’s just the corner of your coffee station.
If you’re using the Maestri House S2, you’ll appreciate the touch controls. They’re on the glass surface, so you can wipe them clean without worrying about crumbs getting stuck under buttons. The silicone pad also catches stray grounds, and you can rinse it off in seconds.
Comparing Manual vs. Auto Timer Modes
| Mode | When to Use | Pros | Cons |
|---|---|---|---|
| Manual timer | Pour-over, French press, cold brew | You control when it starts; works with any recipe | Requires you to remember to press the button |
| Auto timer | Espresso shots, especially with a direct-connect portafilter | Starts automatically when weight changes; no fumbling | Can trigger prematurely if you bump the scale |
The auto mode is great for espresso because it starts the moment coffee hits the basket. But it can be finicky if you’re using a portafilter that doesn’t sit evenly. If you see the timer starting before you’ve placed the portafilter, switch to manual mode.
For pour-over, manual mode is almost always better. You want the timer to start exactly when you begin pouring, not when the weight changes slightly from a drip. The auto mode might start early if a drop falls from the kettle.
I’ve used both modes extensively. The auto mode on the Maestri House S2 is responsive, but I still prefer manual for pour-over because I like full control. It’s a personal preference, not a flaw.
How to Avoid Spills and Messes in Practice
Even with the right setup, spills happen. Here’s how to minimize them:
- Use a dosing funnel – It’s the single best anti-mess tool. It fits over the portafilter or dripper and keeps grounds from scattering.
- Don’t overfill the basket – If your portafilter holds 18g, don’t put 20g in it. Overfilled baskets cause grounds to spill when you tamp.
- Keep a small brush nearby – A pastry brush or a dedicated coffee brush lets you sweep stray grounds into the sink without touching them.
- Wipe the scale after each use – Coffee oils and grounds can build up and affect accuracy. A dry paper towel is enough.
- Use the scale’s tare function wisely – Tare with the vessel on the scale, not before adding the vessel. That’s a common mistake that leads to wrong measurements and messy corrections.
One more tip: if you’re using a scale with a removable silicone pad, take it off and rinse it occasionally. Grounds get trapped underneath, and that can throw off the weight readings by a fraction of a gram. It’s not a big deal for most brews, but for espresso, it matters.
I’ve also learned to keep my kettle away from the scale when it’s boiling. Steam condenses on the scale surface and makes it slippery. That’s a recipe for a tipped-over dripper.
Frequently Asked Questions
Can I use a coffee scale with timer for pour-over?
Yes, absolutely. In fact, it’s the best way to brew pour-over consistently. You weigh your beans, then weigh your water as you pour, and the timer tracks your bloom and total brew time. The Maestri House S2 has a 0.1g precision and a 2kg capacity, which is plenty for a standard pour-over.
How do I clean a coffee scale without damaging it?
Most coffee scales, including the Maestri House S2, have a glass or silicone surface that wipes clean. Use a damp cloth, not running water. Don’t submerge the scale. If you have a silicone pad, remove it and wash it separately. Check the manufacturer’s instructions for specific cleaning guidance.
What’s the difference between auto and manual timer mode?
Auto mode starts the timer when it detects a change in weight, which is useful for espresso. Manual mode requires you to press a button to start timing. For pour-over, manual is more reliable because you control the start point. For espresso, auto saves you a step.
Do I need a scale with a timer, or can I use a separate timer?
You can use a separate timer, but it’s less convenient. A built-in timer keeps everything in one place, so you don’t have to coordinate two devices. It also lets you use the auto-start feature, which a separate timer can’t do. If you’re serious about consistency, a scale with a timer is worth it.
Why does my coffee scale give inconsistent readings?
Several reasons: the scale isn’t on a flat surface, there’s something stuck under the sensor, or the battery is low. Also, if you’re using a scale without a silicone pad, moisture can affect the load cell. Make sure the surface is dry and the scale is at room temperature before use.
What I’d Tell a Friend Starting Out
If you’re new to using a coffee scale with a timer, don’t overcomplicate it. Start with a simple routine: weigh your beans, grind, weigh your water, and time your brew. You don’t need to chase the perfect ratio on day one. Get comfortable with the scale first.
Keep your workspace clean and organized. A clutter-free counter is the best defense against messes. And if you’re looking for a scale that’s small enough to leave out, the Maestri House S2 is a solid choice. It’s compact, rechargeable, and the silicone pad keeps it in place.
One thing I wish someone told me earlier: don’t be afraid to use the manual timer mode. The auto mode is cool, but it’s not always right for every brew. You’ll get better results if you understand when each mode works best.
If you’re also dealing with a dirty coffee maker, check out our guide on cleaning with vinegar—it’s a natural way to keep your equipment in shape. And for regular upkeep, our cleaning frequency guide explains how often to deep-clean. A clean machine makes better coffee, and a clean scale makes better measurements.
At the end of the day, using a coffee scale with a timer is about consistency, not perfection. You’ll spill a few grounds now and then. That’s fine. Just brush them off and keep brewing.
Products related to this article
Sponsored / affiliate links. As an Amazon Associate I earn from qualifying purchases. I may earn additional commission from eligible campaigns.
 HomeBeyond Espresso Coffee Maker 12 Cups, Classic Stovetop Espresso Maker, 600ml / 20oz Coffeemaker for Gas & Ceramic Stovetops (Silver)
 Coffee Mug Warmer, Heating Cup Mat Electric Cup Warmer Pad Electric Thermostat Coaster USB Cup Heater Electric Beverage Warmers for Office Home (A)
 Coffee Mug Warmer & You are Awesome Mug Set, Electric Cup Warmer for Desk