You pull a shot, and there it is — a puddle spreading across the counter. Or maybe you notice water pooling in the drip tray after only two drinks. A leaking compact espresso machine is frustrating, but it’s rarely a death sentence. Most leaks trace back to a handful of parts that wear out with normal use. With a few basic tools and a little patience, you can fix most of them yourself.
This guide walks you through the diagnostic process step by step. You’ll learn where to look, what to check, and when to call a pro. We’ll cover the most common leak points, how to test each one, and what repairs cost. By the end, you’ll know exactly what’s wrong with your machine and how to fix it.

Rancilio
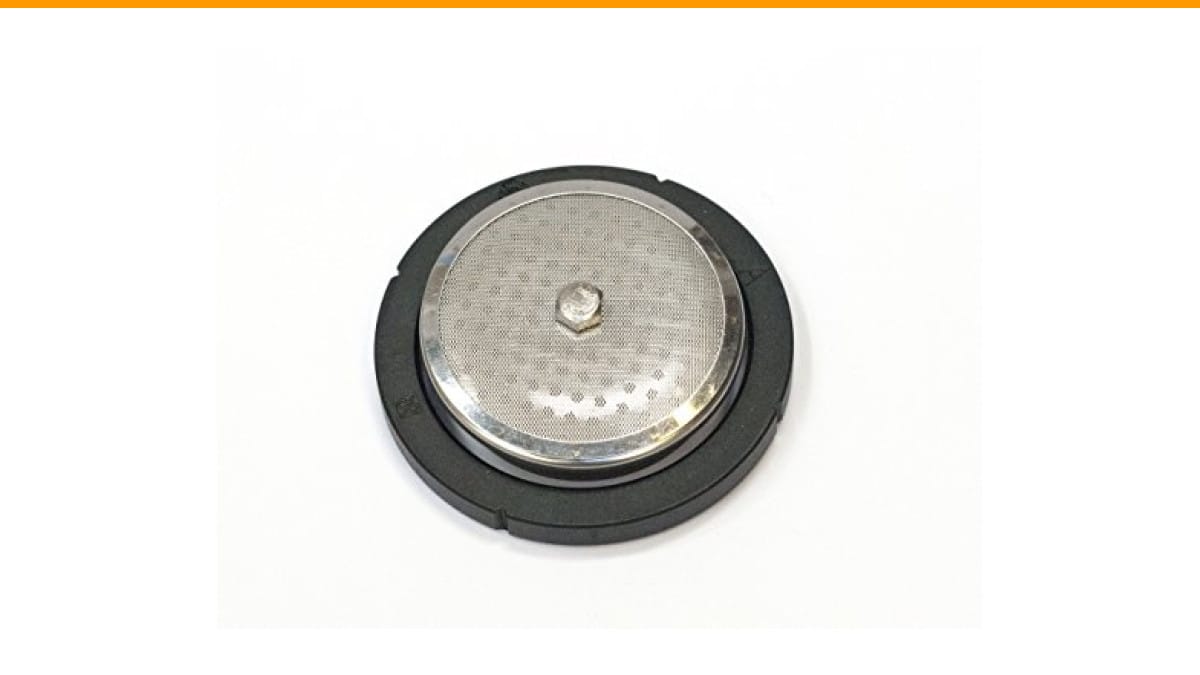
Rancilio Silvia Espresso Machine Repair Kit.
- This OEM repair kit can help you to fix some of the most common Rancilio Silvia problems.
- Water leaking around the portafilter: Usually the grouphead gasket needs to be replaced.
- Flow or no flow of water from grouphead. Your screen is probably clogged and needs to be replaced.
As an Amazon Associate I earn from qualifying purchases.
If you own a Rancilio Silvia, the Rancilio Silvia Espresso Machine Repair Kit is worth having on hand. It includes the OEM group head gasket and screen — the two parts that cause most leaks. Replacing them takes about ten minutes and costs far less than a service call.
Diagnose the Leak: A Quick Map of Where Water Escapes
Before you unscrew anything, look at where the water collects. The location tells you which part is failing. Here’s a quick reference:
- Water dripping from the portafilter while brewing — The group head gasket is worn or the screen is clogged.
- Puddles under the machine — Check the water tank, boiler seals, or internal hoses.
- Water leaking from the steam wand — The steam valve O-ring is dry or cracked.
- Water pooling in the drip tray too fast — The three-way valve or drain hose may be blocked.
For a more detailed breakdown of leaks on automatic machines, see our guide on automatic espresso machine leaking water.
Once you know the area, you can move to the specific fix.
The #1 Culprit: Worn Group Head Gasket (and How to Test It)
The group head gasket is a rubber ring that seals the portafilter to the machine. It takes a beating every time you lock in the portafilter. Over months of use, it compresses, hardens, and loses its grip. The result is water sneaking around the edges of the portafilter.
How to Test the Gasket
Lock in an empty portafilter. Place a paper towel underneath. Run water for 10 seconds. If you see water on the paper towel, the gasket needs replacing. A good gasket should seal completely — no drips, no spray.
Another test: Lock in the portafilter and try to wiggle it side to side. If it moves more than a few millimeters, the gasket is worn. It should sit snugly, like a cork in a bottle.
Step-by-Step Gasket Replacement
- Turn off the machine and unplug it. Let it cool completely.
- Remove the shower screen. On most machines, a single screw holds it in place. Use a flathead screwdriver.
- Pry out the old gasket. It may be stuck — use a pick or small flathead to work it out.
- Clean the groove where the gasket sits. Old coffee oils can leave a sticky residue.
- Press the new gasket into place. Make sure it sits flat and evenly.
- Reattach the shower screen and screw.
- Run a blank shot (no coffee) to test the seal.
That’s it. The whole job takes 10–15 minutes. For a visual guide, check the Rancilio Silvia Repair Kit — it includes the gasket and screen, so you’ll have both parts ready.
If you’re using a super-automatic machine, the process is similar, but the group head is often enclosed. Some models require removing a side panel to access the gasket. If that sounds daunting, skip to the professional repair section.
Leaks from the Bottom: Tank, Boiler, and Internal Hose Issues
Water under the machine is a different beast. It usually points to one of three problems: a cracked water tank, a failed boiler seal, or a loose internal hose.
Cracked Water Tank
Inspect the tank for hairline cracks, especially around the bottom edges and the valve that connects to the machine. Cracks happen after years of thermal cycling — hot water, cold refills. If you find a crack, the tank must be replaced. Duct tape won’t hold under pressure.
Boiler Seals
The boiler is the heart of the machine. It heats water to brew temperature and builds steam pressure. Over time, the seals around the boiler can fail. You’ll notice water weeping from the seam where the boiler halves meet. This is a more involved repair — you’ll need to drain the boiler, remove it, and replace the gaskets. It’s doable for a confident DIYer, but it’s easy to mess up. If you’re not comfortable, call a technician.
Internal Hoses
Internal hoses carry water from the tank to the pump to the boiler. They’re held on by small clamps. A loose clamp or a perished hose will drip steadily. Check all the hoses you can see. Feel around the connections for moisture. Tighten any loose clamps with a screwdriver. If a hose feels hard or cracked, replace it.
Before you start poking around inside, you must depressurize the boiler. Here’s the safety protocol:
- Turn off the machine and unplug it.
- Open the steam wand and let it vent until no more steam escapes.
- Wait 30 minutes for the boiler to cool completely.
- Place a towel under the machine to catch any residual water.
- Now you can safely remove the top cover and inspect.
Skipping this step can result in a face full of hot steam. Not worth it.
For a broader look at automatic machine issues, read our automatic vs semi-automatic comparison to understand how different designs affect leak proneness.
Steam Wand and Valve Leaks: O-Rings and Descaling
A steam wand that drips when closed is a classic O-ring failure. The O-ring sits inside the valve mechanism. When it dries out, it can’t seal properly. The fix is straightforward: replace the O-ring.
First, you need to access the valve. On most machines, the steam wand unscrews from the valve body. Inside, you’ll see the O-ring. Use a pick to remove it. Take it to a hardware store to match the size — they’re standard metric sizes. Apply a thin layer of food-safe silicone grease to the new O-ring before installing. Slide it into place, reassemble, and test.
Another common cause of steam wand leaks is scale buildup. Mineral deposits can prevent the valve from closing fully. If you’ve never descaled your machine, now’s the time. A 50/50 mix of water and white vinegar works in a pinch, but a proper descaling solution is better. Run it through the steam wand as well as the group head. For a full walkthrough, see our how to descale coffee machine at home guide.
After descaling, the leak may stop. If it doesn’t, the O-ring is the likely culprit.
When to Call a Professional vs. DIY Repair (with Cost Guide)
Not every leak is a DIY job. Here’s a cost comparison to help you decide.
| Leak Type | DIY Difficulty | DIY Cost | Professional Cost |
|---|---|---|---|
| Group head gasket | Easy | $5–$15 | $50–$100 |
| Clogged screen | Easy | $10–$20 | $50–$80 |
| Steam wand O-ring | Moderate | $2–$5 | $60–$120 |
| Boiler seal | Hard | $20–$40 | $150–$250 |
| Internal hose | Moderate | $5–$15 | $80–$150 |
| Cracked tank | Easy (if part available) | $30–$60 | $100–$200 |
If the machine is under warranty, don’t touch it — call the manufacturer. If it’s out of warranty and the repair is simple, DIY saves you money. For anything involving the boiler or electrical components, I recommend a professional. A botched boiler repair can turn a $200 fix into a $400 replacement.
One more thing: if your machine is more than 10 years old and the leak is from the boiler, consider the cost of repair versus a new machine. Sometimes it’s smarter to upgrade.
Preventative Maintenance Schedule to Stop Future Leaks
Leaks don’t happen overnight. They’re the result of months of wear. The good news: a simple maintenance routine prevents most of them.
| Frequency | Task | Why It Matters |
|---|---|---|
| Weekly | Backflush with water | Flushes coffee oils out of the group head and three-way valve. |
| Monthly | Backflush with espresso cleaner | Dissolves stubborn oils that cause clogs and back pressure. |
| Monthly | Inspect gasket and screen | Catches wear before it turns into a leak. |
| Quarterly | Descale the boiler | Prevents scale from damaging seals and valves. |
| Quarterly | Check hoses and clamps | Catches loose fittings before they drip. |
| Yearly | Replace group head gasket | Cheap insurance against the most common leak. |
Backflushing requires a blind basket (a basket with no holes). You put it in the portafilter, add cleaner, and run the brew cycle for 10 seconds, then stop. Repeat 5–10 times. This pushes water back through the group head, clearing debris.
If you don’t have a blind basket, you can use a rubber stopper from a hardware store. It’s the same idea.
Frequently Asked Questions (FAQs)
Why is my compact espresso machine leaking water from the bottom?
Water under the machine usually means a cracked water tank, a failed boiler seal, or a loose internal hose. Start by checking the tank for cracks, then inspect the hoses you can see. If everything looks dry, the boiler seal is the likely suspect — that’s a job for a professional.
Can I use my espresso machine if it’s leaking?
Short-term, yes, but you risk electrical damage and worse leaks. Water inside the machine can short-circuit the electronics. If you see water pooling near the base, stop using it until you find the source.
How often should I replace the group head gasket?
Every 12 months for home use, more often if you pull multiple shots daily. A worn gasket is the number one cause of portafilter leaks. If you see water dripping around the portafilter, replace it.
Will descaling fix a steam wand leak?
Sometimes. Scale can prevent the valve from closing completely. Descaling dissolves the scale and restores the seal. If the leak persists after descaling, the O-ring is likely worn and needs replacing.
Is it worth repairing an old espresso machine?
If the repair costs less than half the price of a new machine, and the machine is otherwise in good shape, yes. But if the boiler is leaking and the machine is over 10 years old, consider a new one. The cost of parts and labor can exceed the value of the machine.
The Bottom Line: Fixing the Leak for Good
You don’t need to be a technician to fix most espresso machine leaks. A little detective work, a few basic tools, and the right replacement parts will have you back to pulling shots in an afternoon.
- Start with the leak map: where the water collects tells you which part is failing.
- The group head gasket is the most common fix — replace it first if water drips from the portafilter.
- Always depressurize the boiler before opening the machine. Safety first.
- Steam wand leaks are almost always O-rings or scale — both are simple fixes.
- Compare DIY cost vs. professional repair before you start. Some jobs are better left to experts.
- Stick to a maintenance schedule: backflush weekly, descale quarterly, replace gaskets yearly.
- Keep a repair kit like the Rancilio Silvia Repair Kit on hand so you’re never caught without the parts.
Now go fix that leak. Your counter will thank you.
Products related to this article
Sponsored / affiliate links. As an Amazon Associate I earn from qualifying purchases. I may earn additional commission from eligible campaigns.
 Coffee Espresso Machine Handle Replacement Parts, Cafe Bracket Handle for Lidl Silvercrest CM4621 CM4218 KF5002 KF500S Barista (for 51mm Portafilter Basket - Not included)
 Linnkyfloa Coffee Espresso Maker Handle Replacement for Stovetop Moka Pot or Percolator, Black Plastic for Spare Part Compatible with Italian(9-12 Cup)
 HomeBeyond Espresso Coffee Maker 12 Cups, Classic Stovetop Espresso Maker, 600ml / 20oz Coffeemaker for Gas & Ceramic Stovetops (Silver)