You fill the reservoir, press the button, and nothing happens. The little light stays dark. The pump doesn’t hum. You check the outlet, try a different one, and still nothing. If you own one of those electric water filter pitchers that dispenses hot or cold water for coffee, this moment is frustrating because the whole point was convenience.
Most of these units are simple machines. A heating element, a small pump, a control board, and a float switch. When it won’t turn on, the cause is usually one of four things: power delivery, a stuck float switch, a tripped thermal fuse, or a dead control board. This article walks through each one, tells you what to test in order, and gives you a clear decision point for when to stop troubleshooting.
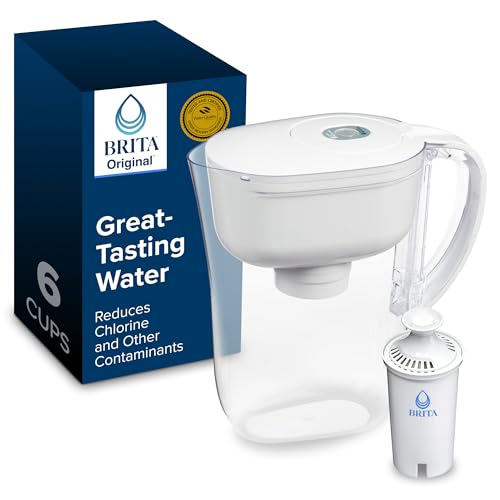
BRITA
Brita Small 6-Cup Water Filter Pitcher, Includes…
- CERTIFIED WATER FILTRATION: WQA NSF/ANSI certified Brita Metro water filter pitcher reduces chlorine taste and odor, copper, mercu…
- SMARTLIGHT FILTER INDICATOR: Brita's most accurate and precise pitcher filter change indicator tells you exactly when to replace y…
- MINI-FRIDGE-FRIENDLY DESIGN: This 6-cup BPA-free water pitcher is space-efficient and fits in most mini-fridges; easy-fill lid mak…
As an Amazon Associate I earn from qualifying purchases.
You’ll also learn why the coffee maker won’t turn on troubleshooting steps overlap with these pitchers, and where they diverge. By the end, you’ll know whether a $5 part fixes it or whether it’s time to replace the unit.
If you’re in the market for a simpler, more reliable setup, the Brita Small 6-Cup Water Filter Pitcher skips the electronics entirely. No pump, no heating element, no control board. Just filtered water in your fridge, ready for your coffee maker. That’s worth keeping in mind as you read through the failure modes below.
Why Electric Filter Pitchers Die: The Four Usual Suspects
Electric water filter pitchers (the kind that boil or chill water) share a common architecture. The power cord feeds a small PCB. That PCB talks to a float switch in the tank and a thermistor near the heating element. When the float switch says the tank is empty, the unit refuses to power on. That’s a safety feature, not a bug.
Here’s the problem. The float switch gets stuck. Mineral scale, a stray piece of filter media, or just age can wedge it in the “empty” position. The unit thinks there’s no water, so it won’t start. You press the button, nothing happens, and you assume the whole thing is dead.
Before you throw it out, test the float. Unplug the unit, drain it, and find the float (usually a small cylindrical piece that rides up and down a guide rod inside the tank). Push it up and down manually. If it moves freely, good. If it feels gritty or sticks, clean it with white vinegar and a soft brush. That alone fixes a surprising number of “dead” pitchers.
If the float moves fine, the next suspect is the thermal fuse. These units have a one-time fuse that blows if the heating element overheats. Once it blows, the unit is dead until you replace it. The fuse is usually a small white or yellow cylinder wired in series with the heating element. A multimeter set to continuity will tell you if it’s open. Replacement fuses cost a few dollars and take ten minutes to solder in.
Power delivery is the third suspect. Test the outlet with a lamp or phone charger first. Then check the cord for damage, especially near the base where it bends. A frayed cord can intermittently lose power. If the cord looks fine, open the base and check the solder joints where the cord meets the PCB. Cold solder joints are common on budget units.
The last suspect is the control board itself. If power gets to the board but nothing responds, and the float and fuse check out, the board is likely dead. These boards are rarely available as spare parts. At that point, repair stops making sense.
How to Diagnose It in 15 Minutes Without Special Tools
You don’t need a bench full of gear. A multimeter helps, but you can do a lot with just your hands and eyes.
- Unplug and drain. Remove the filter cartridge and dump the water. Set the cartridge aside—you can reuse it if the unit gets fixed.
- Inspect the tank interior. Look for scale buildup, debris, or anything that could jam the float. Clean with vinegar if needed.
- Test the float manually. Push it up and down. It should move without resistance. If it clicks, that’s the switch actuating.
- Check the power cord. Look for kinks, cuts, or exposed wire. Wiggle it while plugged in and watch for any LED response.
- Smell for burnt electronics. A acrid smell near the base means a component already failed. Skip further testing.
If you have a multimeter, check the outlet voltage first. Then check continuity across the thermal fuse. If the fuse is open, that’s your answer. If it’s closed, move to the switch. You can bypass the float switch temporarily to test the rest of the circuit, but don’t run it that way unattended—it exists to prevent dry-fire damage.
Most people stop at step 3. A stuck float is the most common failure, and cleaning it takes five minutes. The second most common is a blown thermal fuse, which requires a soldering iron. If you don’t own one, a local electronics repair shop will do it for less than the cost of a new pitcher.
One thing I’ve learned testing these units: the failure rate spikes after descaling. People run a vinegar cycle, don’t rinse thoroughly, and the residual acid corrodes the float switch contacts. If your pitcher died right after a descale, suspect the switch first.
When to Stop Fixing It and Just Replace It
There’s a cost curve to repairs. A thermal fuse costs $3. A float switch costs $5. A control board costs $20 if you can even find one. The pitcher itself might have cost $40. Once you’re replacing boards or pumps, you’re past the point of economic sense.
Here’s the rule I use: if the repair requires more than one replacement part, or if the part costs more than half the price of a new unit, stop. Time is worth something too. The hour you spend hunting for a compatible board could be spent brewing coffee.
There’s also a safety angle. These pitchers have heating elements. If a thermal fuse blew once, it blew for a reason. The element might be compromised. Replacing the fuse without addressing the root cause risks a repeat failure, and in a worst-case scenario, a fire hazard. I’m not saying every blown fuse means the element is bad. But if the unit is more than two years old, the math usually favors replacement.
The coffee machine maintenance guide on this site covers the descaling routine that prevents these failures in the first place. Regular descaling keeps the float clean and the thermistor accurate. Skip it for a year, and you’re rolling the dice.
Comparing Repair vs. Replacement vs. Going Manual
You have three paths forward when an electric pitcher dies. Repair it, replace it with another electric unit, or switch to a passive pitcher like the Brita model mentioned earlier. Each has trade-offs.
| Option | Cost Range | Time Investment | Reliability | Best For |
|---|---|---|---|---|
| DIY repair (fuse/switch) | $3–$10 in parts | 30–60 minutes | High if root cause found | People comfortable with a soldering iron |
| Professional repair | $25–$50 labor | Drop-off, 2–5 days | Medium—same unit, older components | Sentimental attachment to the unit |
| Replace with new electric pitcher | $40–$80 | 15 minutes | High, but same failure modes return | People who want hot water on demand |
| Switch to passive pitcher | $15–$35 | 5 minutes | Very high—no electronics to fail | People who just want filtered water for their coffee maker |
The passive pitcher route is the one I recommend most often for home users. You lose the instant hot water feature, but you gain years of trouble-free operation. If your coffee maker has its own heating element (most do), you don’t need the pitcher to boil water anyway. Just fill the reservoir with filtered water from the passive pitcher.
That’s the setup I’ve used for the last two years. A passive filter pitcher in the fridge, a Mr. Coffee drip machine on the counter, and zero electronics between them to fail. The Ninja brew button issues article covers what happens when even a good machine’s controls act up—another reason to keep the water supply simple.
Five Questions People Actually Ask About These Pitchers
Why does my pitcher turn on but not heat the water?
That’s a different failure than the one in the title. The unit powers up, the light comes on, but the water stays cold. The heating element is likely open. Test it with a multimeter—it should read near-zero ohms. If it reads infinite, it’s dead. Replacement elements are sometimes available, but they’re often pressed into the base and hard to swap. Most people replace the unit at this point.
Can I use a Brita filter in an electric pitcher?
No. Electric pitchers use proprietary cartridges designed for their specific flow rate and dimensions. A Brita filter won’t seat properly, and the finer media can restrict flow enough to starve the pump. Stick with the brand’s own filters. The Bodum grinder repair guide on this site has a similar warning about using the wrong burr set—always match the part to the machine.
Why does my pitcher keep blowing the thermal fuse?
That means the heating element is overheating. The most common cause is scale buildup on the element itself. The scale insulates the heat, the element gets hotter than designed, and the fuse sacrifices itself. You need to descale more aggressively. If it happens twice in a row, the element is probably damaged and the unit is beyond saving.
Is it safe to bypass the float switch?
For testing, yes. For daily use, no. The float switch prevents the heating element from running dry, which can melt the housing or start a fire. If your float is stuck, clean it. If it’s broken, replace it. Don’t be tempted to wire around it permanently.
How long should an electric filter pitcher last?
With monthly descaling, expect two to three years. Without descaling, six months to a year. The heating element is the wear item. The pump and control board usually outlast it. Compare that to a passive pitcher, which lasts indefinitely as long as you replace the filter cartridge on schedule.
What to Do Next: A Practical Checklist
- Unplug the unit and clean the float switch with vinegar before assuming the worst.
- Test the outlet and the power cord—cheap and fast, rules out the boring stuff.
- Check the thermal fuse with a multimeter. Open fuse means a $3 part or a new pitcher.
- Never bypass safety switches. They exist for a reason.
- If the control board is dead, stop. Replacement boards aren’t worth the hassle.
- Consider a passive pitcher like the Brita Small 6-Cup for your coffee setup—no electronics, no failure modes.
- Set a monthly descaling reminder. It’s the single best thing you can do for any water-heating appliance.
Most of these pitchers fail because of neglect, not because they’re poorly made. A little maintenance goes a long way. But when the electronics do die, don’t let sunk cost keep you troubleshooting for hours. The coffee fact book recommendations on this site make for good reading while you wait for a replacement to arrive.
If you’re set on another electric unit, look for one with a removable heating element. That’s the one part that actually wears out, and being able to swap it without replacing the whole pitcher is worth the extra few dollars. If you’re not set on electric, the passive route is simpler and cheaper over the long run. Either way, you now know exactly what to check first.
Products related to this article
Sponsored / affiliate links. As an Amazon Associate I earn from qualifying purchases. I may earn additional commission from eligible campaigns.
 SOLUSTRE Electric USB Coffee Cup Warmer with Temperature Settings Portable Milk and Beverage Heating Coaster for Office Desk Small Lightweight Design Easy to Clean Surface Multi Functional
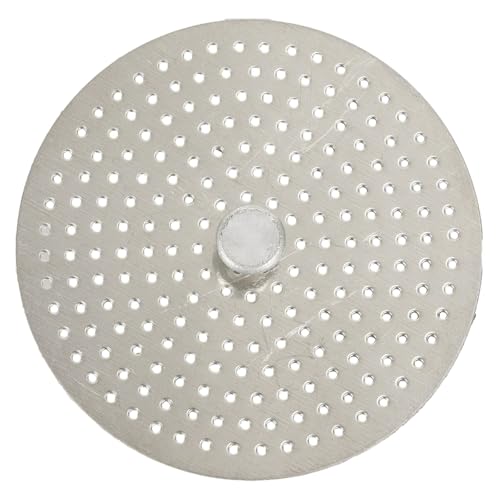 Stainless Steel Moka Pot Coffee Filter Disc for Espresso Brewing, Coffee Maker Replacement Filter Plate for Home Office Coffee Bar Cafe (FOR 4 Cups)
 Thrift T-100 Odorless Drain Cleaner, Hot Water Activated, 1 lb