You bought a compact coffee maker to save counter space, not to babysit it. But after a few months of daily use, the brew slows down, the coffee tastes bitter, and that faint burnt smell lingers no matter how many times you rinse the carafe. That’s the moment most people toss the machine and buy another one. You don’t have to.
This guide covers everything you need to know about how to maintain a small coffee maker, from daily rinses to deep descaling cycles. You’ll learn the exact schedule, the right cleaning agents, and the mistakes that shorten a machine’s life. I’ve tested these steps on drip machines, single-serve pods, and small espresso units, and they work across the board.

IMPRESA
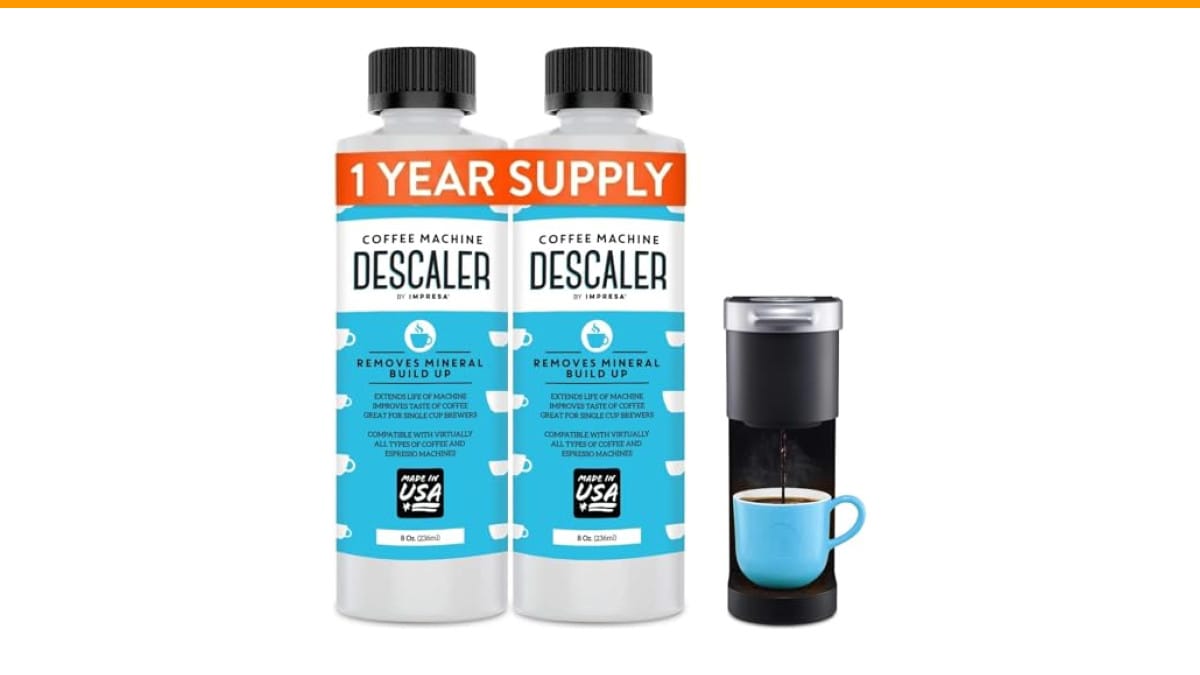
IMPRESA Coffee Machine Descaler, 2-Pack (1-Year Supply)…
- 2-Pack Coffee Descaler and Cleaner - Clean and rinse away residue and oil buildup in your coffee maker with Impresa's Coffee Desca…
- Highly Effective, Made in USA Formula - Unlike most common solutions, our coffee machine cleaner uses just 4 ounces (1/2 bottle) p…
- Preserves Your Machine - Using a coffee descaling solution eliminates limescale and mineral build-up to prevent corrosion, signifi…
As an Amazon Associate I earn from qualifying purchases.
By the end, you’ll have a maintenance routine that takes about 10 minutes a week and keeps your coffee tasting fresh for years.
One product that makes this easier is the IMPRESA Coffee Machine Descaler, 2-Pack. It’s a universal descaling solution that works with most single-serve and drip machines, including Keurig, Breville, and Cuisinart. The two-bottle pack gives you four full descaling sessions, which covers a year of regular maintenance if you descale every three months.
Why Small Coffee Makers Need Special Attention
Small coffee makers have the same internal components as their full-size counterparts, but they pack them into a smaller frame. That means narrower water lines, tighter valves, and less room for mineral deposits to pass through. When scale builds up, it blocks those narrow paths faster than it would in a larger machine.
Water quality matters more than most people think. Hard water with high calcium and magnesium content leaves scale on the heating element and inside the boiler. That scale acts as an insulator, so the machine has to work harder to heat the same amount of water. You’ll notice longer brew times and louder operation before the machine eventually stops working altogether.
The other issue is coffee oil buildup. Coffee contains natural oils that cling to internal parts. Over time, these oils turn rancid and make your coffee taste stale or bitter, even when you’re using fresh beans. That’s why a descaling solution alone isn’t enough — you need a two-part approach that removes both mineral scale and coffee residue.
For a deeper look at why this matters, check out regular cleaning importance before you decide to skip a cycle.
The Weekly Maintenance Routine
Set aside five minutes once a week. That’s all it takes to keep your machine in good shape between deep cleans. Here’s the routine I follow with every small coffee maker I test.
- Empty and rinse the carafe after every use. Don’t let coffee sit overnight — it leaves stains and acidic residue that eats at the glass or thermal lining.
- Remove and wash the filter basket with warm, soapy water. If your machine uses a permanent filter, scrub it gently with a soft brush to remove trapped oils.
- Wipe down the warming plate with a damp cloth. Coffee spills bake onto the surface and create that burnt smell that transfers to your next brew.
- Run a water-only cycle if you’ve used the machine heavily that week. This flushes loose particles from the internal lines.
- Check the water reservoir for any film or residue. Empty it, wipe it with a clean cloth, and refill with fresh water.
That’s the whole weekly routine. It takes longer to read than to do.
One thing I learned the hard way: never put the carafe or filter basket in the dishwasher unless the manufacturer explicitly says it’s safe. The high heat and harsh detergents can warp plastic parts and strip the non-stick coating on warming plates.
When and How to Descale
Descaling removes mineral buildup that the weekly routine can’t touch. The frequency depends on your water hardness and how often you brew. As a general rule, descale every three months if you use tap water, or every six months if you use filtered or bottled water.
How do you know it’s time? Your brew cycle takes noticeably longer than it did when the machine was new. The coffee tastes flat or slightly metallic. You hear gurgling or hissing sounds that weren’t there before. Any of these signs means scale is accumulating.
Here’s the step-by-step descaling process that works for most small machines:
- Empty the water reservoir and remove any remaining coffee grounds from the filter basket.
- Mix the descaling solution according to the product instructions. For the IMPRESA descaler, that’s 4 ounces of solution per session — half a bottle.
- Pour the mixture into the reservoir and run a full brew cycle without coffee. Use a large container to catch the water, not the carafe, because the solution will loosen scale that you don’t want sitting in your carafe.
- Let the machine sit for 15 to 30 minutes after the first cycle. This gives the solution time to dissolve stubborn scale inside the heating element and lines.
- Run two to three more cycles with fresh water to rinse out all traces of the descaling solution. The water should come out clear and odorless before you brew your next cup.
Never use vinegar as a substitute for a proper descaling solution. Vinegar is acidic enough to remove scale, but it also leaves a strong smell that lingers for weeks and can damage rubber seals in some machines. I’ve seen more than one small coffee maker develop leaks after repeated vinegar treatments. If you want to understand the risks, read this vinegar cleaning guide before you go that route.
The IMPRESA descaler is formulated to work with virtually all single-serve and drip machines, so you don’t need to worry about compatibility. It’s a simple, no-fuss solution that gets the job done in one session.
Deep Cleaning the Parts Most People Forget
The weekly routine covers the basics, but there are a few components that need attention on a monthly basis. These are the parts that collect grime quietly and affect your coffee’s flavor without you noticing.
The water reservoir lid and gasket. Mold can grow in the crevices where the lid meets the reservoir, especially if you live in a humid climate. Remove the lid if it’s detachable and wash it in warm, soapy water monthly. Wipe the gasket with a cloth dipped in vinegar solution, then rinse thoroughly.
The showerhead or spray arm. On drip machines, mineral deposits can clog the small holes that distribute water over the coffee grounds. Use a paperclip or a toothpick to gently clear each hole. On single-serve machines, you can usually remove the needle assembly and soak it in a descaling solution overnight.
The carafe lid and interior. Coffee oils cling to the inside of the carafe lid and the rim where the lid meets the glass. These oils go rancid and add a bitter note to fresh coffee. Soak the lid in warm, soapy water for 15 minutes, then scrub with a bottle brush.
The exterior and control panel. This is cosmetic, but it matters. Coffee splatters on the control panel can seep into the buttons and cause them to stick over time. Wipe the exterior weekly with a damp microfiber cloth, and pay extra attention to the area around the brew button.
If you own a machine that’s already showing signs of clogging, take a look at clogged coffee maker fixes for targeted solutions that go beyond routine maintenance.
Comparing Descaling Methods and Products
Not all descaling approaches are equal. Here’s how the common options stack up based on my testing.
| Method | Effectiveness | Cost per Use | Time Required | Risk to Machine |
|---|---|---|---|---|
| Commercial descaler (liquid) | High — dissolves both scale and coffee oils | Moderate (about $2-3 per session) | 30-45 minutes | Low when used as directed |
| Citric acid powder | High for scale, low for coffee oils | Low (pennies per use) | 30-45 minutes | Low, but requires careful mixing |
| White vinegar | Moderate for scale, weak for oils | Very low | 45-60 minutes | Medium — can damage seals and leave odor |
| Descaling tablets | High, but less effective in small machines | Moderate | 30 minutes | Low, but tablets may not dissolve fully in low water volume |
| Baking soda scrub | Good for surface cleaning, poor for internal scale | Very low | 15 minutes | Low, but doesn’t replace descaling |
My recommendation is a liquid commercial descaler for regular maintenance. It’s the most reliable option and the least likely to cause damage. Citric acid powder is a good budget alternative if you don’t mind measuring and mixing. Skip vinegar unless you’re in a pinch and understand the trade-offs.
Common Mistakes That Shorten a Coffee Maker’s Life
People ruin small coffee makers in predictable ways. I’ve seen all of these in my own testing and in reader reports. Here are the three most common mistakes and how to avoid them.
Mistake 1: Letting water sit in the reservoir for days. Stagnant water breeds bacteria and algae, especially in warm kitchens. That buildup clogs the pump and leaves a musty taste in your coffee. Fix: empty the reservoir at the end of each day and refill with fresh water in the morning.
Mistake 2: Using too much descaling solution. More isn’t better. Excess solution can leave a chemical residue that takes multiple rinse cycles to clear. It can also foam up and overflow the machine. Fix: measure exactly what the product instructions say, and never exceed the recommended amount.
Mistake 3: Ignoring the pump. The pump is the heart of a small coffee maker, and it fails silently. If you notice the brew time creeping up, that’s the pump struggling against scale. Descaling fixes this, but only if you catch it early. Wait too long and the pump burns out completely, which is almost always more expensive to repair than the machine is worth.
For a complete maintenance plan that covers these issues and more, read the long-life maintenance guide on this site.
Frequently Asked Questions
How often should I descale a small coffee maker?
Every three months if you use tap water, every six months if you use filtered water. If you brew more than four cups a day, move that schedule up by a month. The signs of scale — slower brew time, unusual sounds, flat taste — are more reliable than a calendar.
Can I use vinegar instead of a commercial descaler?
You can, but I don’t recommend it. Vinegar removes scale, but it leaves a strong smell that takes multiple rinse cycles to clear. It can also degrade rubber gaskets and seals over time. If you must use vinegar, mix one part vinegar with two parts water and run three full rinse cycles afterward.
Is it safe to put the carafe in the dishwasher?
Only if the manufacturer says so. Many glass carafes are dishwasher-safe, but thermal carafes and plastic parts usually aren’t. The high heat can warp plastic and damage the vacuum seal in thermal carafes. Hand washing with warm, soapy water is always the safe choice.
Why does my coffee taste bitter even after cleaning?
Three possible causes: stale beans, water that’s too hot, or coffee oils that have gone rancid in the internal lines. If you’ve cleaned the visible parts and the bitterness persists, run a full descaling cycle. That’s the only way to remove the oils that collect in the heating element and tubing.
What’s the difference between cleaning and descaling?
Cleaning removes coffee residue, oils, and visible grime from surfaces you can reach. Descaling removes mineral deposits from the internal components you can’t see. You need both. Cleaning keeps the coffee tasting fresh; descaling keeps the machine running efficiently. Skipping either one leads to problems.
What to Remember When You Walk Away
- Rinse the carafe and filter basket after every use. Never let coffee sit overnight.
- Wipe the warming plate and exterior weekly to prevent baked-on residue.
- Descale every 3-6 months with a liquid commercial descaler. The IMPRESA 2-pack covers a full year.
- Never use vinegar as a regular descaling method — it damages seals and leaves odor.
- Empty the water reservoir daily to prevent bacterial growth.
- Watch for slower brew times or unusual sounds as early warning signs of scale buildup.
- Replace your machine when the pump fails, not before. Most small coffee makers can last 5+ years with proper care.
Maintaining a small coffee maker isn’t complicated, but it does require consistency. Ten minutes a week and a quarterly descaling session will keep your machine brewing great coffee for years. That’s a small investment for a morning ritual you rely on every day.
If you’re troubleshooting a specific issue, check the proper cleaning steps for a detailed walkthrough of each component.
Products related to this article
Sponsored / affiliate links. As an Amazon Associate I earn from qualifying purchases. I may earn additional commission from eligible campaigns.
 HomeBeyond Espresso Coffee Maker 12 Cups, Classic Stovetop Espresso Maker, 600ml / 20oz Coffeemaker for Gas & Ceramic Stovetops (Silver)
 Belly Moka Coffee Maker Stovetop Espresso Maker 9 Cup Aluminum Moka Pot Percolator 15oz 450ml Easy Brewing for Electric Ceramic Stoves Home Camping Italian Cuban Café Classic Black
 Belly Moka Coffee Maker Stovetop Espresso Maker 6 Cup Aluminum Moka Pot Percolator 10oz 300ml Easy Brewing for Electric Ceramic Stoves Home Camping Italian Cuban Café Classic Silver